My 93 LS400...
Hello Everyone!
I would like to share pictures of my 93 LS400. I appreciate any feedbacks, constructive criticisms, advices, and any ideas that you may have.
I have owned the car for over 10 years and finally decided to start modifying the car. I daily drive this car and alternate it with my 85 Corolla
GTS Hatch. It depends on what my mood for that day was :). I started gatherng parts for the LS. I got a used Junction Produce kit for the car. My plan was to have my friend install and paint the kit for me but he is always busy so I started going to this site http://www.learnautopainting.com . This site was very helpful and gave me the courage to do body work. I was confident that when I got the Junction Produce kit that it would fit good as it was fitted on another UCF10/11 and the person that I bought the kit from stated the car was a former Autofashion Demo UCF10/11. But I was wrong. The most work I've done in fitting the kit was with the door panels as they were sticking out approximately 10~15mm compared to the sideskirts. Mista808 and other local body shop people gave me advice on how to approach this problem. Here are some picture...


View original BBCode
Hello Everyone!

I would like to share pictures of my 93 LS400. I appreciate any feedbacks, constructive criticisms, advices, and any ideas that you may have.

I have owned the car for over 10 years and finally decided to start modifying the car. I daily drive this car and alternate it with my 85 Corolla
GTS Hatch. It depends on what my mood for that day was :). I started gatherng parts for the LS. I got a used Junction Produce kit for the car. My plan was to have my friend install and paint the kit for me but he is always busy so I started going to this site [URL="http://www.learnautopainting.com"]http://www.learnautopainting.com[/URL] . This site was very helpful and gave me the courage to do body work. I was confident that when I got the Junction Produce kit that it would fit good as it was fitted on another UCF10/11 and the person that I bought the kit from stated the car was a former Autofashion Demo UCF10/11. But I was wrong. The most work I've done in fitting the kit was with the door panels as they were sticking out approximately 10~15mm compared to the sideskirts. Mista808 and other local body shop people gave me advice on how to approach this problem. Here are some picture...
[img]http://im1.shutterfly.com/media/47b9d606b3127ccec7a22d47536a00000040O00AauGbFm0auGQPbz4E/cC/f%3D0/ps%3D50/r%3D0/rx%3D720/ry%3D480/[/img]
[img]http://im1.shutterfly.com/media/47b9d606b3127ccec7a2965b928300000040O00AauGbFm0auGQPbz4E/cC/f%3D0/ps%3D50/r%3D0/rx%3D720/ry%3D480/[/img]
[img]http://im1.shutterfly.com/media/47b9d606b3127ccec7a397a0739c00000040O00AauGbFm0auGQPbz4E/cC/f%3D0/ps%3D50/r%3D0/rx%3D720/ry%3D480/[/img]
[img]http://im1.shutterfly.com/media/47b9d606b3127ccec7a371a4f2db00000040O00AauGbFm0auGQPbz4E/cC/f%3D0/ps%3D50/r%3D0/rx%3D720/ry%3D480/[/img]
[img]http://im1.shutterfly.com/media/47b9d606b3127ccec7a31745f20900000040O00AauGbFm0auGQPbz4E/cC/f%3D0/ps%3D50/r%3D0/rx%3D720/ry%3D480/[/img]
i think you gotta post up pics here instead of a link to CL.... but how the hell did i miss your thread on CL.... car is coming on very nicely.... i was trippin out, i seen AME AXs and was thinking what the hell are my rims doing here? then i seen the junction kit, and was thinking about my homeboys old car, put 2 and 2 together and we have your car...
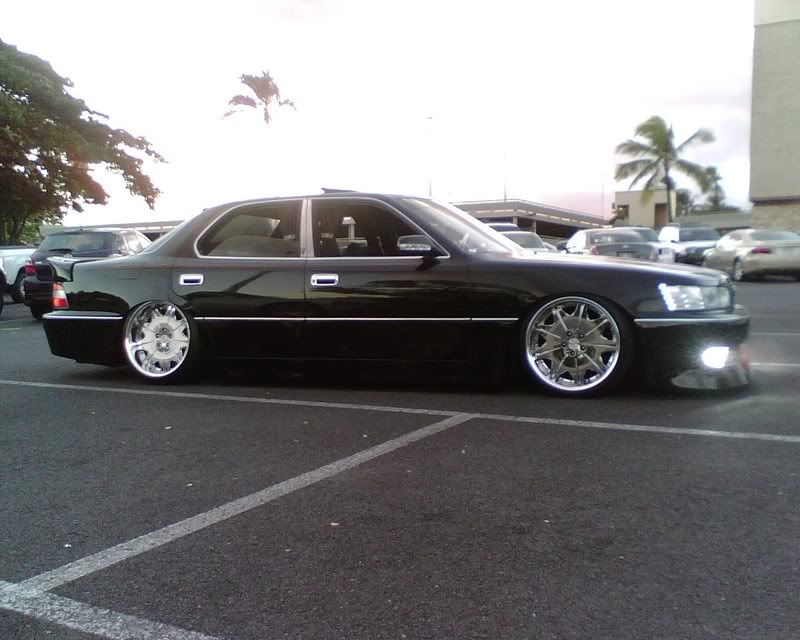
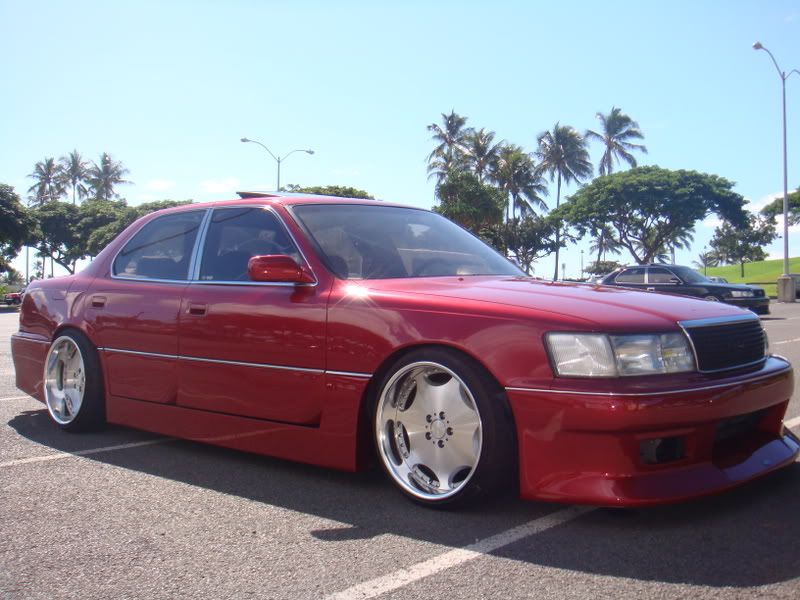
can you adjust the coilovers so you can lay it out more? i think it would look so sick laying the kit on the ground.....
also, you should look into shaving the bumper turn signals... if not, when you put those lower fog lights in, its gonna be one hell of a light show coming from the front of your ride....
View original BBCode
i think you gotta post up pics here instead of a link to CL.... but how the hell did i miss your thread on CL.... car is coming on very nicely.... i was trippin out, i seen AME AXs and was thinking what the hell are my rims doing here? then i seen the junction kit, and was thinking about my homeboys old car, put 2 and 2 together and we have your car...
[IMG]http://i22.photobucket.com/albums/b335/calitri808/martins%20car/IMG00294.jpg[/IMG]
[IMG]http://i22.photobucket.com/albums/b335/calitri808/rays%20LS400%20complete/DSC01231.jpg[/IMG]

can you adjust the coilovers so you can lay it out more? i think it would look so sick laying the kit on the ground.....

also, you should look into shaving the bumper turn signals... if not, when you put those lower fog lights in, its gonna be one hell of a light show coming from the front of your ride....
no it is not...

lol

but car is clean
View original BBCode
no it is not...
lol
but car is clean
Great Project
and Sick Build Thread.
View original BBCode
Great Project
and Sick Build Thread.
continuation...
...working on the side panels...

View original BBCode
...working on the side panels...
[img]http://im1.shutterfly.com/media/47b9d606b3127ccec7a2609a923900000040O00AauGbFm0auGQPbz4E/cC/f%3D0/ps%3D50/r%3D0/rx%3D720/ry%3D480/[/img]
Packages from PG Motoring USA...
Packages from PG Motoring USA came in. PG Motoring USA care of
Mr. James Ota have provided me excellent customer service. Items are from yahoo auction japan (YAJ). If any of you would like to purchase some items from YAJ contact
PG Motoring USA (213) 625-3486.

JP neck pads

JDM Headlights, New Brave Billet grill, and eyelids...


View original BBCode
Packages from PG Motoring USA came in. PG Motoring USA care of [B]Mr. James Ota[/B] have provided me excellent customer service. Items are from yahoo auction japan (YAJ). If any of you would like to purchase some items from YAJ contact [B]PG Motoring USA (213) 625-3486[/B].
[img]http://im1.shutterfly.com/media/47b9d606b3127ccec7a3c9a4f28700000040O00AauGbFm0auGQPbz4E/cC/f%3D0/ps%3D50/r%3D0/rx%3D720/ry%3D480/[/img]

JP neck pads
[img]http://im1.shutterfly.com/media/47b9d606b3127ccec7a3118b73f400000040O00AauGbFm0auGQPbz4E/cC/f%3D0/ps%3D50/r%3D0/rx%3D720/ry%3D480/[/img]

JDM Headlights, New Brave Billet grill, and eyelids...
[img]http://im1.shutterfly.com/media/47b9d606b3127ccec7a39a82332000000040O00AauGbFm0auGQPbz4E/cC/f%3D0/ps%3D50/r%3D0/rx%3D720/ry%3D480/[/img]
[img]http://im1.shutterfly.com/media/47b9d606b3127ccec7a39d0af20300000040O00AauGbFm0auGQPbz4E/cC/f%3D0/ps%3D50/r%3D0/rx%3D720/ry%3D480/[/img]
View original BBCode
Junction Produce exhaust and full mid pipes...
[img]http://im1.shutterfly.com/media/47b9d606b3127ccec7a2f1d1539200000040O00AauGbFm0auGQPbz4E/cC/f%3D0/ps%3D50/r%3D0/rx%3D550/ry%3D400/[/img]
[img]http://im1.shutterfly.com/media/47b9d606b3127ccec7a3980933aa00000040O00AauGbFm0auGQPbz4E/cC/f%3D0/ps%3D50/r%3D0/rx%3D550/ry%3D400/[/img]
[img]http://im1.shutterfly.com/media/47b9d606b3127ccec7a2ef30537c00000040O00AauGbFm0auGQPbz4E/cC/f%3D0/ps%3D50/r%3D0/rx%3D550/ry%3D400/[/img]
[img]http://im1.shutterfly.com/media/47b9d606b3127ccec7a3c727f20300000040O00AauGbFm0auGQPbz4E/cC/f%3D0/ps%3D50/r%3D0/rx%3D550/ry%3D400/[/img]
[img]http://im1.shutterfly.com/media/47b9d606b3127ccec7a30a1033fa00000040O00AauGbFm0auGQPbz4E/cC/f%3D0/ps%3D50/r%3D0/rx%3D550/ry%3D400/[/img]
[img]http://im1.shutterfly.com/media/47b9d606b3127ccec7a27a16138800000040O00AauGbFm0auGQPbz4E/cC/f%3D0/ps%3D50/r%3D0/rx%3D550/ry%3D400/[/img]
[img]http://im1.shutterfly.com/media/47b9d606b3127ccec7a22bb7d2a900000040O00AauGbFm0auGQPbz4E/cC/f%3D0/ps%3D50/r%3D0/rx%3D550/ry%3D400/[/img]
Packages from RidesLow...
:)Packages from
Chris aka RidesLow came in. It was well worth the wait and the quality is A+ and the best bang for the buck!
Please hit up RidesLow for all your Ksport products.
RidesLow has provided me with excellent customer service. Very dependable, reliable, and trustworthy person.


I will be installing the KSport Air Pro kit myself and will list the small extra parts needed to complete the installation but otherwise the kit is complete. It all depends if you want the wires to have a "quick disconnect" harness. Stay tuned :)
View original BBCode
:)Packages from [B]Chris aka RidesLow[/B] came in. It was well worth the wait and the quality is A+ and the best bang for the buck! [B]Please hit up RidesLow for all your Ksport products[/B]. [B][U]RidesLow has provided me with excellent customer service. Very dependable, reliable, and trustworthy person.[/U][/B]
[img]http://im1.shutterfly.com/media/47b9d606b3127ccec7a3674ff23b00000040O00AauGbFm0auGQPbz4E/cC/f%3D0/ps%3D50/r%3D0/rx%3D550/ry%3D400/[/img]
[img]http://im1.shutterfly.com/media/47b9d606b3127ccec7a3d582f2af00000040O00AauGbFm0auGQPbz4E/cC/f%3D0/ps%3D50/r%3D0/rx%3D550/ry%3D400/[/img]
[img]http://im1.shutterfly.com/media/47b9d606b3127ccec7a2abf4539a00000040O00AauGbFm0auGQPbz4E/cC/f%3D0/ps%3D50/r%3D0/rx%3D550/ry%3D400/[/img]

I will be installing the KSport Air Pro kit myself and will list the small extra parts needed to complete the installation but otherwise the kit is complete. It all depends if you want the wires to have a "quick disconnect" harness. Stay tuned  :)
View original BBCode
Front strut/bags installation...
[img]http://im1.shutterfly.com/media/47b9d606b3127ccec7a228ba923d00000040O00AauGbFm0auGQPbz4E/cC/f%3D0/ps%3D50/r%3D0/rx%3D550/ry%3D400/[/img]
[img]http://im1.shutterfly.com/media/47b9d606b3127ccec7a246dc135c00000040O00AauGbFm0auGQPbz4E/cC/f%3D0/ps%3D50/r%3D0/rx%3D550/ry%3D400/[/img]
[img]http://im1.shutterfly.com/media/47b9d606b3127ccec7a32dbd73dc00000040O00AauGbFm0auGQPbz4E/cC/f%3D0/ps%3D50/r%3D0/rx%3D550/ry%3D400/[/img]
[img]http://im1.shutterfly.com/media/47b9d606b3127ccec7a3710b734400000040O00AauGbFm0auGQPbz4E/cC/f%3D0/ps%3D50/r%3D0/rx%3D550/ry%3D400/[/img]
View original BBCode
Rear struts/bags installation...
[img]http://im1.shutterfly.com/media/47b9d606b3127ccec7a2a664139400000040O00AauGbFm0auGQPbz4E/cC/f%3D0/ps%3D50/r%3D0/rx%3D550/ry%3D400/[/img]
[img]http://im1.shutterfly.com/media/47b9d606b3127ccec7a29c9a924700000040O00AauGbFm0auGQPbz4E/cC/f%3D0/ps%3D50/r%3D0/rx%3D550/ry%3D400/[/img]
[img]http://im1.shutterfly.com/media/47b9d606b3127ccec7a313c073be00000040O00AauGbFm0auGQPbz4E/cC/f%3D0/ps%3D50/r%3D0/rx%3D550/ry%3D400/[/img]
[img]http://im1.shutterfly.com/media/47b9d606b3127ccec7a244a7132600000040O00AauGbFm0auGQPbz4E/cC/f%3D0/ps%3D50/r%3D0/rx%3D550/ry%3D400/[/img]
Compressor, valves, pressure switch, plug assembly, and plumbing the air lines...
Once we determined the ideal location of the tank and compressors, we can start assembly of the air suspension components on the base plate. Secure the (2) compressors on the base plate with the provided nuts and bolts.
APPLY TEFLON TAPE, about 3~5 passes, TO ALL THREADED PARTS of each components. Attached the lead hoses to the tank. You may install a water trap in between the compressors and the tank or tank to the valves. This will help prolong the life of the valves by minimizing moisture in the valves, which over time, can corrode and cause valve malfunction.
You should have something similar to this...

Now, we need to plumb the air lines. When you install the fittings, make certain that you wrap the threads with teflon tape at least 3~5 passes. Install the fittings to the billet base of the bags hand tight first then tighten it 1/4 of a turn using a 10mm deep socket.
Front air lines...

Ran the front air line through the left and right side fuel line covers...

Rear lines...

All the lines will go through the left and right side ABS wire harness rubber grommet to the trunk...

The front left and right air lines will meet to a T-fitting and goes to the appointed front valves. The rear left and right air lines will also meet to a T-fitting and goes to the appointed rear valves.
View original BBCode
Once we determined the ideal location of the tank and compressors, we can start assembly of the air suspension components on the base plate. Secure the (2) compressors on the base plate with the provided nuts and bolts. [B]APPLY TEFLON TAPE, about 3~5 passes, TO ALL THREADED PARTS of each components.[/B] Attached the lead hoses to the tank. You may install a water trap in between the compressors and the tank or tank to the valves. This will help prolong the life of the valves by minimizing moisture in the valves, which over time, can corrode and cause valve malfunction.
You should have something similar to this...
[img]http://im1.shutterfly.com/media/47b9d606b3127ccec7a27ccd135000000040O00AauGbFm0auGQPbz4E/cC/f%3D0/ps%3D50/r%3D0/rx%3D550/ry%3D400/[/img]

Now, we need to plumb the air lines. When you install the fittings, make certain that you wrap the threads with teflon tape at least 3~5 passes. Install the fittings to the billet base of the bags hand tight first then tighten it 1/4 of a turn using a 10mm deep socket.

Front air lines...
[img]http://im1.shutterfly.com/media/47b9d606b3127ccec7a20e4413e000000040O00AauGbFm0auGQPbz4E/cC/f%3D0/ps%3D50/r%3D0/rx%3D550/ry%3D400/[/img]

Ran the front air line through the left and right side fuel line covers...
[img]http://im1.shutterfly.com/media/47b9d606b3127ccec7a2c3b5d2df00000040O00AauGbFm0auGQPbz4E/cC/f%3D0/ps%3D50/r%3D0/rx%3D550/ry%3D400/[/img]

Rear lines...
[img]http://im1.shutterfly.com/media/47b9d606b3127ccec7a28399d2d300000040O00AauGbFm0auGQPbz4E/cC/f%3D0/ps%3D50/r%3D0/rx%3D550/ry%3D400/[/img]

All the lines will go through the left and right side ABS wire harness rubber grommet to the trunk...
[img]http://im1.shutterfly.com/media/47b9d606b3127ccec7a3c22633a800000040O00AauGbFm0auGQPbz4E/cC/f%3D0/ps%3D50/r%3D0/rx%3D720/ry%3D480/[/img]

The front left and right air lines will meet to a T-fitting and goes to the appointed front valves. The rear left and right air lines will also meet to a T-fitting and goes to the appointed rear valves.
Couple more trunk pictures...
Here are a couple more trunk picture...


View original BBCode
Here are a couple more trunk picture...
[img]http://www.clublexus.com/forums/attachments/ls400/151097d1251412669-my-93-ls400-dsc01923.jpg[/img]
[img]http://www.clublexus.com/forums/attachments/ls400/151098d1251412669-my-93-ls400-dsc01924.jpg[/img]
Running the power wires and wiring the whole system...
Since I do not do this for a living... One of the time consuming phase for me is planning the wiring process. I wanted to have the following: able to remove and reconnect the wires with ease, and wire organization. If you just wanted to tap and splice everything then the KSport Air Pro kit is very complete to finish and make the system run. I wanted to use quick disconnect harness to make it "like" plug-n-play so I bought the following extras:
(4 pairs) 2 pin quick disconnect harness, (2 pairs) 6 pin quick disconnect harness, 12 and 22 gauge spade connectors, and 12 gauge ring terminals. I spent an additional approximately $50.00 or less for these items.
Run the (2) 40amp fused 12 gauge wires from the battery-under the driver side fender liner-inside the driver side kick panel-and under the carpet to the trunk...


2 Pin and 6 Pin quick disconnect harnesses...

12 and 22 gauges spade connectors and ring terminals...

View original BBCode
Since I do not do this for a living... One of the time consuming phase for me is planning the wiring process. I wanted to have the following: able to remove and reconnect the wires with ease, and wire organization. If you just wanted to tap and splice everything then the KSport Air Pro kit is very complete to finish and make the system run. I wanted to use quick disconnect harness to make it "like" plug-n-play so I bought the following extras: [B](4 pairs) 2 pin quick disconnect harness, (2 pairs) 6 pin quick disconnect harness, 12 and 22 gauge spade connectors, and 12 gauge ring terminals. [/B] I spent an additional approximately $50.00 or less for these items.

Run the (2) 40amp fused 12 gauge wires from the battery-under the driver side fender liner-inside the driver side kick panel-and under the carpet to the trunk...
[img]http://www.clublexus.com/forums/attachments/ls400/151108d1251414708-my-93-ls400-dsc01938.jpg[/img]
[img]
http://www.clublexus.com/forums/attachments/ls400/151109d1251414708-my-93-ls400-dsc01947.jpg[/img]
[img]http://www.clublexus.com/forums/attachments/ls400/151110d1251414708-my-93-ls400-dsc01946.jpg[/img]

2 Pin and 6 Pin quick disconnect harnesses...
[img]http://www.clublexus.com/forums/attachments/ls400/151111d1251414708-my-93-ls400-dsc01943.jpg[/img]

12 and 22 gauges spade connectors and ring terminals...
[img]http://www.clublexus.com/forums/attachments/ls400/151112d1251414708-my-93-ls400-dsc01944.jpg[/img]
View original BBCode
Here are pictures of the instruction schematics and diagrams that came with the kit...
[img]http://www.clublexus.com/forums/attachments/ls400/151134d1251436058-my-93-ls400-dsc01961.jpg[/img]
[img]http://www.clublexus.com/forums/attachments/ls400/151135d1251436058-my-93-ls400-dsc01962.jpg[/img]
[img]http://www.clublexus.com/forums/attachments/ls400/151136d1251436058-my-93-ls400-dsc01963.jpg[/img]
[img]http://www.clublexus.com/forums/attachments/ls400/151137d1251436058-my-93-ls400-dsc01964.jpg[/img]
[img]http://www.clublexus.com/forums/attachments/ls400/151138d1251436058-my-93-ls400-dsc01965.jpg[/img]
continuation of wirings...
The KSport Air Pro kit comes with all the wires pre-labeled, the relays are pre-wired and labeled too, and the wireless remote control box wire harness is also pre-labeled. There will also be another set of relays inside the compressor box but you do not need to use them.
Once we have the (2) 40amp fused 12 gauge power wire directly ready from the (+) battery, all we need is to look for a ignition switched activated (+) 12volts power source. I used the gray/white wire from the radio antenna harness.
When you have all the wires set-up and ready, you can begin connecting each wires as directed by the labels and use the instruction schematics and diagrams as a guide.
Connect all the power wires and ground the system appropriately.
When everything is connected. You should have a wire mess like this...

Wireless remote control box...

Panel switch and air pressure gauge location...

I decided to place them inside the center console. I also connected the gauge light wires to the cigarette lighter harness for a switch 12 volts source. It will only light up when the ignition is on.
Run the wires from the wireless remote control box and air lines for the air pressure gauge from the trunk through the rear firewall. Remove the soft metal cover with an "X" stamped on the cover...

View original BBCode
The KSport Air Pro kit comes with all the wires pre-labeled, the relays are pre-wired and labeled too, and the wireless remote control box wire harness is also pre-labeled. There will also be another set of relays inside the compressor box but you do not need to use them.

Once we have the (2) 40amp fused 12 gauge power wire directly ready from the (+) battery, all we need is to look for a ignition switched activated (+) 12volts power source. I used the gray/white wire from the radio antenna harness.

When you have all the wires set-up and ready, you can begin connecting each wires as directed by the labels and use the instruction schematics and diagrams as a guide.

Connect all the power wires and ground the system appropriately.

When everything is connected. You should have a wire mess like this...
[img]http://www.clublexus.com/forums/attachments/ls400/151140d1251442782-my-93-ls400-dsc01941.jpg[/img]

Wireless remote control box...
[img]http://www.clublexus.com/forums/attachments/ls400/151139d1251442014-my-93-ls400-dsc01942.jpg[/img]

Panel switch and air pressure gauge location...
[img]http://www.clublexus.com/forums/attachments/ls400/151141d1251442782-my-93-ls400-dsc01937.jpg[/img]
I decided to place them inside the center console. I also connected the gauge light wires to the cigarette lighter harness for a switch 12 volts source. It will only light up when the ignition is on.

Run the wires from the wireless remote control box and air lines for the air pressure gauge from the trunk through the rear firewall. Remove the soft metal cover with an "X" stamped on the cover...
[img]http://www.clublexus.com/forums/attachments/ls400/151142d1251442782-my-93-ls400-dsc01966.jpg[/img]
continuation of wirings...
Run these wires and air lines under the carpet to the center console...


Set the struts' 36 way adjustable dampener to basic setting by first turning the adjustment knobs fully clockwise (you are now on the hardest setting), then adjust 2 full turns counter clockwise (about 12 clicks-you are now on basic setting). This will be your baseline setting. You may turn clockwise to hard and counter clockwise to soft depending on your preference and driving style and condition...

Double check all the wirings and connections. Once you have verified that everything is correct, you may start your car and let the compressors fill the tank. Once the tank is filled, fill the bags at approximately 80psi. Check each bags and fittings for leaks by using a spray bottle with soap and water solution. If you find any leaks, release the pressure and fix the leak properly. If there are no leaks, you may mount back the wheels and remove the car from the jack stands.
You may now start cleaning up your cluttered wiring by using those wire organizers and label each group as needed.
You have done a GREAT JOB!
View original BBCode
Run these wires and air lines under the carpet to the center console...
[img]http://www.clublexus.com/forums/attachments/ls400/151148d1251443991-my-93-ls400-dsc01968.jpg[/img]
[img]http://www.clublexus.com/forums/attachments/ls400/151149d1251443991-my-93-ls400-dsc01969.jpg[/img]
[img]http://www.clublexus.com/forums/attachments/ls400/151152d1251445826-my-93-ls400-dsc01936.jpg[/img]

Set the struts' 36 way adjustable dampener to basic setting by first turning the adjustment knobs fully clockwise (you are now on the hardest setting), then adjust 2 full turns counter clockwise (about 12 clicks-you are now on basic setting). This will be your baseline setting. You may turn clockwise to hard and counter clockwise to soft depending on your preference and driving style and condition...
[img]http://www.clublexus.com/forums/attachments/ls400/151151d1251445005-my-93-ls400-dsc01940.jpg[/img]

Double check all the wirings and connections. Once you have verified that everything is correct, you may start your car and let the compressors fill the tank. Once the tank is filled, fill the bags at approximately 80psi. Check each bags and fittings for leaks by using a spray bottle with soap and water solution. If you find any leaks, release the pressure and fix the leak properly. If there are no leaks, you may mount back the wheels and remove the car from the jack stands.

You may now start cleaning up your cluttered wiring by using those wire organizers and label each group as needed.

You have done a GREAT JOB!
View original BBCode
It is time for demonstration...

All up (approximately ~130psi)...
[img]http://www.clublexus.com/forums/attachments/ls400/151153d1251446305-my-93-ls400-dsc01931.jpg[/img]
[img]http://www.clublexus.com/forums/attachments/ls400/151154d1251446305-my-93-ls400-dsc01932.jpg[/img]
[img]http://www.clublexus.com/forums/attachments/ls400/151155d1251446305-my-93-ls400-dsc01933.jpg[/img]
[img]http://www.clublexus.com/forums/attachments/ls400/151156d1251446305-my-93-ls400-dsc01934.jpg[/img]
[img]http://www.clublexus.com/forums/attachments/ls400/151157d1251446305-my-93-ls400-dsc01935.jpg[/img]
View original BBCode
All down (0psi)...
[img]http://www.clublexus.com/forums/attachments/ls400/151170d1251466737-my-93-ls400-dsc01925.jpg[/img]
[img]http://www.clublexus.com/forums/attachments/ls400/151158d1251446702-my-93-ls400-dsc01926.jpg[/img]
[img]http://www.clublexus.com/forums/attachments/ls400/151159d1251446702-my-93-ls400-dsc01927.jpg[/img]
[img]http://www.clublexus.com/forums/attachments/ls400/151160d1251446702-my-93-ls400-dsc01928.jpg[/img]
[img]http://www.clublexus.com/forums/attachments/ls400/151161d1251446702-my-93-ls400-dsc01929.jpg[/img]
To mista808
Thanks! I can definitely still adjust the strut body to go lower and lay the kit on the ground. I am looking for those pictures at the moment.
I am debating on shaving the front signals like you have mentioned because for sure it will look like a big light show.
Here is my ride height...


mista808;266731 wrote:i think you gotta post up pics here instead of a link to CL.... but how the hell did i miss your thread on CL.... car is coming on very nicely.... i was trippin out, i seen AME AXs and was thinking what the hell are my rims doing here? then i seen the junction kit, and was thinking about my homeboys old car, put 2 and 2 together and we have your car...
can you adjust the coilovers so you can lay it out more? i think it would look so sick laying the kit on the ground.....
also, you should look into shaving the bumper turn signals... if not, when you put those lower fog lights in, its gonna be one hell of a light show coming from the front of your ride....
View original BBCode
Thanks! I can definitely still adjust the strut body to go lower and lay the kit on the ground. I am looking for those pictures at the moment.

I am debating on shaving the front signals like you have mentioned because for sure it will look like a big light show.

Here is my ride height...
[img]http://im1.shutterfly.com/media/47b9d609b3127ccec7adf1853c8c00000040O00AauGbFm0auGQPbz4E/cC/f%3D0/ps%3D50/r%3D0/rx%3D720/ry%3D480/[/img]
[img]http://im1.shutterfly.com/media/47b9d609b3127ccec7ad01733c0200000040O00AauGbFm0auGQPbz4E/cC/f%3D0/ps%3D50/r%3D0/rx%3D720/ry%3D480/[/img]
[img]http://im1.shutterfly.com/media/47b9d609b3127ccec7ad829c7c3400000040O00AauGbFm0auGQPbz4E/cC/f%3D0/ps%3D50/r%3D0/rx%3D720/ry%3D480/[/img]
[img]http://im1.shutterfly.com/media/47b9d609b3127ccec7ace1729d0f00000040O00AauGbFm0auGQPbz4E/cC/f%3D0/ps%3D50/r%3D0/rx%3D720/ry%3D480/[/img]

[QUOTE=mista808;266731]i think you gotta post up pics here instead of a link to CL.... but how the hell did i miss your thread on CL.... car is coming on very nicely.... i was trippin out, i seen AME AXs and was thinking what the hell are my rims doing here? then i seen the junction kit, and was thinking about my homeboys old car, put 2 and 2 together and we have your car...

can you adjust the coilovers so you can lay it out more? i think it would look so sick laying the kit on the ground.....

also, you should look into shaving the bumper turn signals... if not, when you put those lower fog lights in, its gonna be one hell of a light show coming from the front of your ride....[/QUOTE]
nice looks like a good project you got going on.
View original BBCode
nice looks like a good project you got going on.
real nice project i always liked ls's
View original BBCode
real nice project i always liked ls's
Cant Wait for final project
View original BBCode
Cant Wait for final project
for the love of god, please clean up the wiring.

loving the progress though.
View original BBCode
for the love of god, please clean up the wiring.
loving the progress though.
Does look like a hazard back there...stance is good the kit and the exhaust is on point its coming along nicely
View original BBCode
Does look like a hazard back there...stance is good the kit and the exhaust is on point its coming along nicely
To carlos and jbo
Thanks for the comment and suggestions! I have cleaned the wirings by using those black plastic "accordion" hoses. Nothing fancy or for show as the whole system is hidden anyway to keep my luggage compartment space...


carlos;267534 wrote:for the love of god, please clean up the wiring.
loving the progress though.
jbo;267660 wrote:Does look like a hazard back there...stance is good the kit and the exhaust is on point its coming along nicely
View original BBCode
Thanks for the comment and suggestions! I have cleaned the wirings by using those black plastic "accordion" hoses. Nothing fancy or for show as the whole system is hidden anyway to keep my luggage compartment space...
[img]http://im1.shutterfly.com/media/47b9d610b3127ccec7aa059e080e00000040O00AauGbFm0auGQPbz4E/cC/f%3D0/ps%3D50/r%3D0/rx%3D550/ry%3D400/[/img]
[img]http://im1.shutterfly.com/media/47b9d610b3127ccec7aa60f7c9fd00000040O00AauGbFm0auGQPbz4E/cC/f%3D0/ps%3D50/r%3D0/rx%3D550/ry%3D400/[/img]

[QUOTE=carlos;267534]for the love of god, please clean up the wiring.

loving the progress though.[/QUOTE]

[QUOTE=jbo;267660]Does look like a hazard back there...stance is good the kit and the exhaust is on point its coming along nicely[/QUOTE]
Oh and if you wanna lay frame on your car i am selling a used Youzealand SS kit 20mm Front/Rear for
$300.00 (SHIPPED!) -Fits UCF10/11 UCF20/21
Item Retail link: (if your not familiar w/ it)
http://www.youzealand.net/sskit/1020sskit.htmlView original BBCode
Oh and if you wanna lay frame on your car i am selling a used Youzealand SS kit 20mm Front/Rear for [B]$300.00 [COLOR=#ffff00](SHIPPED!) [/COLOR][/B]-Fits UCF10/11 UCF20/21

Item Retail link: (if your not familiar w/ it)
[URL]http://www.youzealand.net/sskit/1020sskit.html[/URL]
View original BBCode
I started to re-prep the front bumper and also shaved the turn signal lights...
[img]http://im1.shutterfly.com/media/47b9d730b3127ccef843acf1045200000030O00AauGbFm0auGQPbz4E/cC/f%3D0/ps%3D50/r%3D0/rx%3D550/ry%3D400/[/img]
[img]http://im1.shutterfly.com/media/47b9d730b3127ccef8439ce7045c00000030O00AauGbFm0auGQPbz4E/cC/f%3D0/ps%3D50/r%3D0/rx%3D550/ry%3D400/[/img]
[img]http://im1.shutterfly.com/media/47b9d730b3127ccef8432f32444800000030O00AauGbFm0auGQPbz4E/cC/f%3D0/ps%3D50/r%3D0/rx%3D550/ry%3D400/[/img]
Rear Bumper Prep...
Here is the rear bumper...

View original BBCode
Here is the rear bumper...
[img]http://im1.shutterfly.com/media/47b9d730b3127ccef8438986c59f00000030O00AauGbFm0auGQPbz4E/cC/f%3D0/ps%3D50/r%3D0/rx%3D550/ry%3D400/[/img]
Black grill frame...
I painted the chrome grill frame to black...

View original BBCode
I painted the chrome grill frame to black...
[img]http://im1.shutterfly.com/media/47b9d730b3127ccef8422a1024bc00000030O00AauGbFm0auGQPbz4E/cC/f%3D0/ps%3D50/r%3D0/rx%3D550/ry%3D400/[/img]
This is definitely crazy, Do you plan on running more than one size of wheel? Or just those 20x10 AME's? Whatever they are? heh
View original BBCode
This is definitely crazy, Do you plan on running more than one size of wheel? Or just those 20x10 AME's? Whatever they are? heh
Front Bumper Painted...
The front bumper is painted and installed...its ok. I still need to color sand and buff...


View original BBCode
The front bumper is painted and installed...its ok. I still need to color sand and buff...
[img]http://im1.shutterfly.com/media/47b9d730b3127ccef842ac6aa5b500000030O00AauGbFm0auGQPbz4E/cC/f%3D0/ps%3D50/r%3D0/rx%3D550/ry%3D400/[/img]
[img]http://im1.shutterfly.com/media/47b9d732b3127ccef84e001a15c800000030O00AauGbFm0auGQPbz4E/cC/f%3D0/ps%3D50/r%3D0/rx%3D550/ry%3D400/[/img]
Extra picture...scene stealer
Just can't resist the attention...:p

View original BBCode
Just can't resist the attention...:p
[img]http://im1.shutterfly.com/media/47b9d732b3127ccef84e9144554600000030O00AauGbFm0auGQPbz4E/cC/f%3D0/ps%3D50/r%3D0/rx%3D550/ry%3D400/[/img]
Rear Bumper Painted and Installed...
Rear bumper is painted and installed...


View original BBCode
Rear bumper is painted and installed...
[img]http://im1.shutterfly.com/media/47b9d739b3127ccef8709cd9b9af00000030O00AauGbFm0auGQPbz4E/cC/f%3D0/ps%3D50/r%3D0/rx%3D550/ry%3D400/[/img]
[img]http://im1.shutterfly.com/media/47b9d739b3127ccef871b31d589800000030O00AauGbFm0auGQPbz4E/cC/f%3D0/ps%3D50/r%3D0/rx%3D550/ry%3D400/[/img]
Subscribed
Good Nice Project :dance:

Im Subcribed:runcoold:
View original BBCode
Good Nice Project :dance:
Im Subcribed:runcoold:
Awesome writeup!!

Keep us updated!! i am subscribed to this thread!
View original BBCode
Awesome writeup!!
Keep us updated!! i am subscribed to this thread!
this is good, very, very good. nice work too, perfect parts, good choice in shaving the bumper lenses...are you gonna just go with out front blinkers, just zip tie the wires/sockets in the engine bay or splice a blinker into the corner lenses?
View original BBCode
this is good, very, very good. nice work too, perfect parts, good choice in shaving the bumper lenses...are you gonna just go with out front blinkers, just zip tie the wires/sockets in the engine bay or splice a blinker into the corner lenses?
did you use matte clean on the bumpers?...looks dull...

suspension is dope though...
View original BBCode
did you use matte clean on the bumpers?...looks dull...
suspension is dope though...
To VIP-UCF...
I used clear gloss but I need to color sand and buff.
VIP-UCF;272129 wrote:did you use matte clean on the bumpers?...looks dull...
suspension is dope though...
View original BBCode
I used clear gloss but I need to color sand and buff.

[QUOTE=VIP-UCF;272129]did you use matte clean on the bumpers?...looks dull...

suspension is dope though...[/QUOTE]
To NELSON09...
I will use the corner lenses for turn signals and corner lights. I am trying to figure out how to wire them like that.
NELSON09;272035 wrote:this is good, very, very good. nice work too, perfect parts, good choice in shaving the bumper lenses...are you gonna just go with out front blinkers, just zip tie the wires/sockets in the engine bay or splice a blinker into the corner lenses?
View original BBCode
I will use the corner lenses for turn signals and corner lights. I am trying to figure out how to wire them like that.

[QUOTE=NELSON09;272035]this is good, very, very good. nice work too, perfect parts, good choice in shaving the bumper lenses...are you gonna just go with out front blinkers, just zip tie the wires/sockets in the engine bay or splice a blinker into the corner lenses?[/QUOTE]
Thanks everyone!
JDMGalant;267775 wrote:nyce.
sinyo1;270402 wrote:good taste..
ClutchOne;271909 wrote:Good Nice Project :dance:
Im Subcribed:runcoold:
hondaboi;271943 wrote:Awesome writeup!!
Keep us updated!! i am subscribed to this thread!
GS300ToM;272006 wrote:lookin good
View original BBCode
Thanks everyone!

[QUOTE=JDMGalant;267775]nyce.[/QUOTE]

[QUOTE=sinyo1;270402]good taste..[/QUOTE]

[QUOTE=ClutchOne;271909]Good Nice Project :dance:

Im Subcribed:runcoold:[/QUOTE]

[QUOTE=hondaboi;271943]Awesome writeup!!

Keep us updated!! i am subscribed to this thread![/QUOTE]

[QUOTE=GS300ToM;272006]lookin good[/QUOTE]
View original BBCode
I painted the door caps, and installed the chrome trim...
Everything is installed on the car but not finish yet. I still need to color sand, buff and polish. Here are pictures...

[img]http://im1.shutterfly.com/media/47b9ce25b3127ccef81d7161dde700000030O00AauGbFm0auGQPbz4E/cC/f%3D0/ps%3D50/r%3D0/rx%3D550/ry%3D400/[/img]
[img]http://im1.shutterfly.com/media/47b9ce25b3127ccef81db907dde500000030O00AauGbFm0auGQPbz4E/cC/f%3D0/ps%3D50/r%3D0/rx%3D550/ry%3D400/[/img]
[img]http://im1.shutterfly.com/media/47b9ce25b3127ccef81c261d3c5400000030O00AauGbFm0auGQPbz4E/cC/f%3D0/ps%3D50/r%3D0/rx%3D550/ry%3D400/[/img]
[img]http://im1.shutterfly.com/media/47b9ce25b3127ccef81cd1007caa00000030O00AauGbFm0auGQPbz4E/cC/f%3D0/ps%3D50/r%3D0/rx%3D550/ry%3D400/[/img]
[img]http://im1.shutterfly.com/media/47b9ce25b3127ccef81c107fbd1d00000030O00AauGbFm0auGQPbz4E/cC/f%3D0/ps%3D50/r%3D0/rx%3D550/ry%3D400/[/img]
View original BBCode
[img]http://im1.shutterfly.com/media/47b9ce25b3127ccef81d45205c8c00000030O00AauGbFm0auGQPbz4E/cC/f%3D0/ps%3D50/r%3D0/rx%3D550/ry%3D400/[/img]
[img]http://im1.shutterfly.com/media/47b9ce25b3127ccef81d347c1c7000000030O00AauGbFm0auGQPbz4E/cC/f%3D0/ps%3D50/r%3D0/rx%3D550/ry%3D400/[/img]
[img]http://im1.shutterfly.com/media/47b9ce25b3127ccef81ced407cf400000030O00AauGbFm0auGQPbz4E/cC/f%3D0/ps%3D50/r%3D0/rx%3D550/ry%3D400/[/img]
[img]http://im1.shutterfly.com/media/47b9ce25b3127ccef81c3ca03ce400000030O00AauGbFm0auGQPbz4E/cC/f%3D0/ps%3D50/r%3D0/rx%3D550/ry%3D400/[/img]
[img]http://im1.shutterfly.com/media/47b9ce25b3127ccef81c8d6bfddf00000030O00AauGbFm0auGQPbz4E/cC/f%3D0/ps%3D50/r%3D0/rx%3D550/ry%3D400/[/img]
[img]http://im1.shutterfly.com/media/47b9ce25b3127ccef81ca70cfdad00000030O00AauGbFm0auGQPbz4E/cC/f%3D0/ps%3D50/r%3D0/rx%3D550/ry%3D400/[/img]
[img]http://im1.shutterfly.com/media/47b9ce25b3127ccef81cb36b7cf000000030O00AauGbFm0auGQPbz4E/cC/f%3D0/ps%3D50/r%3D0/rx%3D550/ry%3D400/[/img]
View original BBCode
[img]http://im1.shutterfly.com/media/47b9ce25b3127ccef81dceb91cc800000030O00AauGbFm0auGQPbz4E/cC/f%3D0/ps%3D50/r%3D0/rx%3D550/ry%3D400/[/img]
[img]http://im1.shutterfly.com/media/47b9ce25b3127ccef81cca82bd8d00000030O00AauGbFm0auGQPbz4E/cC/f%3D0/ps%3D50/r%3D0/rx%3D550/ry%3D400/[/img]
[img]http://im1.shutterfly.com/media/47b9ce25b3127ccef81d78941cbe00000030O00AauGbFm0auGQPbz4E/cC/f%3D0/ps%3D50/r%3D0/rx%3D550/ry%3D400/[/img]
[img]http://im1.shutterfly.com/media/47b9ce25b3127ccef81c27af7c7e00000030O00AauGbFm0auGQPbz4E/cC/f%3D0/ps%3D50/r%3D0/rx%3D550/ry%3D400/[/img]
Looking good cant wait to see it after all the polishing and sanding...
View original BBCode
Looking good cant wait to see it after all the polishing and sanding...
Garage7RP;272524 wrote:I will use the corner lenses for turn signals and corner lights. I am trying to figure out how to wire them like that.
Cool, if you aren't familiar with splicing, any audio shop should be able to hook you up cheap, or just research it and go for it...project has come a long way. I agree, can't wait to see it after the westsand & polish. But like I said earlier, perfect choice in parts, wheels and shaving the bumper lenses sets it apart. Good work.
View original BBCode
[QUOTE=Garage7RP;272524]I will use the corner lenses for turn signals and corner lights. I am trying to figure out how to wire them like that.[/QUOTE]
Cool, if you aren't familiar with splicing, any audio shop should be able to hook you up cheap, or just research it and go for it...project has come a long way. I agree, can't wait to see it after the westsand & polish. But like I said earlier, perfect choice in parts, wheels and shaving the bumper lenses sets it apart. Good work.
i like it as the two tone :dance: haha
 but when polished should look good too.
View original BBCode
i like it as the two tone :dance: haha
but when polished should look good too.
View original BBCode
[img]http://www.clublexus.com/forums/attachments/ls400/187846d1286072754-my-93-ls400-img_4669.jpg[/img]
[img]http://www.clublexus.com/forums/attachments/ls400/187847d1286072754-my-93-ls400-img_4671.jpg[/img]
[img]http://www.clublexus.com/forums/attachments/ls400/187848d1286072754-my-93-ls400-img_4672.jpg[/img]
[img]http://www.clublexus.com/forums/attachments/ls400/187849d1286072754-my-93-ls400-img_4674.jpg[/img]
[img]http://www.clublexus.com/forums/attachments/ls400/187850d1286072754-my-93-ls400-img_4684.jpg[/img]
View original BBCode
[img]http://www.clublexus.com/forums/attachments/ls400/187851d1286072809-my-93-ls400-img_4687.jpg[/img]
[img]http://www.clublexus.com/forums/attachments/ls400/187852d1286072809-my-93-ls400-img_4691.jpg[/img]
[img]http://www.clublexus.com/forums/attachments/ls400/187853d1286072809-my-93-ls400-img_4694.jpg[/img]
[img]http://www.clublexus.com/forums/attachments/ls400/187854d1286072809-my-93-ls400-img_4698.jpg[/img]
[img]http://www.clublexus.com/forums/attachments/ls400/187855d1286072809-my-93-ls400-img_4699.jpg[/img]
I think i remember seeing this at lexus of westminster, we were in a LS4 with MAE wheels.
View original BBCode
I think i remember seeing this at lexus of westminster, we were in a LS4 with MAE wheels.
Wow looks good man. how much did you get the exhaust for if you don't mind me asking?
View original BBCode
Wow looks good man. how much did you get the exhaust for if you don't mind me asking?
Awesome LS400
This thread is great inspiration for my 97 LS400 plans, thanks for the link about the DIY auto painting, I will definitely read up on that. Hopefully soon I will be able to post my project up.
View original BBCode
This thread is great inspiration for my 97 LS400 plans, thanks for the link about the DIY auto painting, I will definitely read up on that. Hopefully soon I will be able to post my project up.
car looks great. did u finish sanding the paint?
also, i think the jp tips need to stick out more. maybe go get them extended
View original BBCode
car looks great. did u finish sanding the paint?
also, i think the jp tips need to stick out more. maybe go get them extended
Great write-up! Just went through the whole thing! Keep us posted!
View original BBCode
Great write-up! Just went through the whole thing! Keep us posted!
I love the write up! The car looks awesome when its air out.
View original BBCode
I love the write up! The car looks awesome when its air out.
very nice the car looks really good
View original BBCode
very nice the car looks really good



