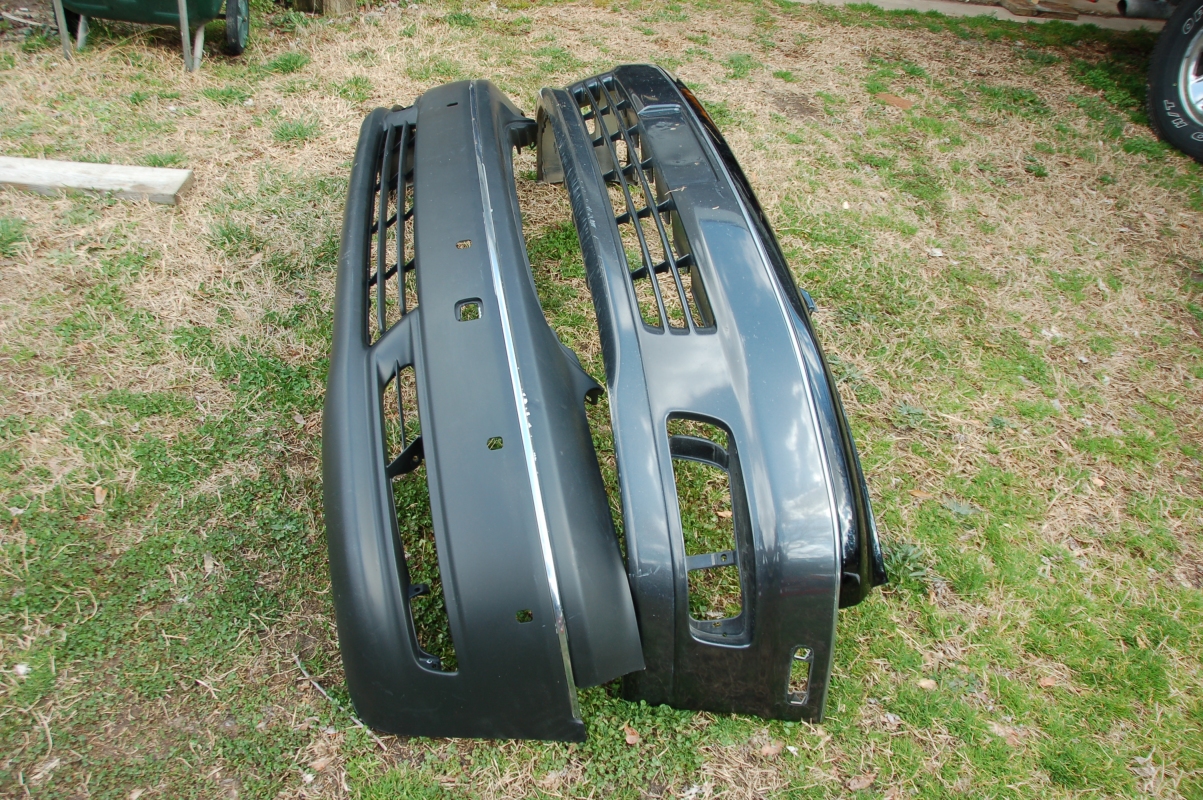
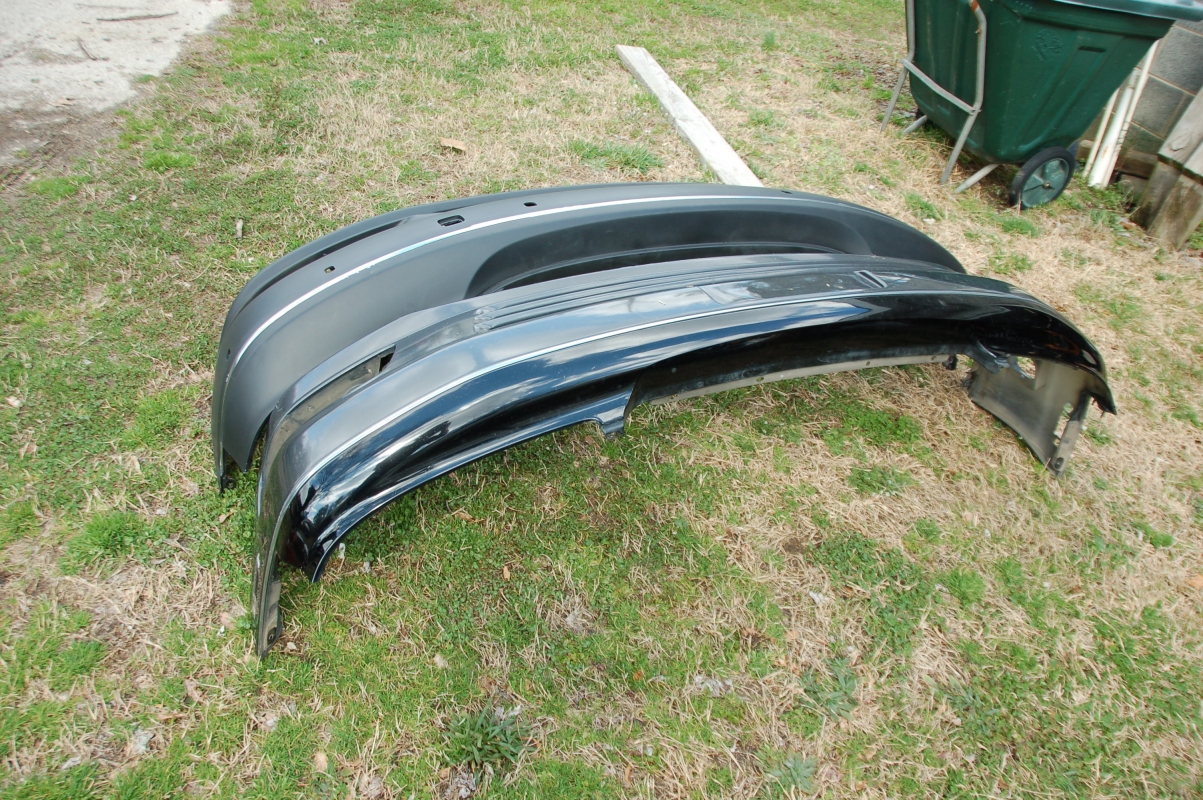
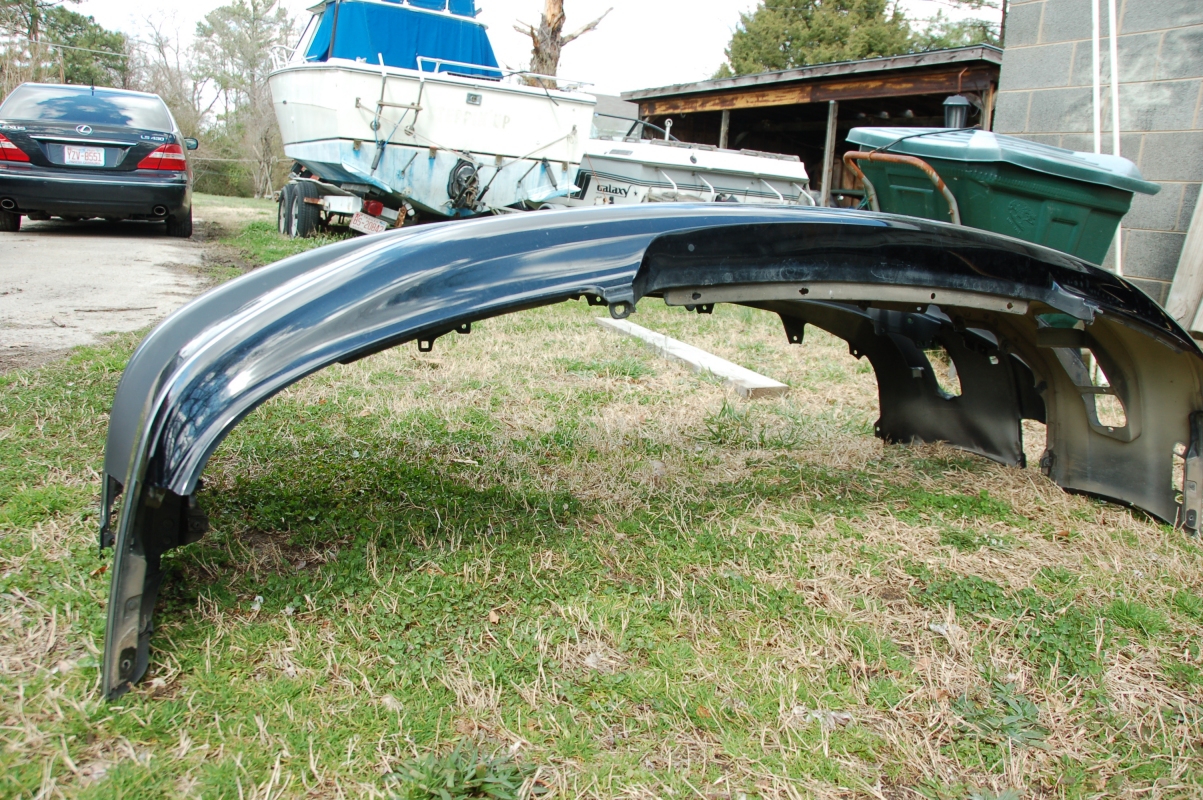
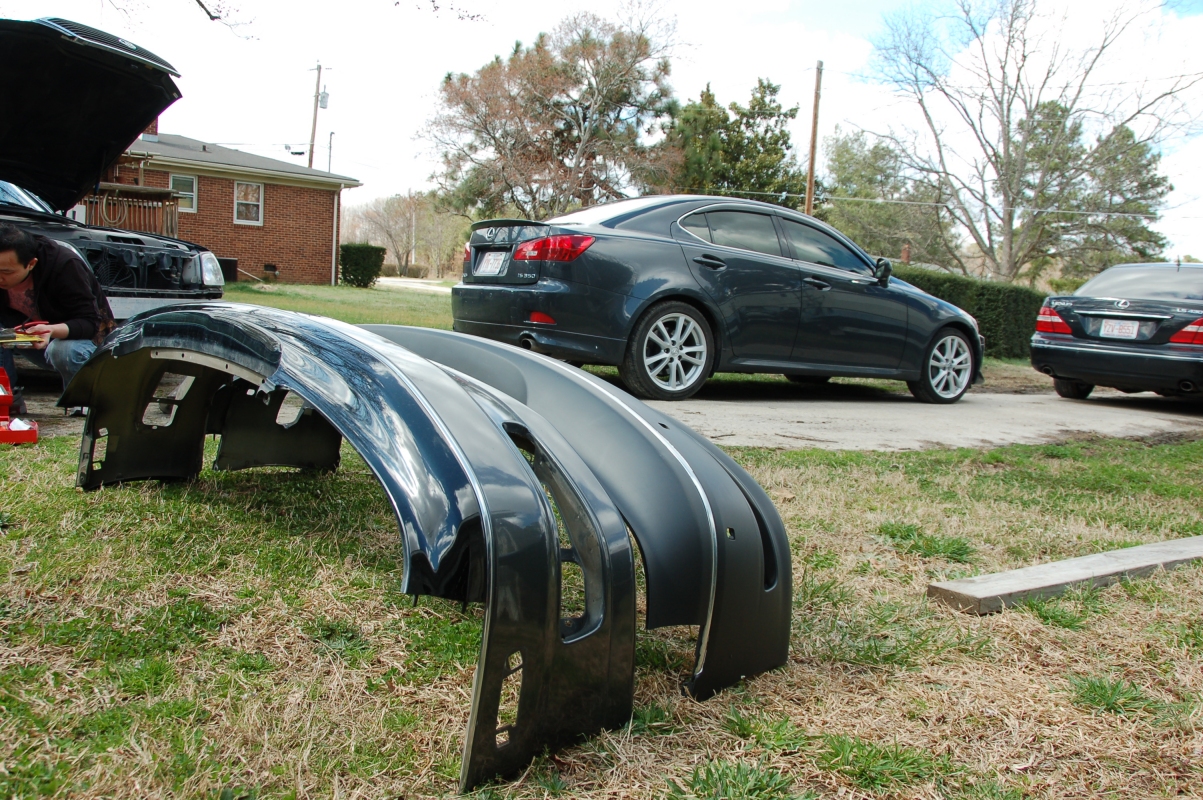
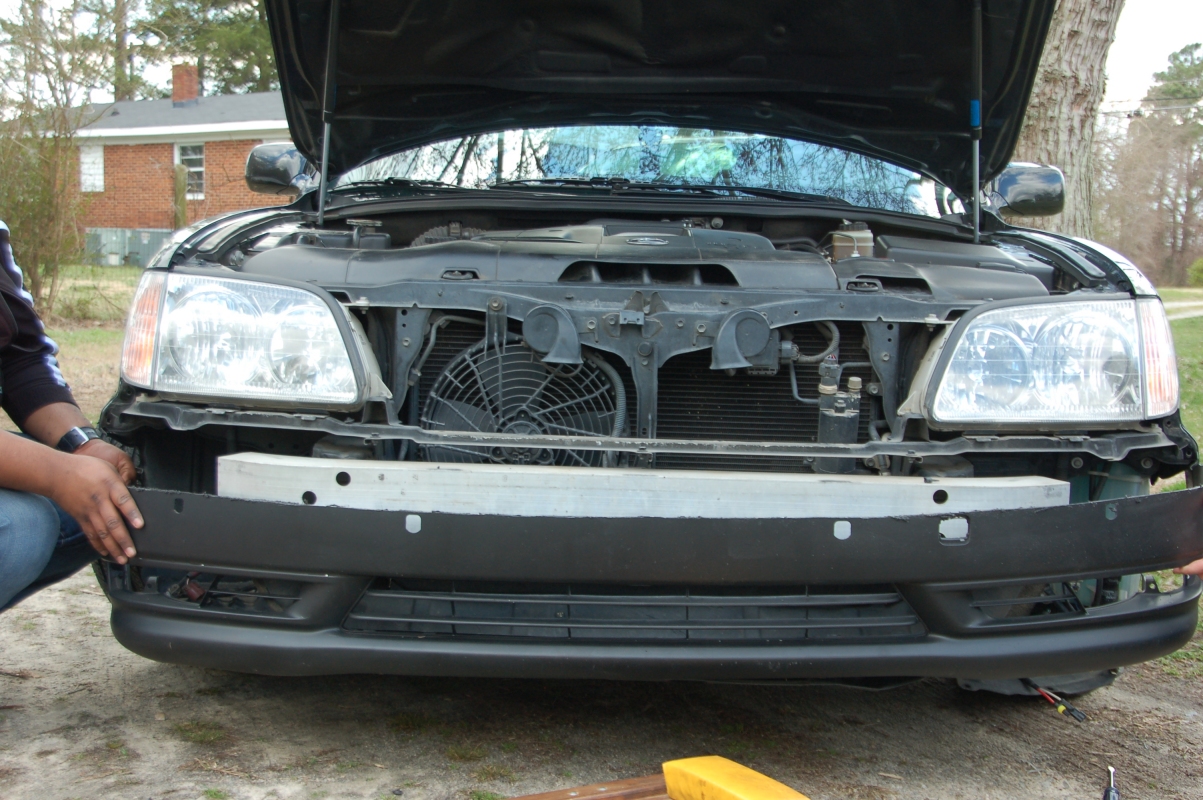
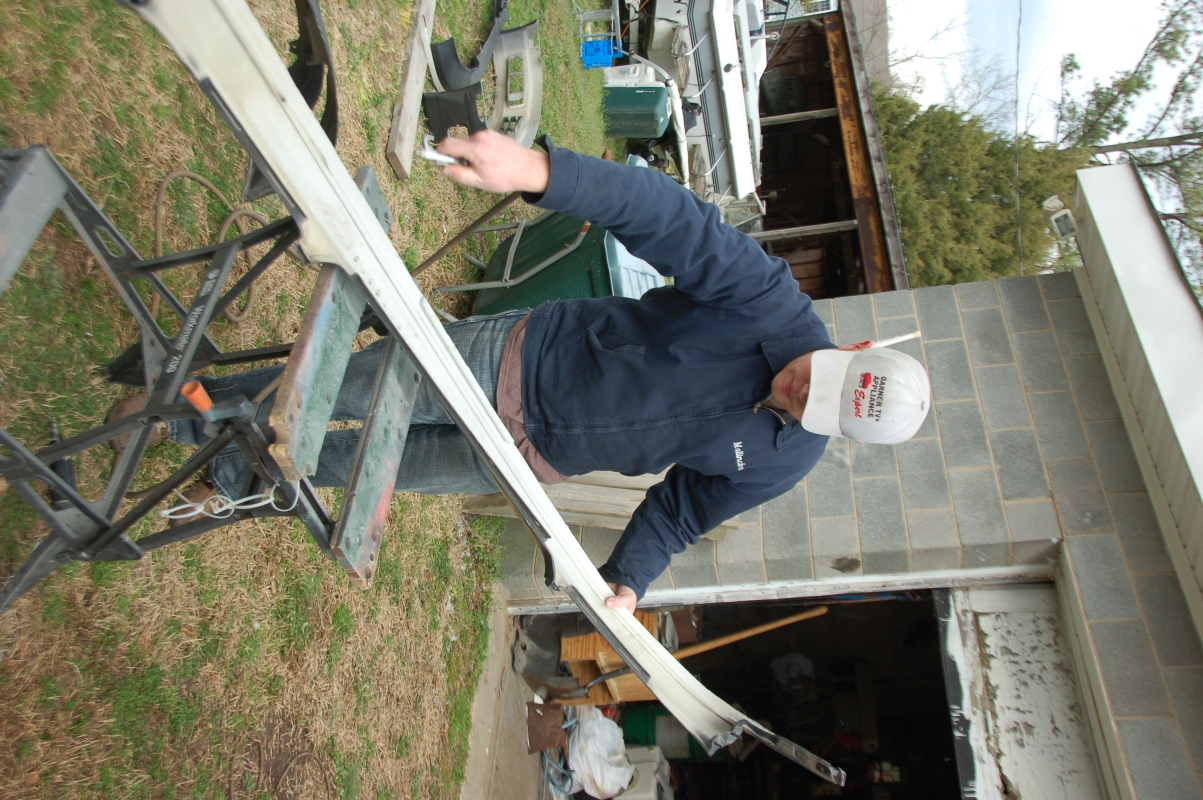
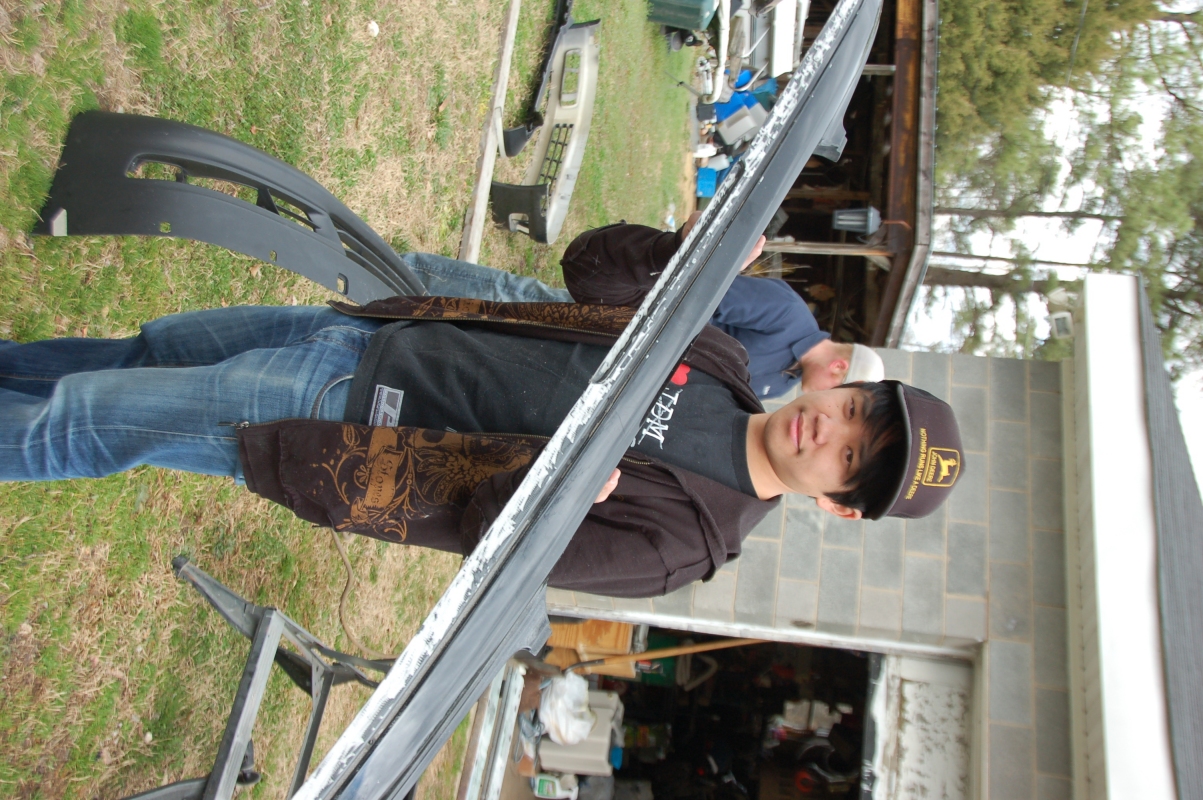
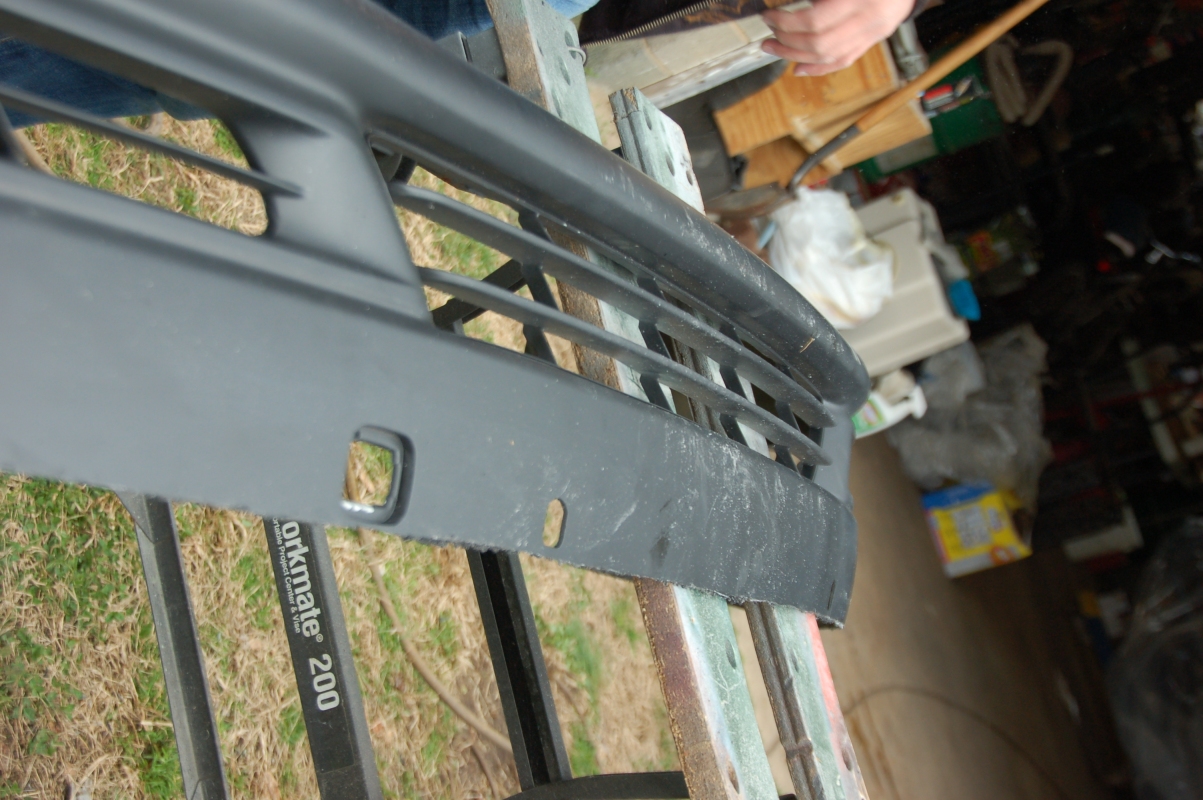
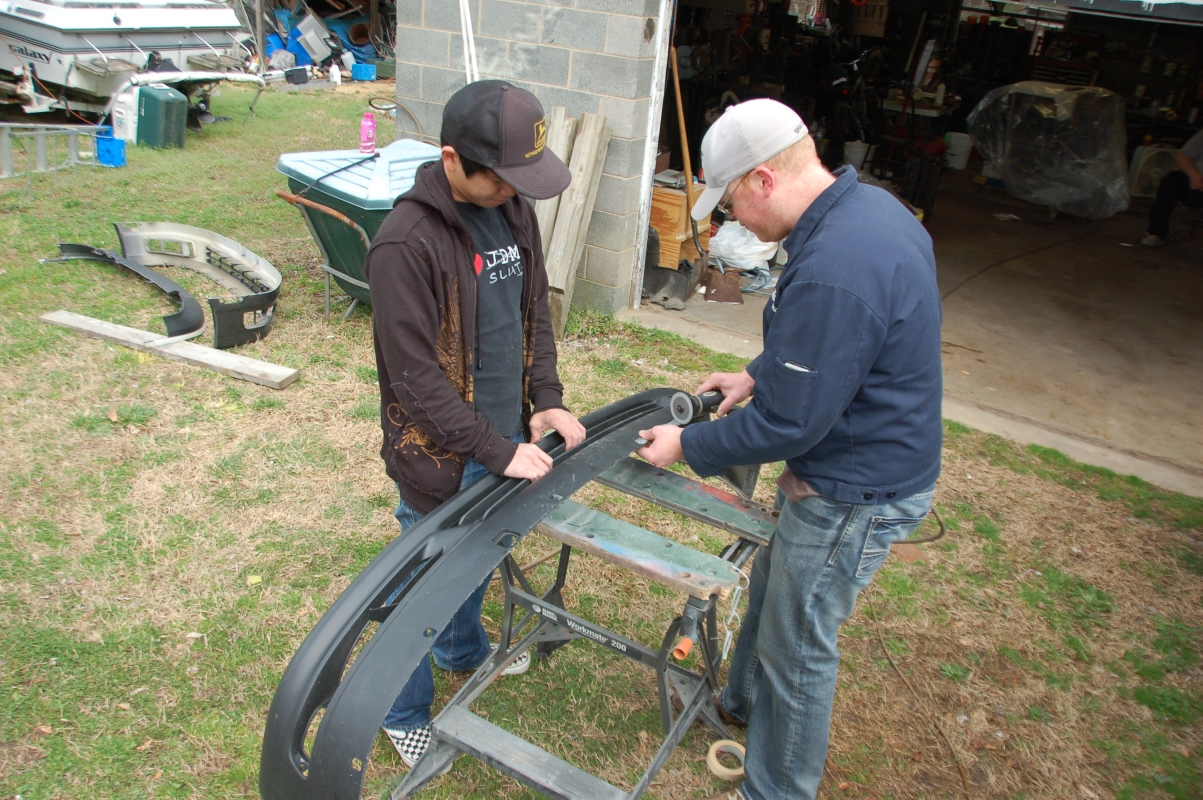
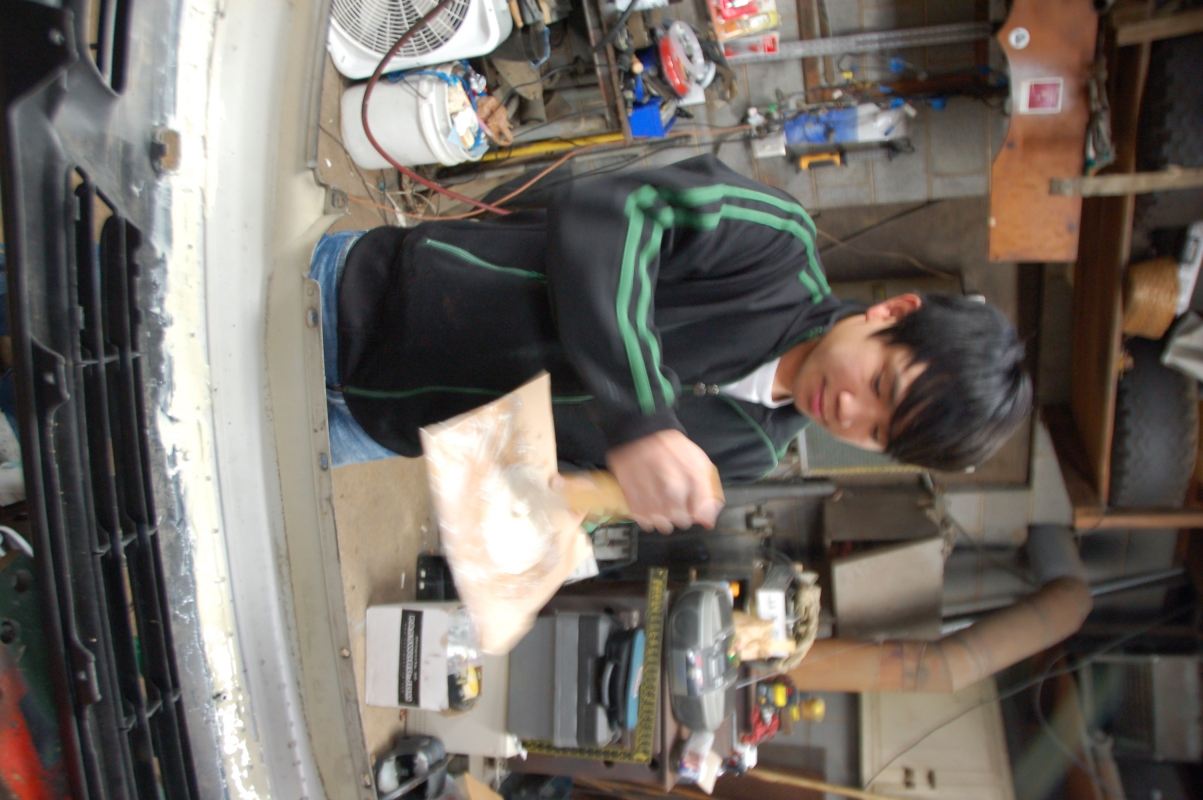
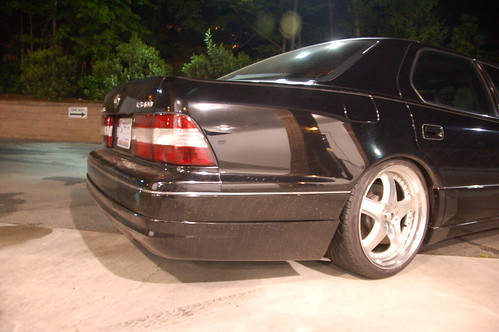
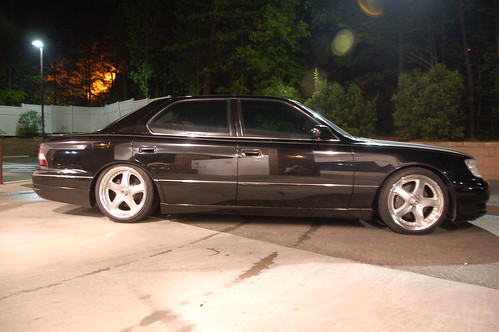
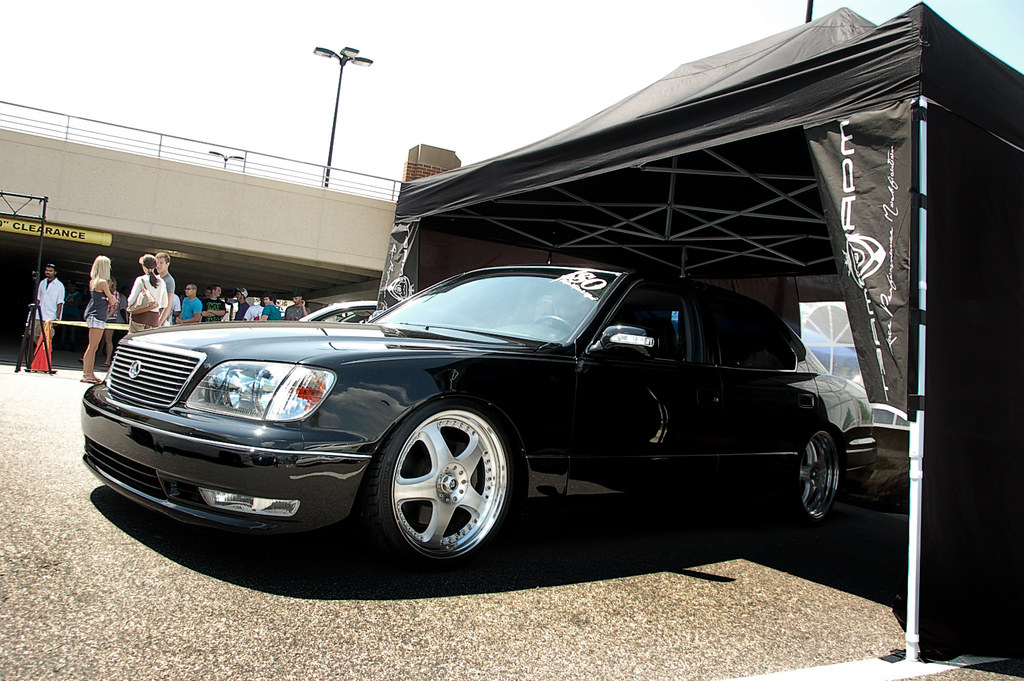
Merging two bumpers together
Hey guys,
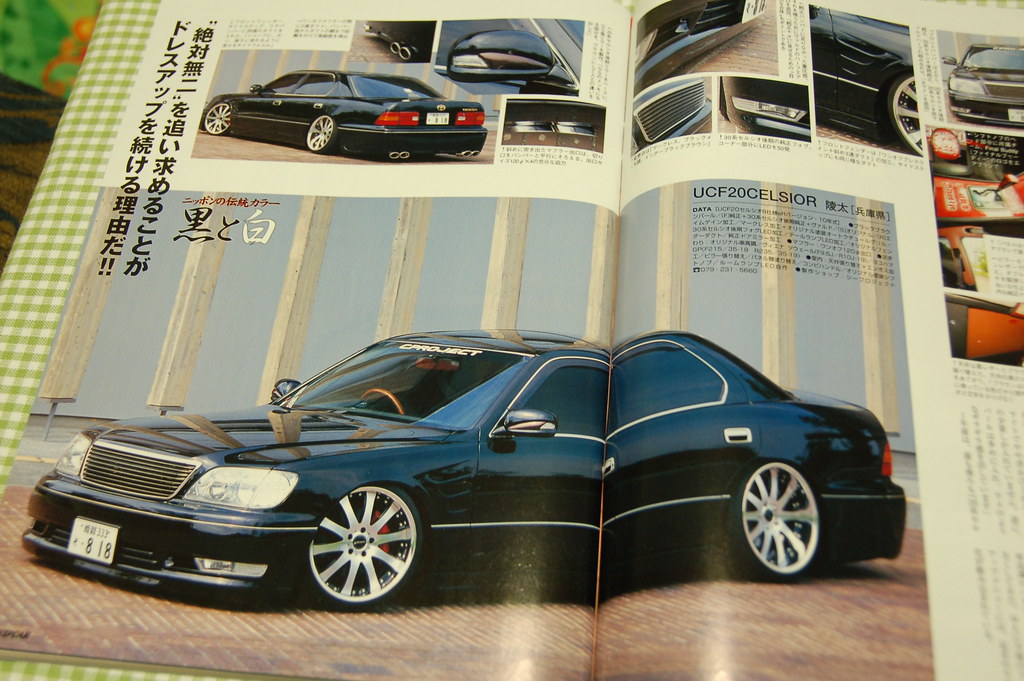
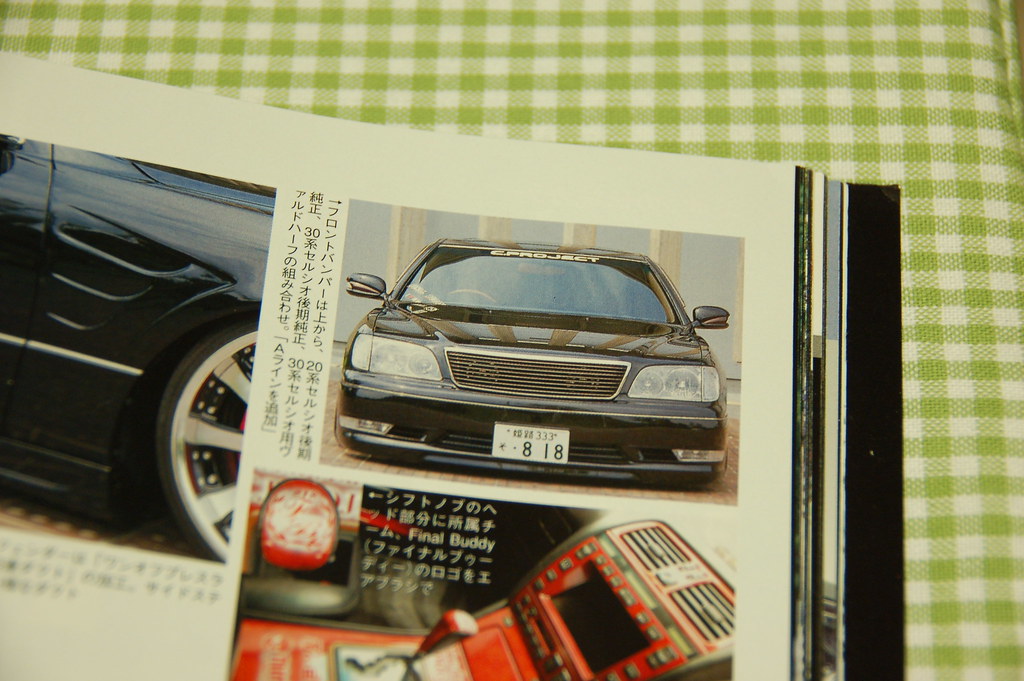
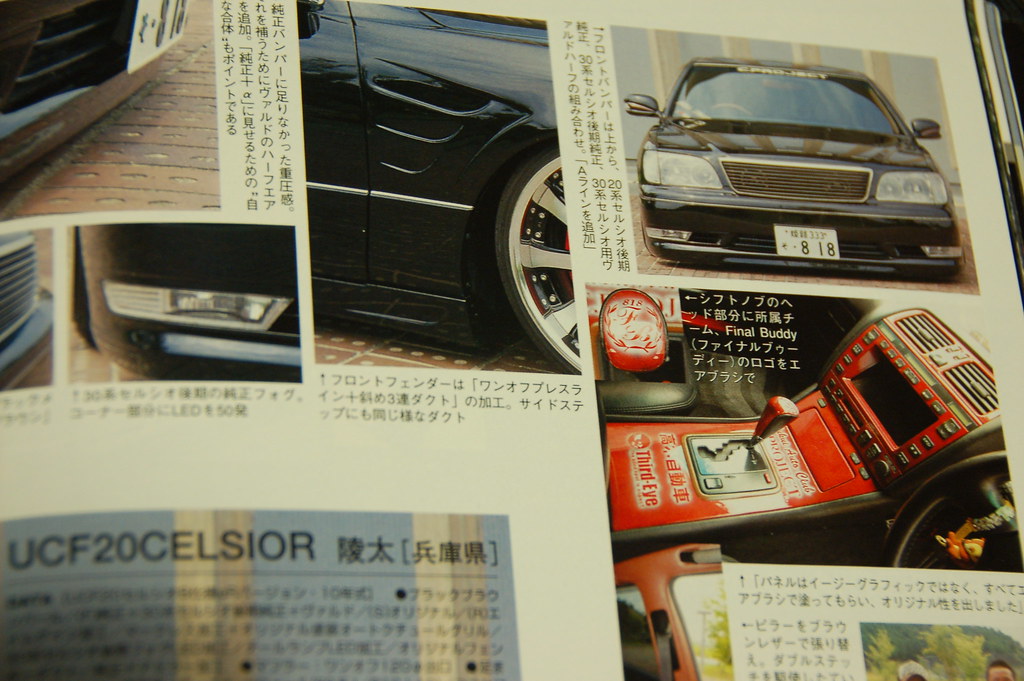
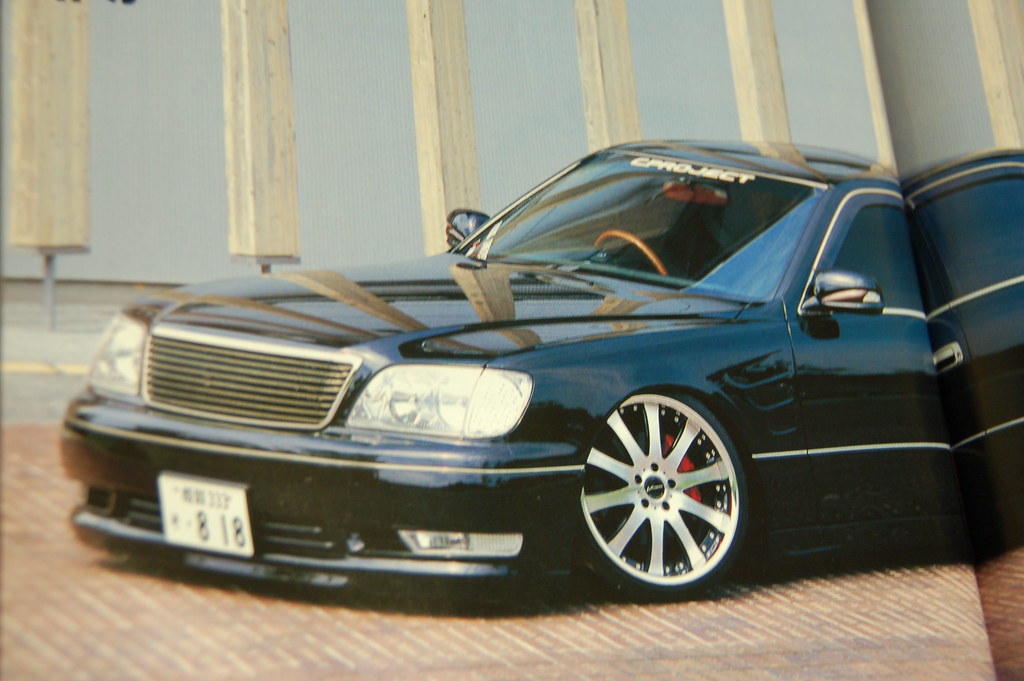
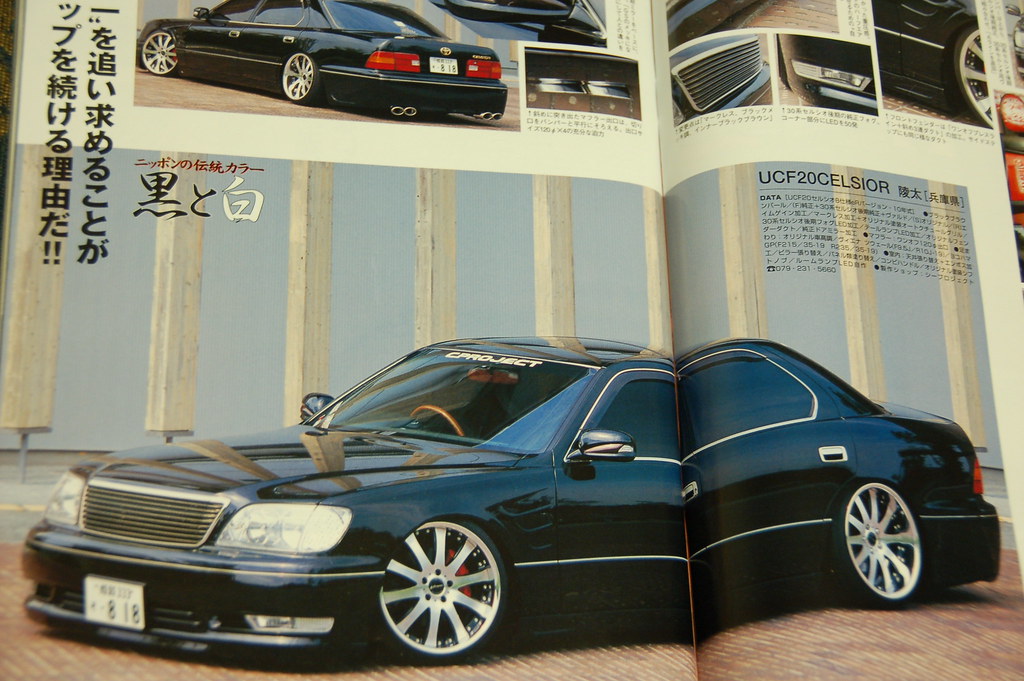
So I sold my SC and bought a 98 LS400 (black on black). Anyways, what I want to do is take the 04-06 LS430 front bumper and merge it with mine's. I really like the streamline foglights of the LS430, and I've seen it done before in one of my vip magazines, and I love it. I have an idea of what I am suppose to do in order to achieve this, but I was hoping for some of the more experienced guys to chime in and give me some pointers on where to start. I want to know how you would approach this project.
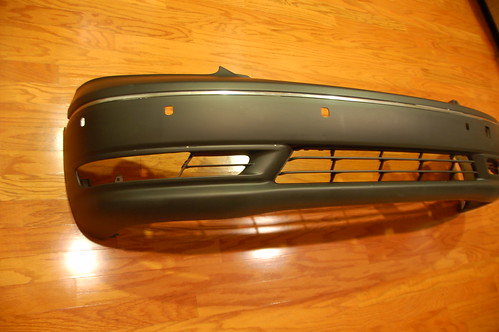
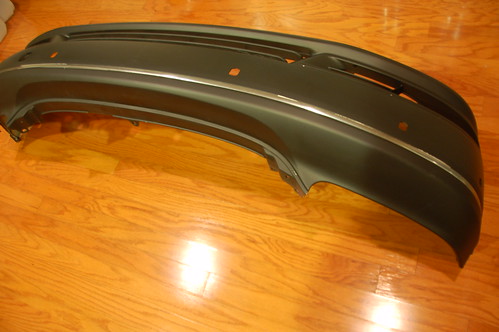
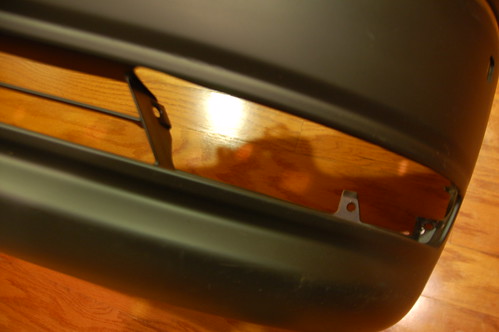
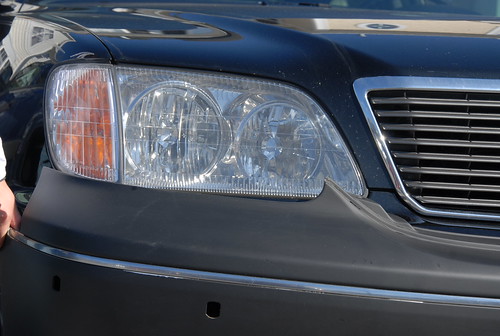
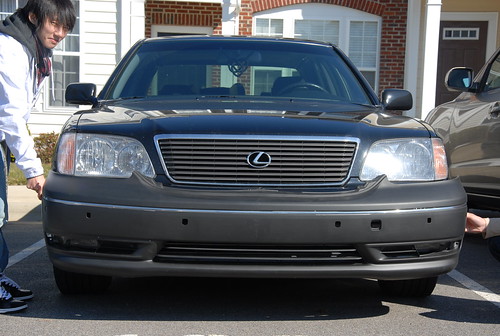
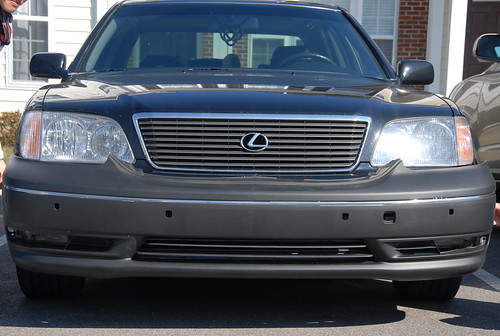
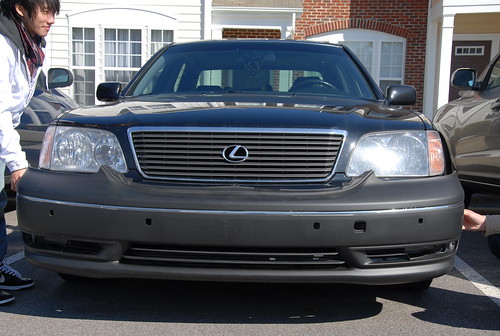
Here are some pictures to help you visualize what needs to be done:
LS430:

LS400:

View original BBCode
Hey guys,
      So I sold my SC and bought a 98 LS400 (black on black).  Anyways, what I want to do is take the 04-06 LS430 front bumper and merge it with mine's.  I really like the streamline foglights of the LS430, and I've seen it done before in one of my vip magazines, and I love it.  I have an idea of what I am suppose to do in order to achieve this, but I was hoping for some of the more experienced guys to chime in and give me some pointers on where to start.  I want to know how you would approach this project.

Here are some pictures to help you visualize what needs to be done:


LS430:
[IMG]http://images.automotive.com/reviews/images/05-ls430-hero.jpg[/IMG]

LS400:
[IMG]http://images.automotive.com/reviews/images/98ls400.jpg[/IMG]cut at the line just below the grille and fuse bumpers together with an abs plastic bonding agent
View original BBCode
cut at the line just below the grille and fuse bumpers together with an abs plastic bonding agent
Kohinoor;291121 wrote:cut at the line just below the grille and fuse bumpers together with an abs plastic bonding agent
Below the grill? I was planning on cutting it right above the fog lights on both, then fuse it from there. What's a good abs plastic bonding agent to use? I only know how to use fiberglass and bondo.
View original BBCode
[QUOTE=Kohinoor;291121]cut at the line just below the grille and fuse bumpers together with an abs plastic bonding agent[/QUOTE]

Below the grill?  I was planning on cutting it right above the fog lights on both, then fuse it from there.  What's a good abs plastic bonding agent to use?  I only know how to use fiberglass and bondo.
i always assumed this would be the easiest place to cut and mold. or maybe slightly lower since the area is flat. im really just guessing though, as i dont do body work.

View original BBCode
i always assumed this would be the easiest place to cut and mold. or maybe slightly lower since the area is flat. im really just guessing though, as i dont do body work.

[IMG]http://farm5.static.flickr.com/4028/4225902226_55abf47df2_o.jpg[/IMG]
If you can, take pics of the one you seen in the vip mag. Might help with the ideas.
View original BBCode
If you can, take pics of the one you seen in the vip mag. Might help with the ideas.
Okay, I'll do that tonight. It looks badass.
View original BBCode
Okay, I'll do that tonight. It looks badass.
Kohinoor;291133 wrote:i always assumed this would be the easiest place to cut and mold. or maybe slightly lower since the area is flat. im really just guessing though, as i dont do body work.
I see what you're saying now, I'll have to make sure that I don't cut into any mounting points first.
View original BBCode
[QUOTE=Kohinoor;291133]i always assumed this would be the easiest place to cut and mold. or maybe slightly lower since the area is flat. im really just guessing though, as i dont do body work.

[/QUOTE]

I see what you're saying now, I'll have to make sure that I don't cut into any mounting points first.
kohinoo is right, that is the best area to make your cut but you will want to leave the original area around the arches. you will probably have to make some vertical cuts as well to get it to look really good unless they just happen to have very similar dimensions (ucf30 seems bigger to me).

the proper way to piece them back together would be plastic welding or 2 part plastic repair. if you get lucky they'll be the same type of plastic so you can get a really strong bond. if not you'll have to use some universal stuff which isn't as good imo. the corny way is to just glass it all together.

just by the pics that one looks like a pretty easy section to do.
View original BBCode
kohinoo is right, that is the best area to make your cut but you will want to leave the original area around the arches. you will probably have to make some vertical cuts as well to get it to look really good unless they just happen to have very similar dimensions (ucf30 seems bigger to me).
the proper way to piece them back together would be plastic welding or 2 part plastic repair. if you get lucky they'll be the same type of plastic so you can get a really strong bond. if not you'll have to use some universal stuff which isn't as good imo. the corny way is to just glass it all together.
just by the pics that one looks like a pretty easy section to do.
good luck . when it's done it will be nice . i also like the 430 bumper
View original BBCode
good luck . when it's done it will be nice . i also like the 430 bumper
I don't have any advice, I've see it done w/ my ride and it is one of those things that's hit or miss...I've seen it come out perfect and is a crazy mod (IMO) but I've also seen failed attempts where it just looks tacky. Good luck man.
View original BBCode
I don't have any advice, I've see it done w/ my ride and it is one of those things that's hit or miss...I've seen it come out perfect and is a crazy mod (IMO) but I've also seen failed attempts where it just looks tacky. Good luck man.
BLKonBLK98;291160 wrote:kohinoo is right, that is the best area to make your cut but you will want to leave the original area around the arches. you will probably have to make some vertical cuts as well to get it to look really good unless they just happen to have very similar dimensions (ucf30 seems bigger to me).
the proper way to piece them back together would be plastic welding or 2 part plastic repair. if you get lucky they'll be the same type of plastic so you can get a really strong bond. if not you'll have to use some universal stuff which isn't as good imo. the corny way is to just glass it all together.
just by the pics that one looks like a pretty easy section to do.
thanx for the advice man, could you hook me up with a link to some good quality plastic bonding product?
Midway-VIP;291164 wrote:good luck . when it's done it will be nice . i also like the 430 bumper
Thanx man
NELSON09;291165 wrote:I don't have any advice, I've see it done w/ my ride and it is one of those things that's hit or miss...I've seen it come out perfect and is a crazy mod (IMO) but I've also seen failed attempts where it just looks tacky. Good luck man.
haha, thanx. I am really banking on this project to turn out looking like a top notch job, so I can assure you it's not going to look tacky. Just gotta make sure it's sturdy and durable is my concern.
View original BBCode
[QUOTE=BLKonBLK98;291160]kohinoo is right, that is the best area to make your cut but you will want to leave the original area around the arches. you will probably have to make some vertical cuts as well to get it to look really good unless they just happen to have very similar dimensions (ucf30 seems bigger to me).

the proper way to piece them back together would be plastic welding or 2 part plastic repair. if you get lucky they'll be the same type of plastic so you can get a really strong bond. if not you'll have to use some universal stuff which isn't as good imo. the corny way is to just glass it all together.

just by the pics that one looks like a pretty easy section to do.[/QUOTE]

thanx for the advice man, could you hook me up with a link to some good quality plastic bonding product?

[QUOTE=Midway-VIP;291164]good luck . when it's done it will be nice . i also like the 430 bumper[/QUOTE]

Thanx man

[QUOTE=NELSON09;291165]I don't have any advice, I've see it done w/ my ride and it is one of those things that's hit or miss...I've seen it come out perfect and is a crazy mod (IMO) but I've also seen failed attempts where it just looks tacky. Good luck man.[/QUOTE]

haha, thanx.  I am really banking on this project to turn out looking like a top notch job, so I can assure you it's not going to look tacky.  Just gotta make sure it's sturdy and durable is my concern.
View original BBCode
[URL]http://solutions.3m.com/wps/portal/3M/en_US/3MAutomotive/Aftermarket/Products/Product-Catalog/?nid=JSPNXHDFFBgsNGQGZXQ0C5glLXCCKC564Xbl[/URL]

this or something like it.
BLKonBLK98;291183 wrote:http://solutions.3m.com/wps/portal/3M/en_US/3MAutomotive/Aftermarket/Products/Product-Catalog/?nid=JSPNXHDFFBgsNGQGZXQ0C5glLXCCKC564Xbl
this or something like it.
Thanx man!!!
I just got a LS430 bumper. Can't wait til it comes in so I can get started on this project.
View original BBCode
[QUOTE=BLKonBLK98;291183][URL]http://solutions.3m.com/wps/portal/3M/en_US/3MAutomotive/Aftermarket/Products/Product-Catalog/?nid=JSPNXHDFFBgsNGQGZXQ0C5glLXCCKC564Xbl[/URL]

this or something like it.[/QUOTE]


Thanx man!!!


I just got a LS430 bumper.  Can't wait til it comes in so I can get started on this project.
In this situation, the bumpers are just about identical in size.  This would be one of the easiest to fuse together.

Most shops these days no longer train their workers how to do plastic work.  Truth is, it is more cost efficent to replace a bumper then it would be to repair one.  You might have some trouble finding someone local to do the work but its not difficult at all.

In most cases, they dont just cut the top of one and the bottom of the other.  They would just cut out the mouth part extended slightly to the sides of the bumper.  This way they keep the body lines consistant
View original BBCode
In this situation, the bumpers are just about identical in size. This would be one of the easiest to fuse together.
Most shops these days no longer train their workers how to do plastic work. Truth is, it is more cost efficent to replace a bumper then it would be to repair one. You might have some trouble finding someone local to do the work but its not difficult at all.
In most cases, they dont just cut the top of one and the bottom of the other. They would just cut out the mouth part extended slightly to the sides of the bumper. This way they keep the body lines consistant
widebody_Q;291188 wrote:In this situation, the bumpers are just about identical in size. This would be one of the easiest to fuse together.
Most shops these days no longer train their workers how to do plastic work. Truth is, it is more cost efficent to replace a bumper then it would be to repair one. You might have some trouble finding someone local to do the work but its not difficult at all.
In most cases, they dont just cut the top of one and the bottom of the other. They would just cut out the mouth part extended slightly to the sides of the bumper. This way they keep the body lines consistant
Oh, good point! I was thinking about having some curvature distortion between the two bumpers, so I am guessing it might be best to just cut above where the fog lights are and merge it from there. I'll be tacking this project myself......w/ no garage.......in the cold on my balcony.....so it should be fun. :biggthumpup:
View original BBCode
[QUOTE=widebody_Q;291188]In this situation, the bumpers are just about identical in size.  This would be one of the easiest to fuse together.

Most shops these days no longer train their workers how to do plastic work.  Truth is, it is more cost efficent to replace a bumper then it would be to repair one.  You might have some trouble finding someone local to do the work but its not difficult at all.

In most cases, they dont just cut the top of one and the bottom of the other.  They would just cut out the mouth part extended slightly to the sides of the bumper.  This way they keep the body lines consistant[/QUOTE]

Oh, good point!  I was thinking about having some curvature distortion between the two bumpers, so I am guessing it might be best to just cut above where the fog lights are and merge it from there.  I'll be tacking this project myself......w/ no garage.......in the cold on my balcony.....so it should be fun.  :biggthumpup:
Oh ok.  Its really not hard.  Ive done it in school and built a custom bumper for a power wheels kids car when my instructor wasnt paying attention lol.

Ill pm you later where I think it would be best to cut it so it flows nicely.  Good luck and take lots of pics
View original BBCode
Oh ok. Its really not hard. Ive done it in school and built a custom bumper for a power wheels kids car when my instructor wasnt paying attention lol.
Ill pm you later where I think it would be best to cut it so it flows nicely. Good luck and take lots of pics
Remember to measure twice and cut once!

LOL, that's the only advice I can give. I'd say cut it where the molding line is...but you really have to take off your stock bumper and put on the ls430 one, to get an idea of how it will 'mold' to your 98 body, then maybe you'll get an idea of where to properly cut it. It shouldn't be TOO hard...besides, flip one of those pictures and chop it real quick to see how you'll like it. Maybe take some reference from the pictures on the vip mag and kind of guestimate where they cut their bumpers.
View original BBCode
Remember to measure twice and cut once!
LOL, that's the only advice I can give. I'd say cut it where the molding line is...but you really have to take off your stock bumper and put on the ls430 one, to get an idea of how it will 'mold' to your 98 body, then maybe you'll get an idea of where to properly cut it. It shouldn't be TOO hard...besides, flip one of those pictures and chop it real quick to see how you'll like it. Maybe take some reference from the pictures on the vip mag and kind of guestimate where they cut their bumpers.
View original BBCode
[QUOTE=Caoboy;291273]Remember to measure twice and cut once!

LOL, that's the only advice I can give. I'd say cut it where the molding line is...but you really have to take off your stock bumper and put on the ls430 one, to get an idea of how it will 'mold' to your 98 body, then maybe you'll get an idea of where to properly cut it. It shouldn't be TOO hard...besides, flip one of those pictures and chop it real quick to see how you'll like it. Maybe take some reference from the pictures on the vip mag and kind of guestimate where they cut their bumpers.[/QUOTE]

Thanx man, I think I'll really have to just put the two bumpers together and just figure out where the best cutting point is.  Here are some pictures of someone in Japan who already did this project.  Sorry for the pix, I don't have a scanner.

[IMG]http://farm5.static.flickr.com/4057/4226728005_3ac039f6fe_b.jpg[/IMG]

[IMG]http://farm5.static.flickr.com/4030/4227496042_2b4c601d27_b.jpg[/IMG]

[IMG]http://farm5.static.flickr.com/4014/4227493044_0e639dfe9c_b.jpg[/IMG]

[IMG]http://farm3.static.flickr.com/2741/4227490068_366b5a9da7_b.jpg[/IMG]

[IMG]http://farm5.static.flickr.com/4024/4227487380_aef6975886_b.jpg[/IMG]
He left the mouth part of the LS400. So sick
View original BBCode
He left the mouth part of the LS400. So sick
Buy a plastic welder. It'll be like oem. They are cheap on ebay like $150.
View original BBCode
Buy a plastic welder. It'll be like oem. They are cheap on ebay like $150.
here is a little tutorial how to plastic weld
http://www.plasticweldingandtools.com/howto.html
i might actually invest into plastic welder aye,
supermade S13 kit would look nice on my sentia:)
View original BBCode
here is a little tutorial how to plastic weld
[url]http://www.plasticweldingandtools.com/howto.html[/url]

i might actually invest into plastic welder aye,
supermade S13 kit would look nice on my sentia:)
good luck on your project man
View original BBCode
good luck on your project man
alpha;291338 wrote:here is a little tutorial how to plastic weld
http://www.plasticweldingandtools.com/howto.html
i might actually invest into plastic welder aye,
supermade S13 kit would look nice on my sentia:)
Oh kool dude, plastic welders are pretty affordable too. I wonder if I know anybody who already has one, that would be sweet.
View original BBCode
[QUOTE=alpha;291338]here is a little tutorial how to plastic weld
[URL]http://www.plasticweldingandtools.com/howto.html[/URL]

i might actually invest into plastic welder aye,
supermade S13 kit would look nice on my sentia:)[/QUOTE]

Oh kool dude, plastic welders are pretty affordable too.  I wonder if I know anybody who already has one, that would be sweet.
widebody_Q;291293 wrote:He left the mouth part of the LS400. So sick
naw... angles the wrong way. looks like he may have added the horizontals to the 30 bottom half though.
definitely a sick conversion. make it happen.
View original BBCode
[QUOTE=widebody_Q;291293]He left the mouth part of the LS400. So sick[/QUOTE]
naw... angles the wrong way. looks like he may have added the horizontals to the 30 bottom half though.

definitely a sick conversion. make it happen.
PanelBond is your friend
View original BBCode
PanelBond is your friend
BLKonBLK98;292019 wrote:naw... angles the wrong way. looks like he may have added the horizontals to the 30 bottom half though.
definitely a sick conversion. make it happen.
Thats what I meant, looks like he put the insides of the 20 mouth in the 30
View original BBCode
[QUOTE=BLKonBLK98;292019]naw... angles the wrong way. looks like he may have added the horizontals to the 30 bottom half though.

definitely a sick conversion. make it happen.[/QUOTE]

Thats what I meant, looks like he put the insides of the 20 mouth in the 30
that came out really nice I hope your project will also. Ihope you take lots of pics while your doing it so we can all see the progress and help if you get stuck.
View original BBCode
that came out really nice I hope your project will also. Ihope you take lots of pics while your doing it so we can all see the progress and help if you get stuck.
Here's the status at the moment:

*Thought I had a really good deal for a bumper off ebay, bought and paid for item, then seller couldn't find item and finally refunded me the money today.

*Just bought another one today, expecting it next week or so.

Once I get the bumper, I'll definitely take pix and keep you guys in the loop of the progress.
View original BBCode
Here's the status at the moment:
*Thought I had a really good deal for a bumper off ebay, bought and paid for item, then seller couldn't find item and finally refunded me the money today.
*Just bought another one today, expecting it next week or so.
Once I get the bumper, I'll definitely take pix and keep you guys in the loop of the progress.
wow this sounds like its gonna be a sick project!! cant wait to see how it goes. hopefully i can learn enough along your journey to maybe do some custom work on my bumper (since custom is my only option). good luck man! thanks for taking a chance and doing the work so we can all learn from you
View original BBCode
wow this sounds like its gonna be a sick project!! cant wait to see how it goes. hopefully i can learn enough along your journey to maybe do some custom work on my bumper (since custom is my only option). good luck man! thanks for taking a chance and doing the work so we can all learn from you
sounds good!
View original BBCode
sounds good!
That bumper looks really good i can't wait to see when your done with yours.
View original BBCode
That bumper looks really good i can't wait to see when your done with yours.
have you found any plastic-weld?
View original BBCode
have you found any plastic-weld?
View original BBCode
[QUOTE=On3_lo35;296976]have you found any plastic-weld?[/QUOTE]

I'll have to order some.  I just got the bumper today, check it out.

Picked it up a few hours ago:

[IMG]http://farm5.static.flickr.com/4030/4326298967_43dcf885cd.jpg[/IMG]

[IMG]http://farm5.static.flickr.com/4065/4327031164_a82b667b7f.jpg[/IMG]

[IMG]http://farm3.static.flickr.com/2792/4327029156_80f357317d.jpg[/IMG]

[IMG]http://farm5.static.flickr.com/4060/4327027390_5b440f3000.jpg[/IMG]

[IMG]http://farm5.static.flickr.com/4042/4327025526_e0c987d234.jpg[/IMG]

[IMG]http://farm5.static.flickr.com/4064/4326289031_0a7fc3fb9d.jpg[/IMG]
nice, did u get fogs with it aswell?or you will get them separately?
View original BBCode
nice, did u get fogs with it aswell?or you will get them separately?
Nice to see that you got a nice clean one with no damage and not the cheapest one you could find. Good luck
View original BBCode
Nice to see that you got a nice clean one with no damage and not the cheapest one you could find. Good luck
View original BBCode
[QUOTE=widebody_Q;298253]Nice to see that you got a nice clean one with no damage and not the cheapest one you could find.  Good luck[/QUOTE]

Thanx man, I didn't want to have to deal with damaged tabs and stuff in case I needed it.

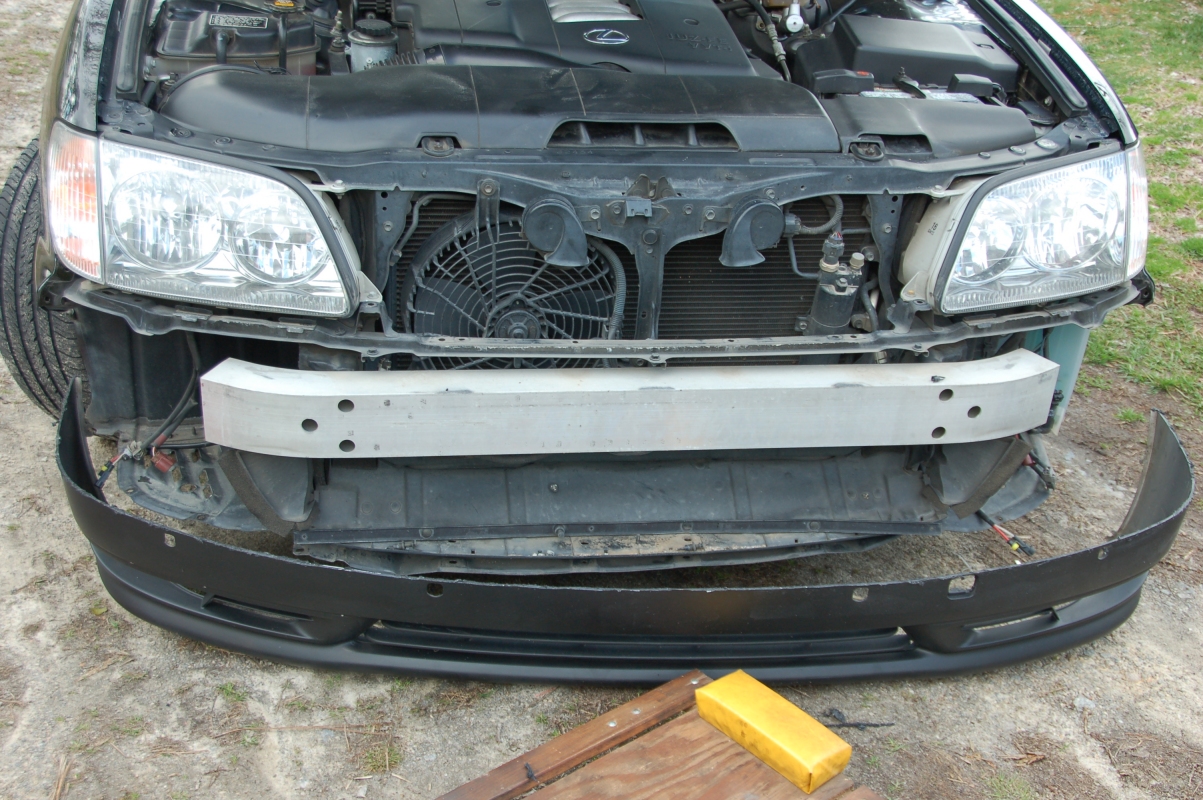
Alright, here's what I got to work with.  It looks like, the curvature of the two bumpers are very close, but the LS430 bumper is shorter than the LS400.....so there's more work than I thought.

[IMG]http://farm5.static.flickr.com/4062/4338091534_9f9102772d.jpg[/IMG]

[IMG]http://farm3.static.flickr.com/2709/4338088910_97de89535c.jpg[/IMG]

[IMG]http://farm5.static.flickr.com/4041/4337342761_f4a654e6e2.jpg[/IMG]

[IMG]http://farm5.static.flickr.com/4067/4338083914_1ea6ed2cf1.jpg[/IMG]

[IMG]http://farm5.static.flickr.com/4048/4338081496_5d250cc13b.jpg[/IMG]

[IMG]http://farm5.static.flickr.com/4020/4337335247_7c3efbd2ee.jpg[/IMG]

[IMG]http://farm3.static.flickr.com/2784/4338076504_c81aeca9cc.jpg[/IMG]

[IMG]http://farm3.static.flickr.com/2757/4337330523_8d82f36ff8.jpg[/IMG]

[IMG]http://farm3.static.flickr.com/2727/4338071904_e45399bdbf.jpg[/IMG]
This is gonna be a sikk conv. brah, gl wit the mod and take mad pics :)
View original BBCode
This is gonna be a sikk conv. brah, gl wit the mod and take mad pics :)
cefiro;298843 wrote:This is gonna be a sikk conv. brah, gl wit the mod and take mad pics :)
Thanx dude, I'll be taking a lot of pictures fo sho.
View original BBCode
[QUOTE=cefiro;298843]This is gonna be a sikk conv. brah, gl wit the mod and take mad pics :)[/QUOTE]

Thanx dude, I'll be taking a lot of pictures fo sho.
Looks like the little mspaint diagram I made. Shouldnt be too hard, just cut the sides just after the fog light of the LS430. Its going to look real nice
View original BBCode
Looks like the little mspaint diagram I made. Shouldnt be too hard, just cut the sides just after the fog light of the LS430. Its going to look real nice
Just remember, if ur using an epoxy of some sort, ur gonna want it within a certain temp. Range for it to work correctly. Doing this in the cold may not be the best idea. I hope u make this happen cuz it'll look sick!
View original BBCode
Just remember, if ur using an epoxy of some sort, ur gonna want it within a certain temp. Range for it to work correctly. Doing this in the cold may not be the best idea. I hope u make this happen cuz it'll look sick!
widebody_Q;298943 wrote:Looks like the little mspaint diagram I made. Shouldnt be too hard, just cut the sides just after the fog light of the LS430. Its going to look real nice
Yeah, it looks like the second set of ideas you sent me will be my approach. Thanx mang.


eg6ky;298953 wrote:Just remember, if ur using an epoxy of some sort, ur gonna want it within a certain temp. Range for it to work correctly. Doing this in the cold may not be the best idea. I hope u make this happen cuz it'll look sick!
Good point man, I am gonna get one of my friend to let me use his garage to work on this project so I don't have to worry about temp. Although it IS getting warmer, so when I find time, it might be alright. We'll see.
View original BBCode
[QUOTE=widebody_Q;298943]Looks like the little mspaint diagram I made.  Shouldnt be too hard, just cut the sides just after the fog light of the LS430.  Its going to look real nice[/QUOTE]

Yeah, it looks like the second set of ideas you sent me will be my approach.  Thanx mang.

[IMG]http://i5.photobucket.com/albums/y170/aedprix/projects/mylex-1.jpg[/IMG]

[IMG]http://i5.photobucket.com/albums/y170/aedprix/projects/Lexus-LS430_2004_800x600_wallpap-1.jpg[/IMG]

[QUOTE=eg6ky;298953]Just remember, if ur using an epoxy of some sort, ur gonna want it within a certain temp. Range for it to work correctly. Doing this in the cold may not be the best idea. I hope u make this happen cuz it'll look sick![/QUOTE]

Good point man, I am gonna get one of my friend to let me use his garage to work on this project so I don't have to worry about temp.  Although it IS getting warmer, so when I find time, it might be alright.  We'll see.
Hmmm... I was thinking that cutting it at the chrome would be good, but I think Agi is right
View original BBCode
Hmmm... I was thinking that cutting it at the chrome would be good, but I think Agi is right
Yeah, I'd just be happy with a 98 front end haha
View original BBCode
Yeah, I'd just be happy with a 98 front end haha
...sorry dude, I like the bigger clears in the bumper myself. hate to be the dlck and give neg feedback, jmo, you know how that goes. we all want what we don't have though and believe you mee - I definately feel you on the need to finagle with things. will watch this thred though and i think Agi has the right approach there. Way beeter than multiple cuts and trying to section each spot.
View original BBCode
...sorry dude, I like the bigger clears in the bumper myself. hate to be the dlck and give neg feedback, jmo, you know how that goes. we all want what we don't have though and believe you mee - I definately feel you on the need to finagle with things. will watch this thred though and i think Agi has the right approach there. Way beeter than multiple cuts and trying to section each spot.
NELSON09;299152 wrote:...sorry dude, I like the bigger clears in the bumper myself. hate to be the dlck and give neg feedback, jmo, you know how that goes. we all want what we don't have though and believe you mee - I definately feel you on the need to finagle with things. will watch this thred though and i think Agi has the right approach there. Way beeter than multiple cuts and trying to section each spot.
lol, you don't have to be sorry for having an opinion man. I welcome all opinions, negative or positive. I've been wanting to do this conversion ever since I saw it in my vip mag. It's not about "I want what I can't have" on this conversion, it's more like "damn, that looks hella good".
View original BBCode
[QUOTE=NELSON09;299152]...sorry dude, I like the bigger clears in the bumper myself. hate to be the dlck and give neg feedback, jmo, you know how that goes. we all want what we don't have though and believe you mee - I definately feel you on the need to finagle with things. will watch this thred though and i think Agi has the right approach there. Way beeter than multiple cuts and trying to section each spot.[/QUOTE]

lol, you don't have to be sorry for having an opinion man.  I welcome all opinions, negative or positive.  I've been wanting to do this conversion ever since I saw it in my vip mag.  It's not about "I want what I can't have" on this conversion, it's more like "damn, that looks hella good".
romeo291;299191 wrote:lol, you don't have to be sorry for having an opinion man. I welcome all opinions, negative or positive. I've been wanting to do this conversion ever since I saw it in my vip mag. It's not about "I want what I can't have" on this conversion, it's more like "damn, that looks hella good".
There you go man. Get it on. Good luck with the proj too. I'm sure it'll come out well, not to mention the satisfaction you'll get when you see every other LS=)
View original BBCode
[QUOTE=romeo291;299191]lol, you don't have to be sorry for having an opinion man.  I welcome all opinions, negative or positive.  I've been wanting to do this conversion ever since I saw it in my vip mag.  It's not about "I want what I can't have" on this conversion, it's more like "damn, that looks hella good".[/QUOTE]
There you go man. Get it on. Good luck with the proj too. I'm sure it'll come out well, not to mention the satisfaction you'll get when you see every other LS=)
View original BBCode
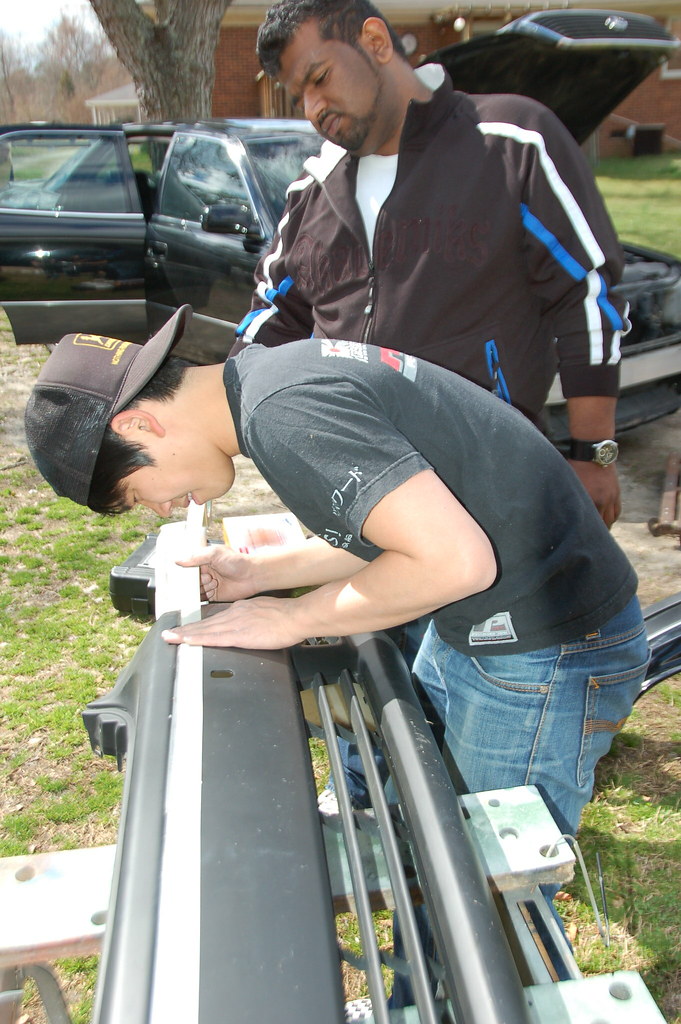
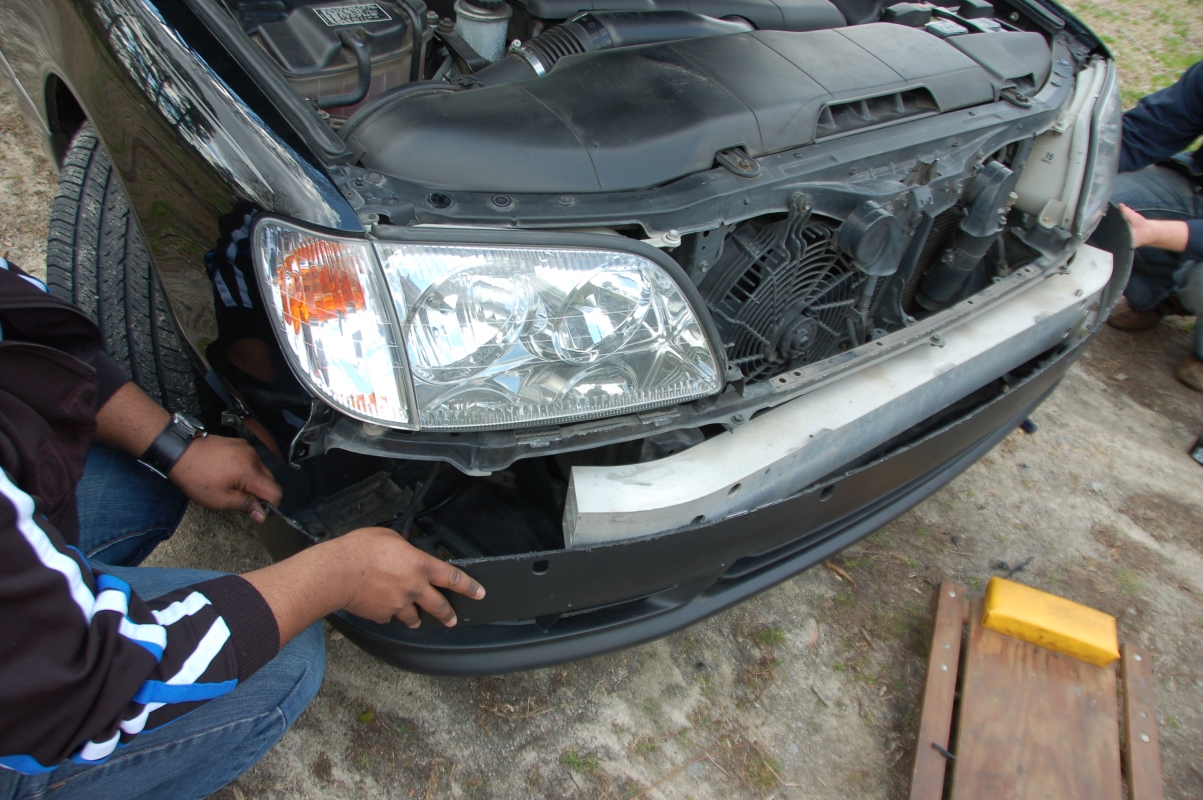
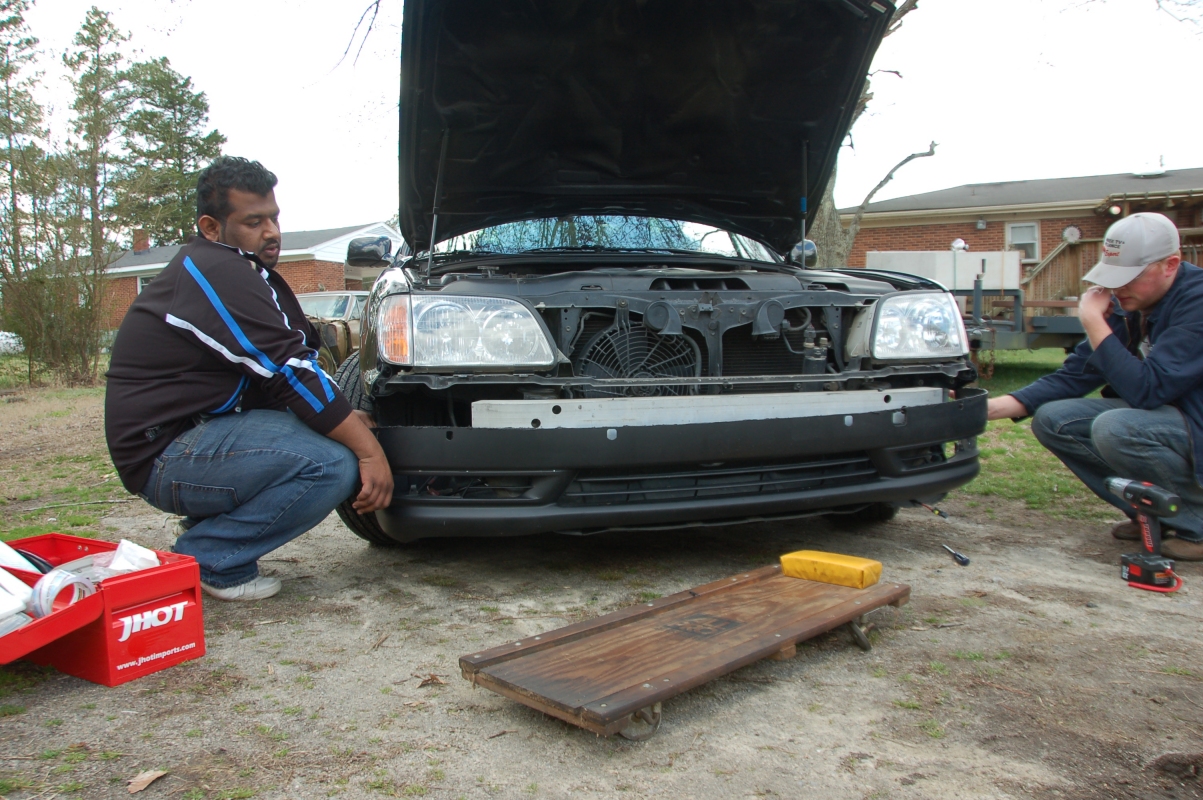
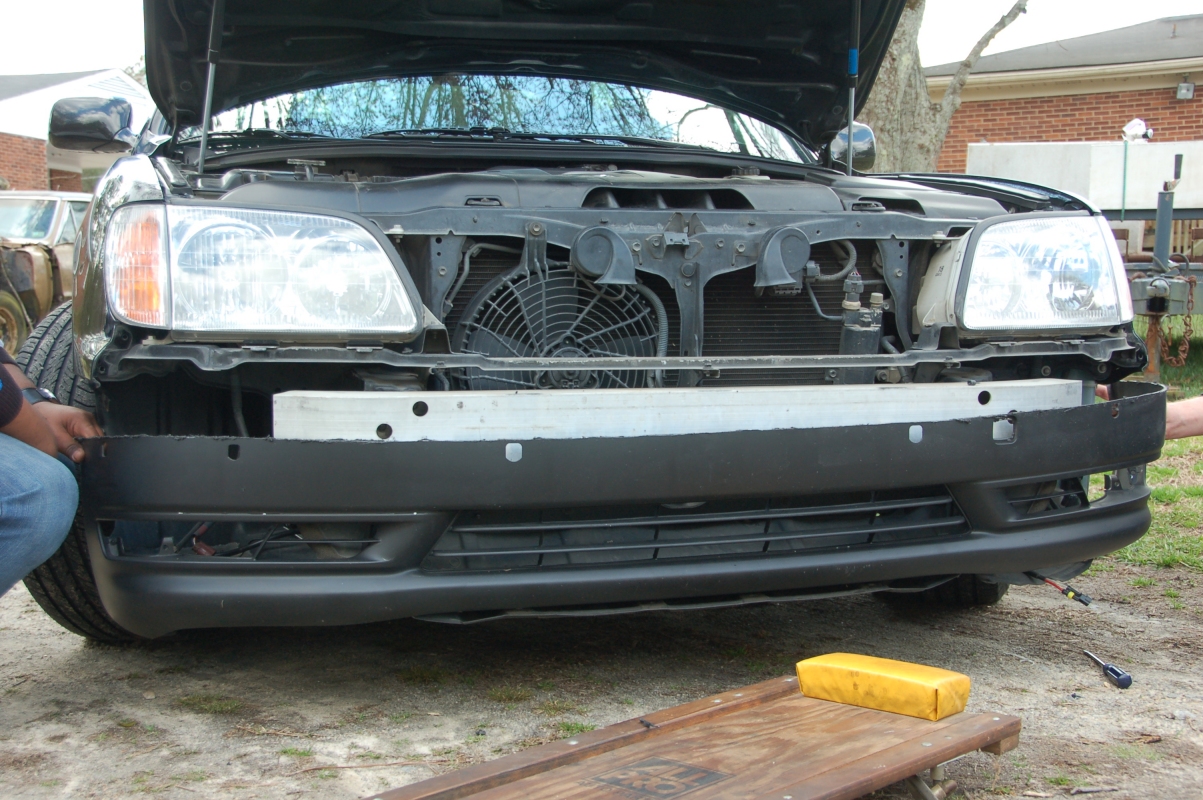
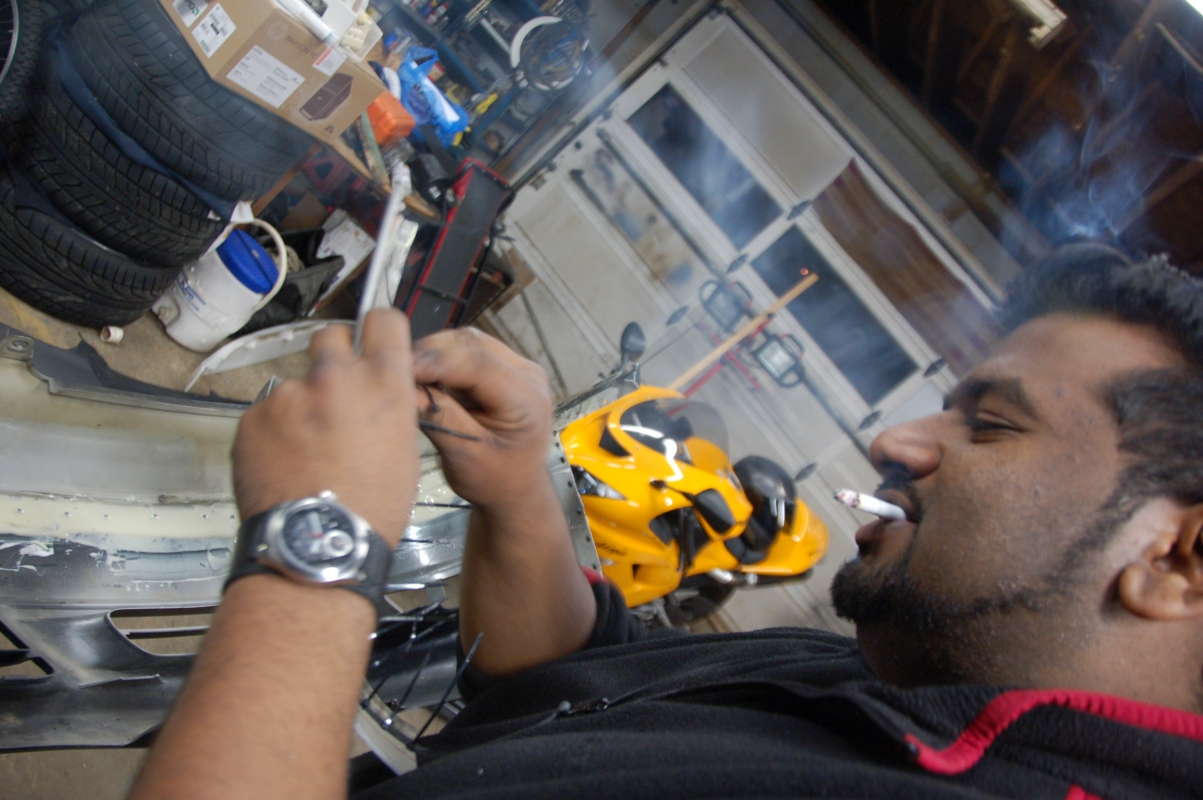
Okay, I finally got around to starting up this project.

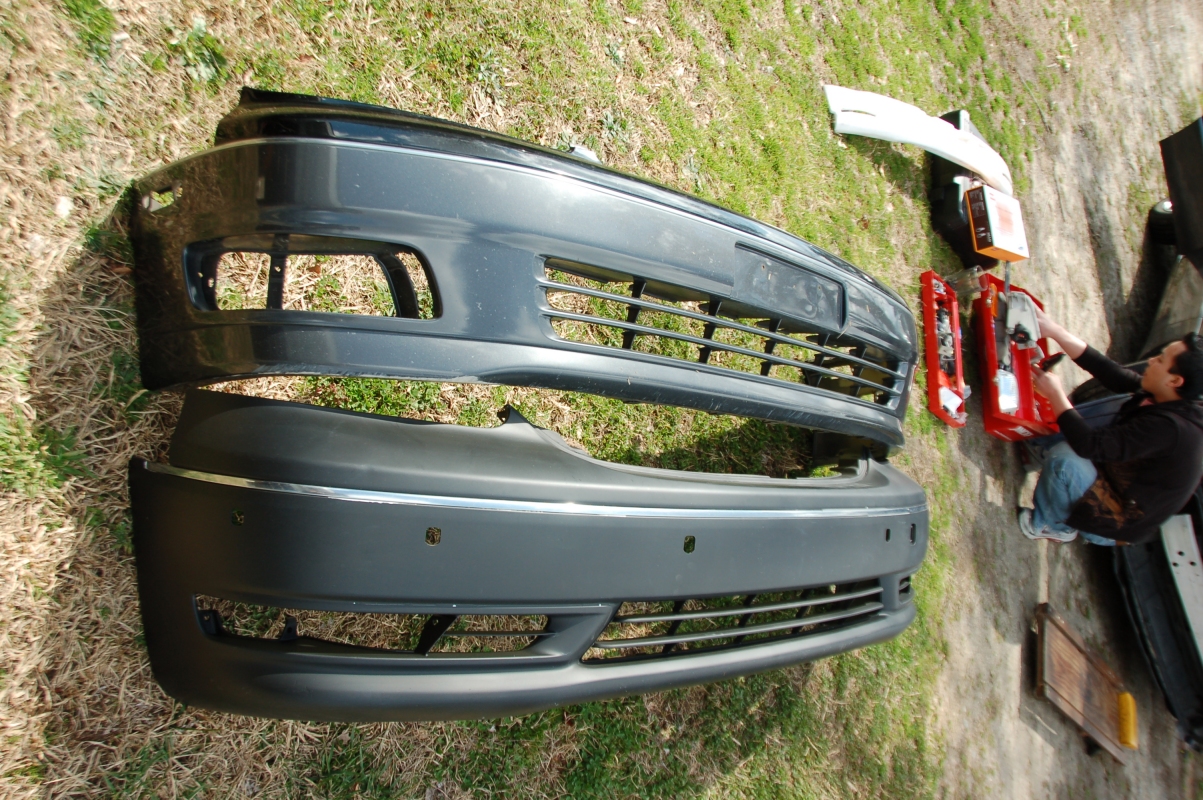
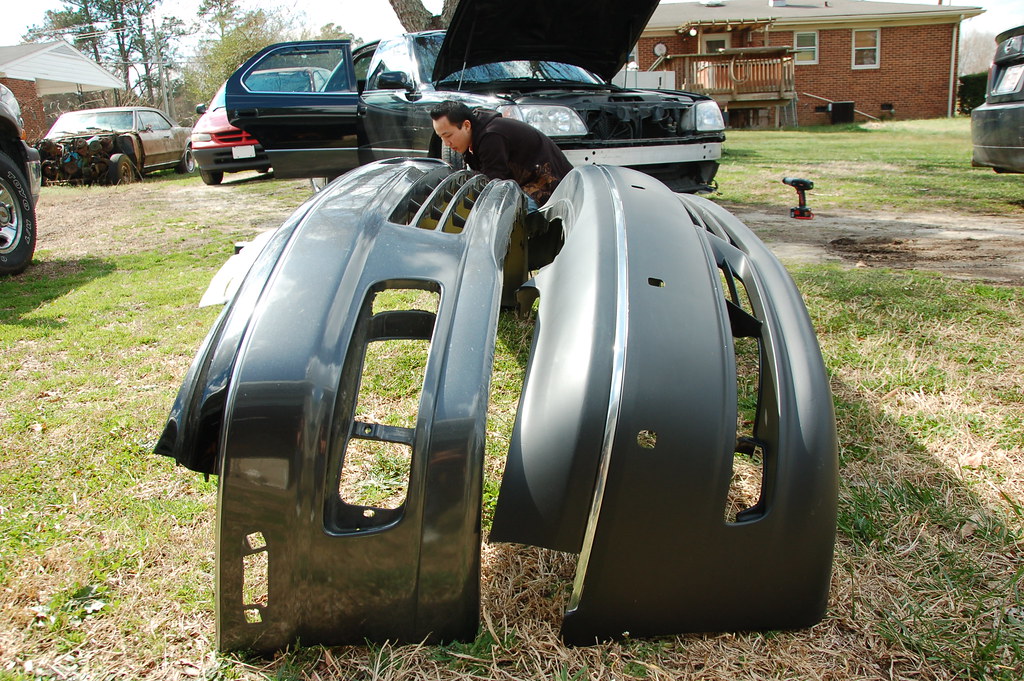
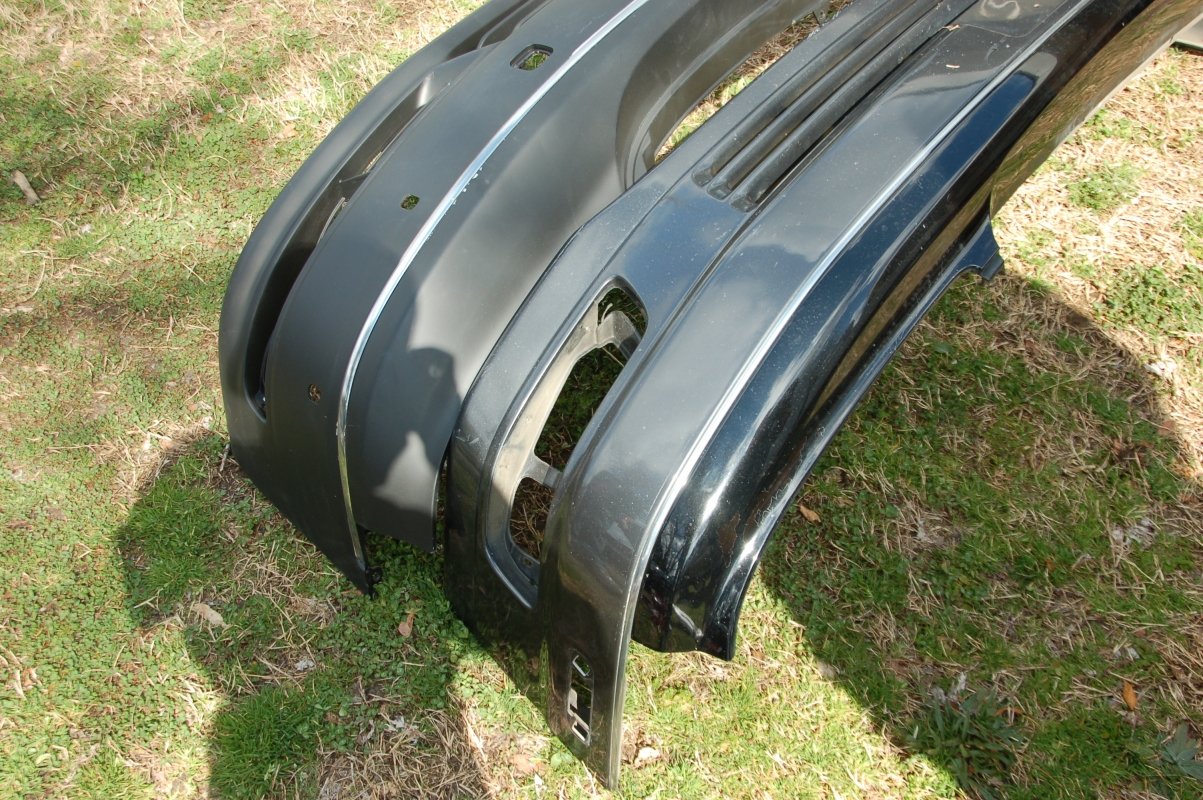
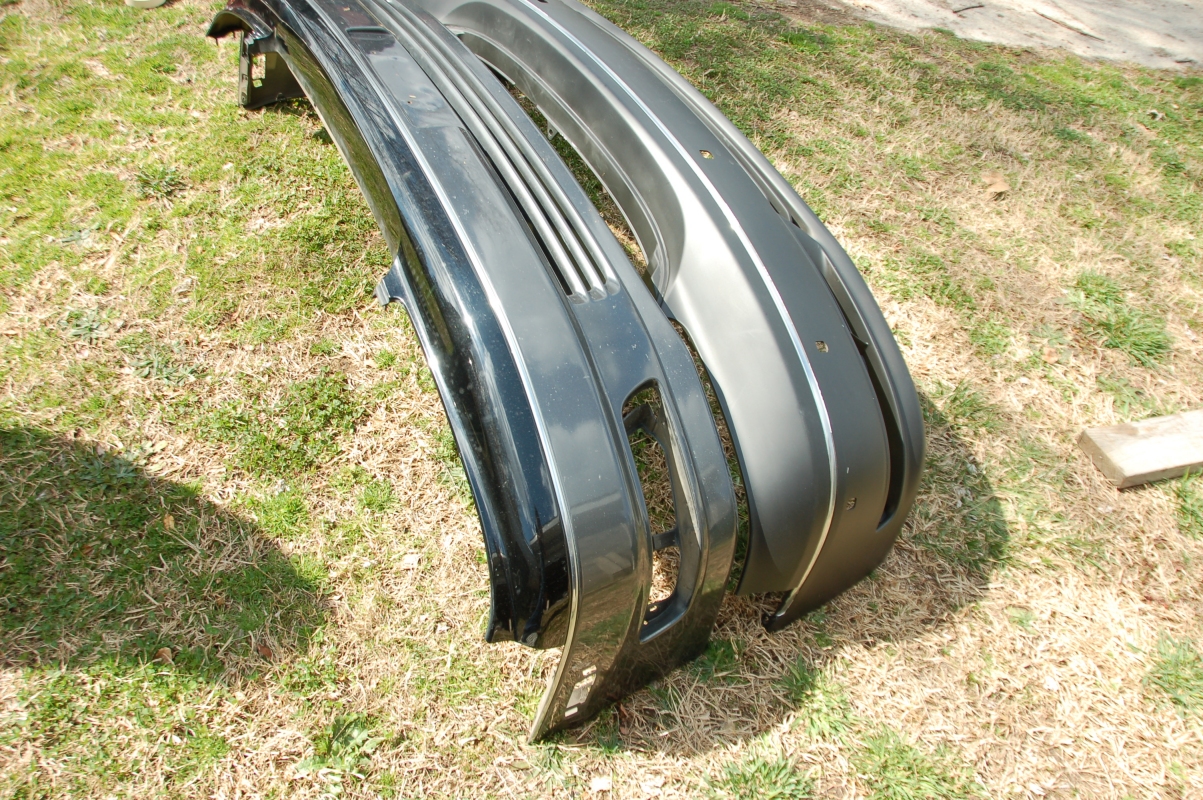
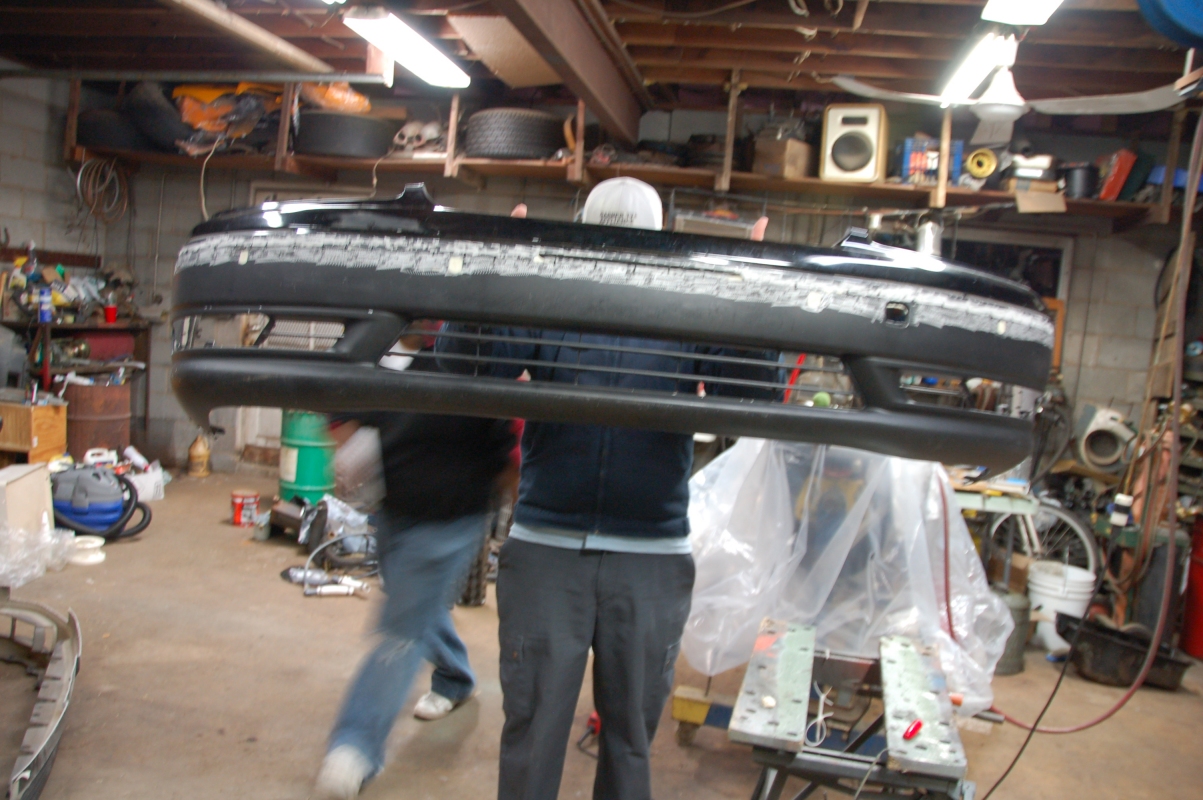
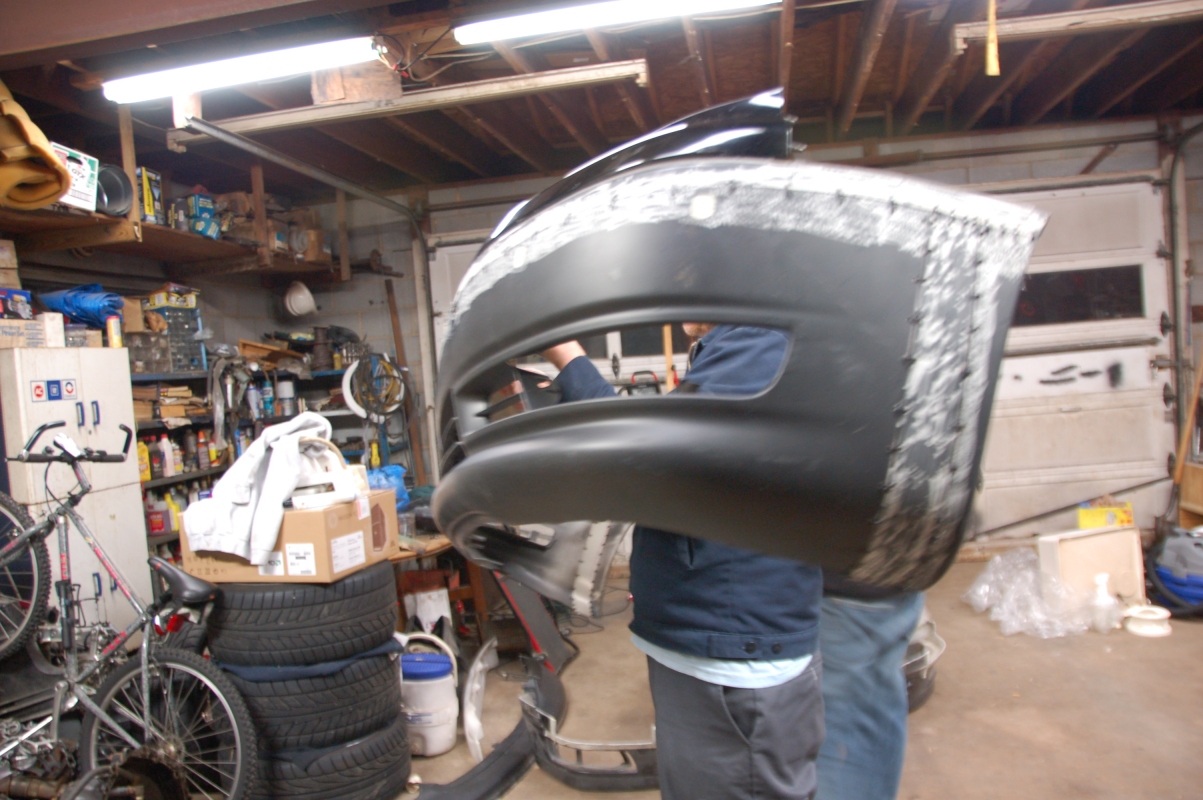
First, we laid the two bumpers next to each other to gauge where to cut and what approach we would use:

[IMG]http://farm5.static.flickr.com/4014/4435397800_c322abd6c3_o.jpg[/IMG]

[IMG]http://farm5.static.flickr.com/4002/4434624477_5828d2086f_o.jpg[/IMG]

[IMG]http://farm5.static.flickr.com/4021/4435399150_2330a19c34_o.jpg[/IMG]

[IMG]http://farm5.static.flickr.com/4033/4434625873_8076e1c954_o.jpg[/IMG]

[IMG]http://farm5.static.flickr.com/4008/4435400396_5220634333_o.jpg[/IMG]

[IMG]http://farm5.static.flickr.com/4052/4434626987_85028556d9_o.jpg[/IMG]

[IMG]http://farm5.static.flickr.com/4047/4435403106_d006af49bd_b.jpg[/IMG]

[IMG]http://farm3.static.flickr.com/2715/4434629855_38f77db915_o.jpg[/IMG]

[IMG]http://farm5.static.flickr.com/4031/4435404602_93a88b519e_o.jpg[/IMG]

[IMG]http://farm5.static.flickr.com/4068/4434631143_2c685ae1d0_o.jpg[/IMG]
View original BBCode
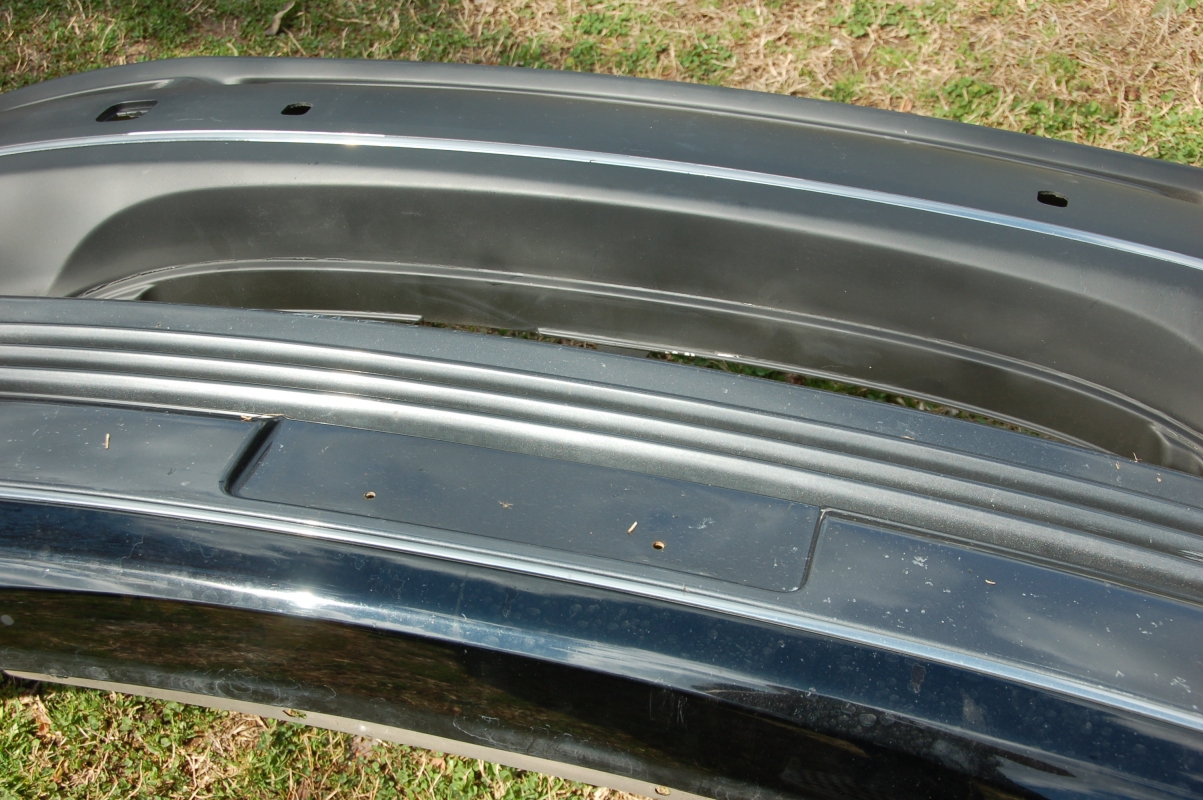
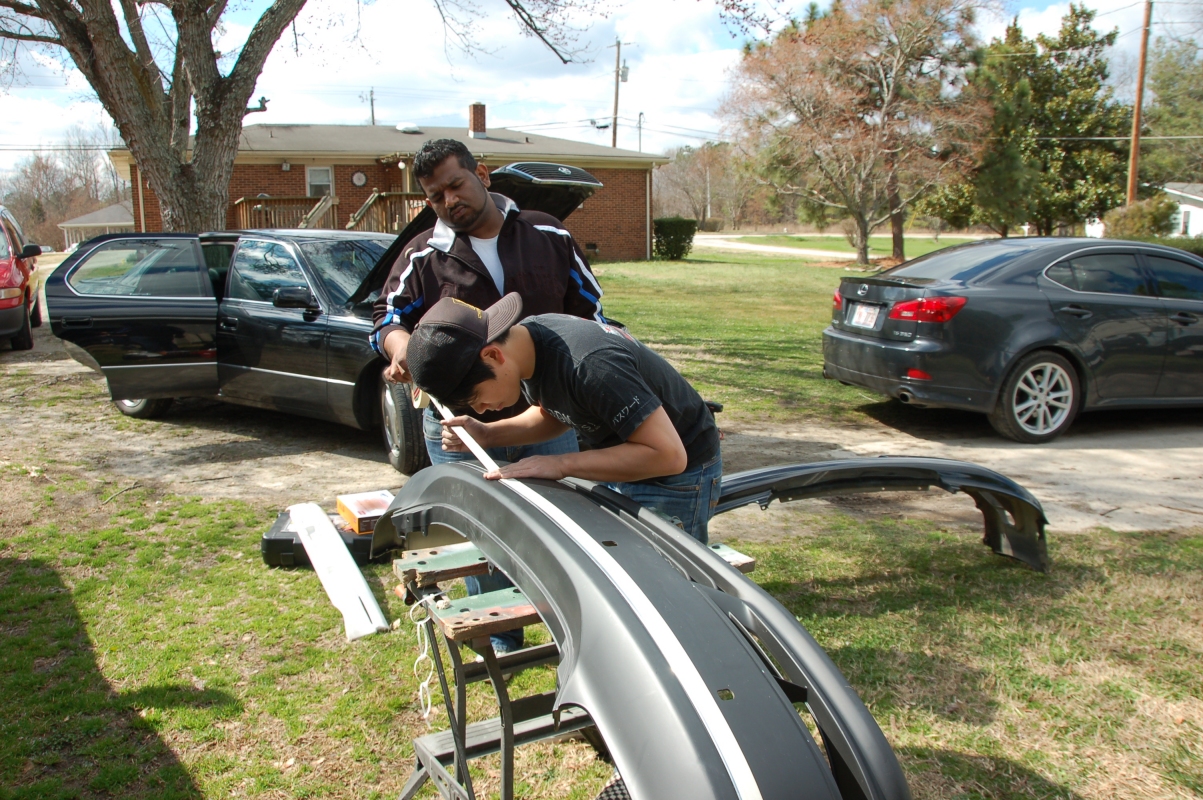
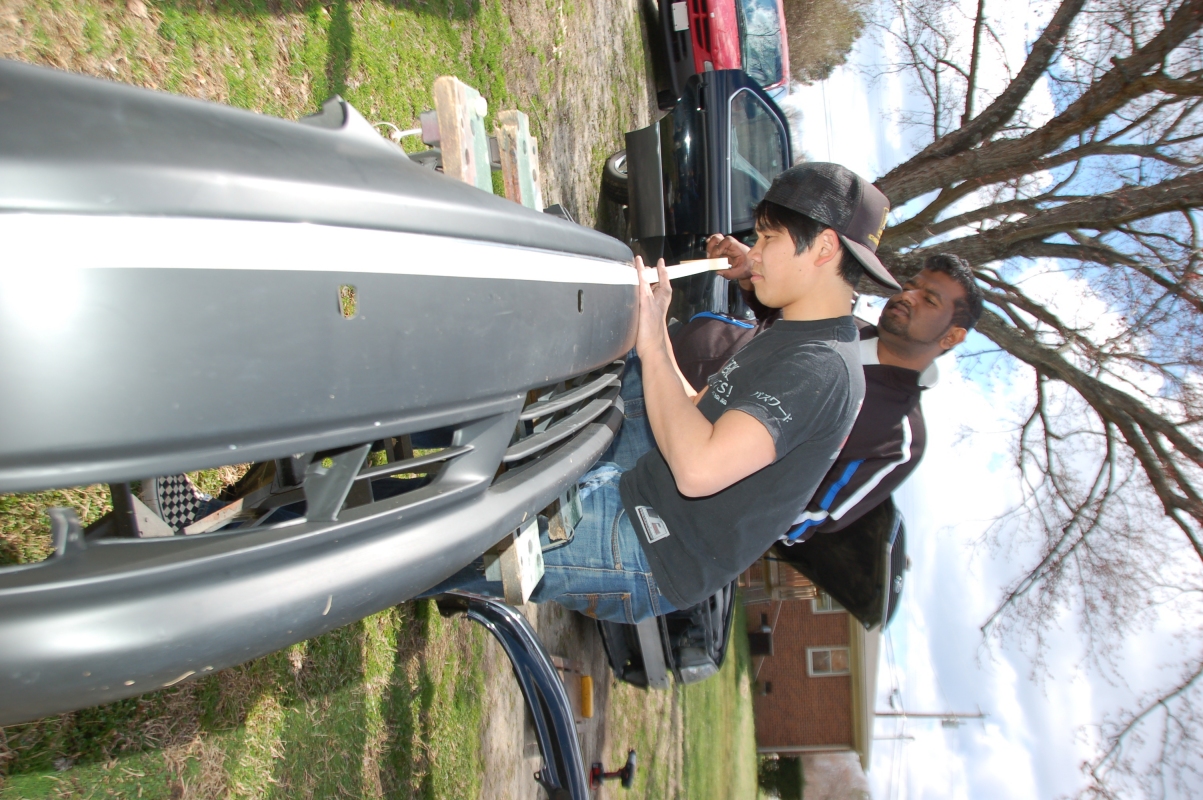
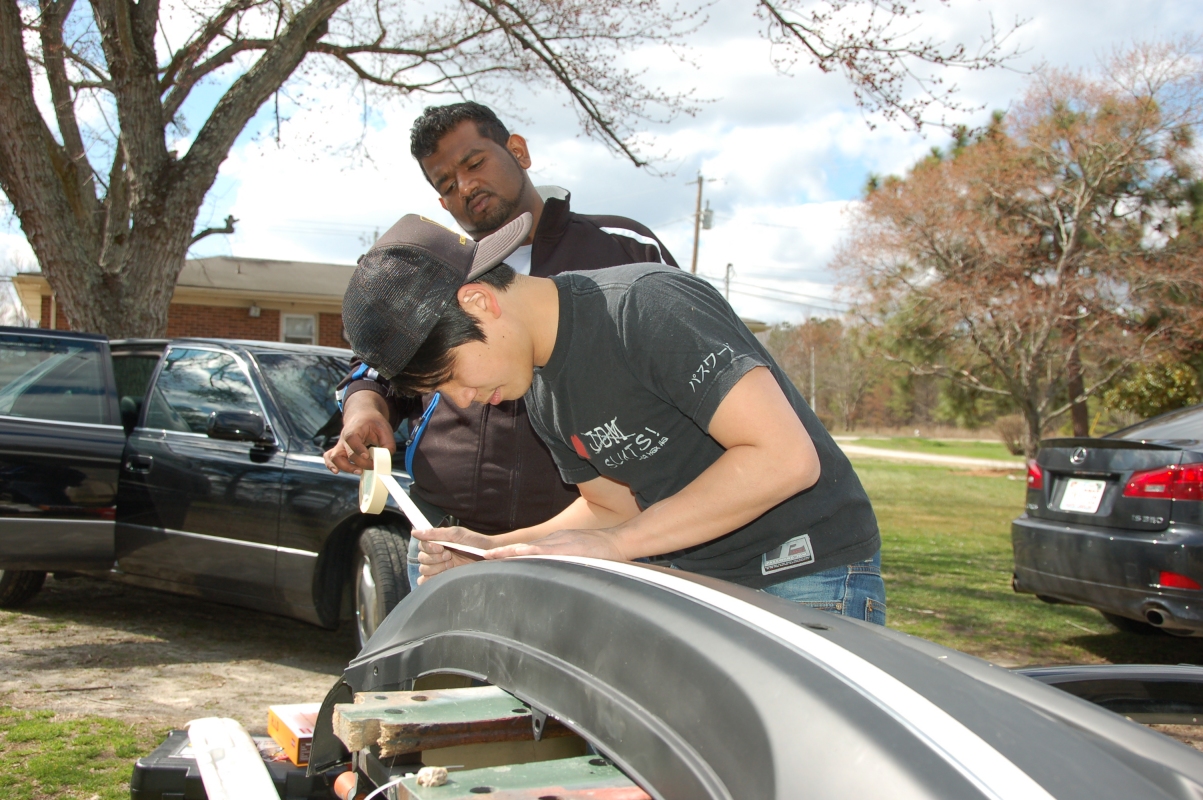
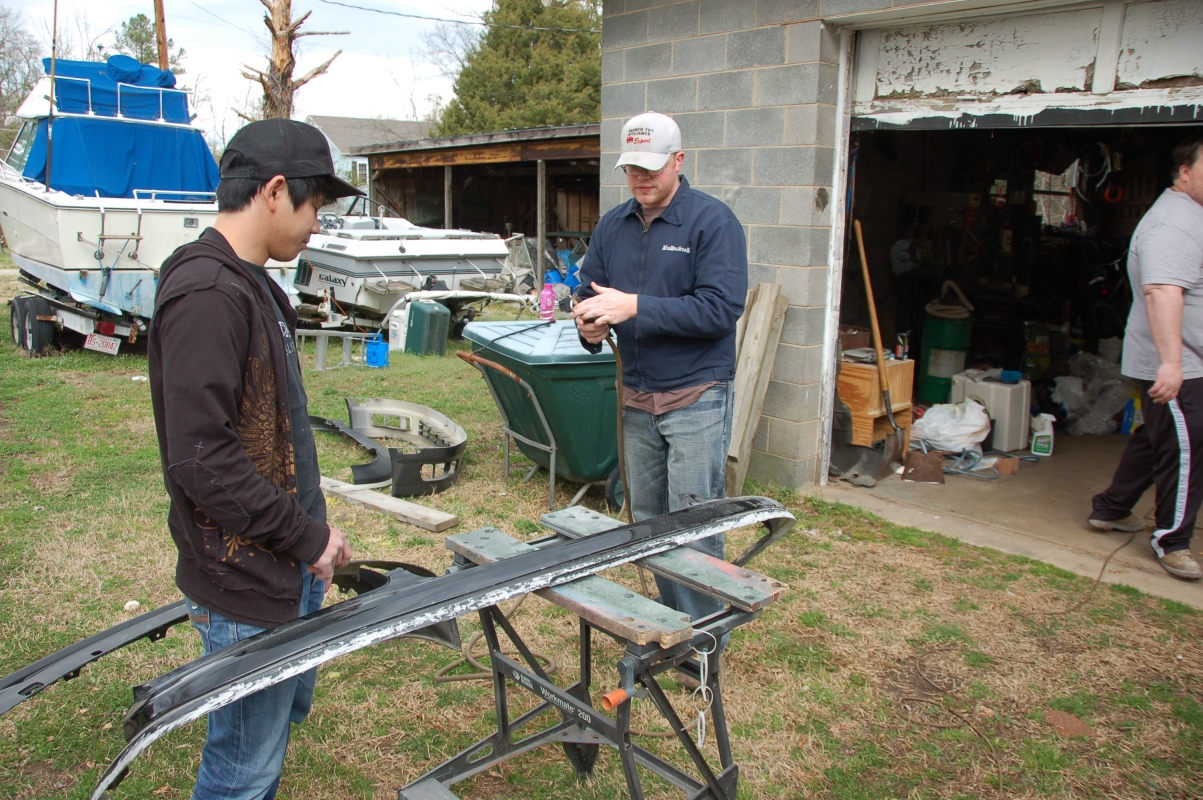
SECOND, We masked off the line where we wanted to cut on both bumpers.  We used the chrome lining as a guide to keep our line as straight as possible.

[IMG]http://farm3.static.flickr.com/2780/4435405822_a3ebb692e3_o.jpg[/IMG]

[IMG]http://farm3.static.flickr.com/2696/4435406386_366ca5024c_o.jpg[/IMG]

[IMG]http://farm3.static.flickr.com/2796/4435406920_ce9813d6cc_o.jpg[/IMG]

[IMG]http://farm3.static.flickr.com/2751/4434634701_474e6cec65_b.jpg[/IMG]

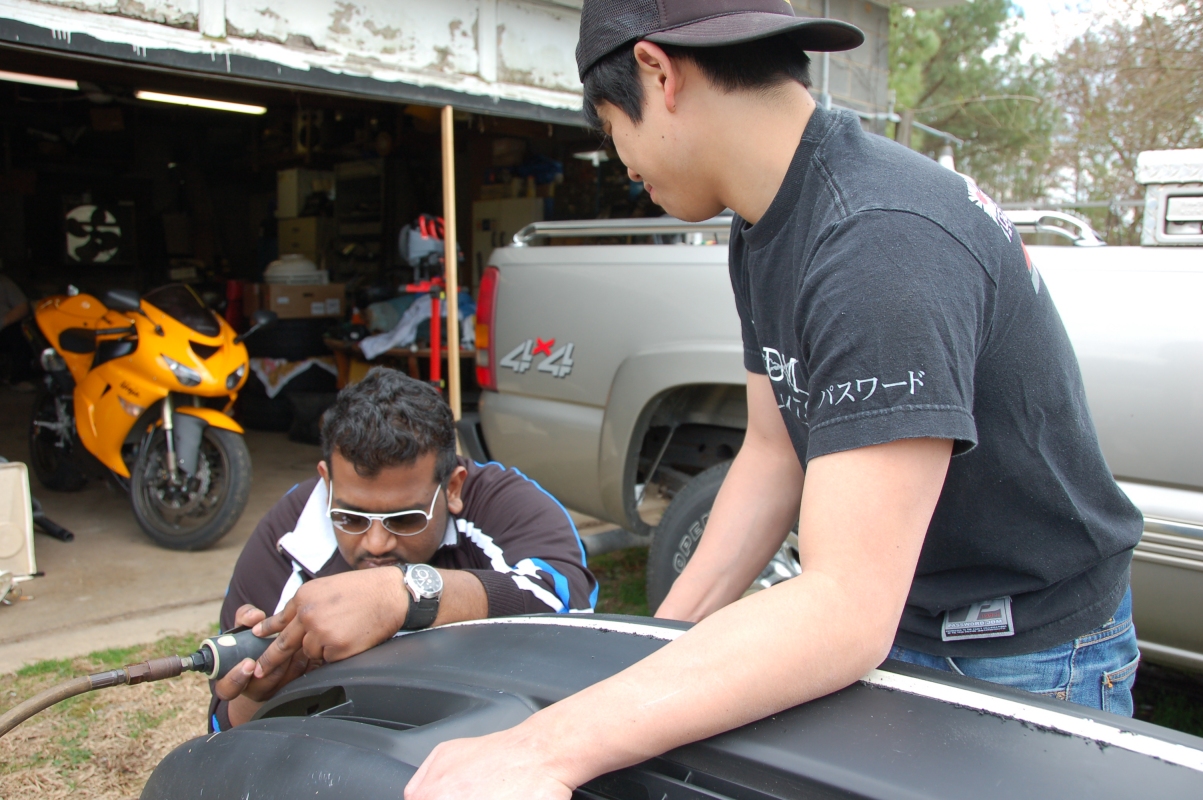
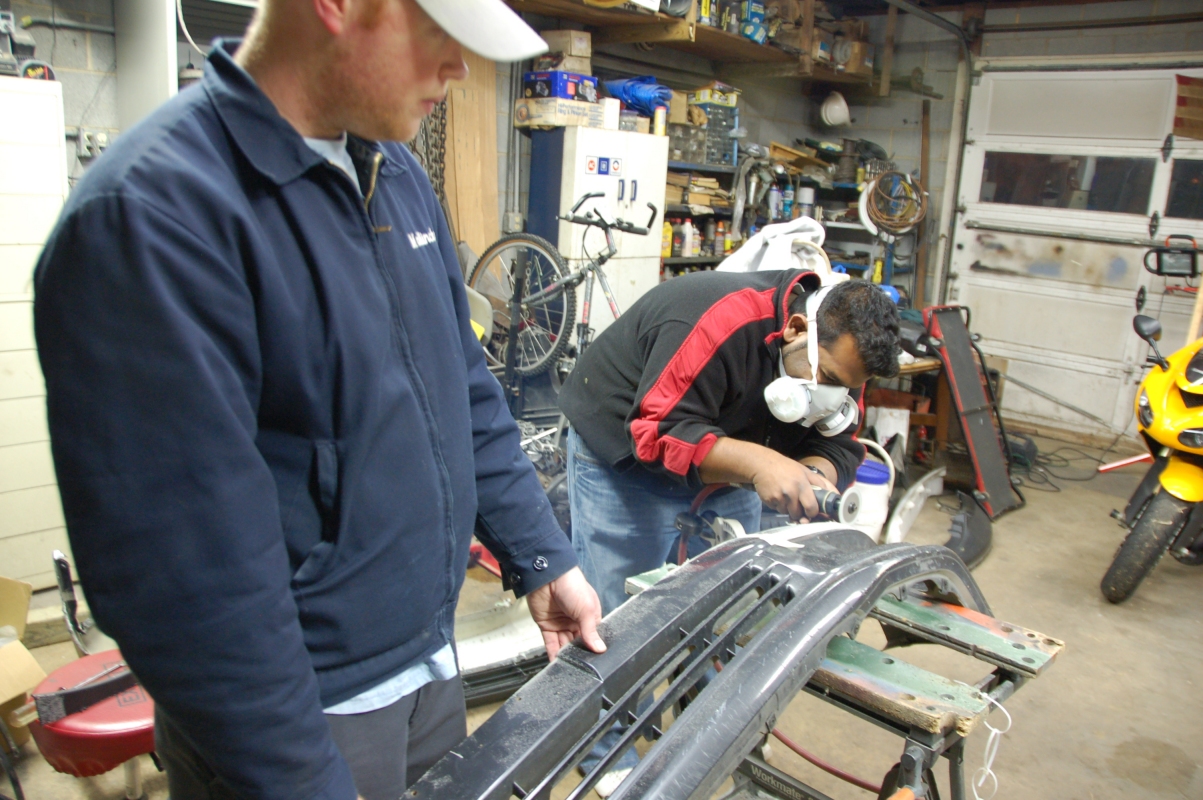
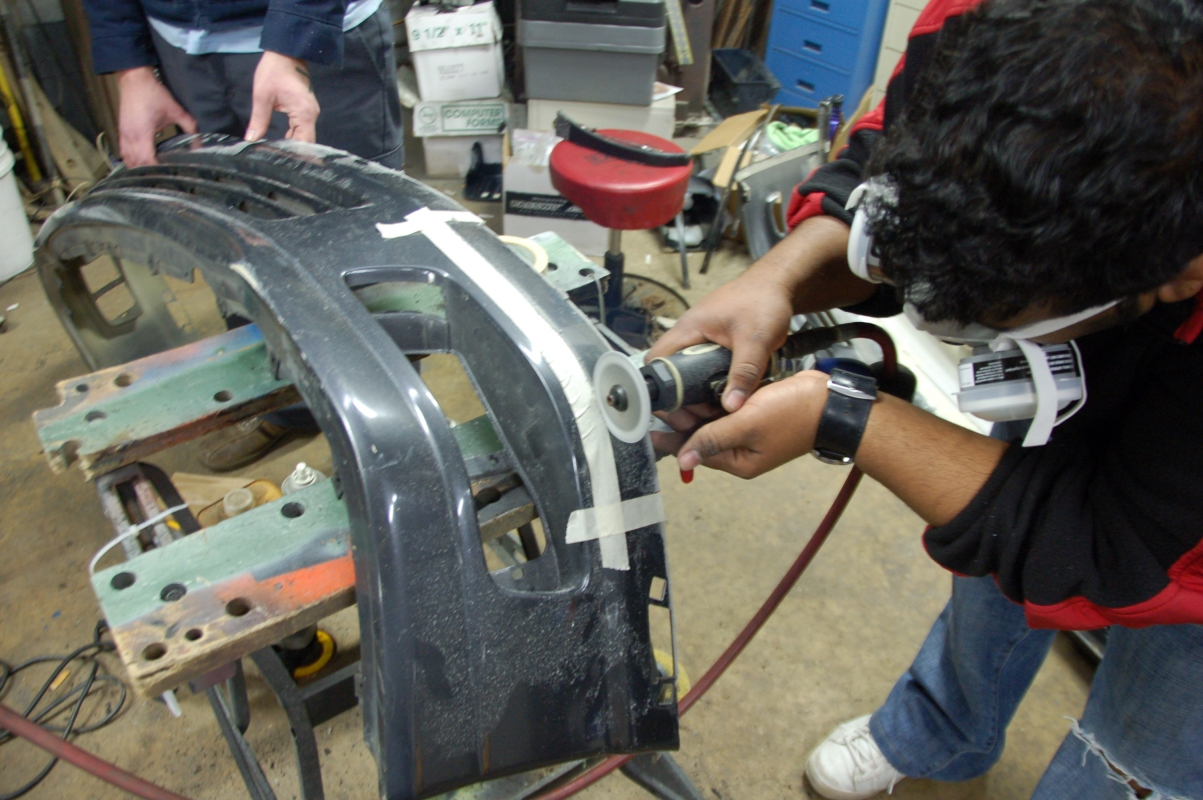
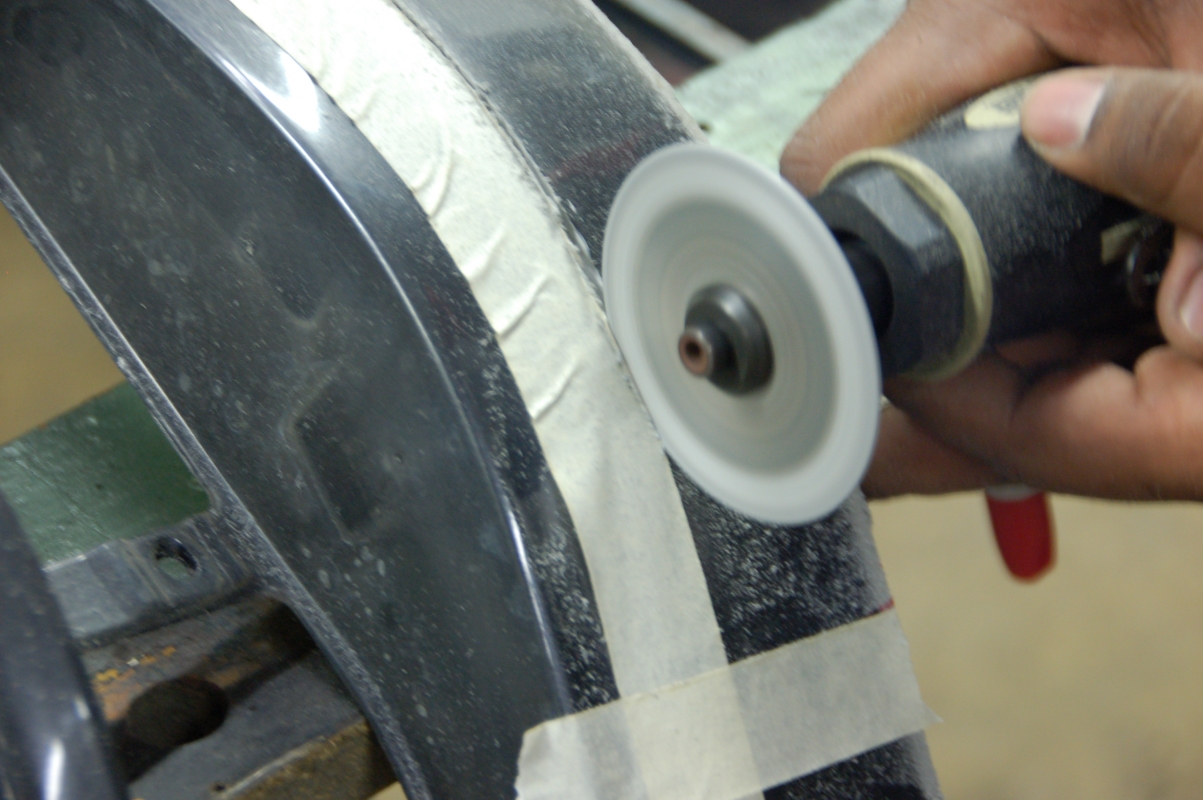
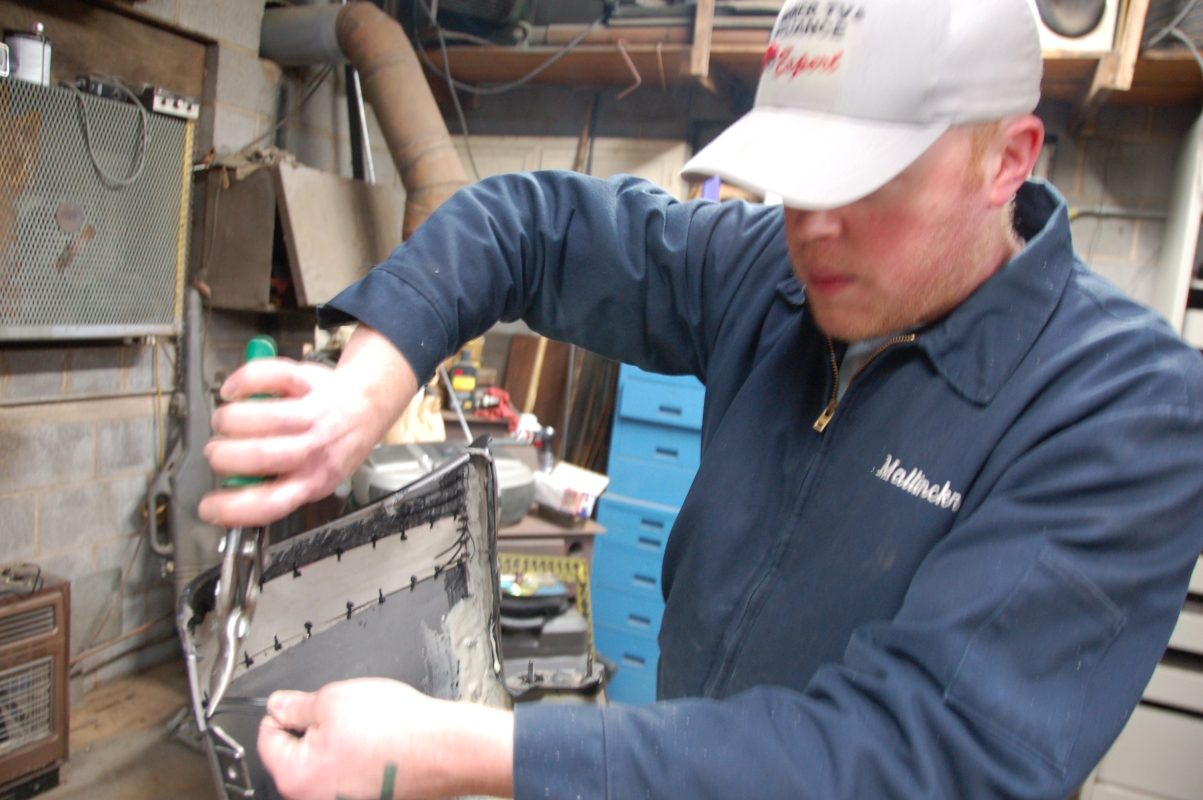
Then we started cutting, making sure to score it first before actually cutting through.  Don't forget to wear some kind of eye protection, and that plastic gets really hot.  Don't try to flick it off, cause it'll stick to your hands and it will burn you.  Speaking from experience.:

[IMG]http://farm5.static.flickr.com/4028/4434635237_f41e389cfa_o.jpg[/IMG]

[IMG]http://farm5.static.flickr.com/4056/4434635691_5eff2e8757_o.jpg[/IMG]
View original BBCode
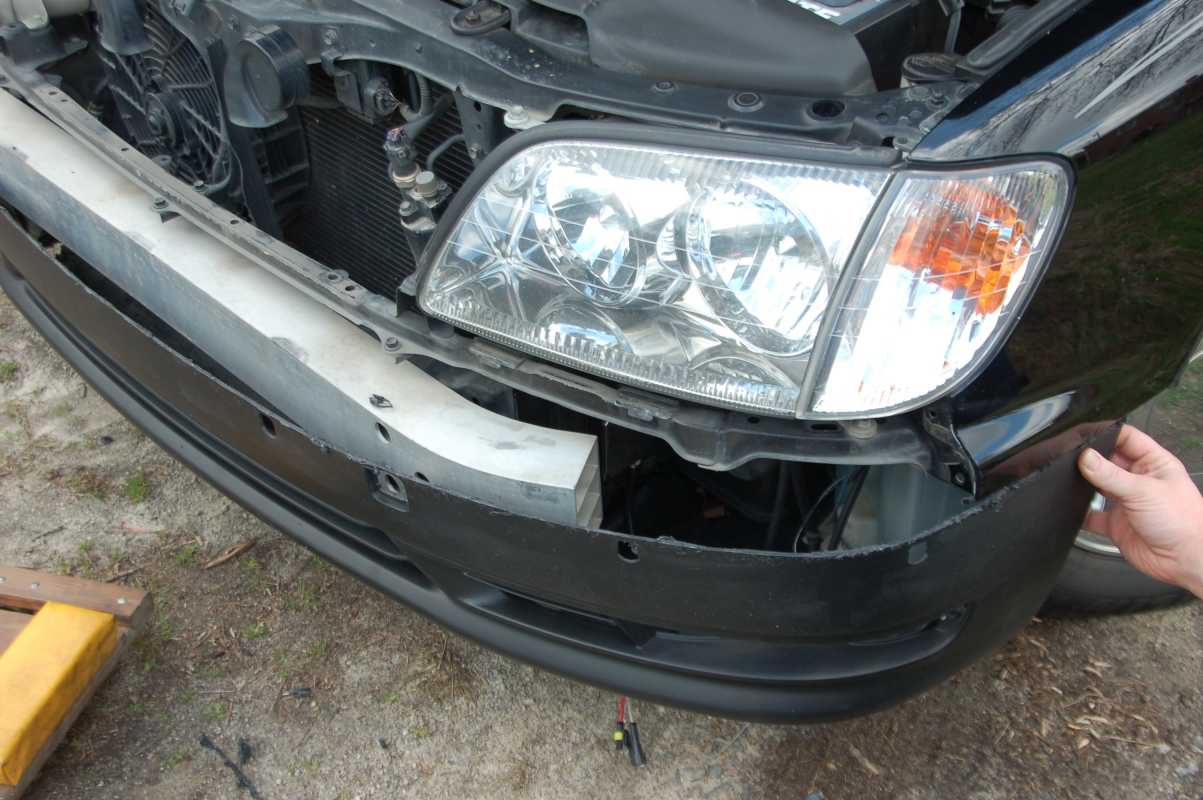
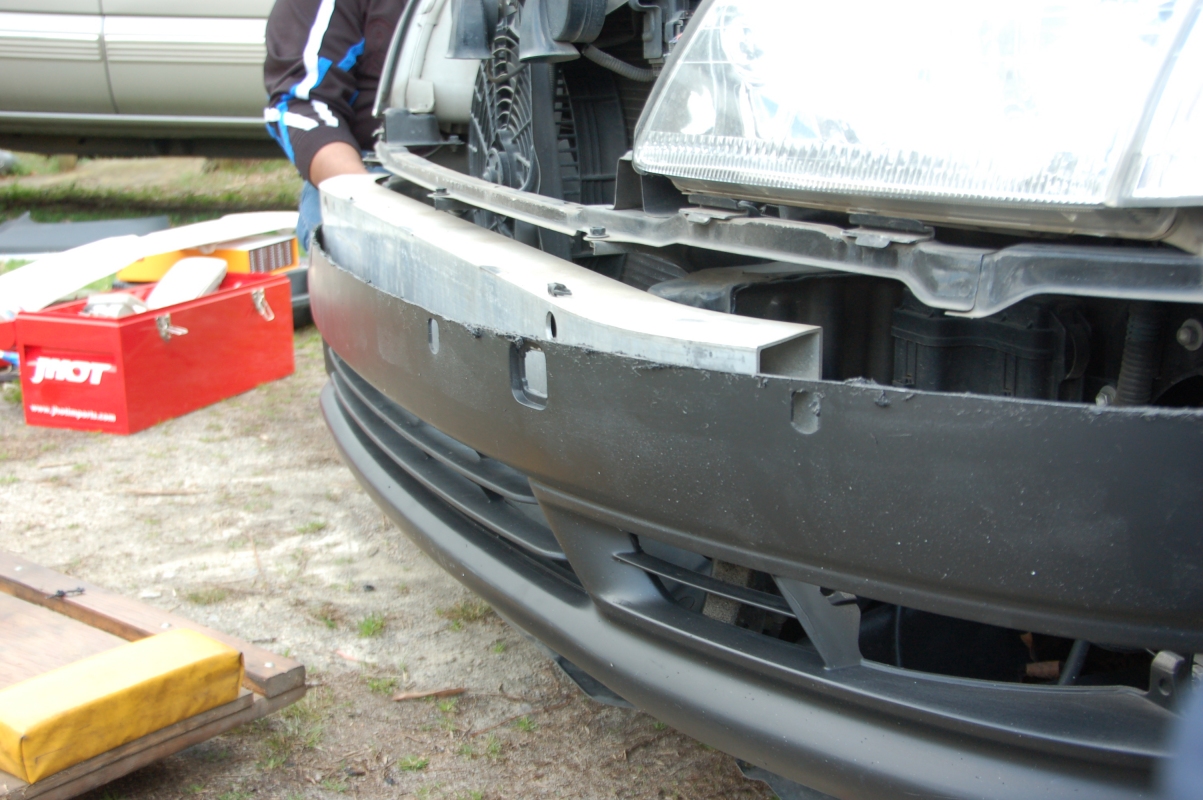
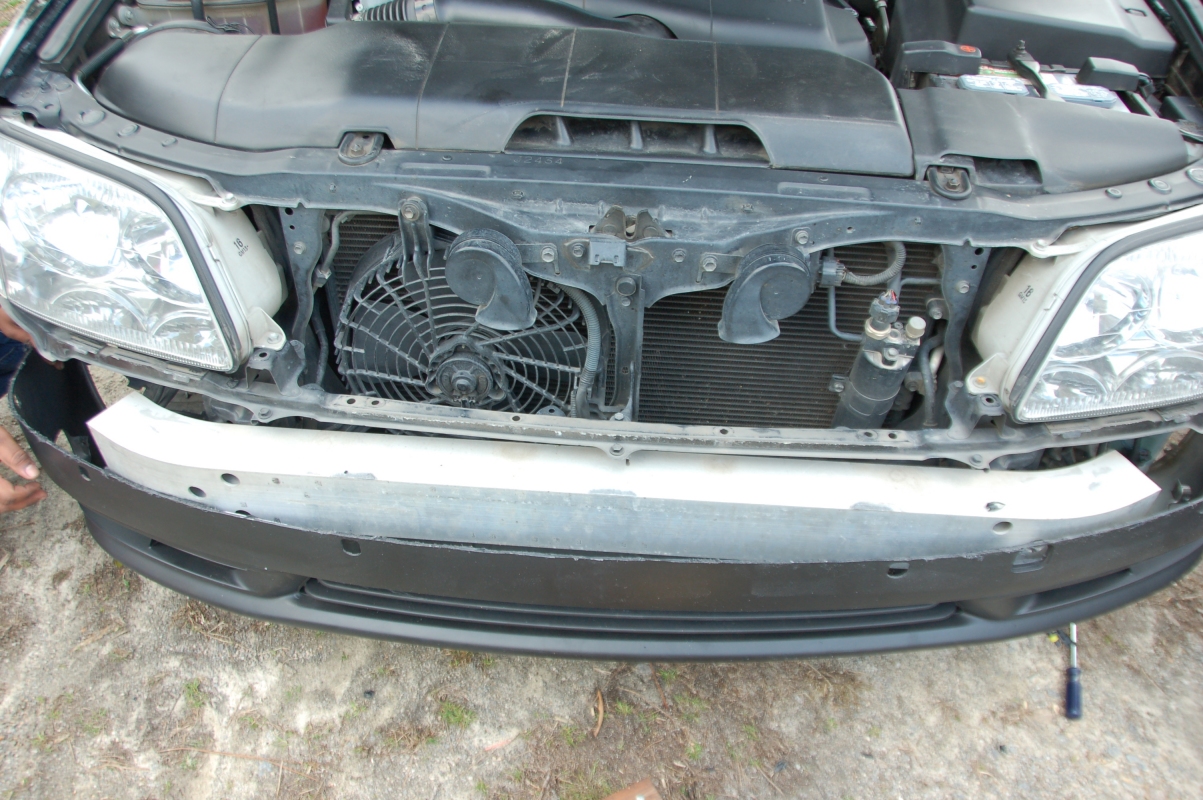
We cut the LS430 front bumper first, because we wanted to practice our cutting before cutting on the LS400 bumper and we wanted to see how it'll sit on the car as well.:

[IMG]http://farm3.static.flickr.com/2792/4434636179_e49872a734_o.jpg[/IMG]

[IMG]http://farm5.static.flickr.com/4038/4434636759_88cd7fa637_o.jpg[/IMG]

[IMG]http://farm5.static.flickr.com/4067/4434637257_46f0d043ca_o.jpg[/IMG]

[IMG]http://farm5.static.flickr.com/4054/4435411678_5dbd4a286c_o.jpg[/IMG]

[IMG]http://farm5.static.flickr.com/4067/4435412094_fb2c98a685_o.jpg[/IMG]

[IMG]http://farm5.static.flickr.com/4008/4434638477_d5872a97b9_o.jpg[/IMG]

[IMG]http://farm5.static.flickr.com/4033/4434638957_5c67ab939e_o.jpg[/IMG]

[IMG]http://farm5.static.flickr.com/4036/4435413470_b9ca9f07db_o.jpg[/IMG]

[IMG]http://farm3.static.flickr.com/2802/4434639857_46fc01c56a_o.jpg[/IMG]

[IMG]http://farm5.static.flickr.com/4043/4435414348_3e6572583c_o.jpg[/IMG]
View original BBCode
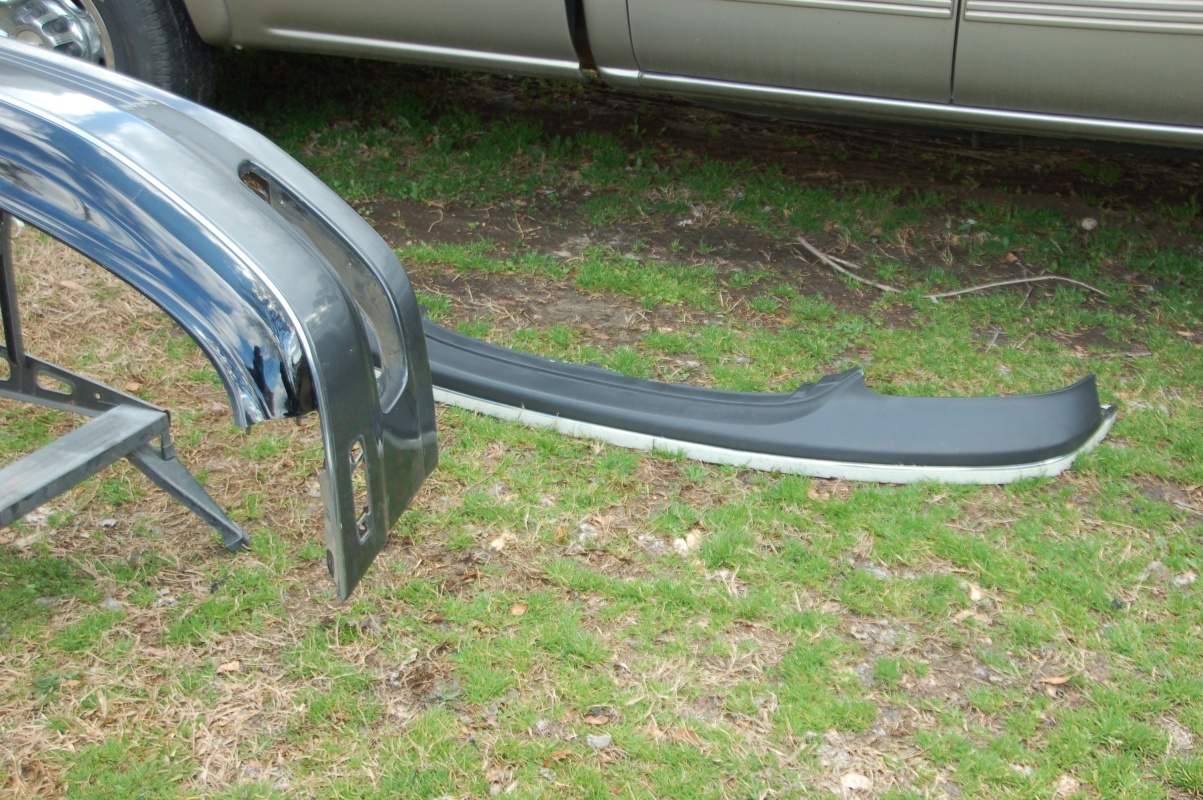
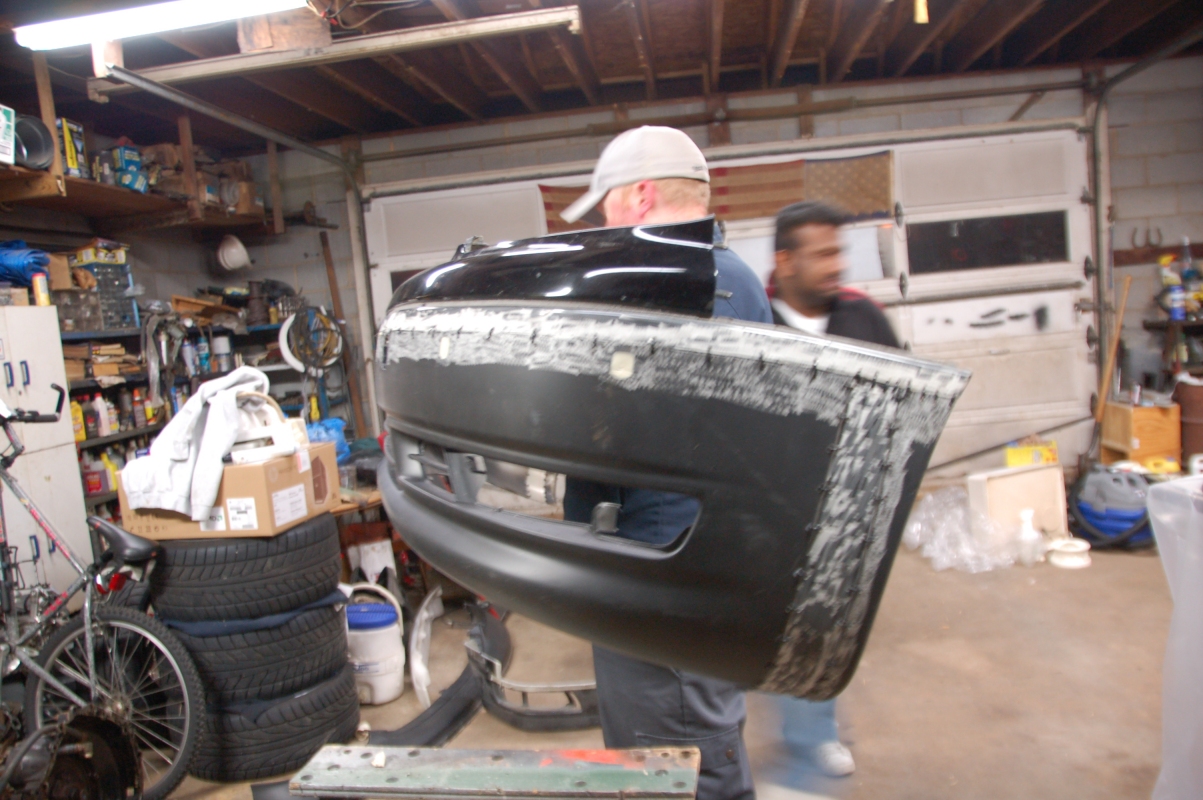
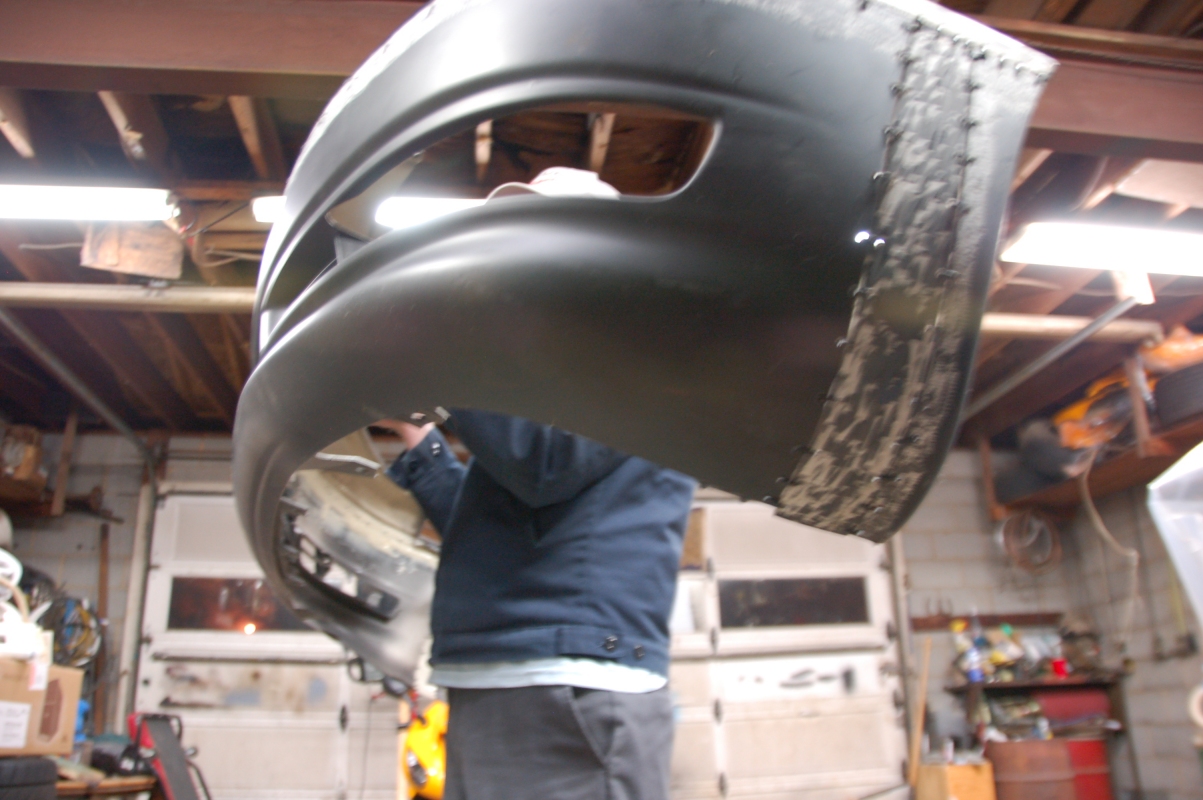
We found that the LS430 bumper was shorter than the LS400 bumper, so we'll have to cut the ends and extend it.  The problem w/ using the ends of the LS400 bumper is the height of the LS430 bumper is much greater than the height of the LS400 bumper, so the easiest approach is to just extend it rather than trying to build from the ends of the LS400 bumper.

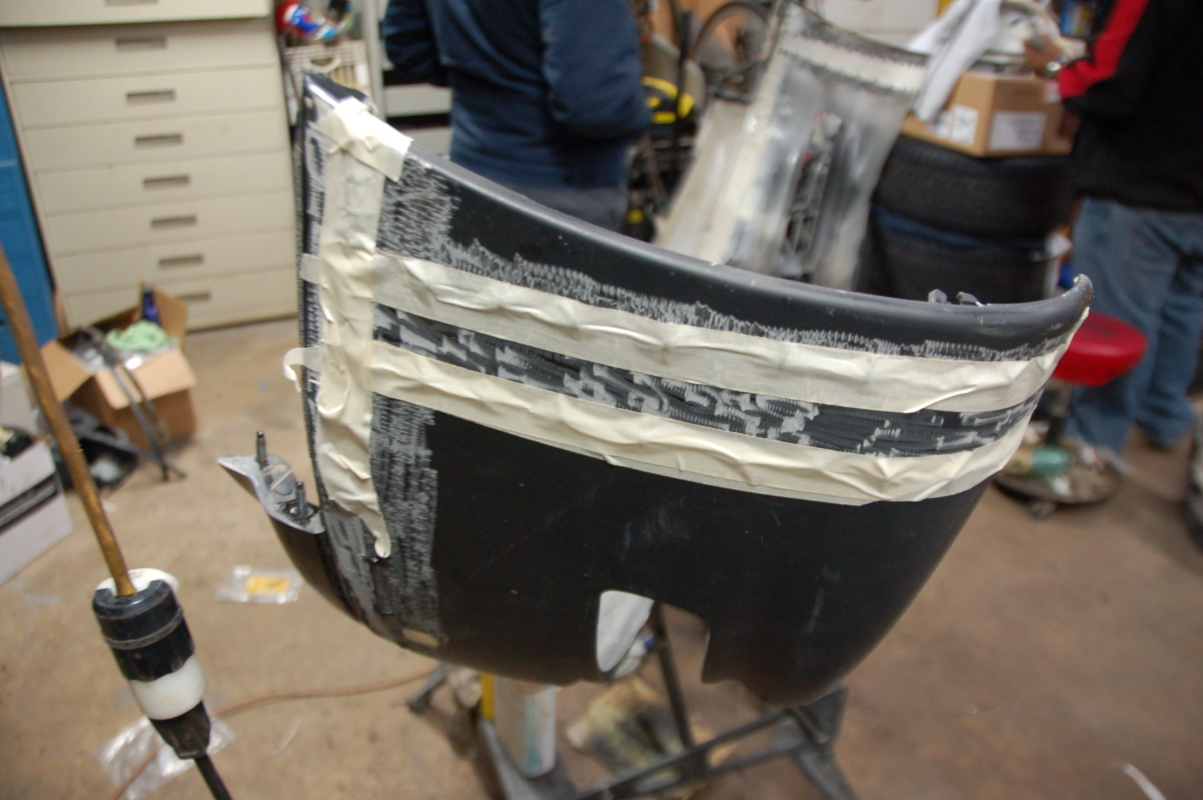
Next, we roughed up the front and back sides of all the pieces we're merging so that the fusing compound would stick/grab better:

[IMG]http://farm5.static.flickr.com/4018/4435414990_8b57c15d7e_o.jpg[/IMG]

[IMG]http://farm3.static.flickr.com/2720/4434641293_de3c647270_o.jpg[/IMG]

[IMG]http://farm3.static.flickr.com/2740/4434641855_a443f3618d_o.jpg[/IMG]

[IMG]http://farm3.static.flickr.com/2751/4435416456_41b00683b1_o.jpg[/IMG]

[IMG]http://farm3.static.flickr.com/2788/4435416970_a2fd49d28a_o.jpg[/IMG]

[IMG]http://farm5.static.flickr.com/4029/4434643435_37be2f93a9_o.jpg[/IMG]
View original BBCode
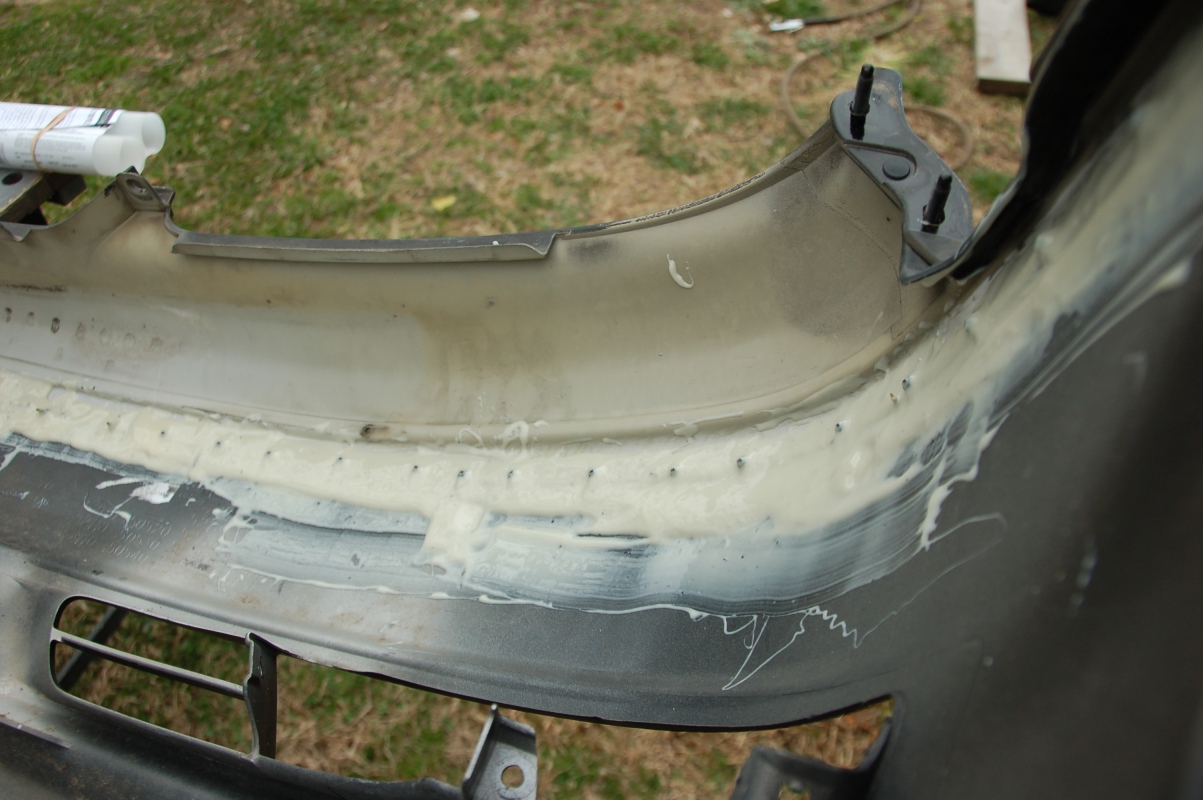
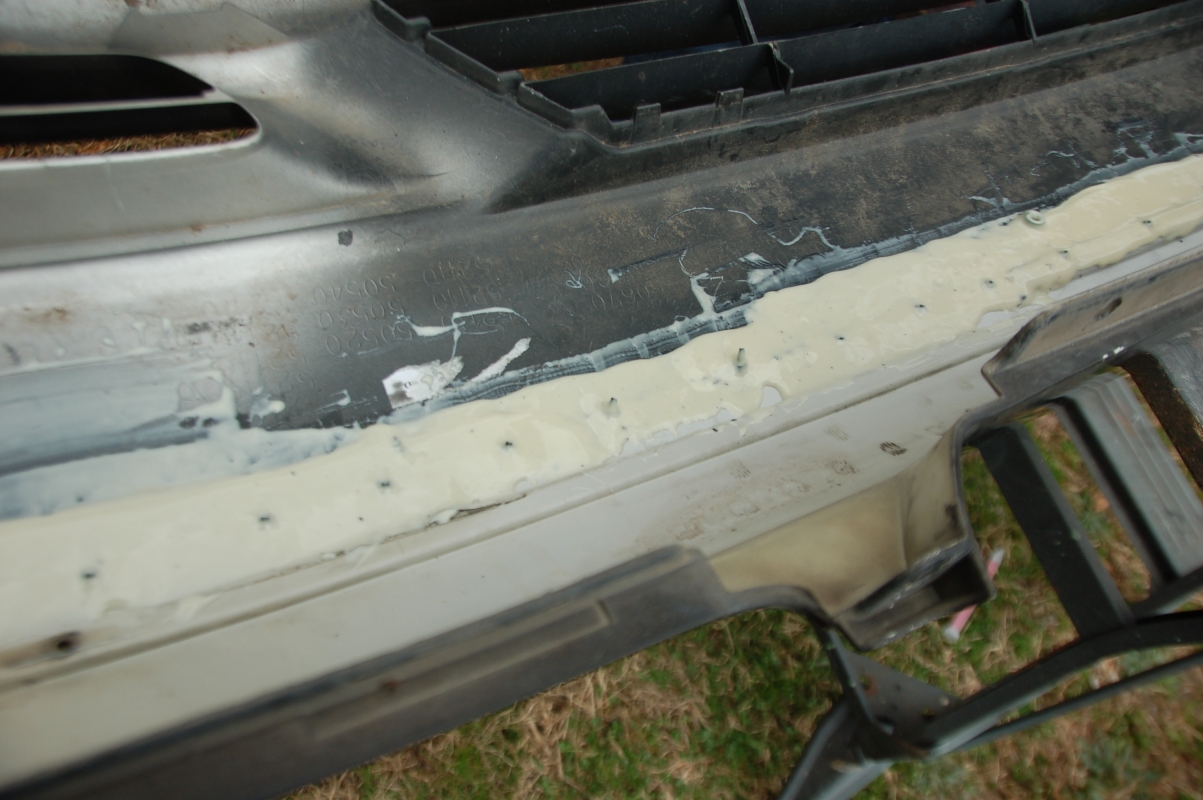
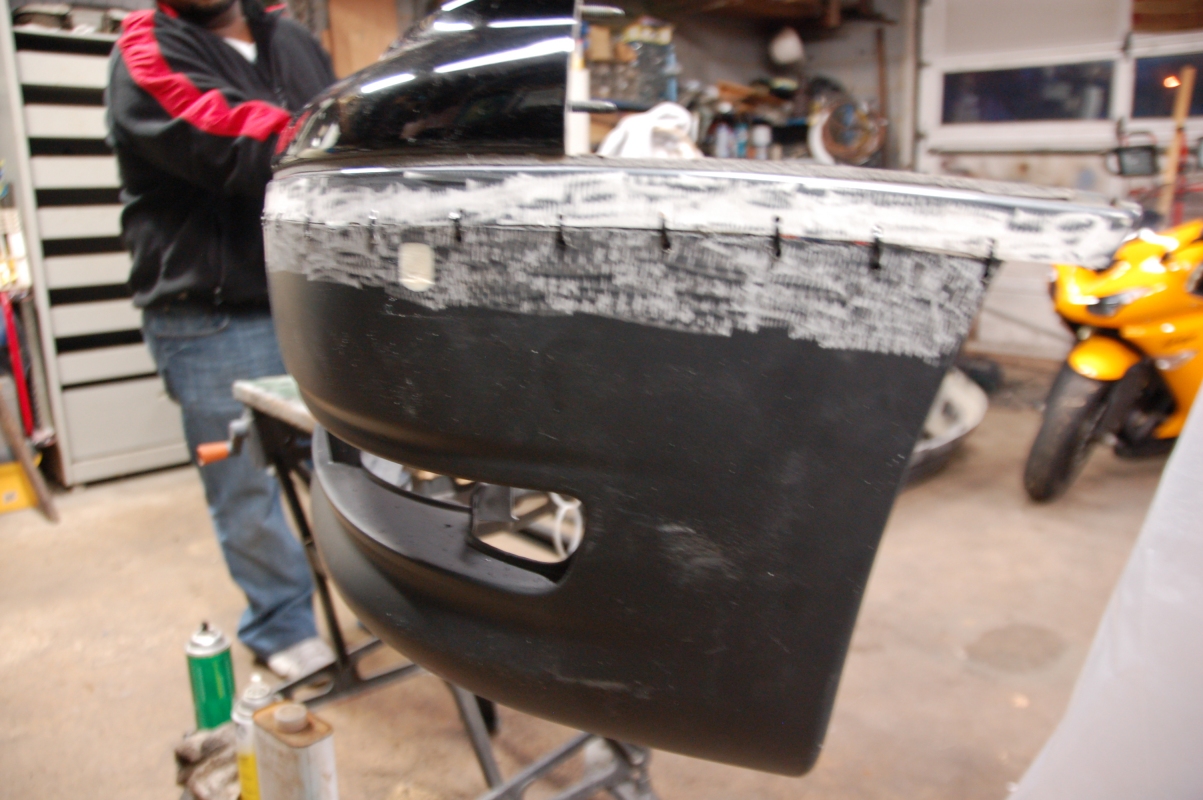
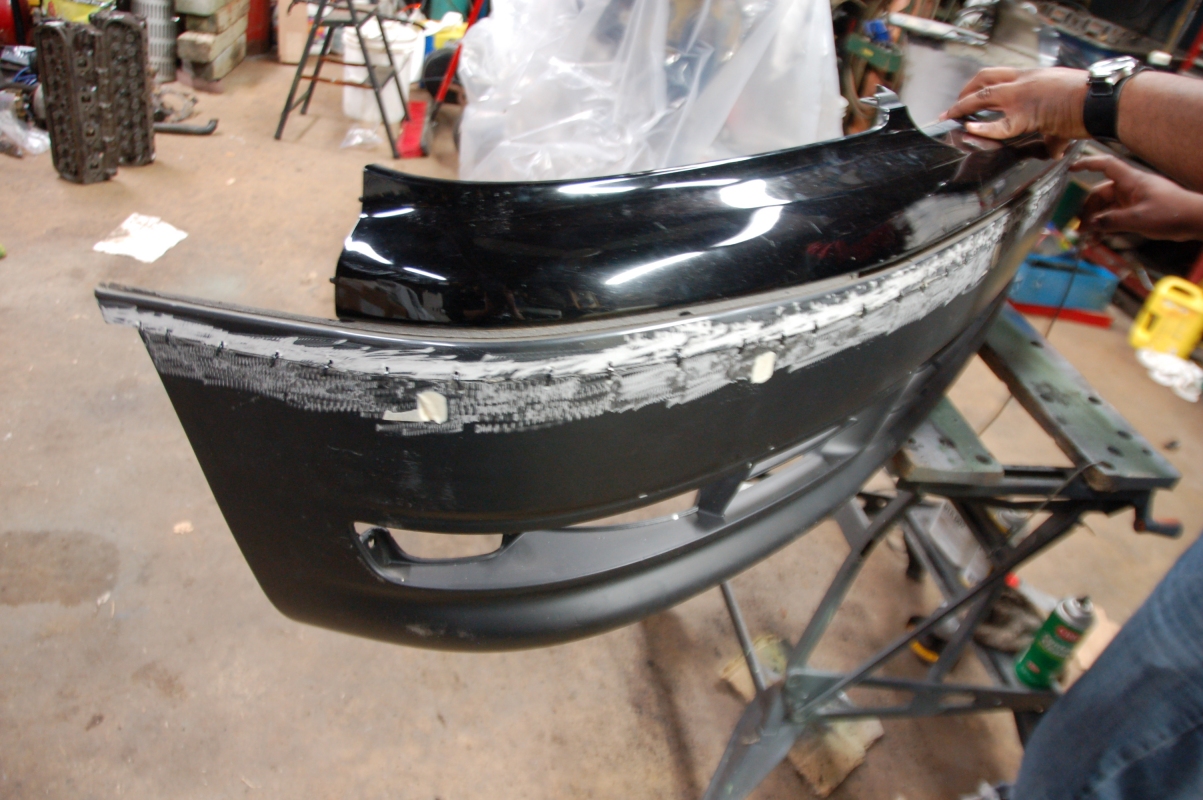
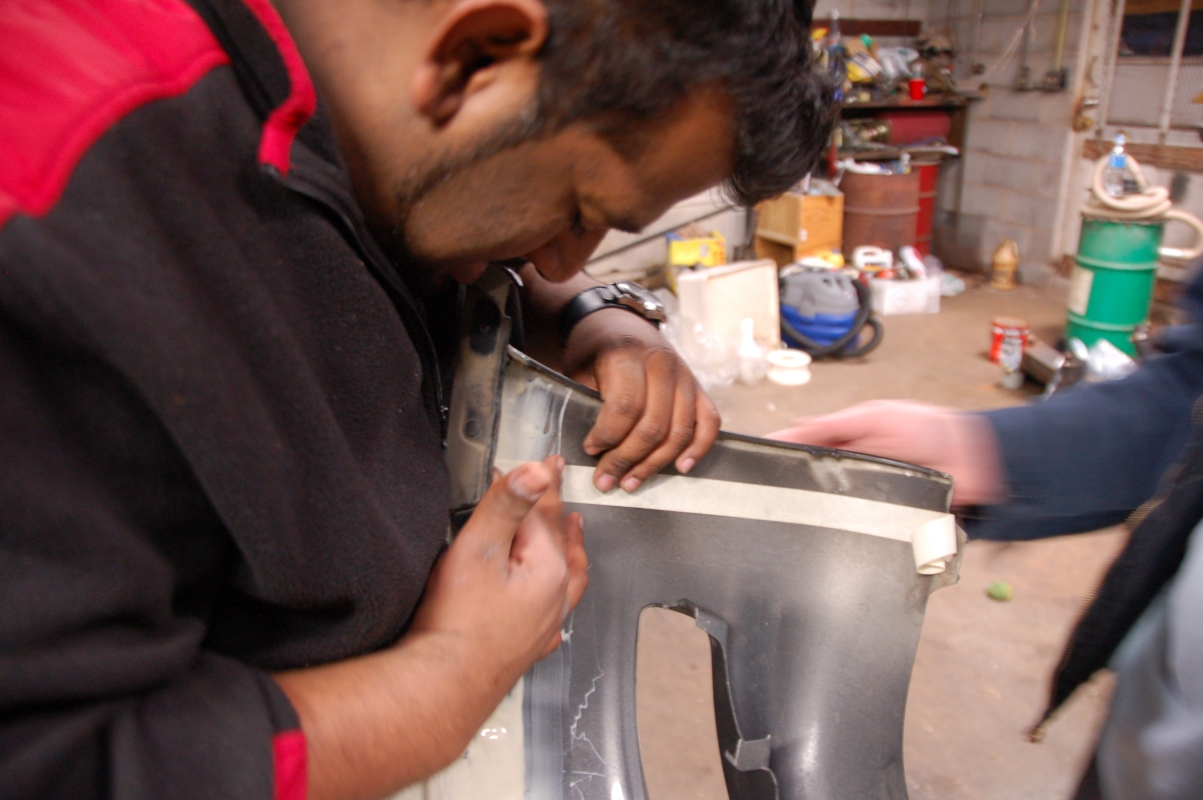
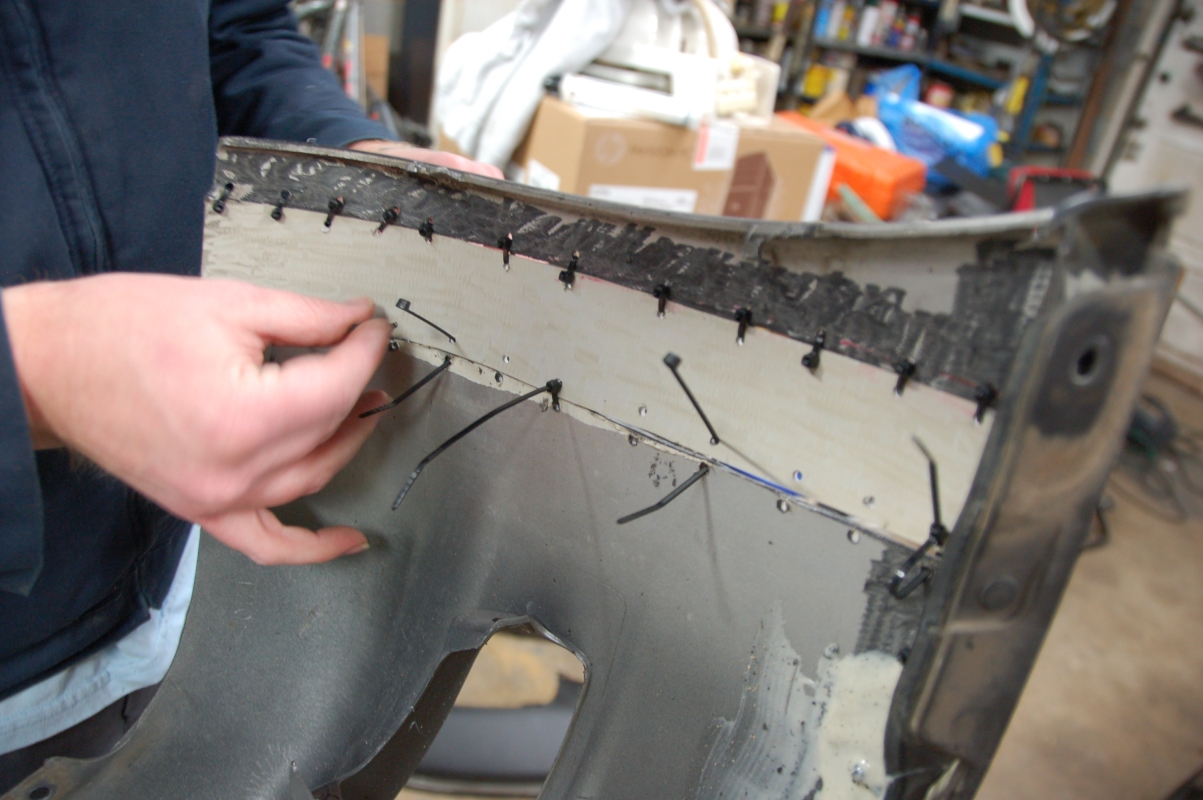
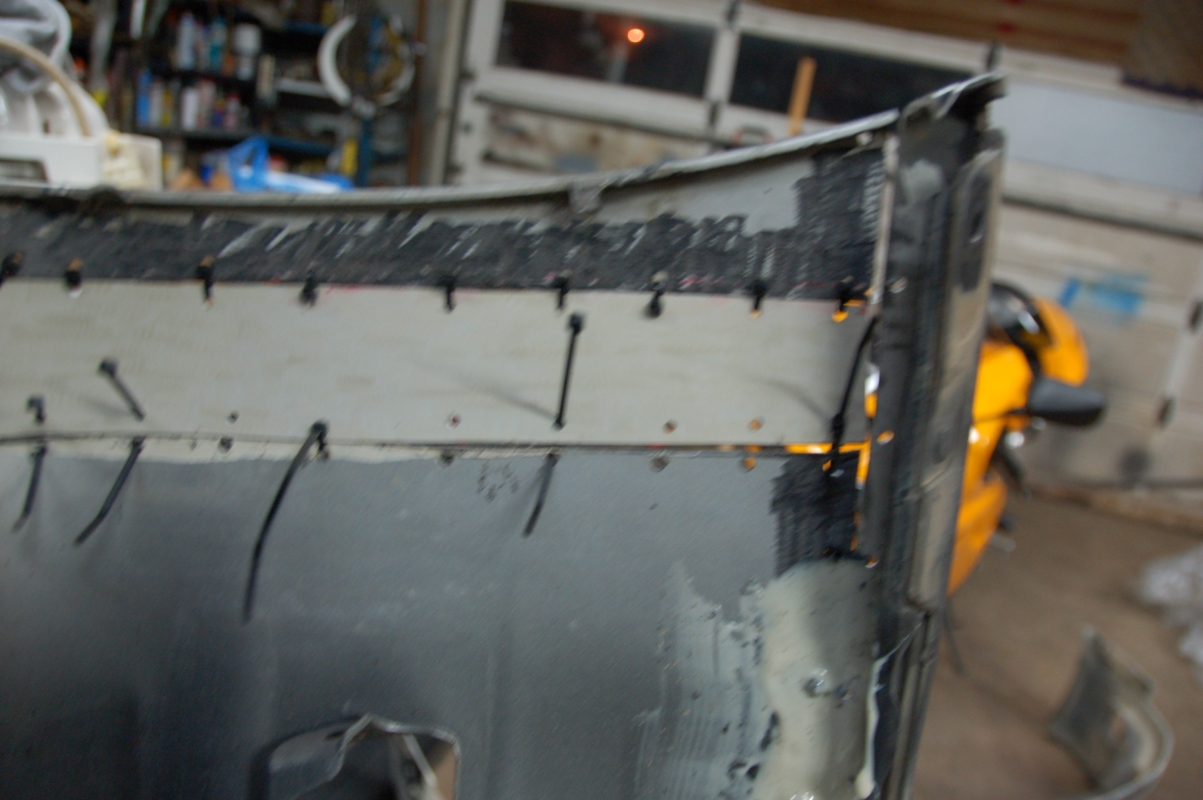
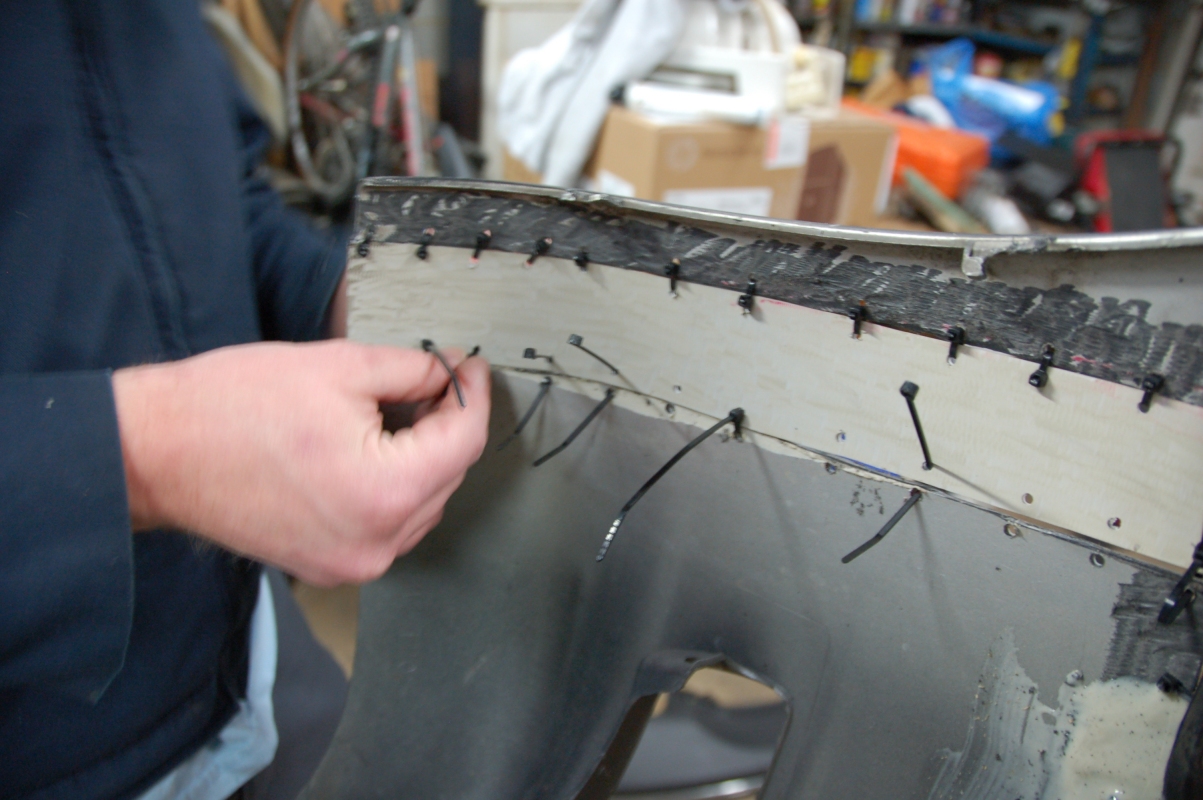
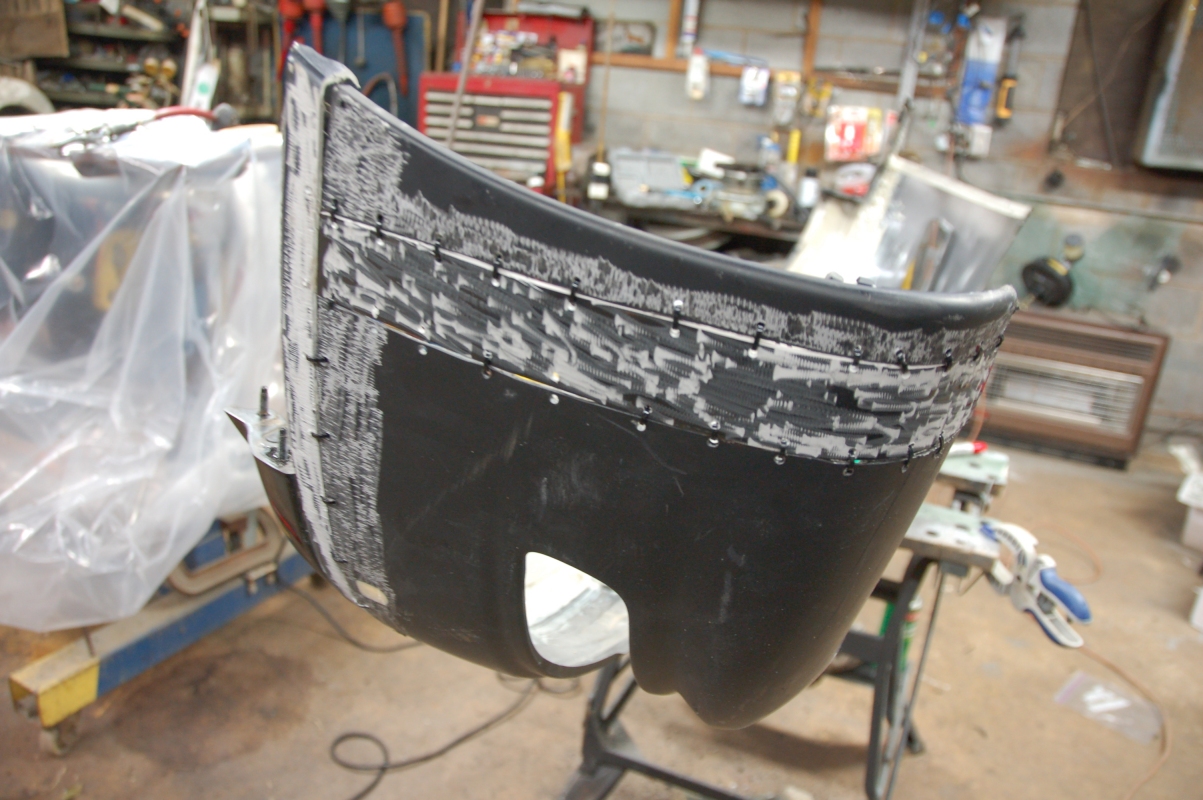
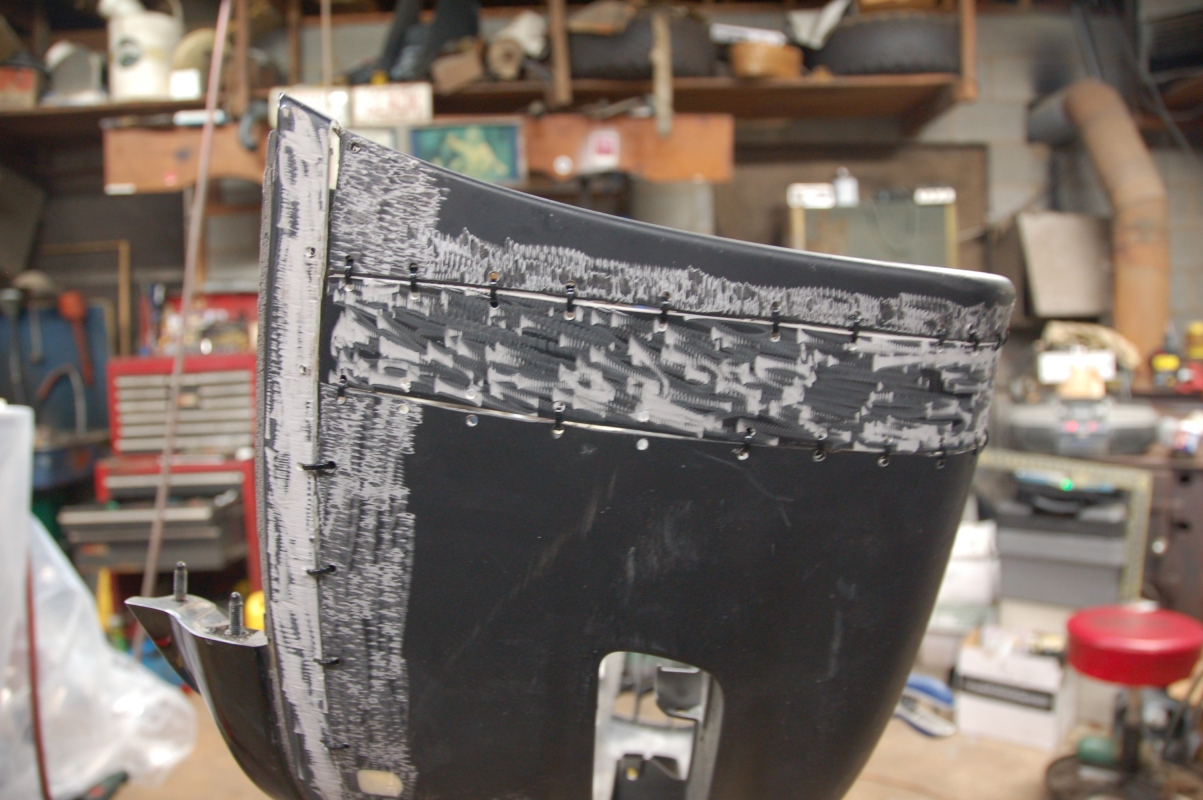
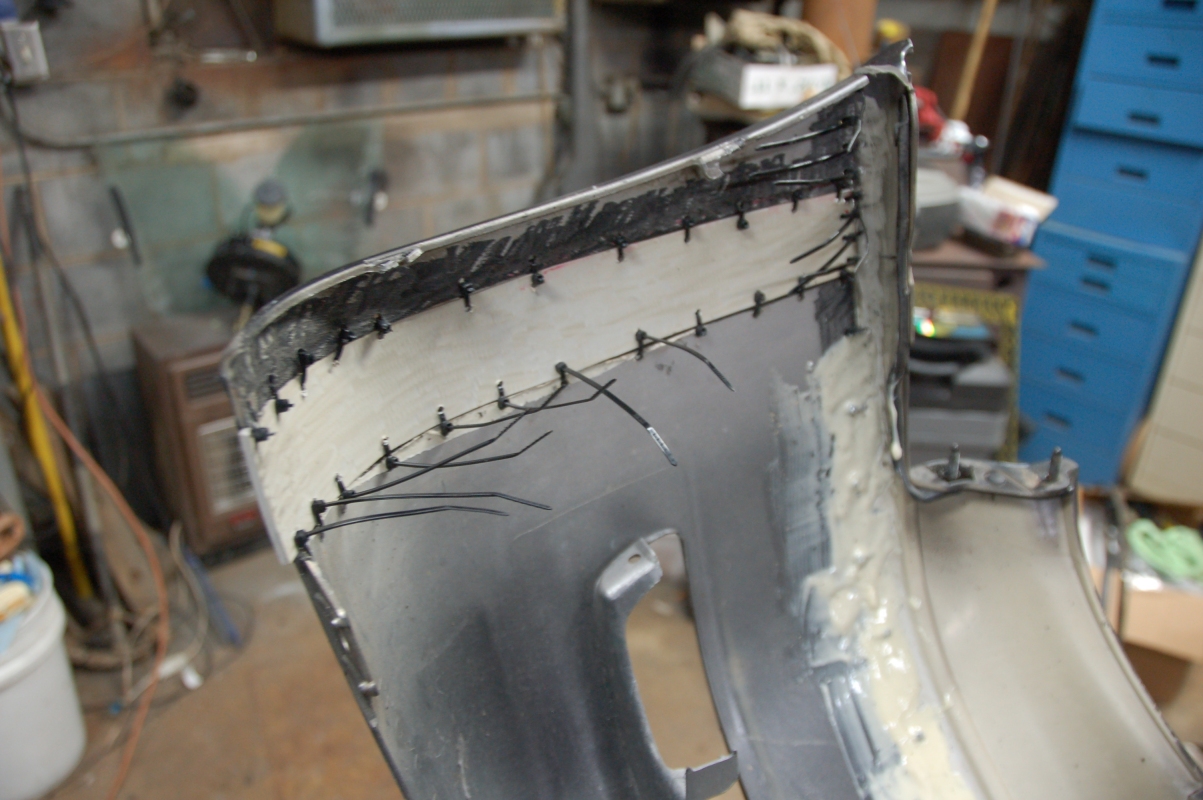
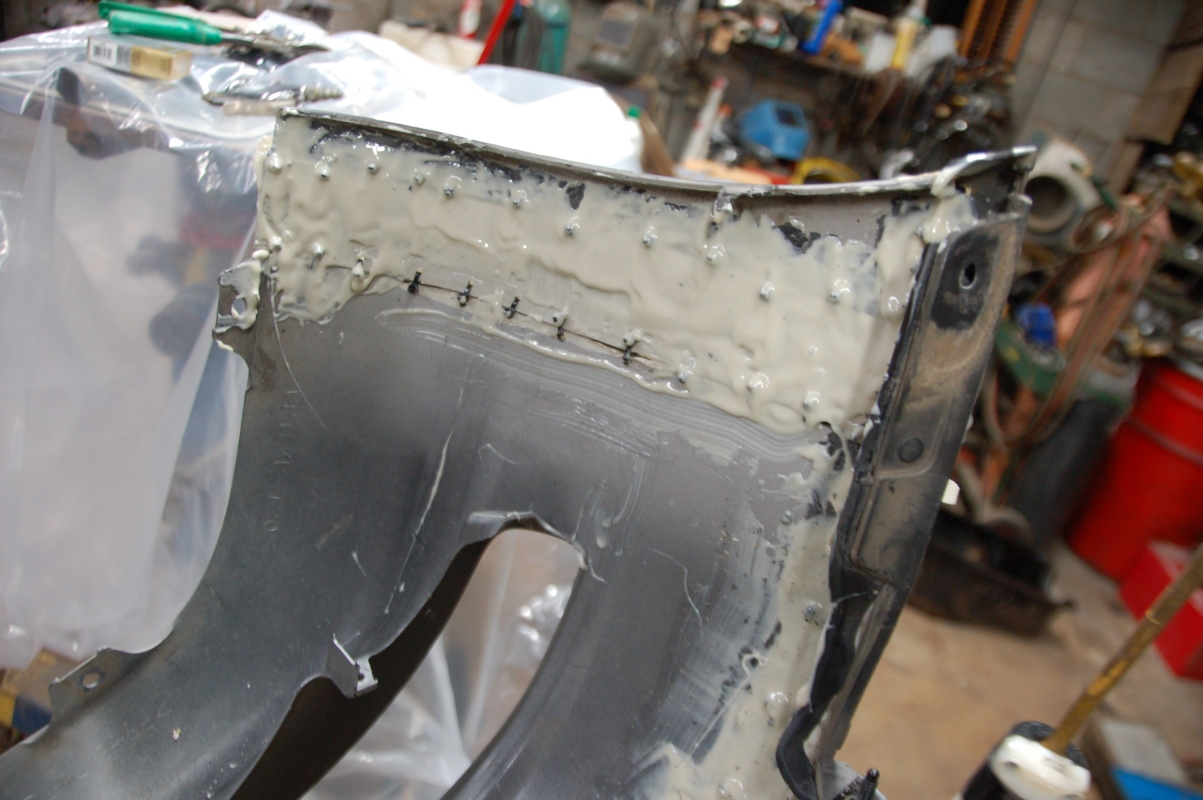
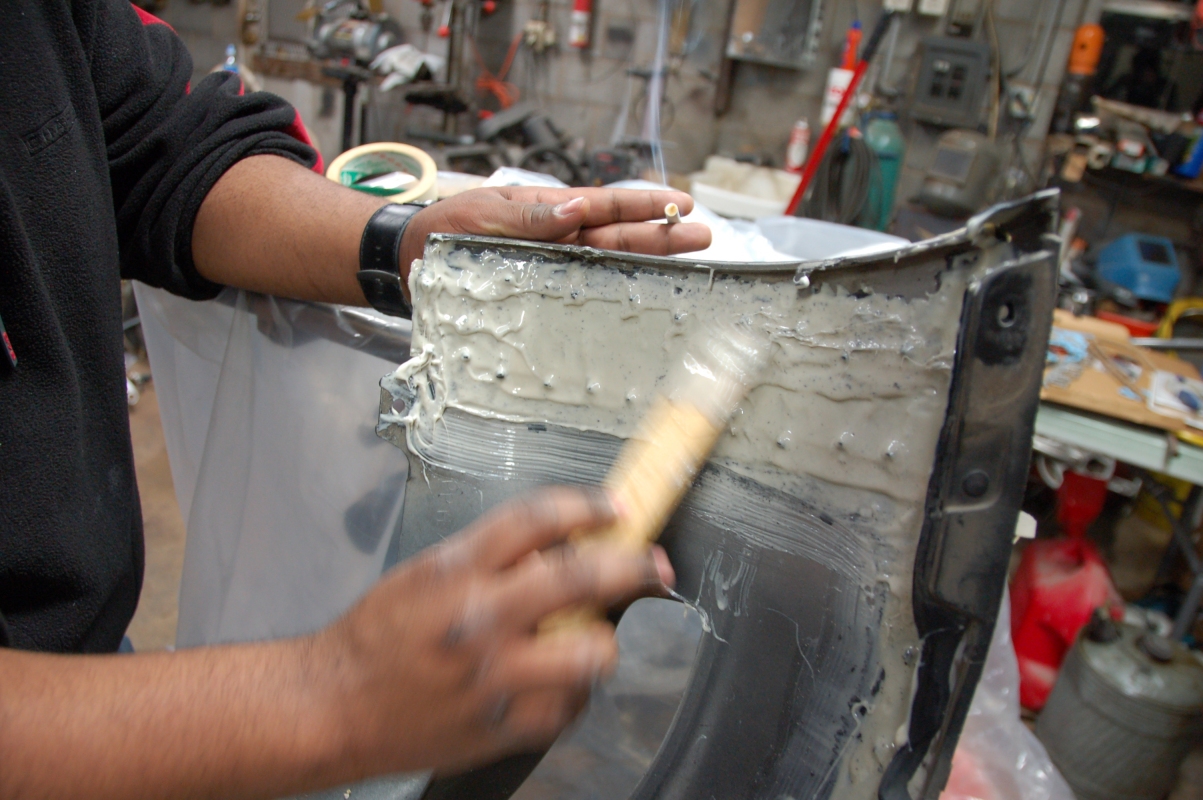
After roughing up the fusing points, we drilled holes on the top piece and the bottom piece and tied them together w/ zip ties.  We did this for every 2.5" all the way through the entire bumper.  I forgot to take pictures of this process.  After tying them together w/ zip ties, we began to mask up the front of the merged bumpers and laid the fusing compound on the back side:

[IMG]http://farm5.static.flickr.com/4027/4434643749_ffa4be87d6_o.jpg[/IMG]

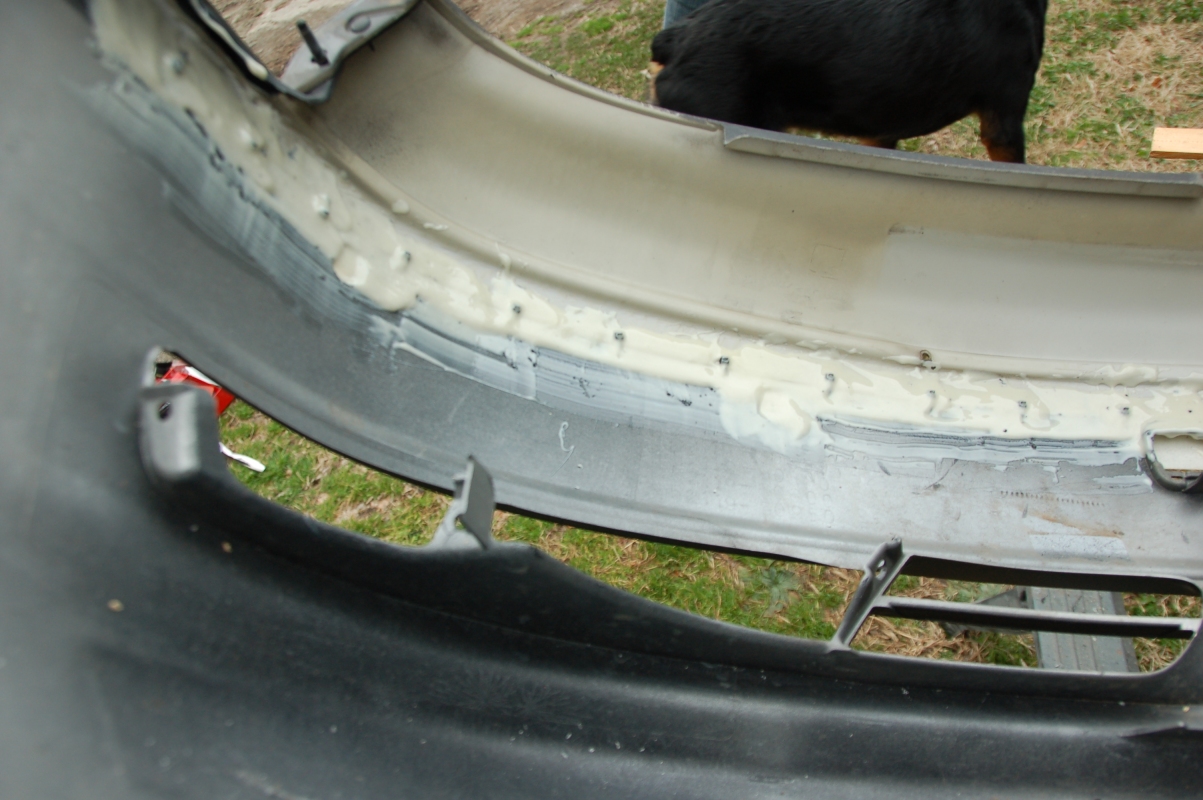
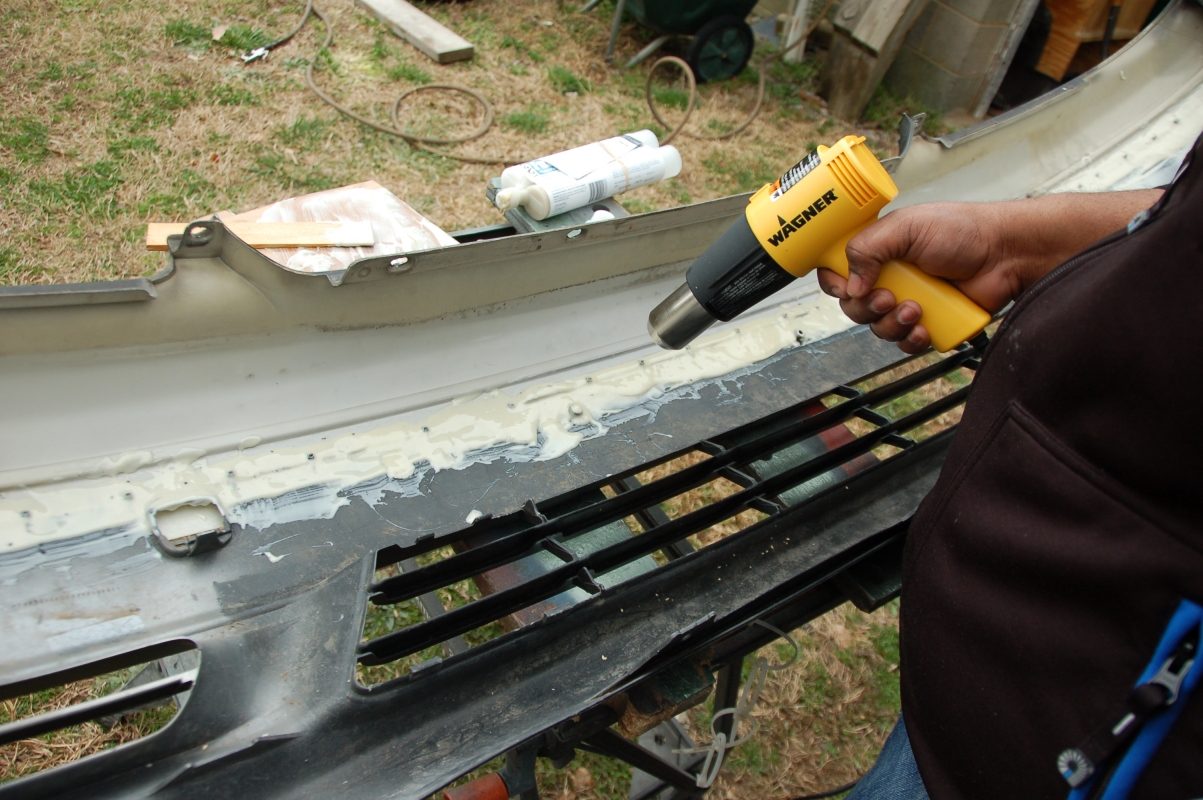
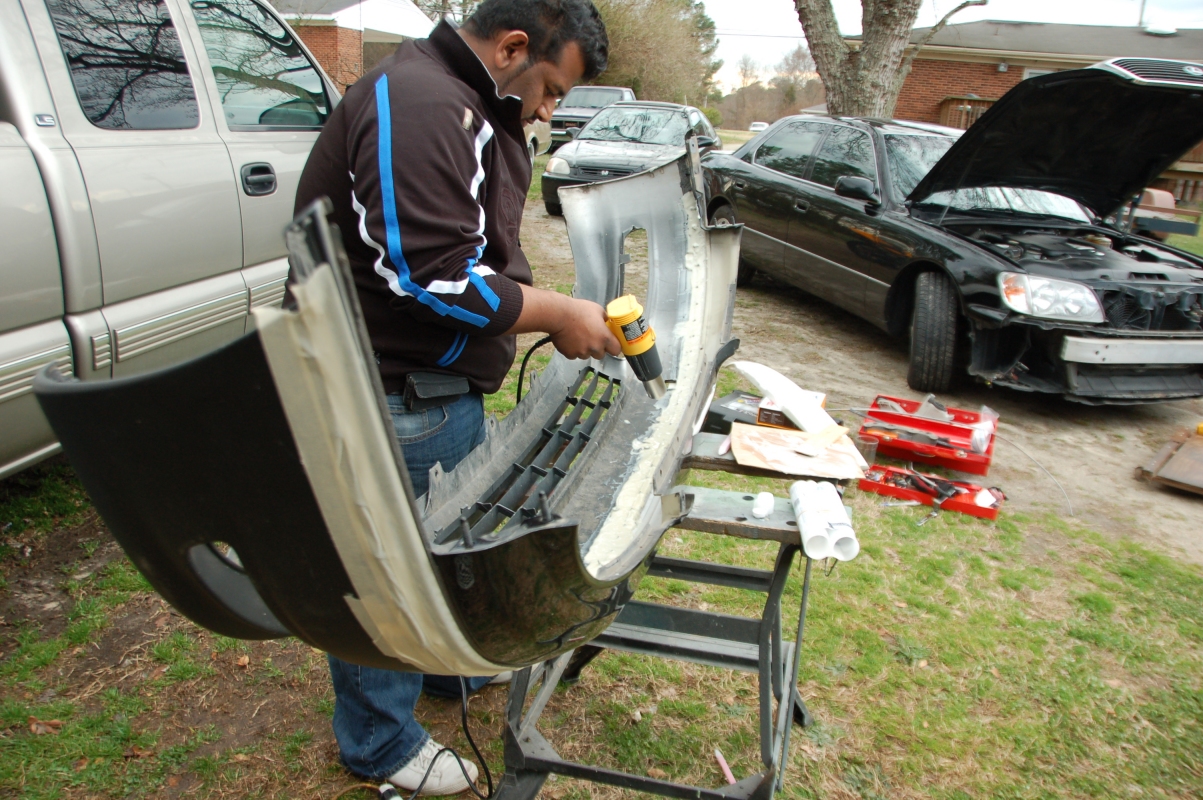
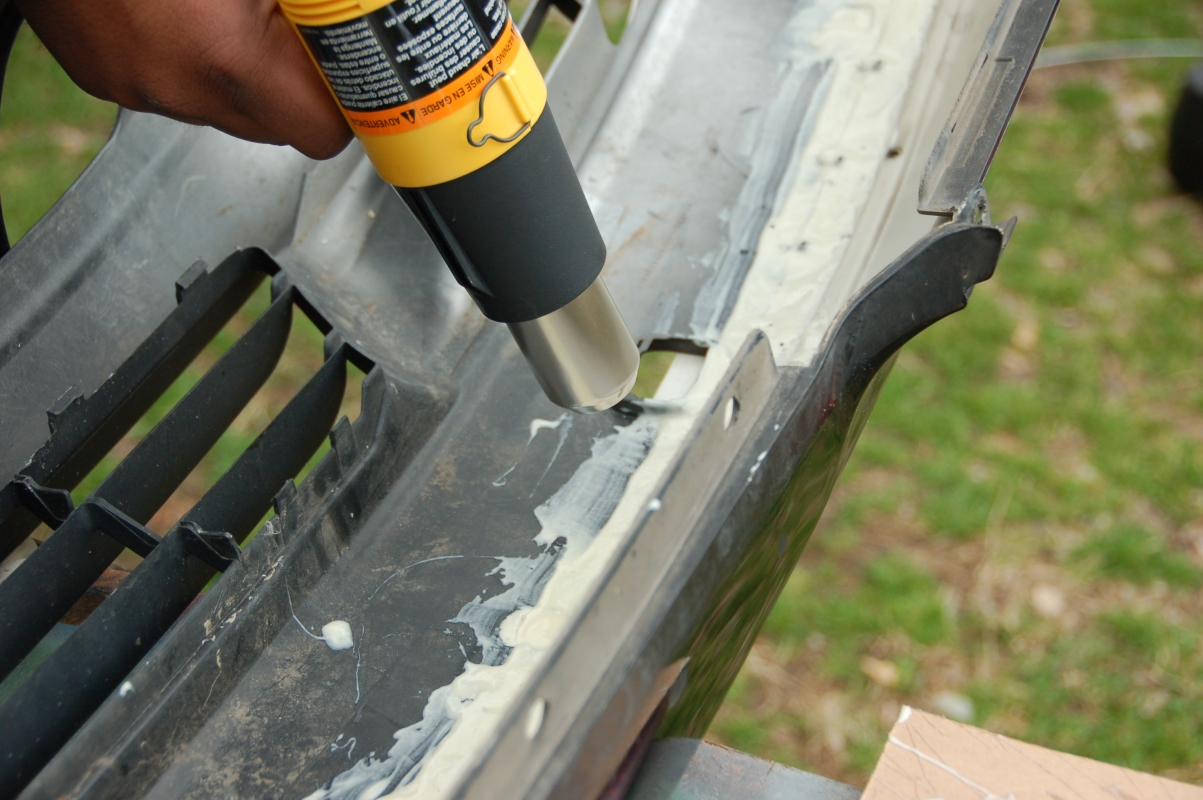
Using a heat gun helps speed up the curing process.  I recommend heating it for about 15 minutes and let it dry:

[IMG]http://farm3.static.flickr.com/2706/4434644135_460b86e1ca_o.jpg[/IMG]

[IMG]http://farm3.static.flickr.com/2741/4434644493_de5e1e6d6f_o.jpg[/IMG]

[IMG]http://farm5.static.flickr.com/4028/4434646001_73ea57121d_b.jpg[/IMG]

[IMG]http://farm3.static.flickr.com/2752/4434646547_442d8ff01e_o.jpg[/IMG]

[IMG]http://farm5.static.flickr.com/4040/4435421174_68b3dc0738_o.jpg[/IMG]

[IMG]http://farm3.static.flickr.com/2761/4434647309_8fbac811a2_o.jpg[/IMG]

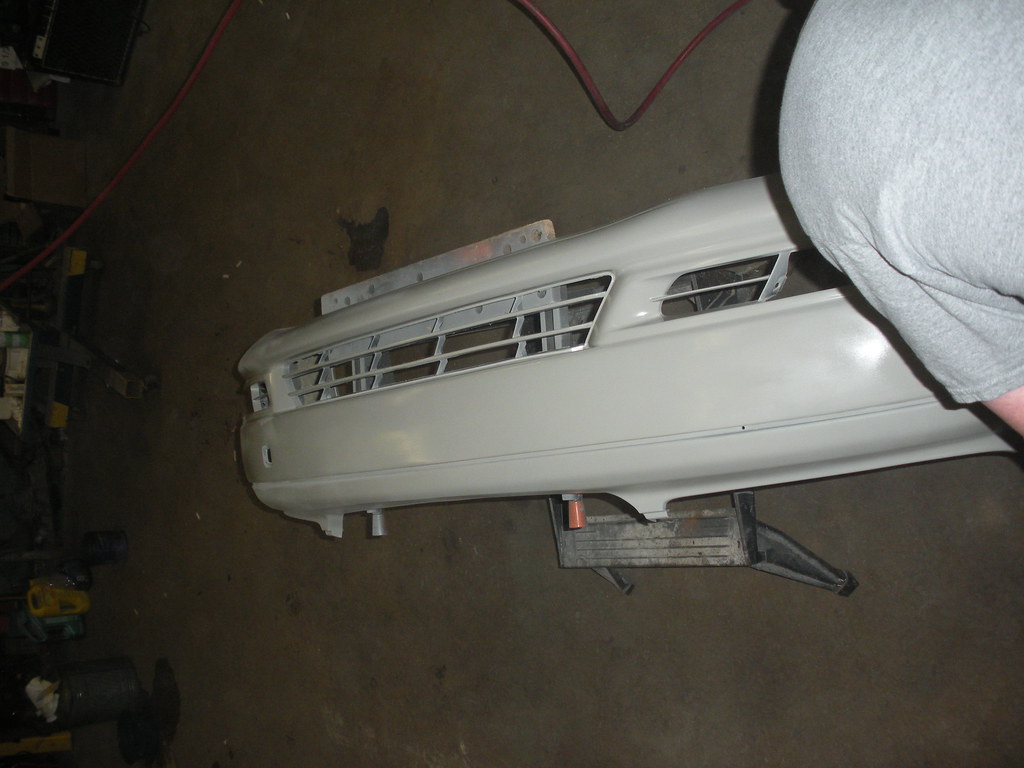
This fusing compound is awesome.  Now, I need to let it cure completely overnight just to ensure it is super strong and then we'll extend the bumper and lay the compound on the front side.  After that, we'll sand it down nice and smooth and start prepping it to get painted.  More updates coming soon.
bumper
I seen it done somewhere


View original BBCode
I seen it done somewhere
[img]http://www.tailors-g.com/gallery/img/CIMG0025.JPG[/img]

[img]http://www.tailors-g.com/gallery/img/CIMG0056.JPG[/img]
You're SO right. This is going to be good. Look at that two tone one he just posted. Thanks for sharing the progress pics and good luck with the rest of the proj.
View original BBCode
You're SO right. This is going to be good. Look at that two tone one he just posted. Thanks for sharing the progress pics and good luck with the rest of the proj.
dbltakegs3;306947 wrote:I seen it done somewhere
Yeah, I've seen it done before as well, I got the idea from a car in one of my Japanese VIP magazines. I posted it in the beginning pages. Very cool mod though, that's why I am doing it. :biggthumpup: PS, if anybody wants the bottom half of the 98 LS400 bumper, lemme know. I got the fogs and side markers too.
NELSON09;306950 wrote:You're SO right. This is going to be good. Look at that two tone one he just posted. Thanks for sharing the progress pics and good luck with the rest of the proj.
Thanx man.
View original BBCode
[QUOTE=dbltakegs3;306947]I seen it done somewhere
[IMG]http://www.tailors-g.com/gallery/img/CIMG0025.JPG[/IMG]

[IMG]http://www.tailors-g.com/gallery/img/CIMG0056.JPG[/IMG][/QUOTE]

Yeah, I've seen it done before as well, I got the idea from a car in one of my Japanese VIP magazines.  I posted it in the beginning pages.  Very cool mod though, that's why I am doing it.  :biggthumpup:  PS, if anybody wants the bottom half of the 98 LS400 bumper, lemme know.  I got the fogs and side markers too.

[QUOTE=NELSON09;306950]You're SO right. This is going to be good. Look at that two tone one he just posted. Thanks for sharing the progress pics and good luck with the rest of the proj.[/QUOTE]

Thanx man.
nice! can't wait to see it on the car
View original BBCode
nice! can't wait to see it on the car
Looks good so far. I am glad you didn't give up and actually tried it
View original BBCode
Looks good so far. I am glad you didn't give up and actually tried it
widebody_Q;306964 wrote:Looks good so far. I am glad you didn't give up and actually tried it
Thanx man, hopefully I can find more time tomorrow to work on it some more. I was never going to give up on this project, just finding the time to do it proves to be quite difficult.
View original BBCode
[QUOTE=widebody_Q;306964]Looks good so far.  I am glad you didn't give up and actually tried it[/QUOTE]

Thanx man, hopefully I can find more time tomorrow to work on it some more.  I was never going to give up on this project, just finding the time to do it proves to be quite difficult.
bumper
romeo291;306958 wrote:Yeah, I've seen it done before as well, I got the idea from a car in one of my Japanese VIP magazines. I posted it in the beginning pages. Very cool mod though, that's why I am doing it. :biggthumpup: PS, if anybody wants the bottom half of the 98 LS400 bumper, lemme know. I got the fogs and side markers too.
Thanx man.
It's gonna look sick. I do have a 98 ls400 also, maybe you can make me one.
View original BBCode
[QUOTE=romeo291;306958]Yeah, I've seen it done before as well, I got the idea from a car in one of my Japanese VIP magazines.  I posted it in the beginning pages.  Very cool mod though, that's why I am doing it.  :biggthumpup:  PS, if anybody wants the bottom half of the 98 LS400 bumper, lemme know.  I got the fogs and side markers too.


Thanx man.[/QUOTE]

It's gonna look sick. I do have a 98 ls400 also, maybe you can make me one.
dbltakegs3;306977 wrote:It's gonna look sick. I do have a 98 ls400 also, maybe you can make me one.
We can make that happen if this project goes through smoothly.
View original BBCode
[QUOTE=dbltakegs3;306977]It's gonna look sick. I do have a 98 ls400 also, maybe you can make me one.[/QUOTE]

We can make that happen if this project goes through smoothly.
looks good
View original BBCode
looks good
Man that is dope. Cant wait to see this done.
View original BBCode
Man that is dope. Cant wait to see this done.
this is awesome. ideas are swirling around in my head!
View original BBCode
this is awesome. ideas are swirling around in my head!
I love it when people get creative and take action.
View original BBCode
I love it when people get creative and take action.
nice diy...

if you really want a good bond, make sure you 'V' out the areas where the 2 bumpers meet...then put an 80 grit scratch to it...after you hit it with 80, wet sand with the most course grit you can find to knock down some of hairs that stand up when sanding raw plastic...

and the heat gun doesn't really help...plastic bond is hardened by a chemical reaction much like bondo but doesn't have the same properties as it...the more external heat that is applied, the more softer it will get...give it a try, put the plastic bond on and let it sit by itself...the working time will be very similar if not faster by letting it air dry...

anyways, enough rambling...i gotta get back to work and blast these cars...

good job dude...
View original BBCode
nice diy...
if you really want a good bond, make sure you 'V' out the areas where the 2 bumpers meet...then put an 80 grit scratch to it...after you hit it with 80, wet sand with the most course grit you can find to knock down some of hairs that stand up when sanding raw plastic...
and the heat gun doesn't really help...plastic bond is hardened by a chemical reaction much like bondo but doesn't have the same properties as it...the more external heat that is applied, the more softer it will get...give it a try, put the plastic bond on and let it sit by itself...the working time will be very similar if not faster by letting it air dry...
anyways, enough rambling...i gotta get back to work and blast these cars...
good job dude...
VIP-UCF;307112 wrote:nice diy...
if you really want a good bond, make sure you 'V' out the areas where the 2 bumpers meet...then put an 80 grit scratch to it...after you hit it with 80, wet sand with the most course grit you can find to knock down some of hairs that stand up when sanding raw plastic...
and the heat gun doesn't really help...plastic bond is hardened by a chemical reaction much like bondo but doesn't have the same properties as it...the more external heat that is applied, the more softer it will get...give it a try, put the plastic bond on and let it sit by itself...the working time will be very similar if not faster by letting it air dry...
anyways, enough rambling...i gotta get back to work and blast these cars...
good job dude...
Yeah, we're hitting the front w/ an angle grinder to create the "V" and then laying more compound on top. I already roughed it up like crazy, so it'll grab really well. The heat gun did help out a lot, it would make the compound softer, but as it cooled down, the chemical reactions seemed to work faster. This was confirmed when the compound on the bumper got harder faster than the stuff on the mixing plate. :shrug:
View original BBCode
[QUOTE=VIP-UCF;307112]nice diy...

if you really want a good bond, make sure you 'V' out the areas where the 2 bumpers meet...then put an 80 grit scratch to it...after you hit it with 80, wet sand with the most course grit you can find to knock down some of hairs that stand up when sanding raw plastic...

and the heat gun doesn't really help...plastic bond is hardened by a chemical reaction much like bondo but doesn't have the same properties as it...the more external heat that is applied, the more softer it will get...give it a try, put the plastic bond on and let it sit by itself...the working time will be very similar if not faster by letting it air dry...

anyways, enough rambling...i gotta get back to work and blast these cars...

good job dude...[/QUOTE]

Yeah, we're hitting the front w/ an angle grinder to create the "V" and then laying more compound on top.  I already roughed it up like crazy, so it'll grab really well.  The heat gun did help out a lot, it would make the compound softer, but as it cooled down, the chemical reactions seemed to work faster.  This was confirmed when the compound on the bumper got harder faster than the stuff on the mixing plate.  :shrug:
Coming alone mad nice brah, not even finish yet and itz looking hott lol keep em coming brah..
View original BBCode
Coming alone mad nice brah, not even finish yet and itz looking hott lol keep em coming brah..
awesome job cant wait to see the finished product
View original BBCode
awesome job cant wait to see the finished product
just be careful, the heat gun could have heated the outside before the inside. I believe that's what vip-ucf was trying to say. Hopefully the way you did it should work out fine though.
View original BBCode
just be careful, the heat gun could have heated the outside before the inside. I believe that's what vip-ucf was trying to say. Hopefully the way you did it should work out fine though.
I cannot wait to see it complete, it’s going to look great.
View original BBCode
[COLOR=#dbdbdb][FONT=Verdana]I cannot wait to see it complete, it’s going to look great. [/FONT][/COLOR]
what are you guys going to do about the ends of the bumpers. It looks like the LS430 bumpers are a bit short. Are you going to mold the ends from the old bumper back on?
View original BBCode
what are you guys going to do about the ends of the bumpers. It looks like the LS430 bumpers are a bit short. Are you going to mold the ends from the old bumper back on?
^
This
romeo291;298971 wrote:Yeah, it looks like the second set of ideas you sent me will be my approach. Thanx mang.
View original BBCode
^
This

[QUOTE=romeo291;298971]Yeah, it looks like the second set of ideas you sent me will be my approach.  Thanx mang.

[IMG]http://i5.photobucket.com/albums/y170/aedprix/projects/mylex-1.jpg[/IMG]

[IMG]http://i5.photobucket.com/albums/y170/aedprix/projects/Lexus-LS430_2004_800x600_wallpap-1.jpg[/IMG]


[/QUOTE]
View original BBCode
[B][U][SIZE=4][COLOR=Red]DAY 02 of the project:[/COLOR][/SIZE][/U][/B]

I finally found some time to continue on the project today after work.  The first thing we did was test the flexibility of the bonding compound.  I am happy to say that after twisting the bumper back and fourth, nothing happened, so it's very flexible and durable.

After taking off the masking tape from the front, the compound filled in the smaller bumper holes really nice:

[IMG]http://farm5.static.flickr.com/4046/4442734434_a50b65d3ea_o.jpg[/IMG]

[IMG]http://farm3.static.flickr.com/2684/4441954941_73e8af3499_o.jpg[/IMG]

You can see in this picture how much we need to extend the ends of the bumper:
[IMG]http://farm5.static.flickr.com/4072/4441955201_4a6724936d_o.jpg[/IMG]

The bumper looks like Frankenstein right now:
[IMG]http://farm5.static.flickr.com/4023/4442735300_bebaa3c9ed_o.jpg[/IMG]

[IMG]http://farm5.static.flickr.com/4008/4442735534_ba92036d26_o.jpg[/IMG]

[IMG]http://farm3.static.flickr.com/2797/4441956031_3f0860f41b_o.jpg[/IMG]

[IMG]http://farm3.static.flickr.com/2764/4441956313_b281228070_o.jpg[/IMG]

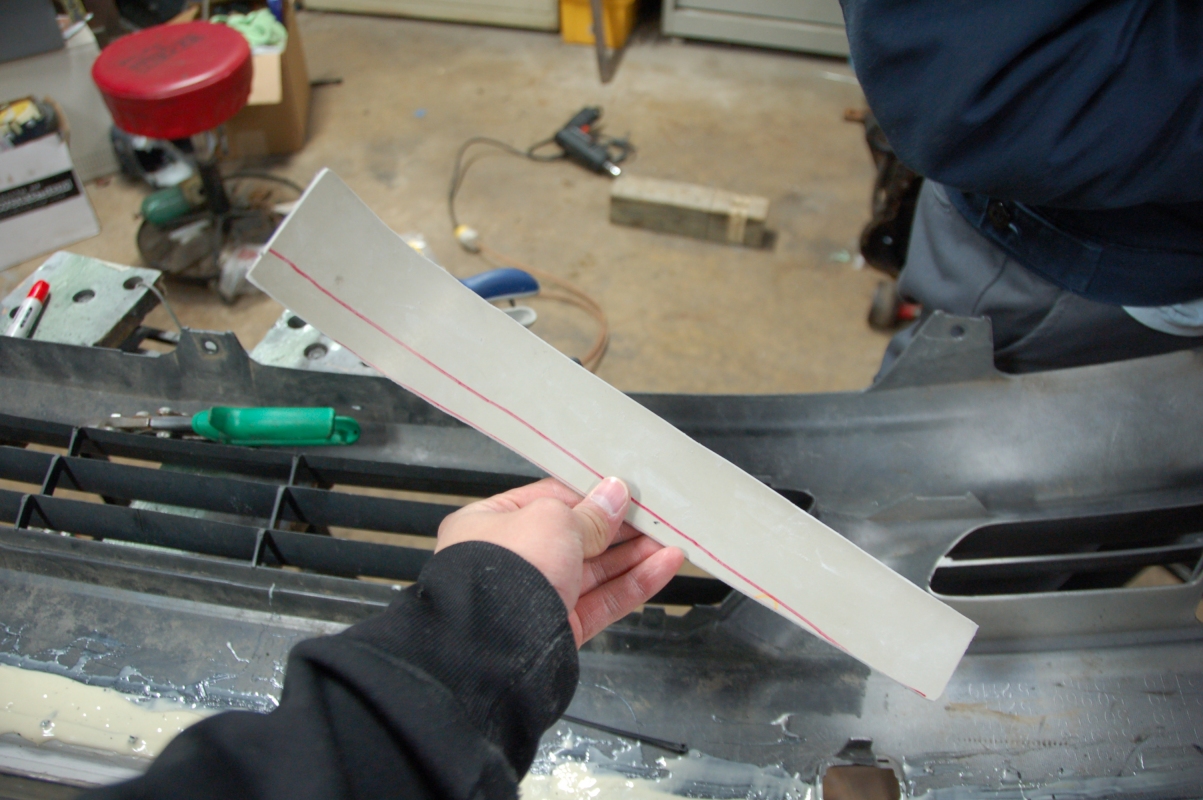
We then started figuring out where to cut and how to extend the ends of the bumper.  What we planned on doing was cut the end that's on there now, cut a piece from the old LS400 bumper, and add it in between to extend it.  Here's how we did it:

Masked off where we needed to cut:
[IMG]http://farm3.static.flickr.com/2719/4441956687_afd6f113f8_o.jpg[/IMG]

[IMG]http://farm5.static.flickr.com/4004/4441957087_fa57d3b495_o.jpg[/IMG]

Cutting the donor piece from the LS400 bumper:
[IMG]http://farm5.static.flickr.com/4048/4442737318_5ab8014057_o.jpg[/IMG]

[IMG]http://farm5.static.flickr.com/4001/4441957943_1c80bf9079_o.jpg[/IMG]

We picked this specific area to cut from for the curvature that it had:
[IMG]http://farm3.static.flickr.com/2787/4442738254_c9ae3e4a7c_o.jpg[/IMG]

[IMG]http://farm5.static.flickr.com/4052/4442738626_f2a21d264d_o.jpg[/IMG]
View original BBCode
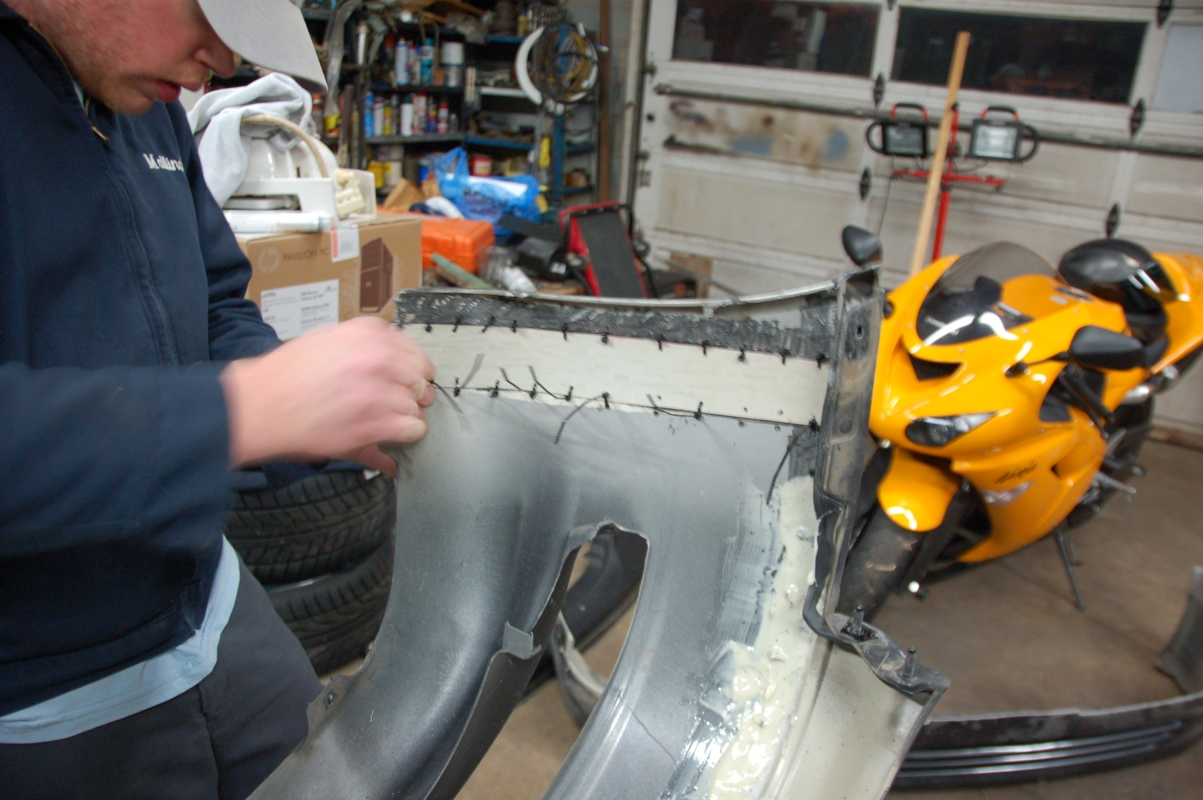
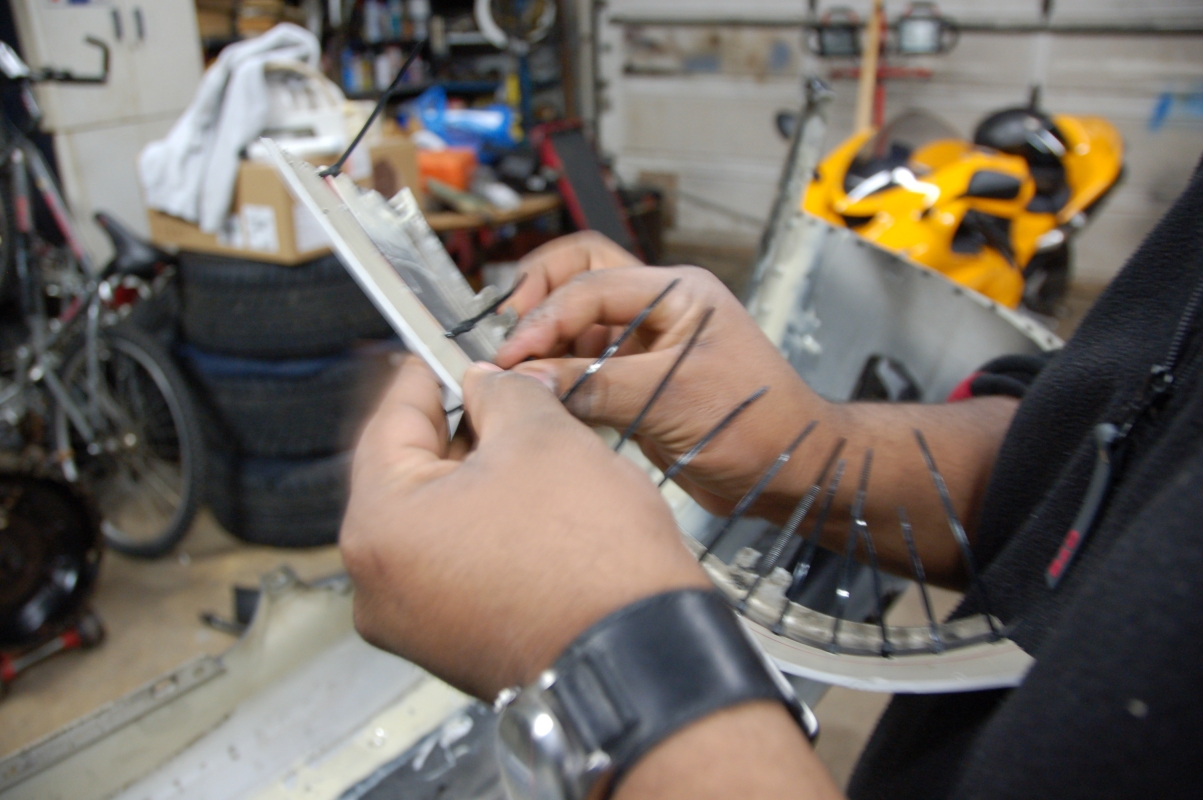
Taking the donor piece, we drilled holes on the bumper, donor piece, and the end piece that we cut off and started stitching them together w/ zip ties:
[IMG]http://farm5.static.flickr.com/4026/4441959279_7d8066e732_o.jpg[/IMG]

[IMG]http://farm5.static.flickr.com/4064/4441959651_3c4d91b2ac_o.jpg[/IMG]

[IMG]http://farm3.static.flickr.com/2738/4441960043_dc42f38362_o.jpg[/IMG]

[IMG]http://farm3.static.flickr.com/2678/4441960425_a6b63d527f_o.jpg[/IMG]

[IMG]http://farm5.static.flickr.com/4070/4441960767_152360e7a4_o.jpg[/IMG]

Here's what it looks like on the front side after being extended w/ the donor piece:
[IMG]http://farm5.static.flickr.com/4043/4442740706_cd6ecedfcd_o.jpg[/IMG]

[IMG]http://farm3.static.flickr.com/2711/4442741078_960fca19c1_o.jpg[/IMG]

[IMG]http://farm5.static.flickr.com/4003/4441961871_35f8b0942f_o.jpg[/IMG]

[IMG]http://farm5.static.flickr.com/4052/4441962187_182ce3aa2a_o.jpg[/IMG]

[IMG]http://farm5.static.flickr.com/4035/4442742072_4a162ea748_o.jpg[/IMG]

[IMG]http://farm5.static.flickr.com/4023/4442742398_346853d6f6_o.jpg[/IMG]

[IMG]http://farm3.static.flickr.com/2727/4442742930_0f647d6a83_o.jpg[/IMG]

[IMG]http://farm3.static.flickr.com/2782/4441963833_1520333298_o.jpg[/IMG]
View original BBCode
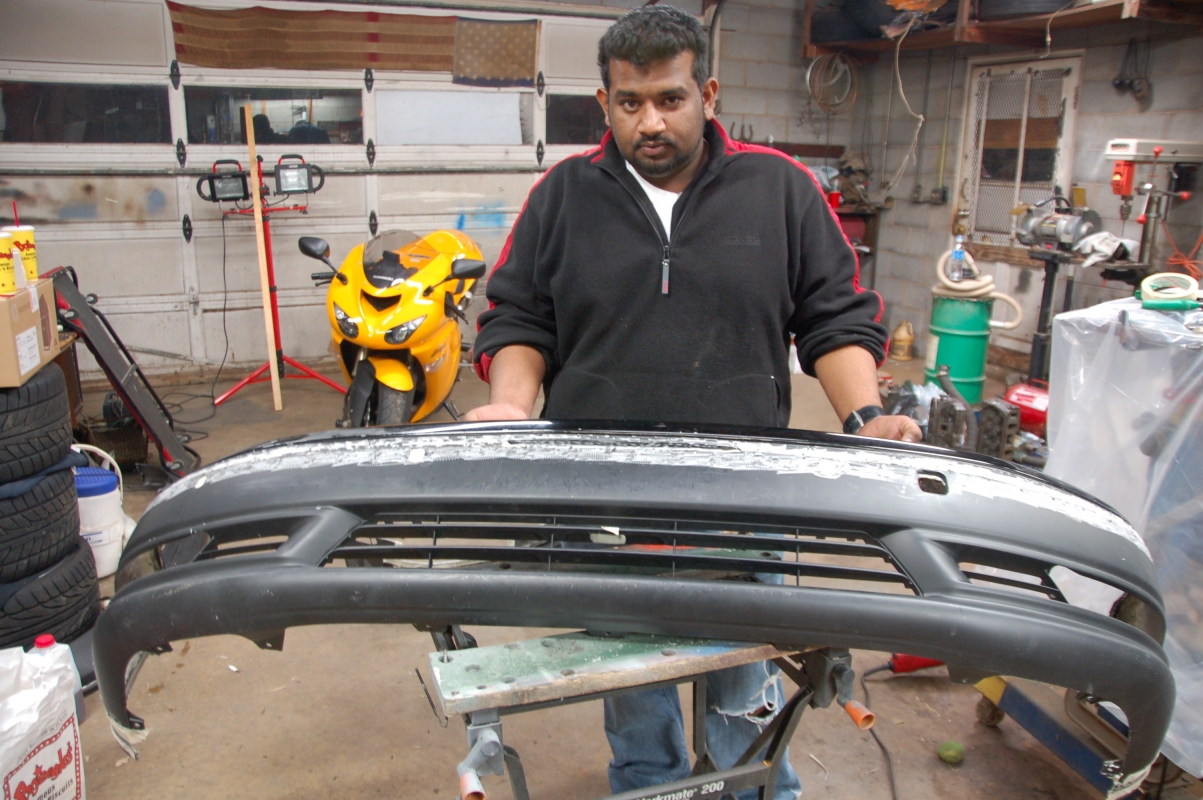
Here's what it looks like extended.  It ain't the prettiest thing, but  it'll work:

[IMG]http://farm5.static.flickr.com/4071/4441964381_de05b6980d_o.jpg[/IMG]

[IMG]http://farm5.static.flickr.com/4033/4441964875_c8711467a1_o.jpg[/IMG]

[IMG]http://farm3.static.flickr.com/2717/4441965355_57aa0ebeef_o.jpg[/IMG]

Ninja, haha:
[IMG]http://farm3.static.flickr.com/2790/4441965603_254981d9bb_o.jpg[/IMG]

[IMG]http://farm3.static.flickr.com/2738/4441965921_162b95b1f9_o.jpg[/IMG]

[IMG]http://farm5.static.flickr.com/4026/4442746104_35ae41b3a5_o.jpg[/IMG]

[IMG]http://farm5.static.flickr.com/4037/4442746386_3bb4fef958_o.jpg[/IMG]

We then masked the front side to lay some of that compound down on it.

[IMG]http://farm5.static.flickr.com/4062/4441967057_74298559de_o.jpg[/IMG]

[IMG]http://farm5.static.flickr.com/4036/4441967413_a4441b8b9d_o.jpg[/IMG]

Me mixing up the compound:
[IMG]http://farm3.static.flickr.com/2756/4442747408_7d23c83de9_o.jpg[/IMG]

[IMG]http://farm5.static.flickr.com/4069/4441968117_bf2f022759_o.jpg[/IMG]

[IMG]http://farm5.static.flickr.com/4009/4442748182_a0575b1994_o.jpg[/IMG]

While waiting for the side part to dry, we went to get some food, then  we came back and started cutting off the zip ties showing on the front  side:

[IMG]http://farm5.static.flickr.com/4002/4441968905_b53f4b4869_o.jpg[/IMG]

It looks less like Frankenstein after that, but still ugly.
[IMG]http://farm3.static.flickr.com/2678/4441969353_7ed2872b24_o.jpg[/IMG]
View original BBCode
Not sure what to do w/ the groove in the middle, I kind of like it, I'll  probably make some unique indention there just to say different from  other LS430 front bumpers.
 [IMG]http://farm5.static.flickr.com/4014/4442749470_6a83e86f50_o.jpg[/IMG]

 [IMG]http://farm5.static.flickr.com/4005/4441970157_87303d26ab_o.jpg[/IMG]

 [IMG]http://farm3.static.flickr.com/2766/4442750030_a8cf48b08b_o.jpg[/IMG]

 [IMG]http://farm3.static.flickr.com/2795/4442750264_d853ba5613_o.jpg[/IMG]

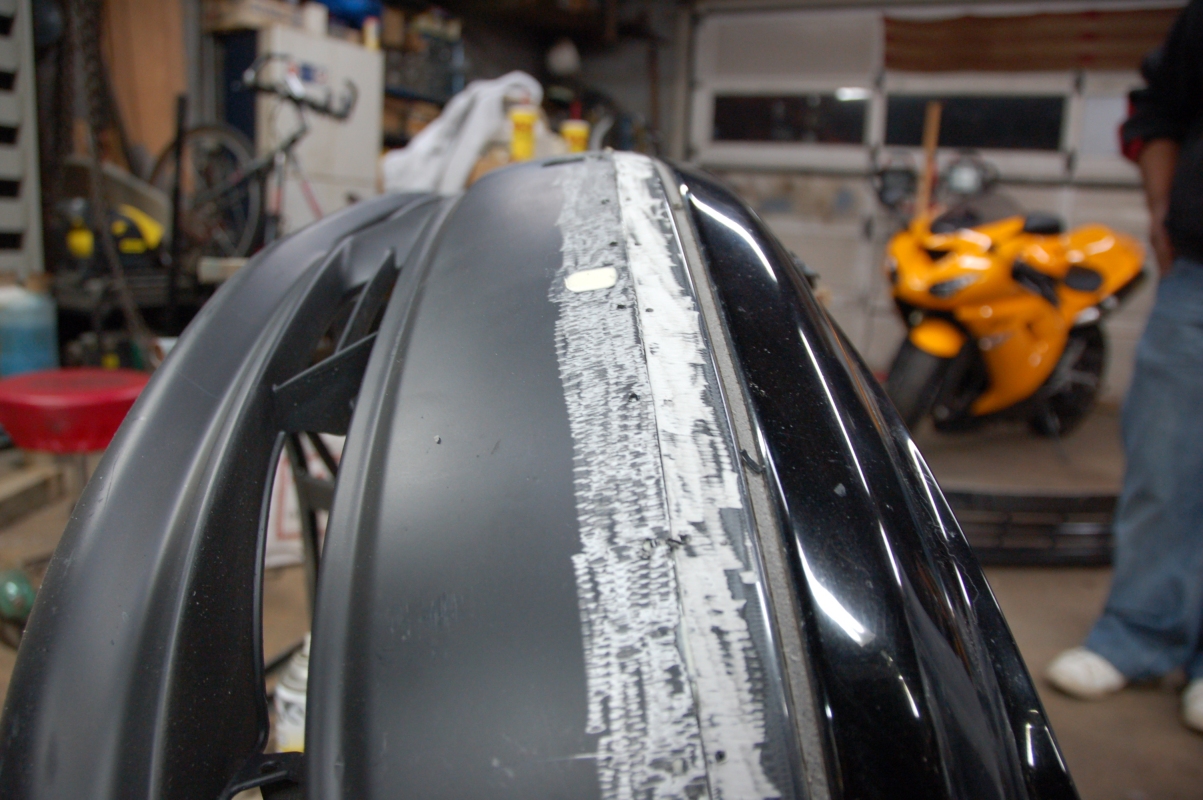
 We laid more compound on the front side, and smooth it out as flat as we  could.  Once that dries up, we'll be ready to do the same thing to the  sides and then start sanding it smooth:

 [IMG]http://farm3.static.flickr.com/2693/4441970943_704e3f99a0_o.jpg[/IMG]

 [IMG]http://farm5.static.flickr.com/4013/4441971159_f7facdb544_o.jpg[/IMG]

 [IMG]http://farm5.static.flickr.com/4019/4442751048_62804c0386_o.jpg[/IMG]

 [IMG]http://farm3.static.flickr.com/2738/4441971715_88ef272e78_o.jpg[/IMG]

 [IMG]http://farm5.static.flickr.com/4033/4442751508_06cfd71a04_o.jpg[/IMG]

 [IMG]http://farm3.static.flickr.com/2711/4442751784_542ccd5838_o.jpg[/IMG]

 So, after 2 days, we're still not near completing this project yet.  I  definitely have a high amount of respect for those that does their own  conversions or shops that can do them.  I can see why they charge so  much money to get it done now.  This project isn't too bad though, it's  only time consuming because we have to wait on the curing of the  compound.  I'll update you guys later, definitely getting closer to the  goal.  It's rough trying to be different.  *sigh*
It came out nice. Good job
View original BBCode
It came out nice. Good job
So sick. i have been searching on a bumper to use for a project like this. Great work guys.
View original BBCode
So sick. i have been searching on a bumper to use for a project like this. Great work guys.
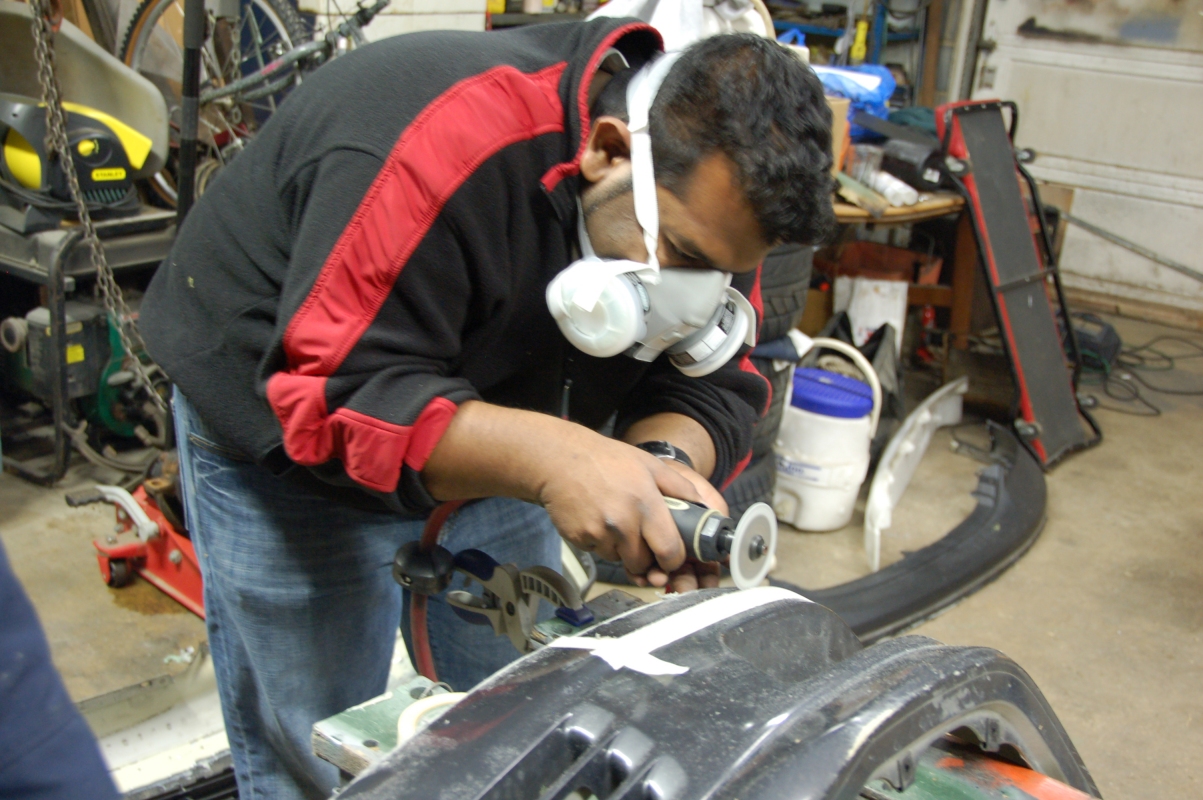
Thank you fellas! What I forgot to mention was that we also put a "V" groove on the front side of the bumper before we laid on the compound. Also, make sure to rough up all surfaces that you want the compound to bond to. We had to go back and rough up some parts because we forgot to. Hopefully the next update, you'll see some smoothness.
View original BBCode
Thank you fellas! What I forgot to mention was that we also put a "V" groove on the front side of the bumper before we laid on the compound. Also, make sure to rough up all surfaces that you want the compound to bond to. We had to go back and rough up some parts because we forgot to. Hopefully the next update, you'll see some smoothness.
Damn that came out nice. Can't wait to see the finished result.
View original BBCode
Damn that came out nice. Can't wait to see the finished result.
DOPE Project!!!
I remeber a long time ago I wanted to do this but w/ 2 aftermarket bumpers....

Good sheit! :biggthumpup:
View original BBCode
DOPE Project!!!
I remeber a long time ago I wanted to do this but w/ 2 aftermarket bumpers....
Good sheit! :biggthumpup:
damn Romeo, shits looking good...im still going to do this even though u beat me to it :saiyancrunks:
View original BBCode
damn Romeo, shits looking good...im still going to do this even though u beat me to it :saiyancrunks:
LiCelsior;307889 wrote:damn Romeo, shits looking good...im still going to do this even though u beat me to it :saiyancrunks:
Thanx man, at least you have some sort of guide to follow now :biggthumpup:
View original BBCode
[QUOTE=LiCelsior;307889]damn Romeo, shits looking good...im still going to do this even though u beat me to it :saiyancrunks:[/QUOTE]
Thanx man, at least you have some sort of guide to follow now :biggthumpup:
props on taking this on man. looking real good
View original BBCode
props on taking this on man. looking real good
Coming along exceptionally well. Final product is gonna be dope.
View original BBCode
Coming along exceptionally well. Final product is gonna be dope.
1ruffryder;307942 wrote:props on taking this on man. looking real good
^^^I'll second that.
View original BBCode
[QUOTE=1ruffryder;307942]props on taking this on man. looking real good[/QUOTE]
^^^I'll second that.
looks sick, can't wait for the end result
View original BBCode
looks sick, can't wait for the end result
Great progress! Props.
View original BBCode
Great progress! Props.
looks great!
View original BBCode
looks great!
hmm so a 98 LS bumper (bottom) would fit perfectly with a 97 LS (top) without having to do the extra step of extending the sides, correct?
View original BBCode
hmm so a 98 LS bumper (bottom) would fit perfectly with a 97 LS (top) without having to do the extra step of extending the sides, correct?
looks great guys, I want to see this done. I wouldn't mind just doing a 98 bottom either.
View original BBCode
looks great guys, I want to see this done. I wouldn't mind just doing a 98 bottom either.
Another option instead of using that bond stuff...you can plastic weld it but that would take up hella time.

Great work and I do agree people don't understand the amount of work that goes into customizing car parts.
View original BBCode
Another option instead of using that bond stuff...you can plastic weld it but that would take up hella time.
Great work and I do agree people don't understand the amount of work that goes into customizing car parts.
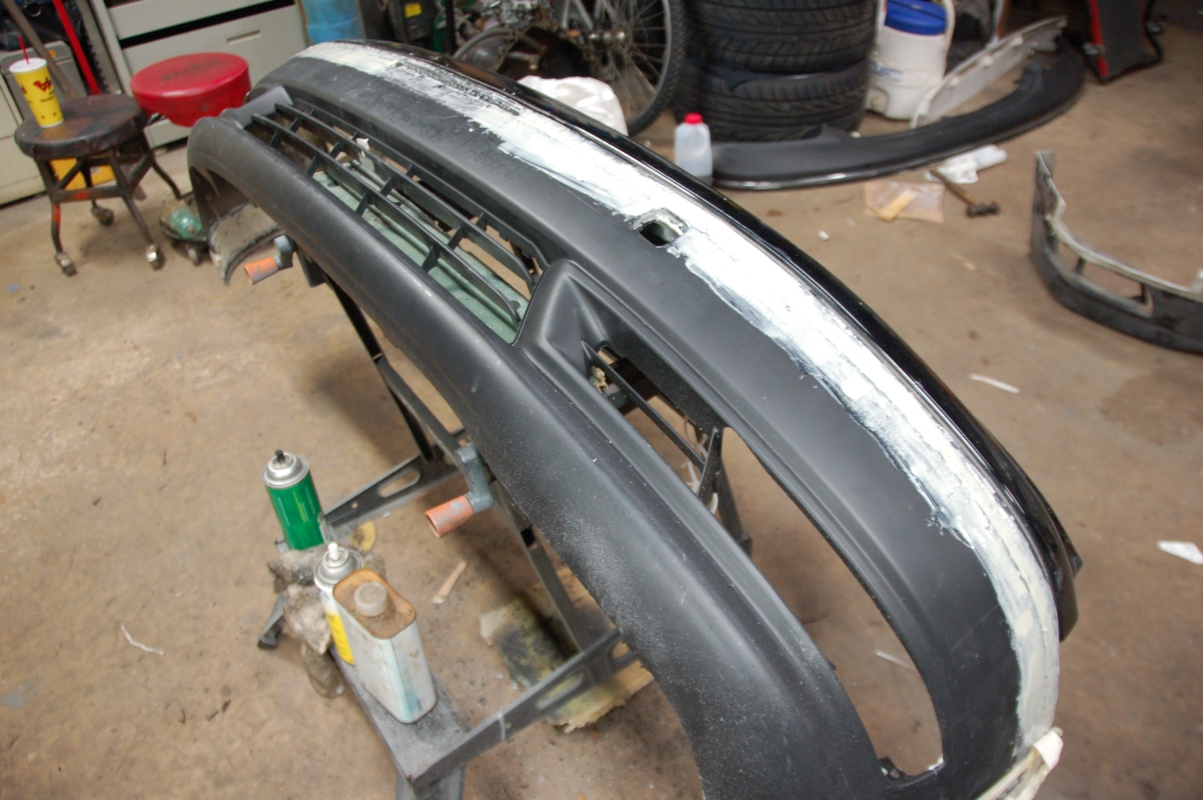
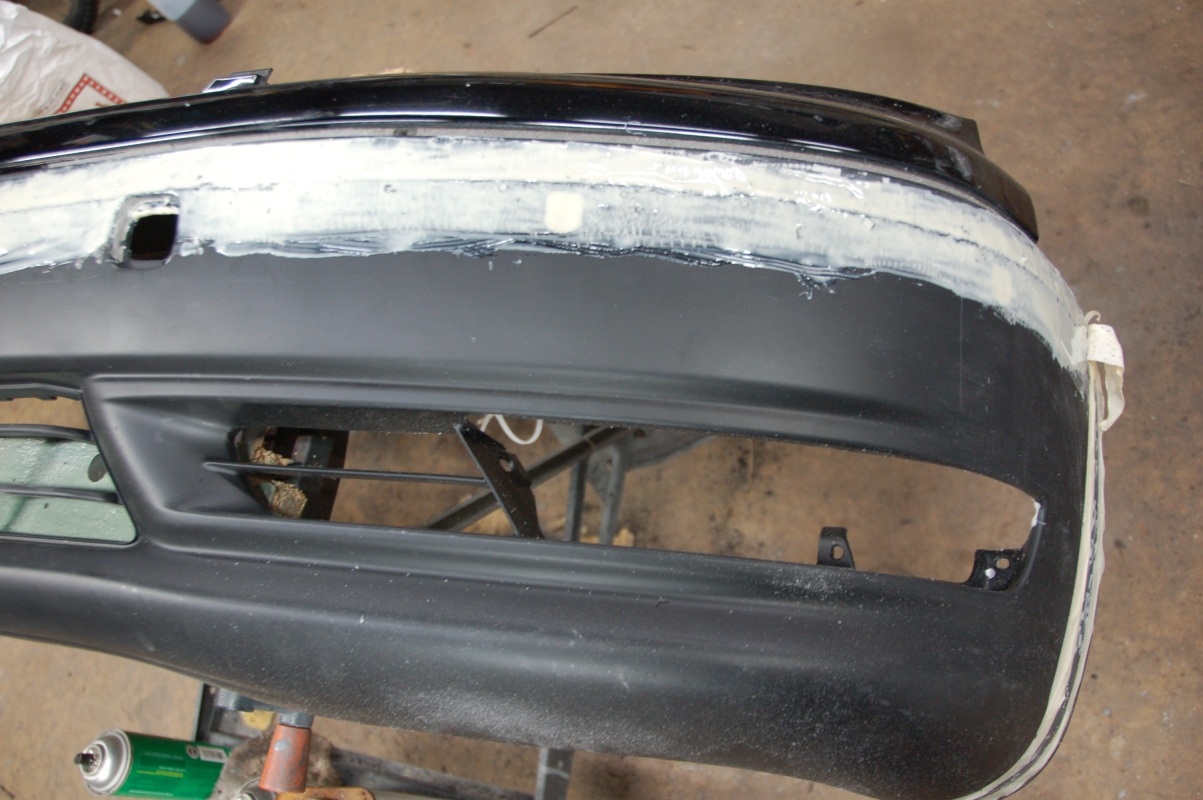
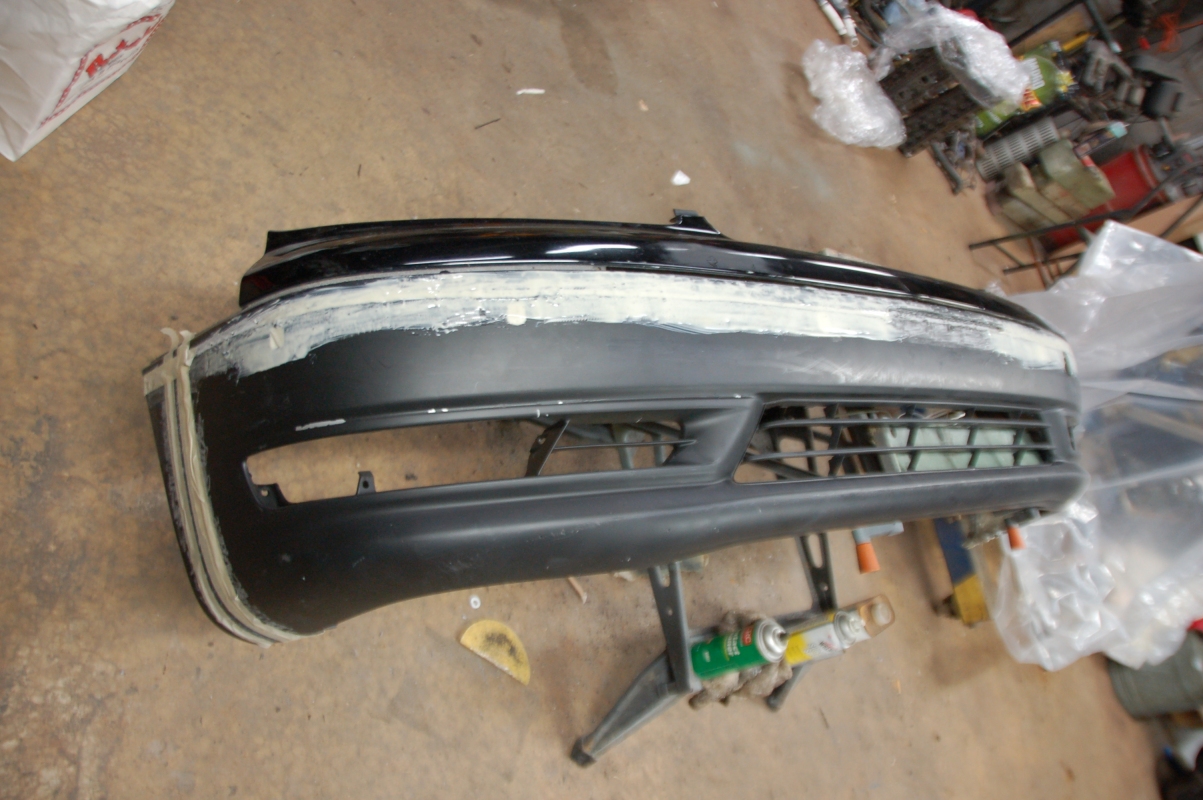
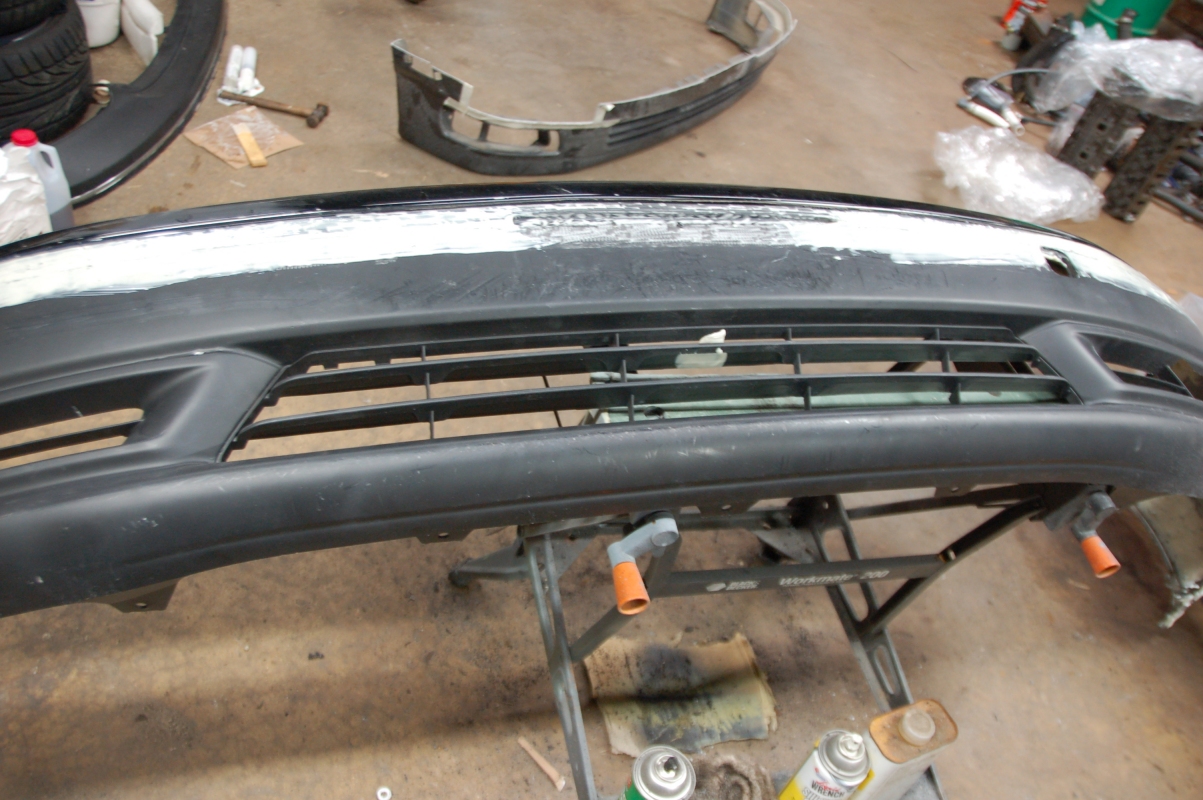
So, I had to be out of town this weekend......but lucky for me, I roll with a deep crew and my boys decided to help me on the bumper anyways. Big huge thanx to AJ and Jeremy, and Chet as well for helping me out. AJ sent me some cell phone pictures of the work that they did. This bumper has A LOT of hours dedicated to it, so maybe I should make a mold of it and get it replicated, haha. Anyways, we are nearing the end, here are some pictures:
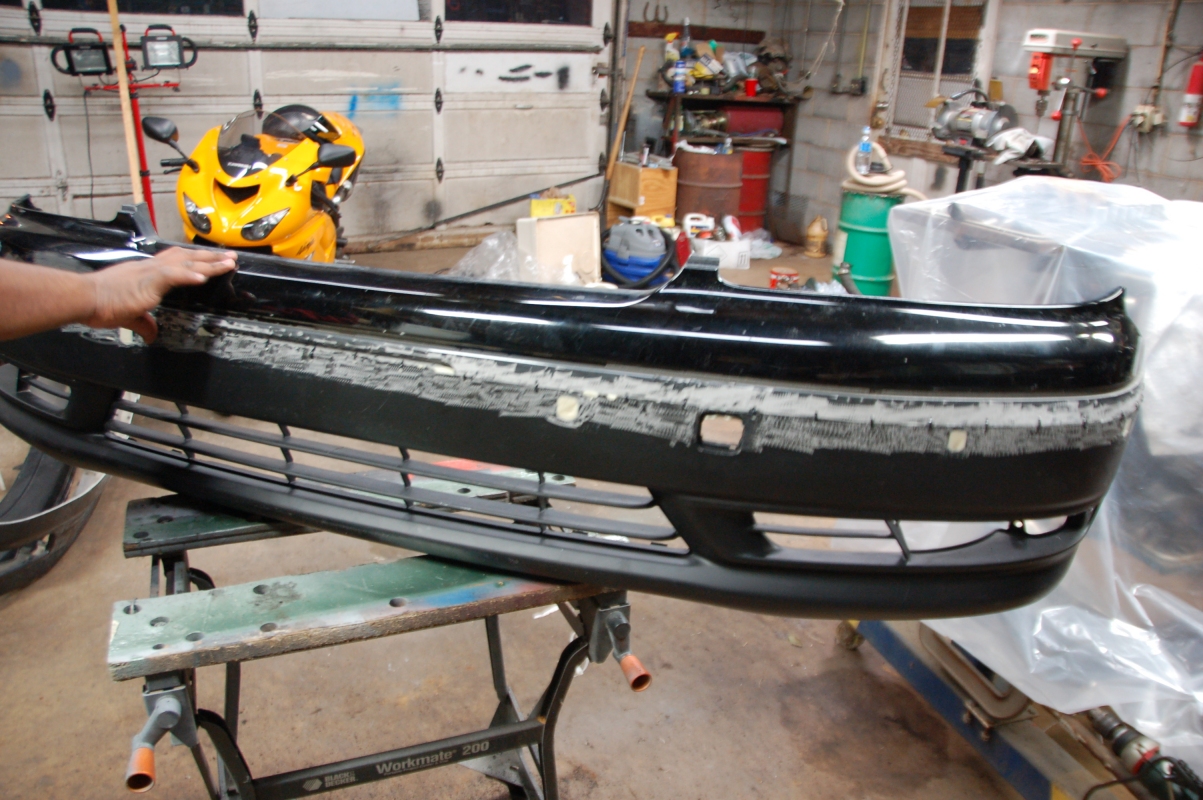
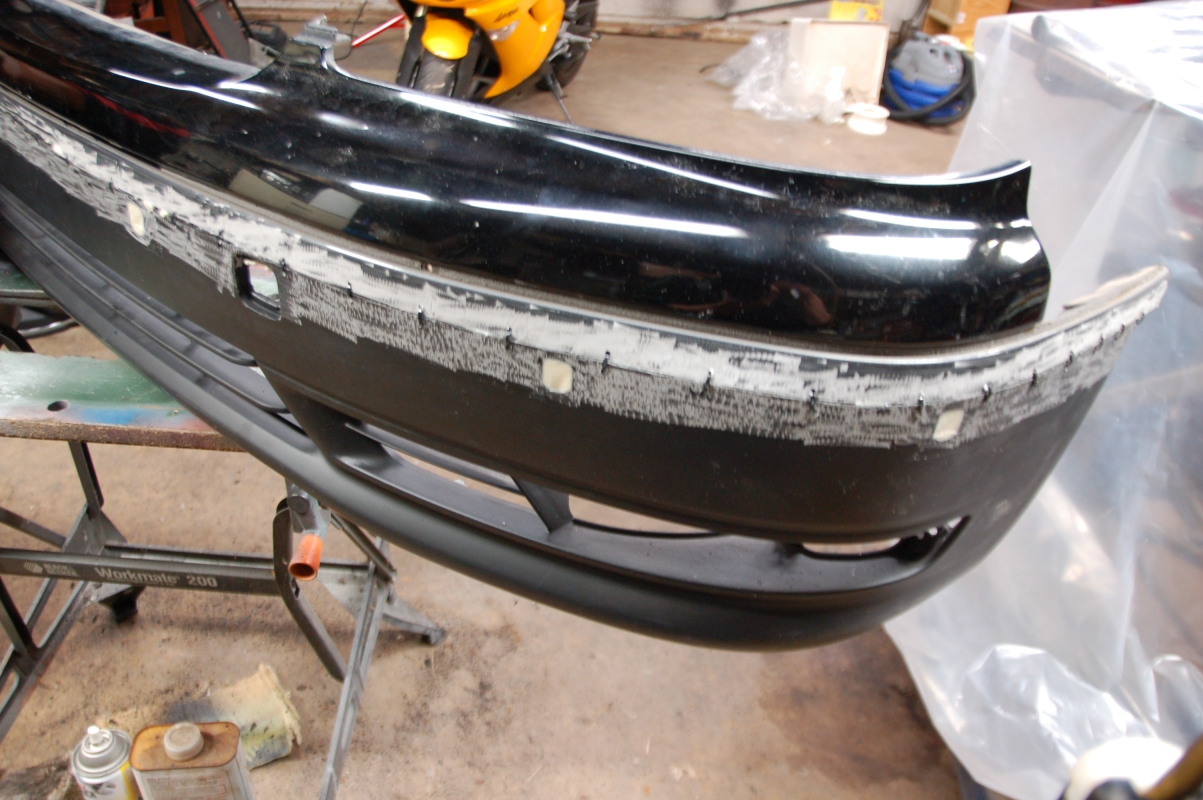
They first sanded down the front real good and then laid on some fiberglass bondo:
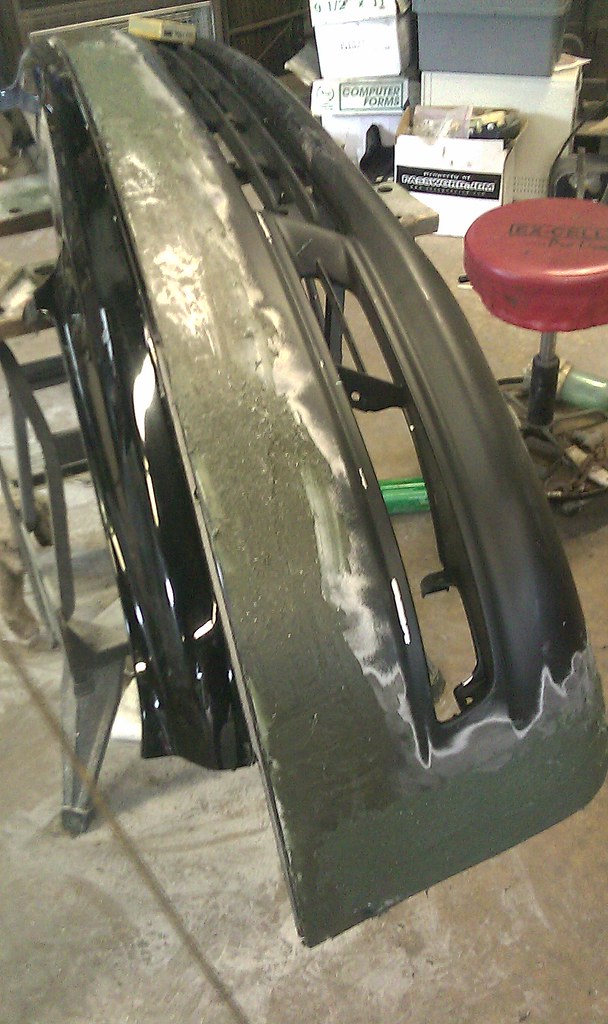
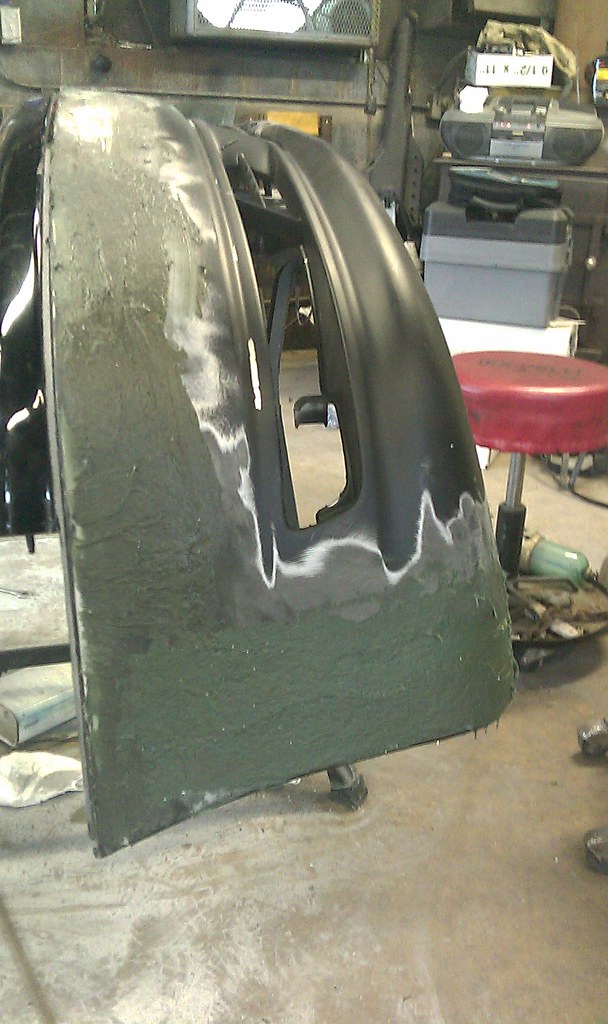
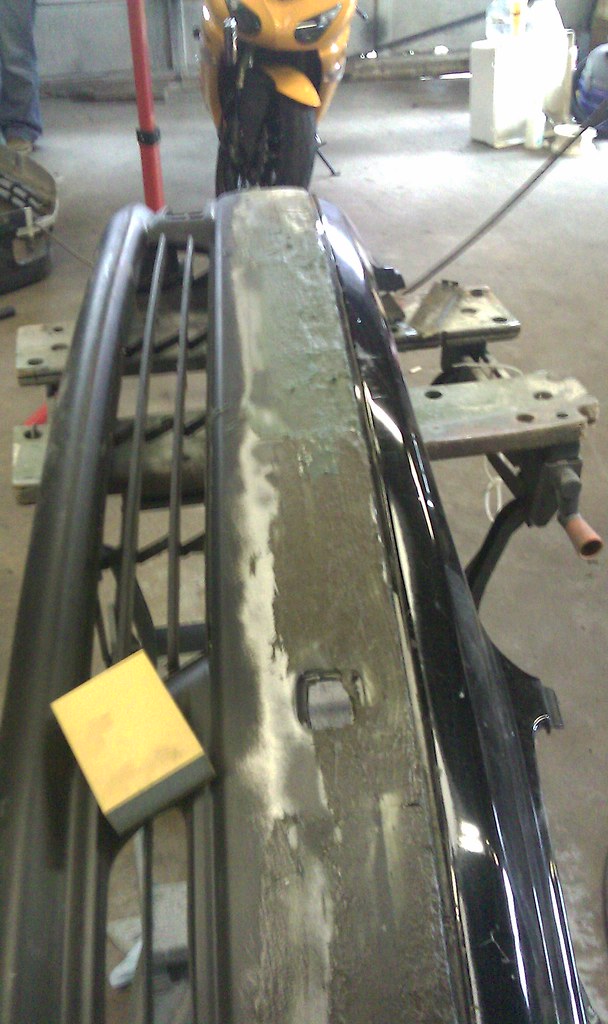
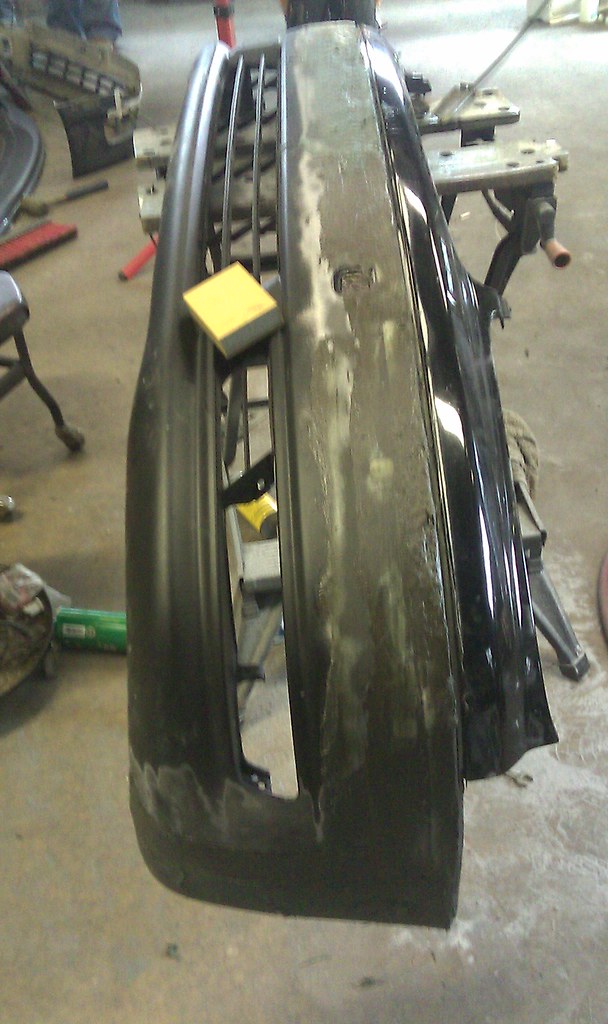
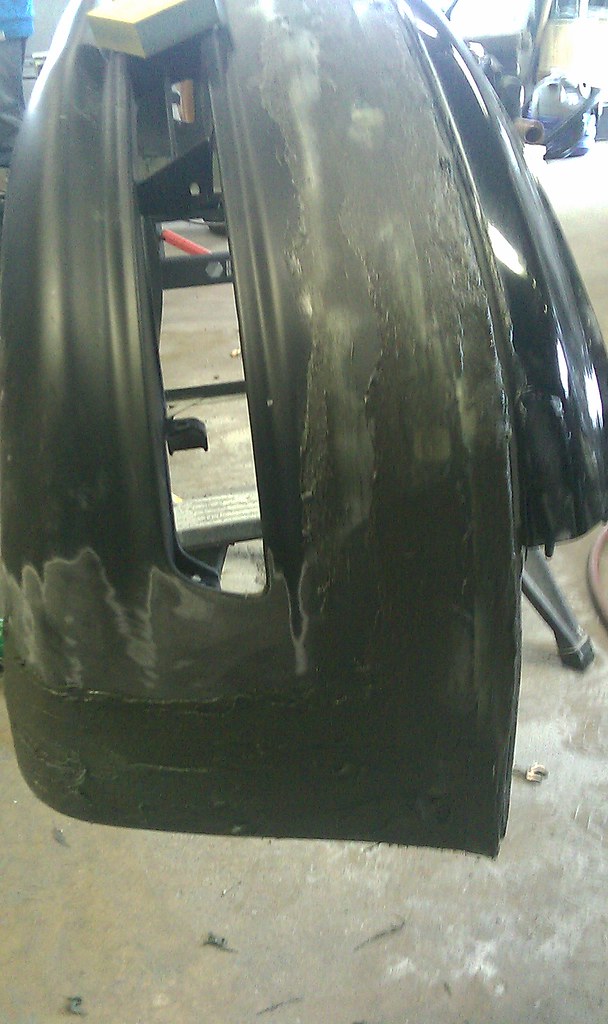
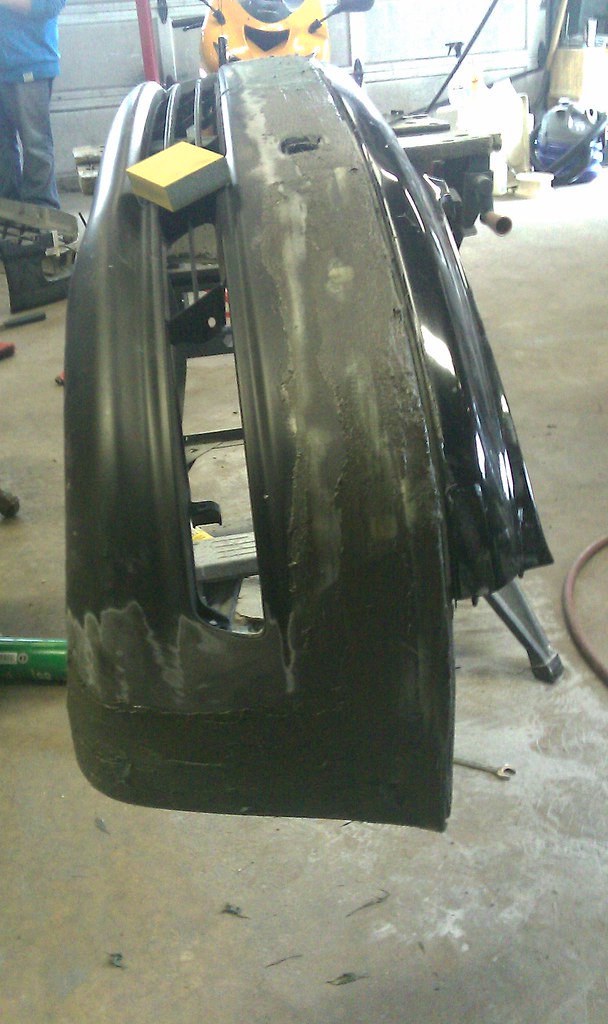
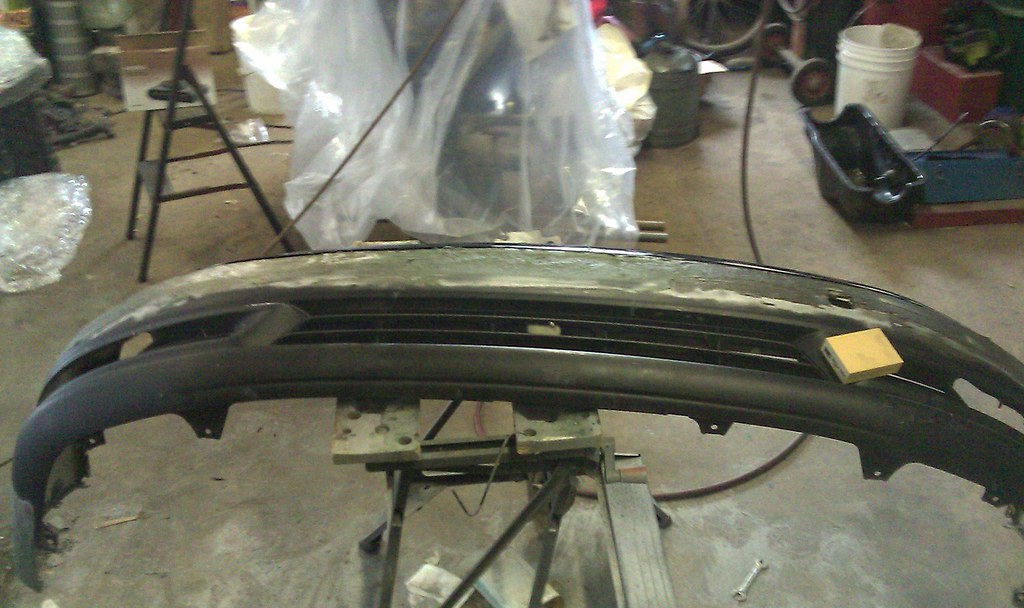
Next, they sanded down the bondo after letting it dry for a while:

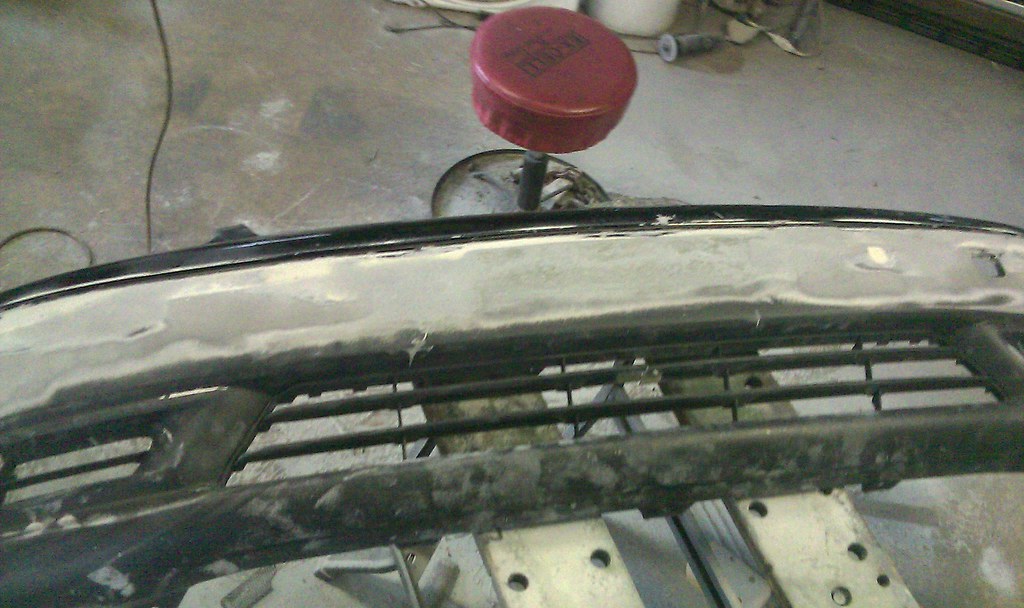
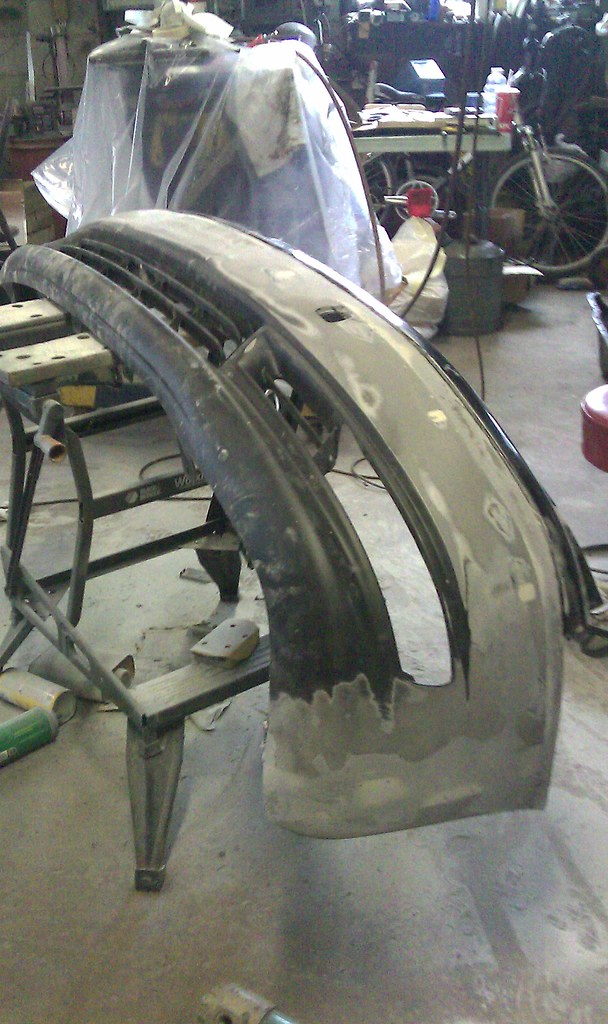
They laid on filler bondo as well to cover up the holes and smooth out any discrepancies on the bumper:
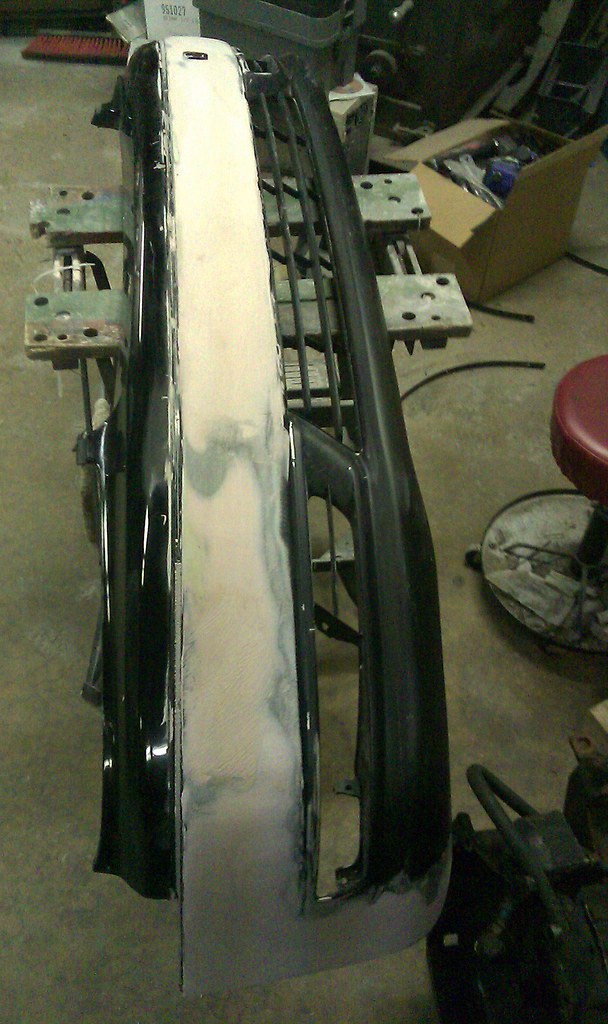
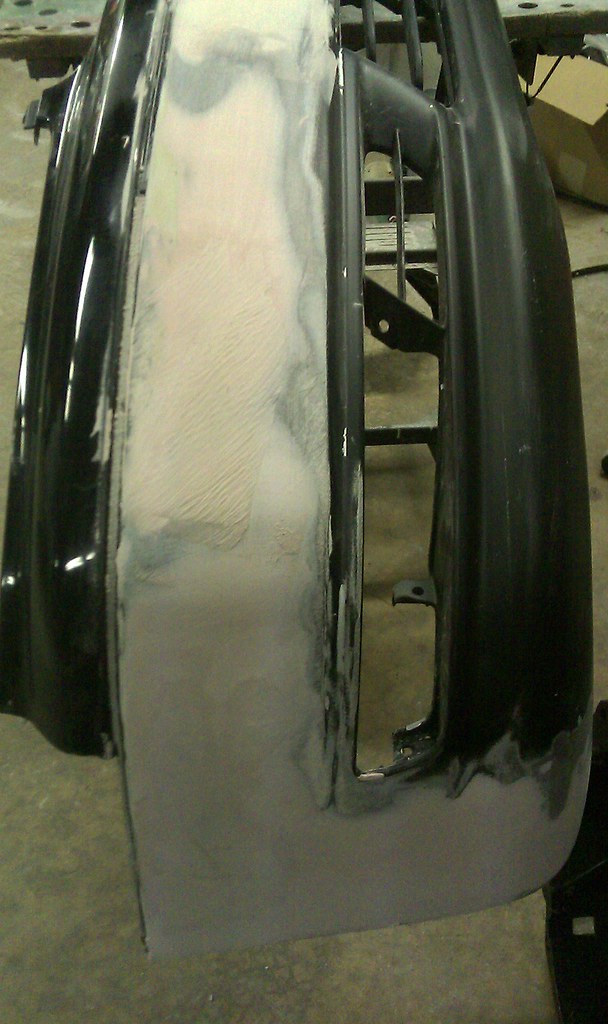
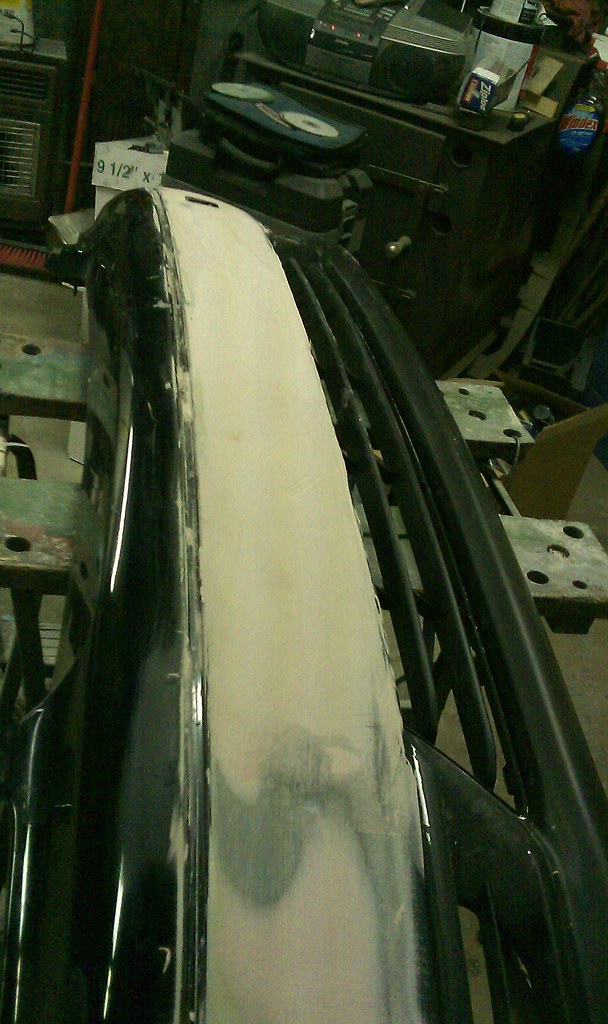
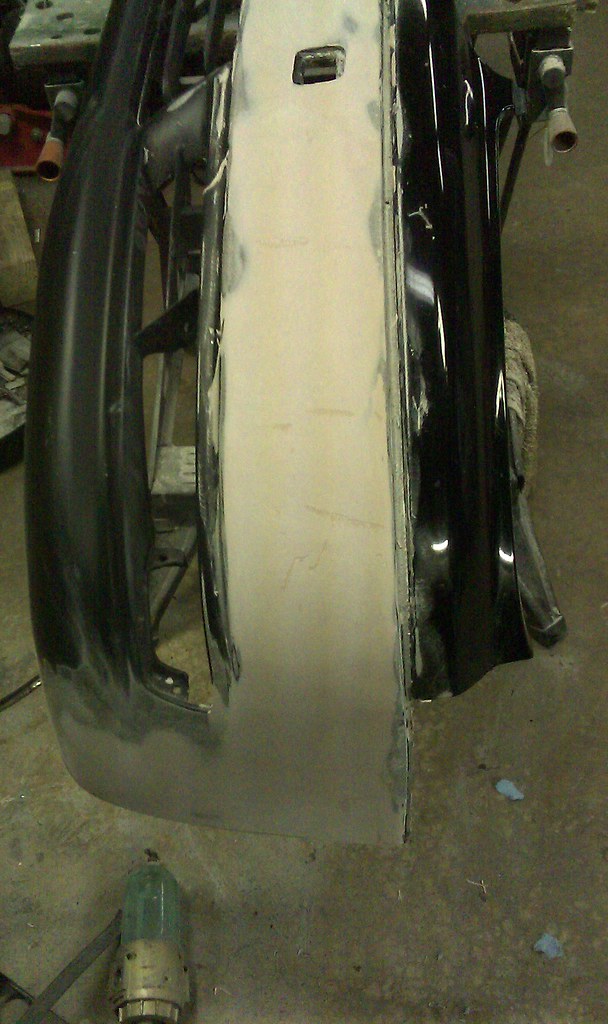
Next up, we'll fix any blemishes, primer, then paint. I am going to paint the sides rocker panels and rear bumper as well. Getting rid of the OEM two-tone look.
View original BBCode
So, I had to be out of town this weekend......but lucky for me, I roll with a deep crew and my boys decided to help me on the bumper anyways.  Big huge thanx to AJ and Jeremy, and Chet as well for helping me out.  AJ sent me some cell phone pictures of the work that they did.  This bumper has A LOT of hours dedicated to it, so maybe I should make a mold of it and get it replicated, haha.  Anyways, we are nearing the end, here are some pictures:

They first sanded down the front real good and then laid on some fiberglass bondo:

[IMG]http://farm5.static.flickr.com/4004/4453404689_cd94b6a73a_b.jpg[/IMG]

[IMG]http://farm5.static.flickr.com/4065/4454182640_ea67ece1f8_b.jpg[/IMG]

[IMG]http://farm3.static.flickr.com/2466/4454183078_3859344981_b.jpg[/IMG]

[IMG]http://farm5.static.flickr.com/4071/4454183494_dfbf10ba52_b.jpg[/IMG]

[IMG]http://farm3.static.flickr.com/2757/4454183888_a838f2cf71_b.jpg[/IMG]

[IMG]http://farm5.static.flickr.com/4008/4453406659_d29cd64ba8_b.jpg[/IMG]

[IMG]http://farm5.static.flickr.com/4013/4453407081_dc772e49c8_b.jpg[/IMG]

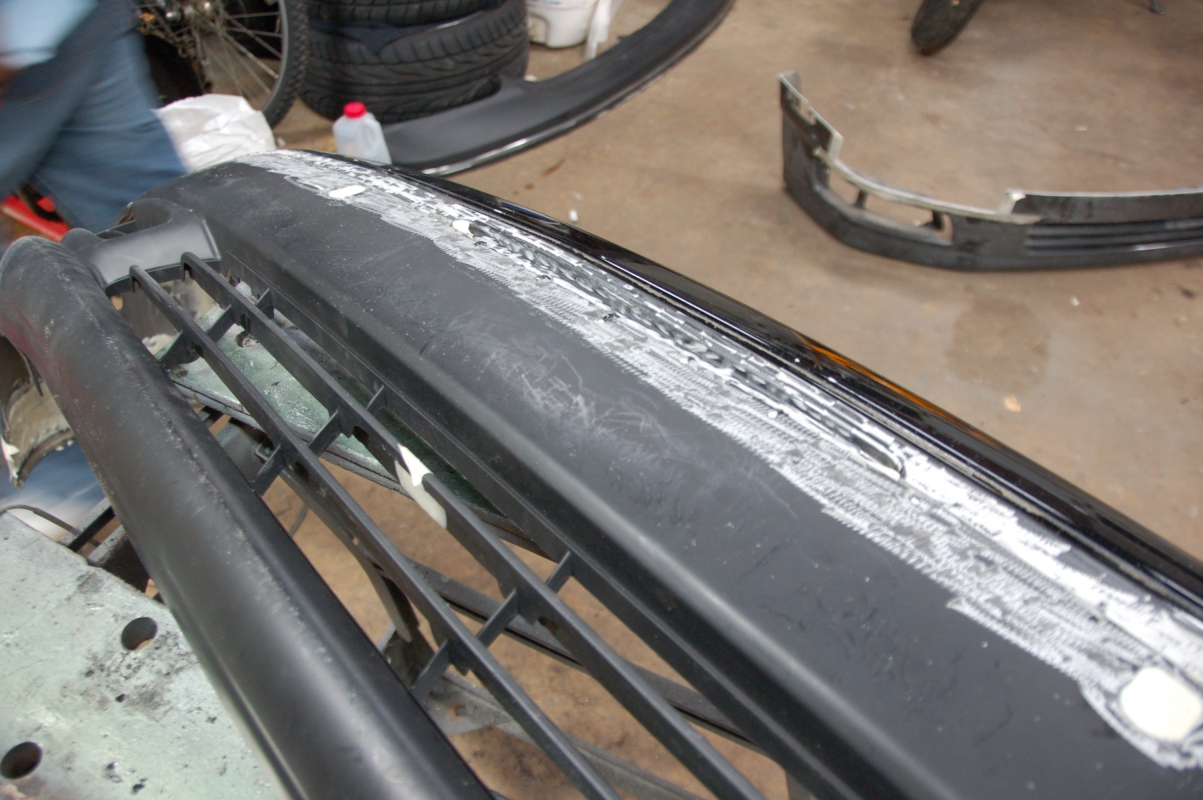
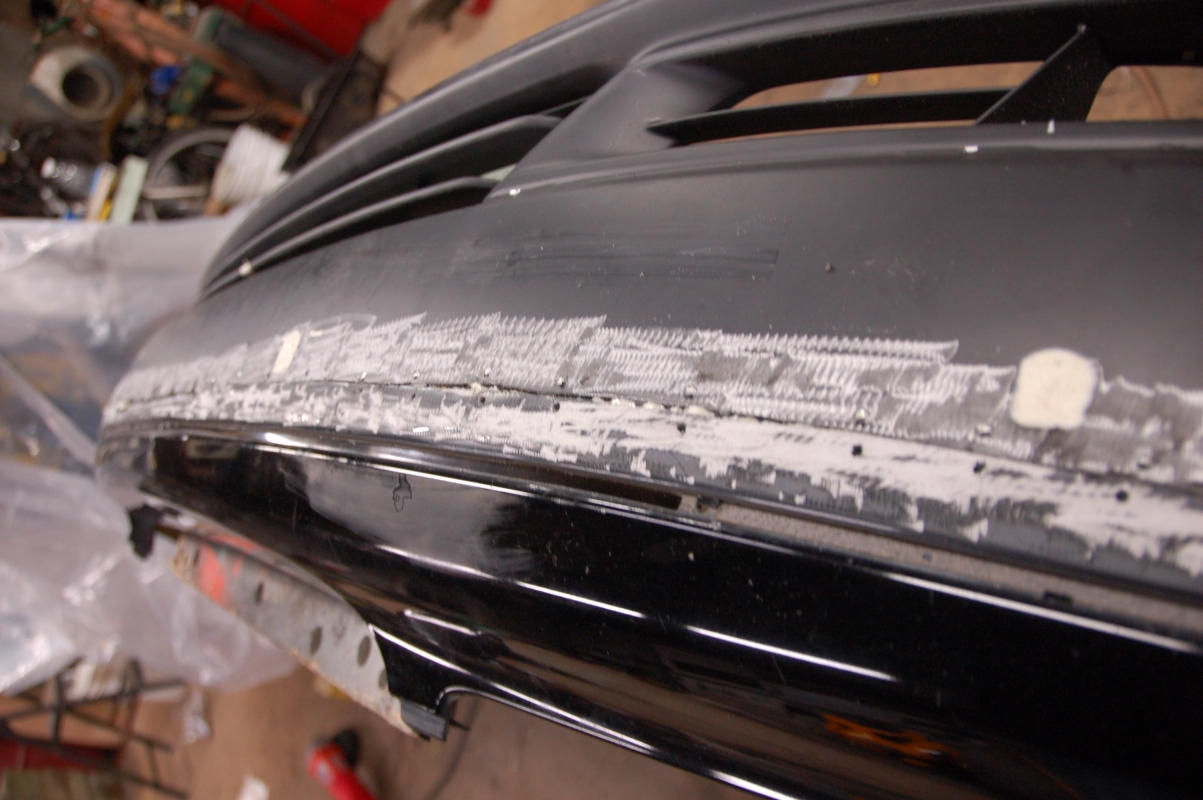
Next, they sanded down the bondo after letting it dry for a while:

[IMG]http://farm5.static.flickr.com/4010/4454185228_11371584c2_b.jpg[/IMG]

[IMG]http://farm5.static.flickr.com/4027/4454185684_4eeb6a4cea_b.jpg[/IMG]

[IMG]http://farm5.static.flickr.com/4040/4453408505_cf9a818ace_b.jpg[/IMG]

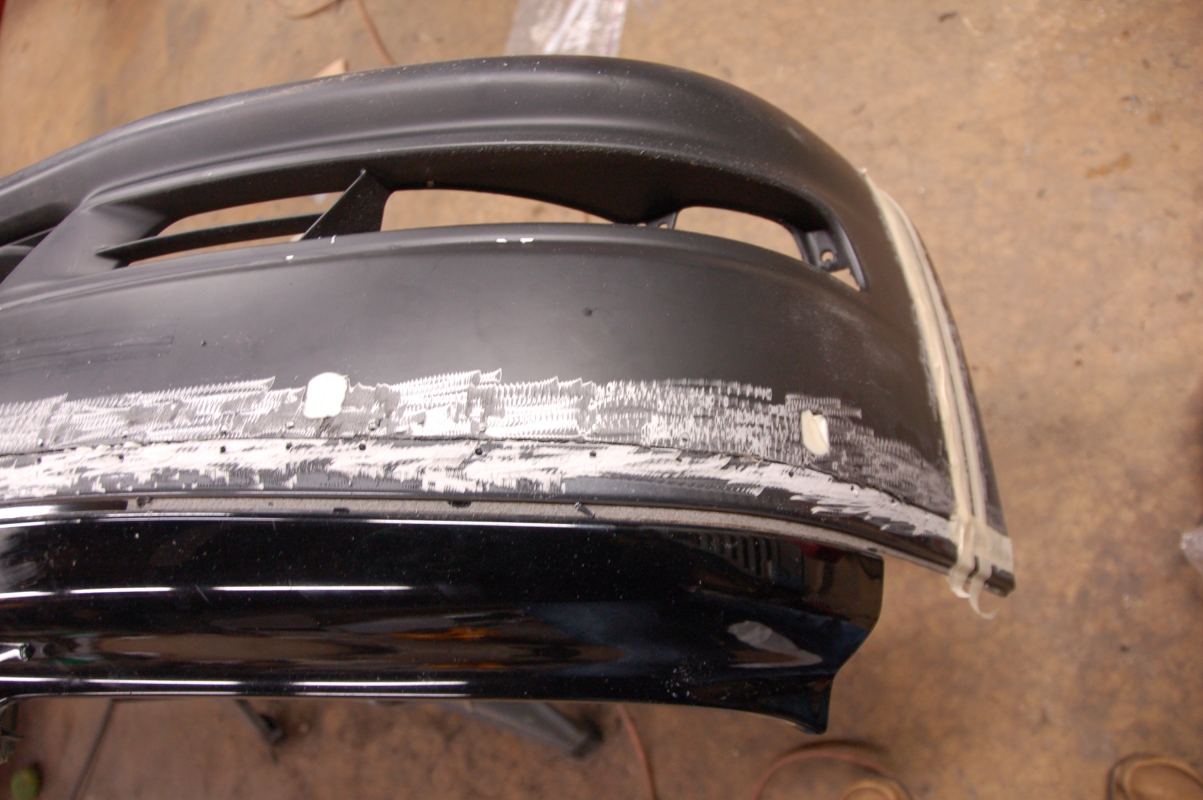
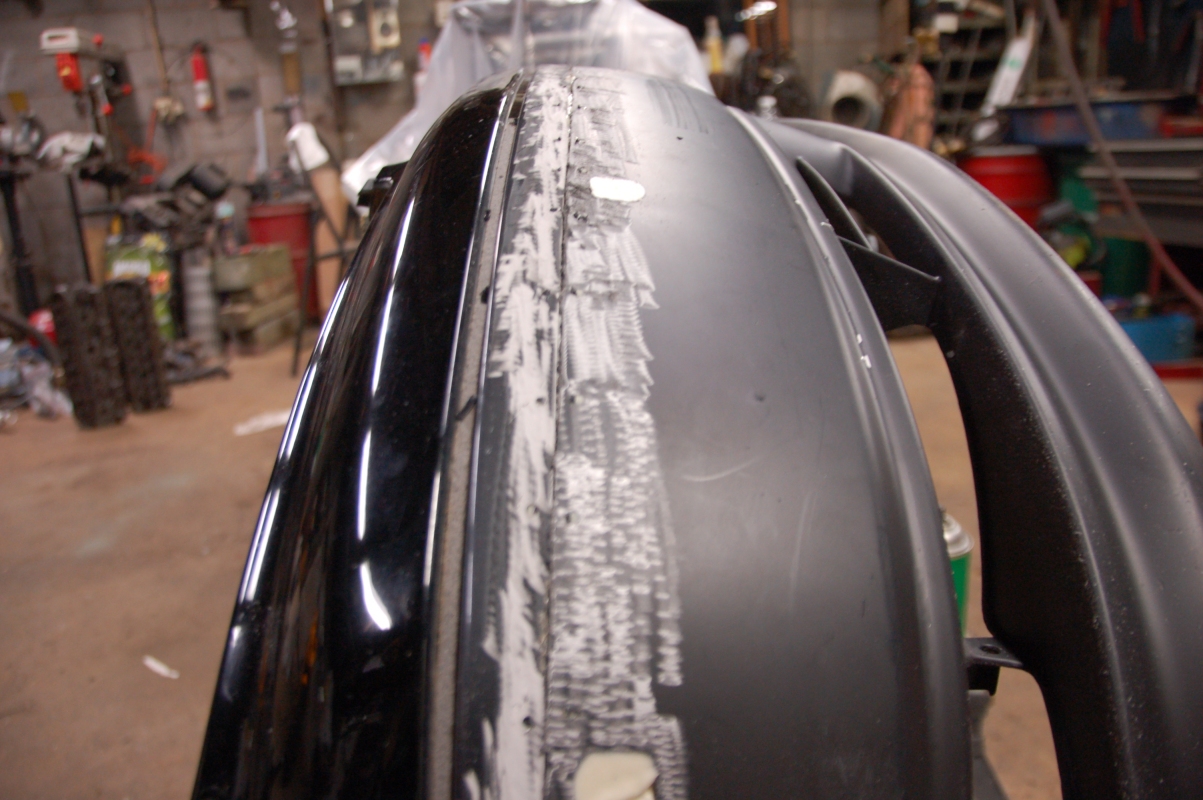
They laid on filler bondo as well to cover up the holes and smooth out any discrepancies on the bumper:

[IMG]http://farm5.static.flickr.com/4021/4454186706_821ceff626_b.jpg[/IMG]

[IMG]http://farm5.static.flickr.com/4002/4454187108_5a2de0ec4f_b.jpg[/IMG]

[IMG]http://farm3.static.flickr.com/2802/4454187524_f0b0c63eab_b.jpg[/IMG]

[IMG]http://farm5.static.flickr.com/4068/4454187918_4f105b5628_b.jpg[/IMG]

Next up, we'll fix any blemishes, primer, then paint.  I am going to paint the sides rocker panels and rear bumper as well.  Getting rid of the OEM two-tone look.
very nice.
View original BBCode
very nice.
good work..
View original BBCode
good work..
Let me add, before any of you try this, know its is much more work then it looks like. Since he used bumpers from the same model, the proportions and shapes were very similiar. When you use other bumpers from different cars, you need to keep the proportions in mind as well as the angles. What looks good on the car it came from might not look good on your car.
View original BBCode
Let me add, before any of you try this, know its is much more work then it looks like. Since he used bumpers from the same model, the proportions and shapes were very similiar. When you use other bumpers from different cars, you need to keep the proportions in mind as well as the angles. What looks good on the car it came from might not look good on your car.
nice job man...your buddies finished it off pretty good...
the right way was to not use any filler on raw plastic bumpers...especially the cheap stuff...you can get away with a skim coat but not a whole bumper...
you should use something similar to this
http://www.shop3m.com/60980109239.html?WT.ac_id=POW_3MAAD_GS
when you primer, use some alchohol wipes to clean and plastic adhesive promoter
good project for a young guy to take on...props...
View original BBCode
nice job man...your buddies finished it off pretty good...

the right way was to not use any filler on raw plastic bumpers...especially the cheap stuff...you can get away with a skim coat but not a whole bumper...

you should use something similar to this

[URL]http://www.shop3m.com/60980109239.html?WT.ac_id=POW_3MAAD_GS[/URL]

when you primer, use some alchohol wipes to clean and plastic adhesive promoter

good project for a young guy to take on...props...
wow results look stunning. cant wait to see it painted
View original BBCode
wow results look stunning. cant wait to see it painted
Very nice writeup! What would one do if the curvature were off? IE: fusing say, a Q bumper to an LS bumper?

Also, how would fusing plastic to fiberglass be different?
View original BBCode
Very nice writeup! What would one do if the curvature were off? IE: fusing say, a Q bumper to an LS bumper?
Also, how would fusing plastic to fiberglass be different?
this is just absolutely AWESOME! I got the idea to do this with a friends 929. You made it look so feasible now!
View original BBCode
this is just absolutely AWESOME! I got the idea to do this with a friends 929. You made it look so feasible now!
Thumbs up on the patience to pull this off. Should look great once it's painted.
View original BBCode
Thumbs up on the patience to pull this off. Should look great once it's painted.
pretty awesome! cant wait to see the finished project.
View original BBCode
pretty awesome! cant wait to see the finished project.
Any updates?
View original BBCode
Any updates?
a-holesniper;312770 wrote:Any updates?
Yeah, a couple of updates. Sooooo, progress has been really slow since I've had to work the past 3 weekends in a row. So yeah, the J.O.B has me tied down bad, but I managed to get some progress going.
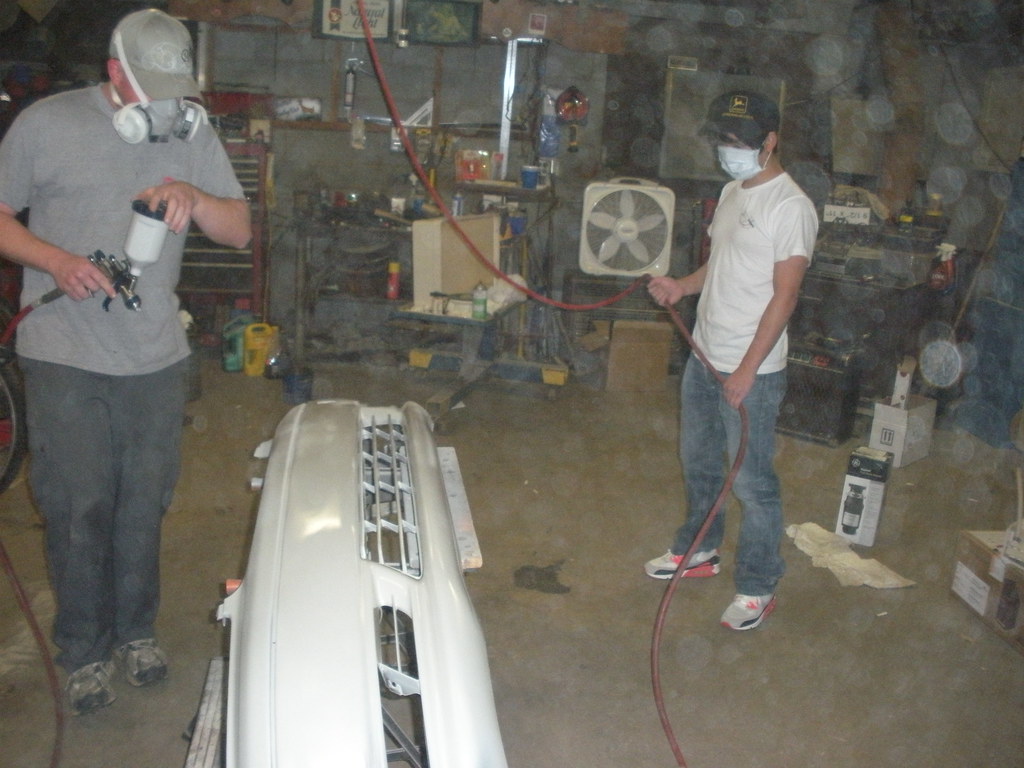
So, there was A LOT of sanding that we needed to do. Knowing that this was going to be painted black, and black is a super unforgiving color, we didn't want any imperfections. So we began sanding:
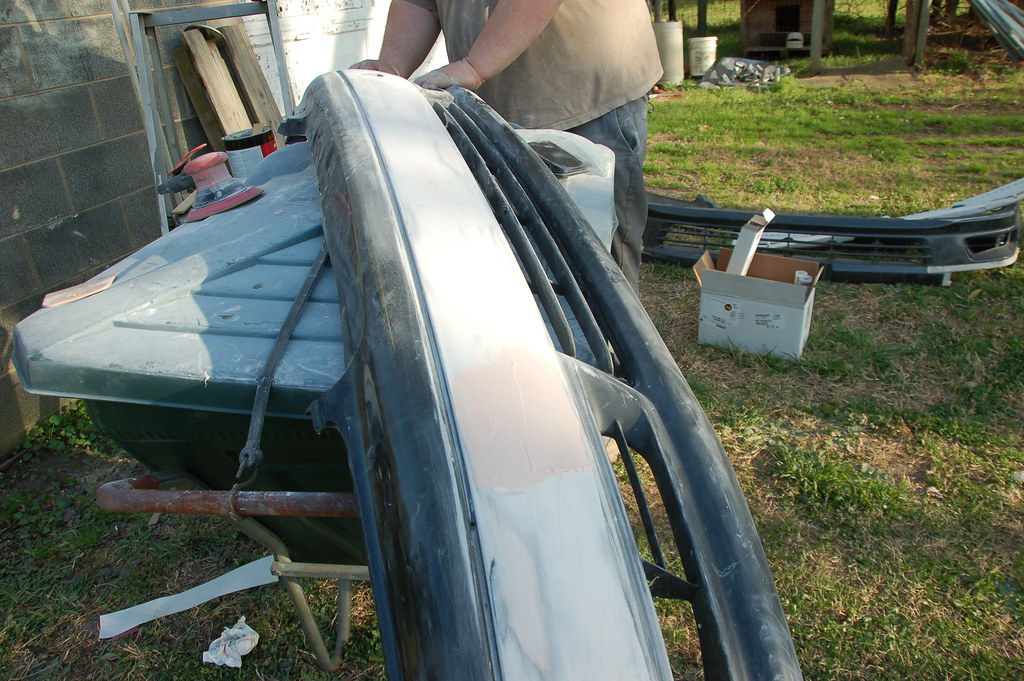
My boy Chet, lending a helping hand:

Pretty much, anytime we felt the level was off, we added more bondo and sanded it down. We kept doing that to get the leveling perfect.
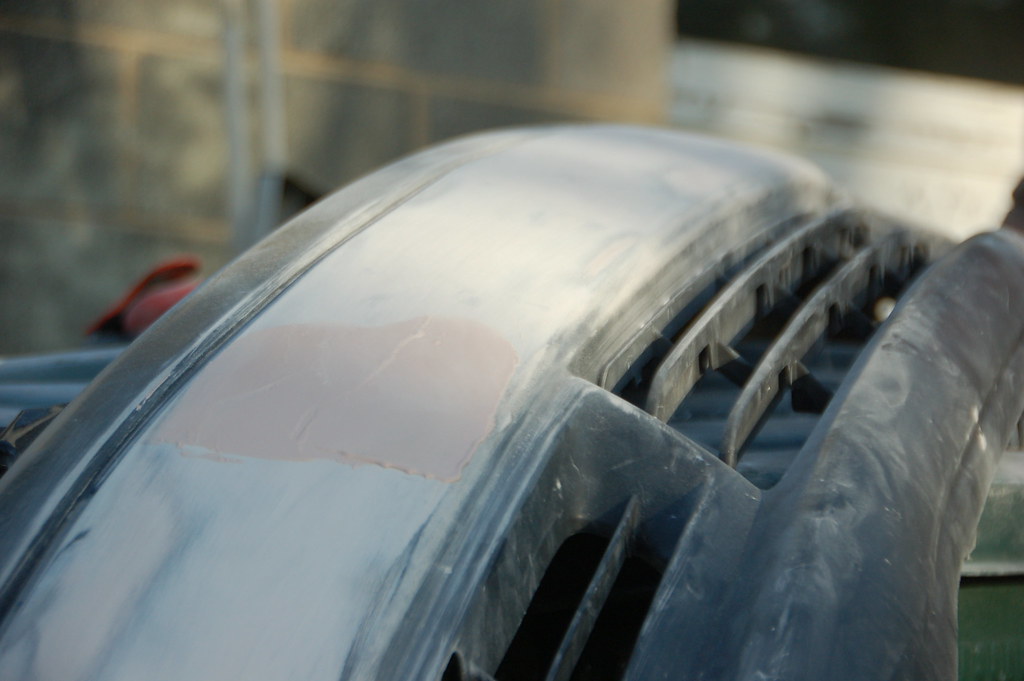
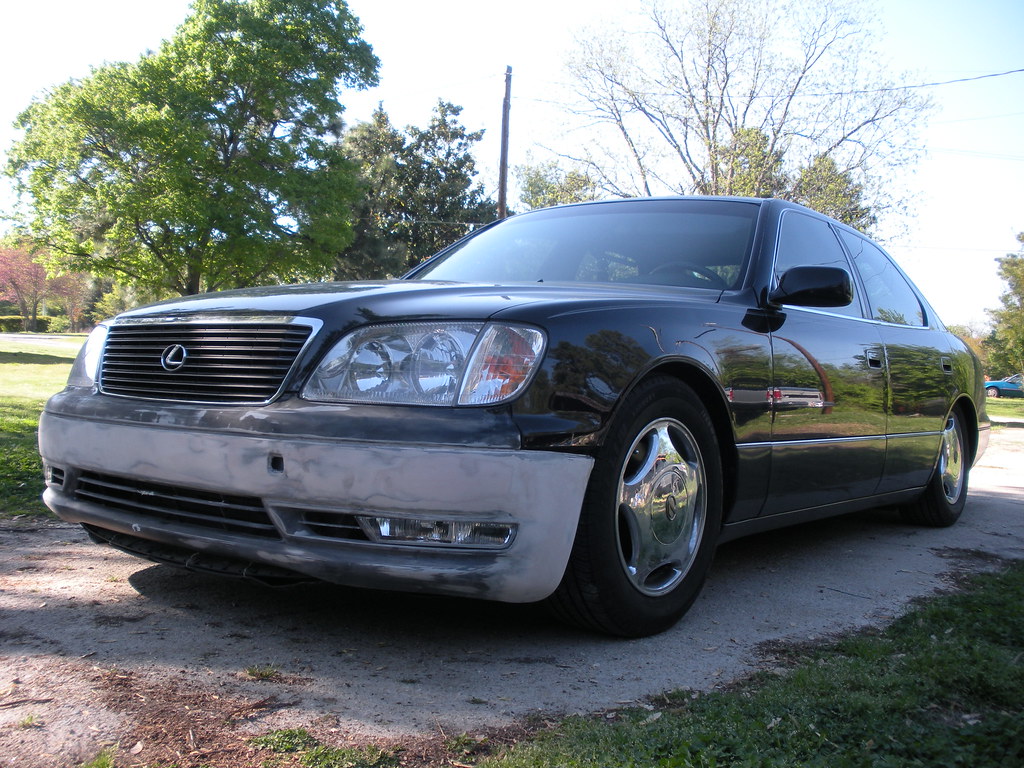
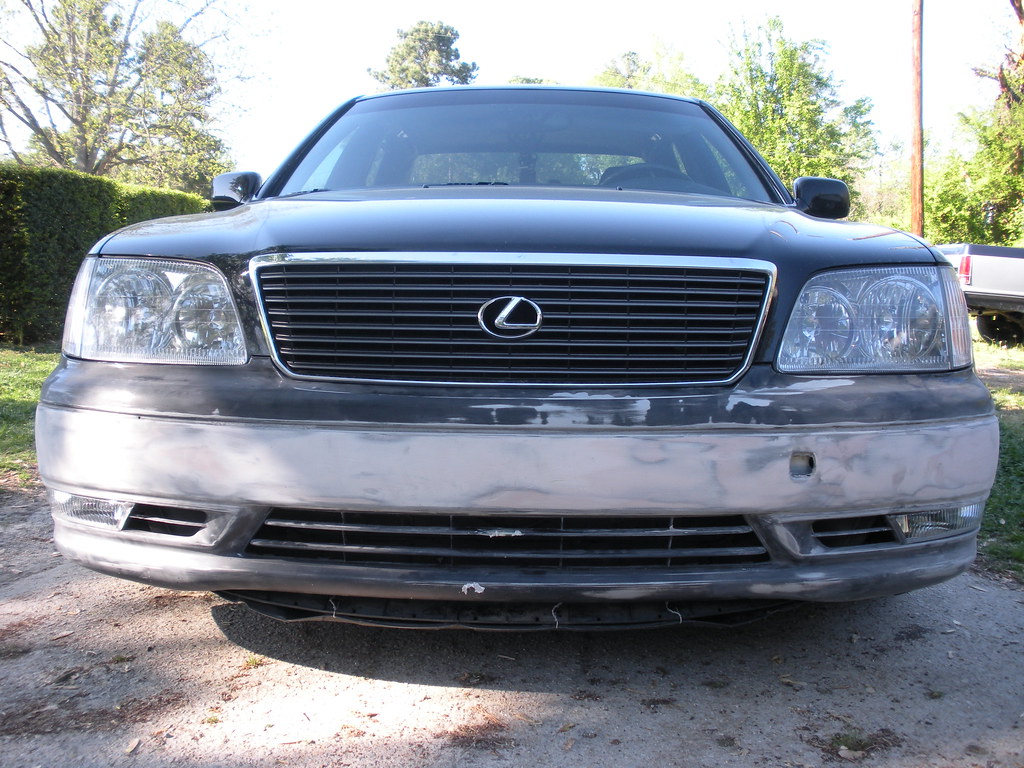
So after a substantial amount of sanding, we loosely laid the bumper on the car w/ the fog lights to see what it looks like:
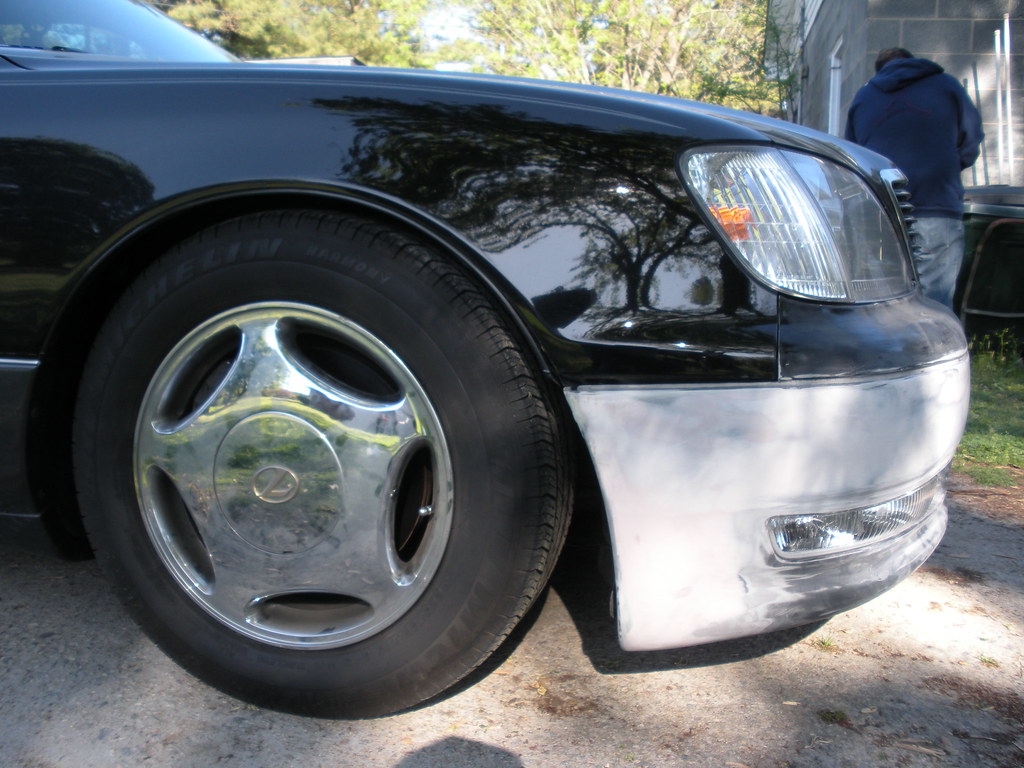
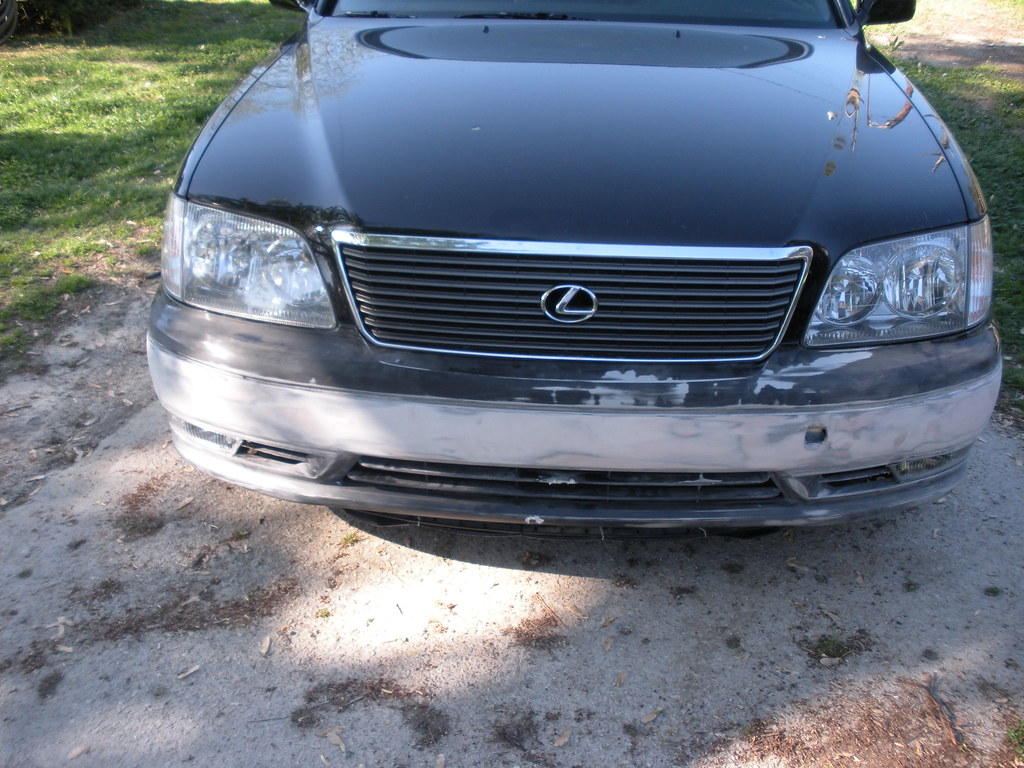
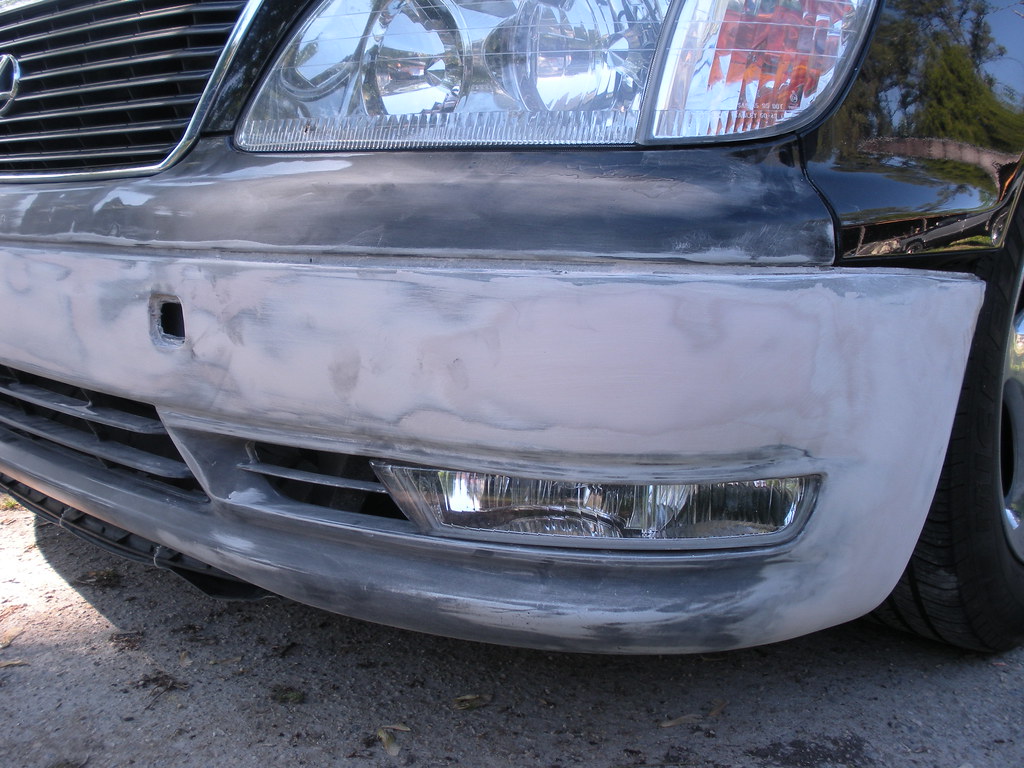
View original BBCode
[QUOTE=a-holesniper;312770]Any updates?[/QUOTE]

Yeah, a couple of updates.  Sooooo, progress has been really slow since I've had to work the past 3 weekends in a row.  So yeah, the J.O.B has me tied down bad, but I managed to get some progress going.

So, there was A LOT of sanding that we needed to do.  Knowing that this was going to be painted black, and black is a super unforgiving color, we didn't want any imperfections.  So we began sanding:

[IMG]http://farm5.static.flickr.com/4001/4483224682_5190cf58aa_b.jpg[/IMG]

My boy Chet, lending a helping hand:

[IMG]http://farm5.static.flickr.com/4063/4482579447_be64337b61_b.jpg[/IMG]

Pretty much, anytime we felt the level was off, we added more bondo and sanded it down.  We kept doing that to get the leveling perfect.

[IMG]http://farm3.static.flickr.com/2732/4483230108_644eaa64a2_b.jpg[/IMG]

So after a substantial amount of sanding, we loosely laid the bumper on the car w/ the fog lights to see what it looks like:

[IMG]http://farm3.static.flickr.com/2746/4517139644_3fd9b0d18d_b.jpg[/IMG]

[IMG]http://farm3.static.flickr.com/2748/4516506311_2fd777f4d7_b.jpg[/IMG]

[IMG]http://farm5.static.flickr.com/4019/4517142360_b7ec5a30cf_b.jpg[/IMG]

[IMG]http://farm5.static.flickr.com/4014/4516508785_0dfdbf96e4_b.jpg[/IMG]

[IMG]http://farm5.static.flickr.com/4002/4516510169_32666aed4a_b.jpg[/IMG]
View original BBCode
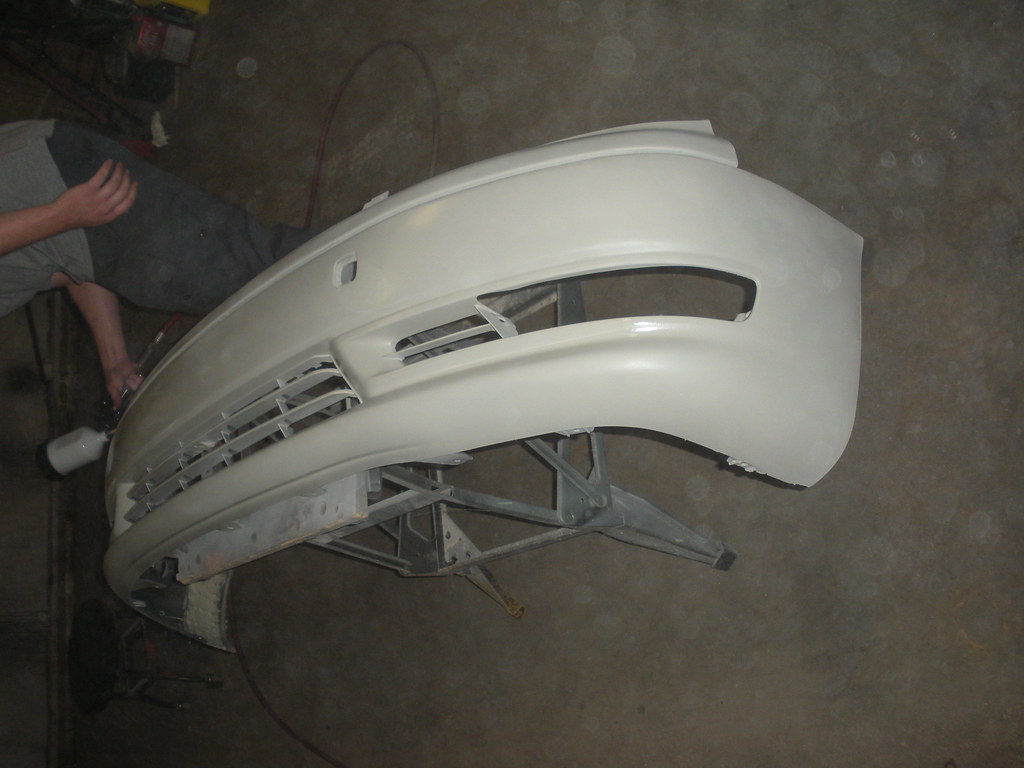
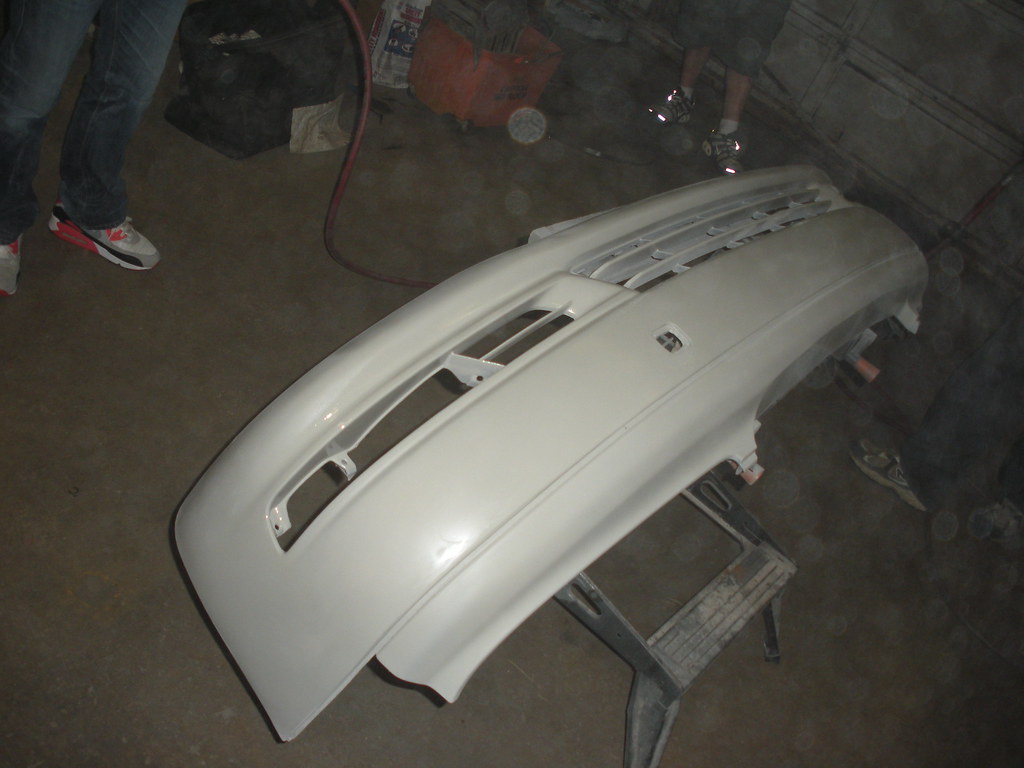
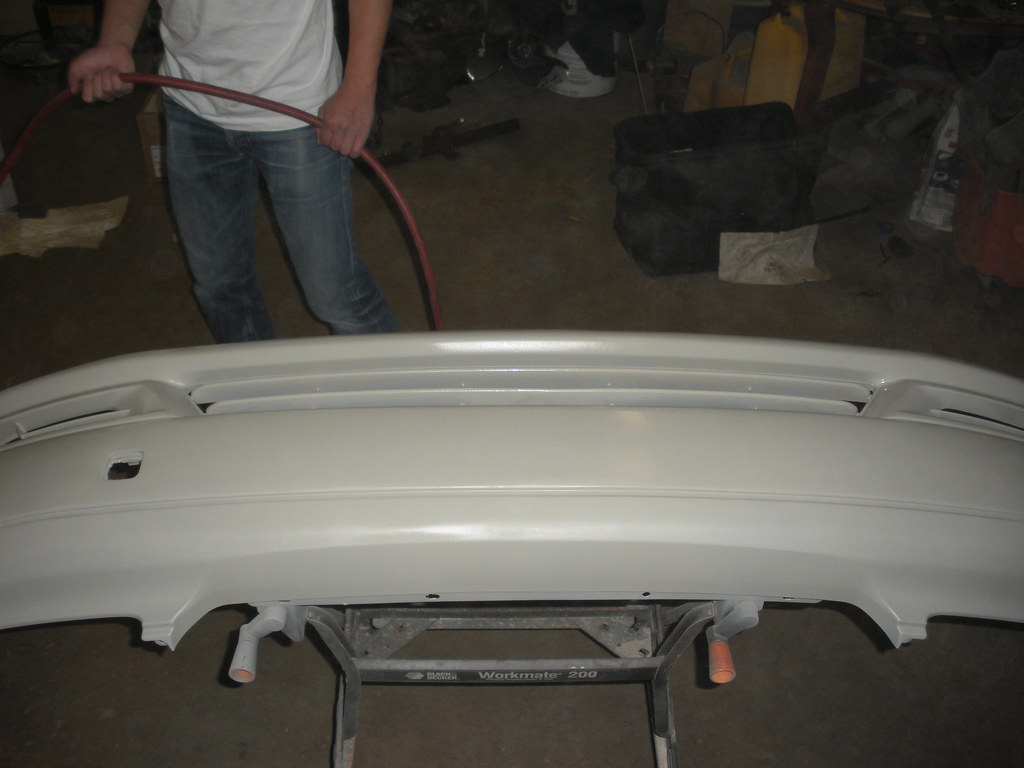
We then sanded it down some more, and worked our way to higher grit sandpaper.  Then we primered it:

[IMG]http://farm3.static.flickr.com/2733/4517146406_176d0236ed_b.jpg[/IMG]

[IMG]http://farm5.static.flickr.com/4001/4517147680_61a3128005_b.jpg[/IMG]

[IMG]http://farm3.static.flickr.com/2690/4517148862_06e07a4a6f_b.jpg[/IMG]

[IMG]http://farm3.static.flickr.com/2529/4516515217_eb2537887e_b.jpg[/IMG]

[IMG]http://farm5.static.flickr.com/4035/4516516557_217f5472e1_b.jpg[/IMG]

[IMG]http://farm5.static.flickr.com/4017/4517152490_a772a1e5c1_b.jpg[/IMG]

Overall, it looks really good being one color.  You can't even tell that this bumper was two pieces, which, of course, was our goal.  There's a lot of sanding that still needs to be done before I can say it's perfect.  After that, I'll primer it one last time before sending it for paint.
Whoa! Great job and attention to detail. I can't wait to see it painted and put on the LS!
View original BBCode
Whoa! Great job and attention to detail. I can't wait to see it painted and put on the LS!
[QUOTE=
Overall, it looks really good being one color. You can't even tell that this bumper was two pieces, which, of course, was our goal. There's a lot of sanding that still needs to be done before I can say it's perfect. After that, I'll primer it one last time before sending it for paint.[/QUOTE]
end of day, slap yor sig on it (inconspicuous yet there) and turn it in for paint. Outstanding work fellas, get it on. This is the heart of it all.
View original BBCode
[QUOTE=
Overall, it looks really good being one color. You can't even tell that this bumper was two pieces, which, of course, was our goal. There's a lot of sanding that still needs to be done before I can say it's perfect. After that, I'll primer it one last time before sending it for paint.[/QUOTE]
end of day, slap yor sig on it (inconspicuous yet there) and turn it in for paint. Outstanding work fellas, get it on. This is the heart of it all.
mean garage project...maybe we'll see a lot more DIY's...

guide coat is your best friend...

did you get overspray on your shoes?  haha
View original BBCode
mean garage project...maybe we'll see a lot more DIY's...
guide coat is your best friend...
did you get overspray on your shoes? haha
Mean :)
View original BBCode
Mean :)
Awesome. Can't wait to see it done.

Looks stock.
View original BBCode
Awesome. Can't wait to see it done.
Looks stock.
almost there!
View original BBCode
almost there!
Hey guys, Thanx for the props. We're definitely almost there. I can't wait to get rid of the two tone, I think the car looks sooooo good one color.
VIP-UCF;313450 wrote:mean garage project...maybe we'll see a lot more DIY's...
guide coat is your best friend...
did you get overspray on your shoes? haha
lol, I don't know, I probably got a lot of overspray on my shoes, but those infrareds are beat anyways, they're so comfortable, I just wear the hell out of them w/out worrying about keeping it fresh, haha.
View original BBCode
Hey guys,  Thanx for the props.  We're definitely almost there.  I can't wait to get rid of the two tone, I think the car looks sooooo good one color.

[QUOTE=VIP-UCF;313450]mean garage project...maybe we'll see a lot more DIY's...

guide coat is your best friend...

did you get overspray on your shoes?  haha[/QUOTE]

lol, I don't know, I probably got a lot of overspray on my shoes, but those infrareds are beat anyways, they're so comfortable, I just wear the hell out of them w/out worrying about keeping it fresh, haha.
Very nice project. Post some good photos once your done
View original BBCode
Very nice project. Post some good photos once your done
Almost done!! looking good so far!!
View original BBCode
Almost done!! looking good so far!!
romeo291;313485 wrote:Hey guys, Thanx for the props. We're definitely almost there. I can't wait to get rid of the two tone, I think the car looks sooooo good one color.
lol, I don't know, I probably got a lot of overspray on my shoes, but those infrareds are beat anyways, they're so comfortable, I just wear the hell out of them w/out worrying about keeping it fresh, haha.
exactly, why buy infrareds if you aint gonna beat em. some worker from a a lucky's near me started pretty much yelling at me for using Bronco's as gym shoes haha.
View original BBCode
[QUOTE=romeo291;313485]Hey guys, Thanx for the props. We're definitely almost there. I can't wait to get rid of the two tone, I think the car looks sooooo good one color.


lol, I don't know, I probably got a lot of overspray on my shoes, but those infrareds are beat anyways, they're so comfortable, I just wear the hell out of them w/out worrying about keeping it fresh, haha.[/QUOTE]

exactly, why buy infrareds if you aint gonna beat em.  some worker from a a lucky's near me started pretty much yelling at me for using Bronco's as gym shoes haha.
Looks great
View original BBCode
Looks great
Dude! All I got to say is sick! Can't wait ti see you fit the kit on her! Keep up the great work
View original BBCode
Dude! All I got to say is sick! Can't wait ti see you fit the kit on her! Keep up the great work
i love me some infareds haha had a pair and sold them for 60 bucks =(.

anyways good job on the bumper.
View original BBCode
i love me some infareds haha had a pair and sold them for 60 bucks =(.
anyways good job on the bumper.
Wow! Looks a lot better with it primered than without...any teaser shots of it on the car after it is fully primed?
View original BBCode
Wow! Looks a lot better with it primered than without...any teaser shots of it on the car after it is fully primed?
Nice job on getting it there. I spy infareds. =)
View original BBCode
Nice job on getting it there. I spy infareds. =)
Caoboy;313685 wrote:Wow! Looks a lot better with it primered than without...any teaser shots of it on the car after it is fully primed?
I got the thing painted already. I went ahead and painted all the gray stuff and the wald bodykit. So my car is completely black now. I just need to find time to take some pictures and start fitting everything back together correctly. Updates coming soon!
View original BBCode
[QUOTE=Caoboy;313685]Wow! Looks a lot better with it primered than without...any teaser shots of it on the car after it is fully primed?[/QUOTE]

I got the thing painted already.  I went ahead and painted all the gray stuff and the wald bodykit.  So my car is completely black now.  I just need to find time to take some pictures and start fitting everything back together correctly.  Updates coming soon!
Congrats!
Can't wait to see it.
View original BBCode
Congrats!
Can't wait to see it.
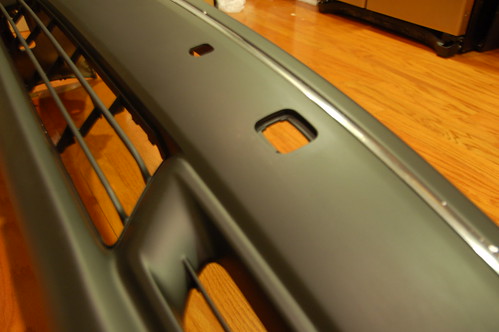
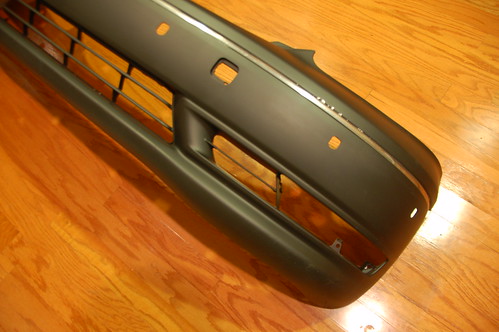
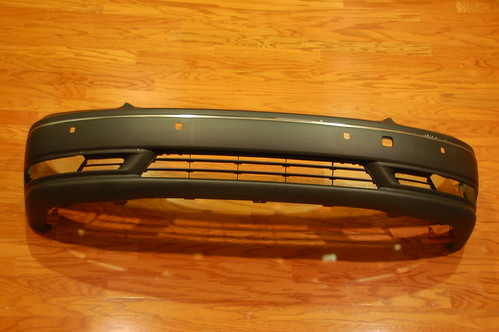
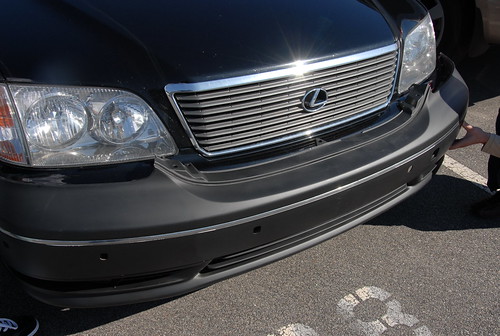
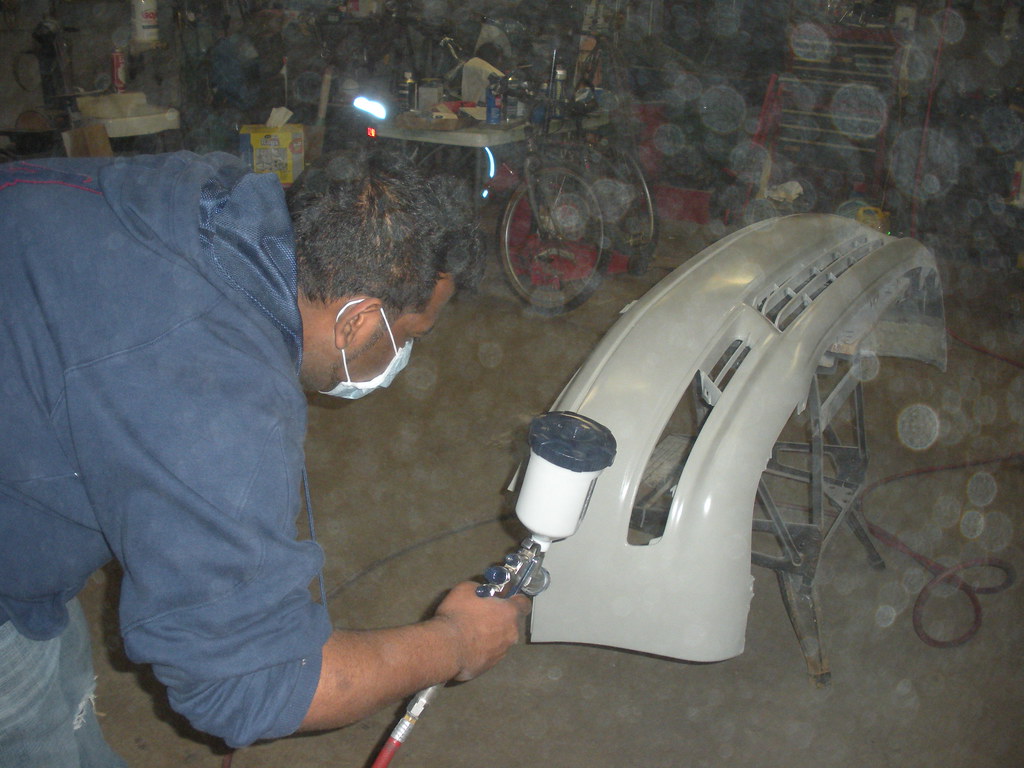
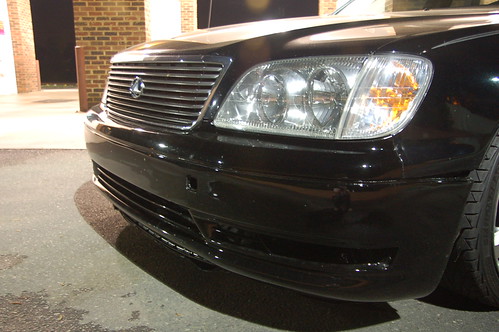
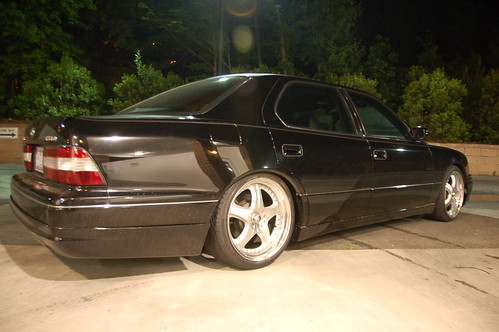
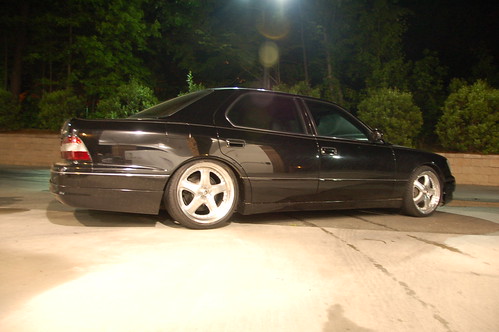
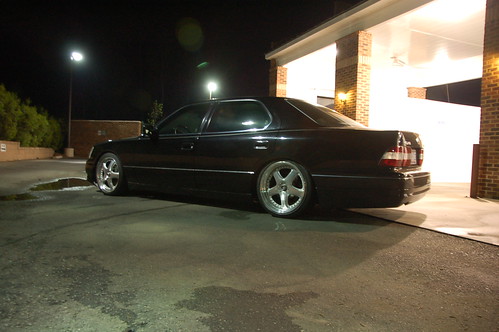
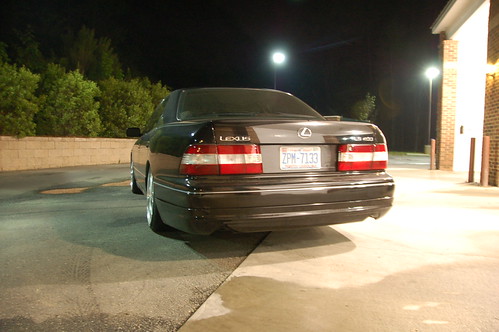
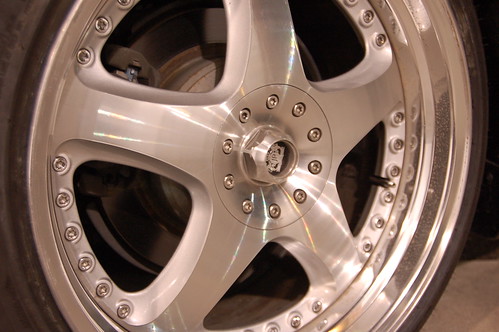
I finally found some time to take some pictures. Too bad I haven't had time to wash the car yet. Still A LOT of work needs to be completed. The front bumper and Wald bodykit haven't even been fitted correctly yet, gotta make it fit better. Actually, the front bumper isn't even on there correctly yeither. I have to take it off and put in my fog lights and mount the HIDs for the fogs, so I just threw a few screws on there just so I don't have to keep driving around w/out a front bumper. The Admiration non-led tail lights looks wayyyyy better than stock though, that was an awesome buy. I gotta thanx kanagawa21 for hooking it up w/ the Wald bodykit and tail lights. Anyways, I gotta work on my stance too, lower the front more (LOL, my stance is all jacked up right now, so don't laugh fellas, I'll fix it, haha) and I need spacers. *phew*, one step at a time. Still more to come, I got a few parts that I need to install. In the meantime, here are some crappy pictures I took at the car wash place, lol, too bad I didn't have time to actually wash the car beforehand. Sorry for the dirty-ness.
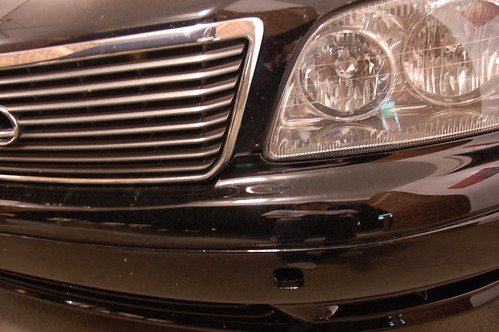
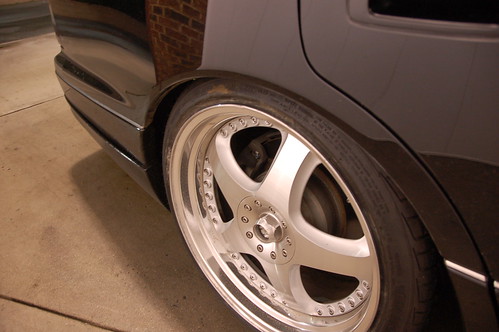
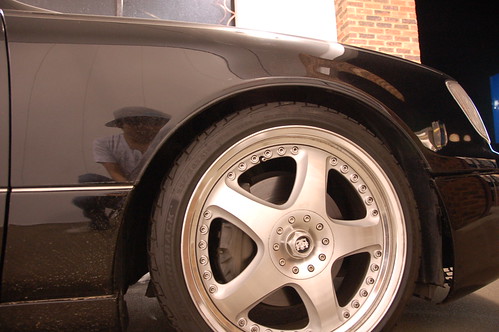
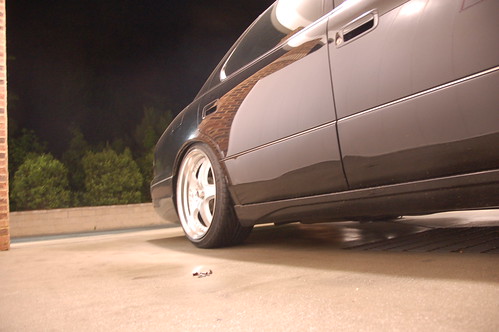
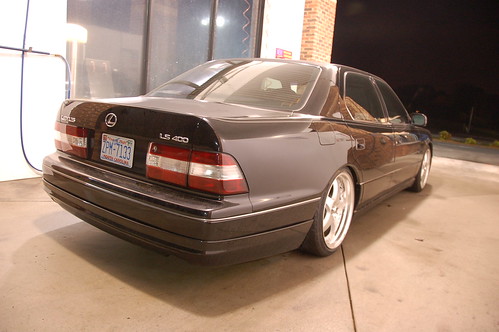
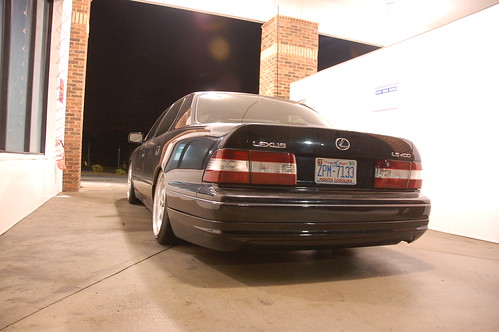
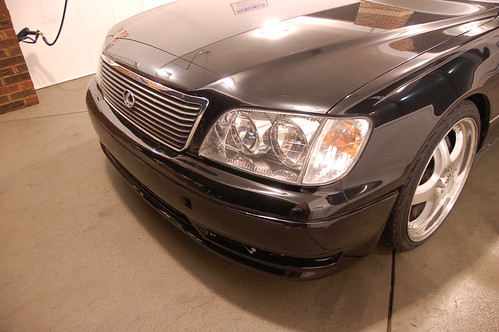
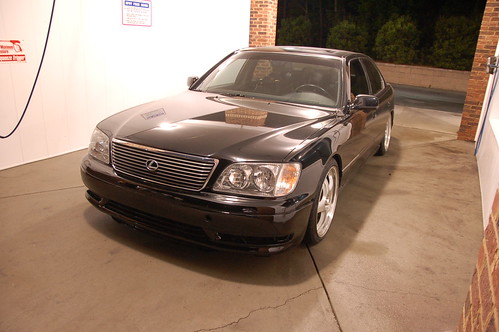
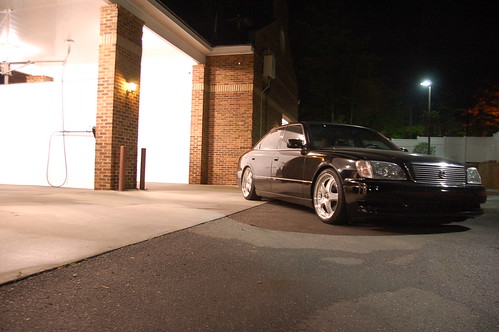
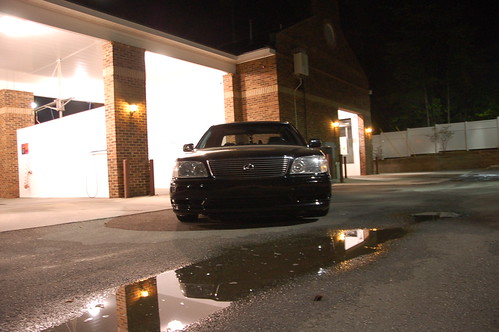
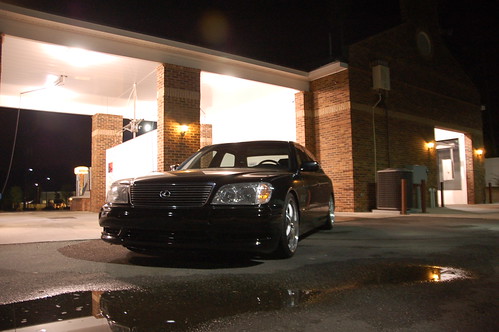
View original BBCode
I finally found some time to take some pictures.  Too bad I haven't had time to wash the car yet.  Still A LOT of work needs to be completed.  The front bumper and Wald bodykit haven't even been fitted correctly yet, gotta make it fit better.  Actually, the front bumper isn't even on there correctly yeither.  I have to take it off and put in my fog lights and mount the HIDs for the fogs, so I just threw a few screws on there just so I don't have to keep driving around w/out a front bumper.  The Admiration non-led tail lights looks wayyyyy better than stock though, that was an awesome buy.  I gotta thanx kanagawa21 for hooking it up w/ the Wald bodykit and tail lights.  Anyways, I gotta work on my stance too, lower the front more (LOL, my stance is all jacked up right now, so don't laugh fellas, I'll fix it, haha) and I need spacers.  *phew*, one step at a time.  Still more to come, I got a few parts that I need to install.  In the meantime, here are some crappy pictures I took at the car wash place, lol, too bad I didn't have time to actually wash the car beforehand.  Sorry for the dirty-ness.

[IMG]http://farm5.static.flickr.com/4026/4547378016_a523cbf661.jpg[/IMG]

[IMG]http://farm5.static.flickr.com/4070/4546742725_5f88b47636.jpg[/IMG]

[IMG]http://farm5.static.flickr.com/4030/4546742295_1a1825f777.jpg[/IMG]

[IMG]http://farm5.static.flickr.com/4059/4546741793_1cec1e36e9.jpg[/IMG]

[IMG]http://farm5.static.flickr.com/4066/4546741319_11b1befd48.jpg[/IMG]

[IMG]http://farm5.static.flickr.com/4060/4547375734_a31fcc636b.jpg[/IMG]

[IMG]http://farm5.static.flickr.com/4048/4547375310_873263ca69.jpg[/IMG]

[IMG]http://farm5.static.flickr.com/4059/4546739913_440e538d95.jpg[/IMG]

[IMG]http://farm5.static.flickr.com/4003/4546739453_4da6d5b8b9.jpg[/IMG]

[IMG]http://farm5.static.flickr.com/4046/4547373930_dc9ac59a54.jpg[/IMG]

[IMG]http://farm5.static.flickr.com/4061/4547373498_b8706b9547.jpg[/IMG]
View original BBCode
[IMG]http://farm5.static.flickr.com/4029/4546738141_3a16373e13.jpg[/IMG]

[IMG]http://farm5.static.flickr.com/4032/4547372000_f44aee8342.jpg[/IMG]

[IMG]http://farm5.static.flickr.com/4018/4546736769_8930f38e0b.jpg[/IMG]

[IMG]http://farm5.static.flickr.com/4064/4547371060_475d98bd1d.jpg[/IMG]

[IMG]http://farm5.static.flickr.com/4042/4547370554_553ba854d2.jpg[/IMG]

[IMG]http://farm5.static.flickr.com/4044/4546734885_1e1de355eb.jpg[/IMG]

[IMG]http://farm5.static.flickr.com/4059/4546734345_26d11af871.jpg[/IMG]

[IMG]http://farm5.static.flickr.com/4017/4547368158_53cfb55762.jpg[/IMG]
Looks good glad it came out so nice for you.
View original BBCode
Looks good glad it came out so nice for you.
looks good
View original BBCode
looks good
came out pretty g...it'll look 5x better with the fogs in there...
View original BBCode
came out pretty g...it'll look 5x better with the fogs in there...
classic, just bring the front down more :P
View original BBCode
classic, just bring the front down more :P
alexisthemovie;316176 wrote:classic, just bring the front down more :P
I know dude, I've been working like crazy lately so it was really late when we installed those coilovers. I was just waiting for them to settle in before adjusting them some more. No worries, it will come down, haven't messed around w/ the stance or anything yet.
View original BBCode
[QUOTE=alexisthemovie;316176]classic, just bring the front down more :P[/QUOTE]

I know dude, I've been working like crazy lately so it was really late when we installed those coilovers.  I was just waiting for them to settle in before adjusting them some more.  No worries, it will come down, haven't messed around w/ the stance or anything yet.
Im glad you kept the square tow hook box. It gives it more of an oem look. Good job, it looks like it belongs on there
View original BBCode
Im glad you kept the square tow hook box. It gives it more of an oem look. Good job, it looks like it belongs on there
widebody_Q;316209 wrote:Im glad you kept the square tow hook box. It gives it more of an oem look. Good job, it looks like it belongs on there
yeah man, it was definitely a pain to work around that square, but we managed, and I love that it's there. Good call on that. I just ordered the tow eye cap from Lexus, they come painted and it was only like $8. I'll update soon as I start putting the car back together.
View original BBCode
[QUOTE=widebody_Q;316209]Im glad you kept the square tow hook box.  It gives it more of an oem look.  Good job, it looks like it belongs on there[/QUOTE]

yeah man, it was definitely a pain to work around that square, but we managed, and I love that it's there.  Good call on that.  I just ordered the tow eye cap from Lexus, they come painted and it was only like $8.  I'll update soon as I start putting the car back together.
Looks good man. Looks stock. Most "joe-shmos" wouldn't even notice the difference. I like it.
View original BBCode
Looks good man. Looks stock. Most "joe-shmos" wouldn't even notice the difference. I like it.
a-holesniper;316236 wrote:Looks good man. Looks stock. Most "joe-shmos" wouldn't even notice the difference. I like it.
Thanks man, it's definitely a lot of work for a very understated mod. But, that's why I like it though, my goal was to do a major mod but have it look factory so it's subtle enough that regular people won't ever notice, but the ones in the scene can quickly see the difference.
View original BBCode
[QUOTE=a-holesniper;316236]Looks good man. Looks stock. Most "joe-shmos" wouldn't even notice the difference. I like it.[/QUOTE]

Thanks man, it's definitely a lot of work for a very understated mod.  But, that's why I like it though, my goal was to do a major mod but have it look factory so it's subtle enough that regular people won't ever notice, but the ones in the scene can quickly see the difference.
Love it - turned out great!
View original BBCode
Love it - turned out great!
Is it possible to fit a UCF30 Wald Executive front lip on that bumper? That would make it flow with the rest of the kit. Nice work!
View original BBCode
Is it possible to fit a UCF30 Wald Executive front lip on that bumper? That would make it flow with the rest of the kit. Nice work!
chrispy;316457 wrote:Is it possible to fit a UCF30 Wald Executive front lip on that bumper? That would make it flow with the rest of the kit. Nice work!
Anything is possible, but it would require some work to fit the front wald lip since the bumper was actually extended on the sides. The problem though, would be that the lip would hang too low and it would not flow w/ the rest of the car. The low point on the front bumper right now is perfectly leveled w/ the low point on the side skirts, so that when I slam the car later, everything will be leveled and laid out. So yeah, I opted out on adding the front lip for that reason. If I had the time, I would've love to make a wald front lip work w/ the bumper because I love that dip in the center, but I am happy w/ the way it is right now.
View original BBCode
[QUOTE=chrispy;316457]Is it possible to fit a UCF30 Wald Executive front lip on that bumper? That would make it flow with the rest of the kit. Nice work![/QUOTE]

Anything is possible, but it would require some work to fit the front wald lip since the bumper was actually extended on the sides.  The problem though, would be that the lip would hang too low and it would not flow w/ the rest of the car.  The low point on the front bumper right now is perfectly leveled w/ the low point on the side skirts, so that when I slam the car later, everything will be leveled and laid out.  So yeah, I opted out on adding the front lip for that reason.  If I had the time, I would've love to make a wald front lip work w/ the bumper because I love that dip in the center, but I am happy w/ the way it is right now.
soo freakin dope!
View original BBCode
soo freakin dope!
love the look. simple and clean.
View original BBCode
love the look. simple and clean.
Did you buy the wald kit from the guy on clublexus? IF so did you get the front lip with it? I'd be interested.
View original BBCode
Did you buy the wald kit from the guy on clublexus? IF so did you get the front lip with it? I'd be interested.
I am diggin it, looks really clean.
Very nice outcome
View original BBCode
I am diggin it, looks really clean.
Very nice outcome
romeo291;316474 wrote:Anything is possible, but it would require some work to fit the front wald lip since the bumper was actually extended on the sides. The problem though, would be that the lip would hang too low and it would not flow w/ the rest of the car. The low point on the front bumper right now is perfectly leveled w/ the low point on the side skirts, so that when I slam the car later, everything will be leveled and laid out. So yeah, I opted out on adding the front lip for that reason. If I had the time, I would've love to make a wald front lip work w/ the bumper because I love that dip in the center, but I am happy w/ the way it is right now.
Maybe a modded JP Sports lip kit might flow well. The lip is small and subtle.
View original BBCode
[QUOTE=romeo291;316474]Anything is possible, but it would require some work to fit the front wald lip since the bumper was actually extended on the sides.  The problem though, would be that the lip would hang too low and it would not flow w/ the rest of the car.  The low point on the front bumper right now is perfectly leveled w/ the low point on the side skirts, so that when I slam the car later, everything will be leveled and laid out.  So yeah, I opted out on adding the front lip for that reason.  If I had the time, I would've love to make a wald front lip work w/ the bumper because I love that dip in the center, but I am happy w/ the way it is right now.[/QUOTE]

Maybe a modded JP Sports lip kit might flow well. The lip is small and subtle.
eg6ky;316513 wrote:Did you buy the wald kit from the guy on clublexus? IF so did you get the front lip with it? I'd be interested.
Yeah, I got the wald kit from him minus the front lip. You can probably still get a hold of him for it, but I don't know if he was willing to ship it.
a-holesniper;316568 wrote:Maybe a modded JP Sports lip kit might flow well. The lip is small and subtle.
Yeah, that or the Aimgain lip would look dope too. The only problem is, whatever lip I get, I'll have to hack it up and extend it, which kind of sucks when you pay so much money for a lip.
View original BBCode
[QUOTE=eg6ky;316513]Did you buy the wald kit from the guy on clublexus?  IF so did you get the front lip with it?  I'd be interested.[/QUOTE]

Yeah, I got the wald kit from him minus the front lip.  You can probably still get a hold of him for it, but I don't know if he was willing to ship it.

[QUOTE=a-holesniper;316568]Maybe a modded JP Sports lip kit might flow well. The lip is small and subtle.[/QUOTE]

Yeah, that or the Aimgain lip would look dope too.  The only problem is, whatever lip I get, I'll have to hack it up and extend it, which kind of sucks when you pay so much money for a lip.
Came out really good. Makes me want to try something similar.
View original BBCode
Came out really good. Makes me want to try something similar.
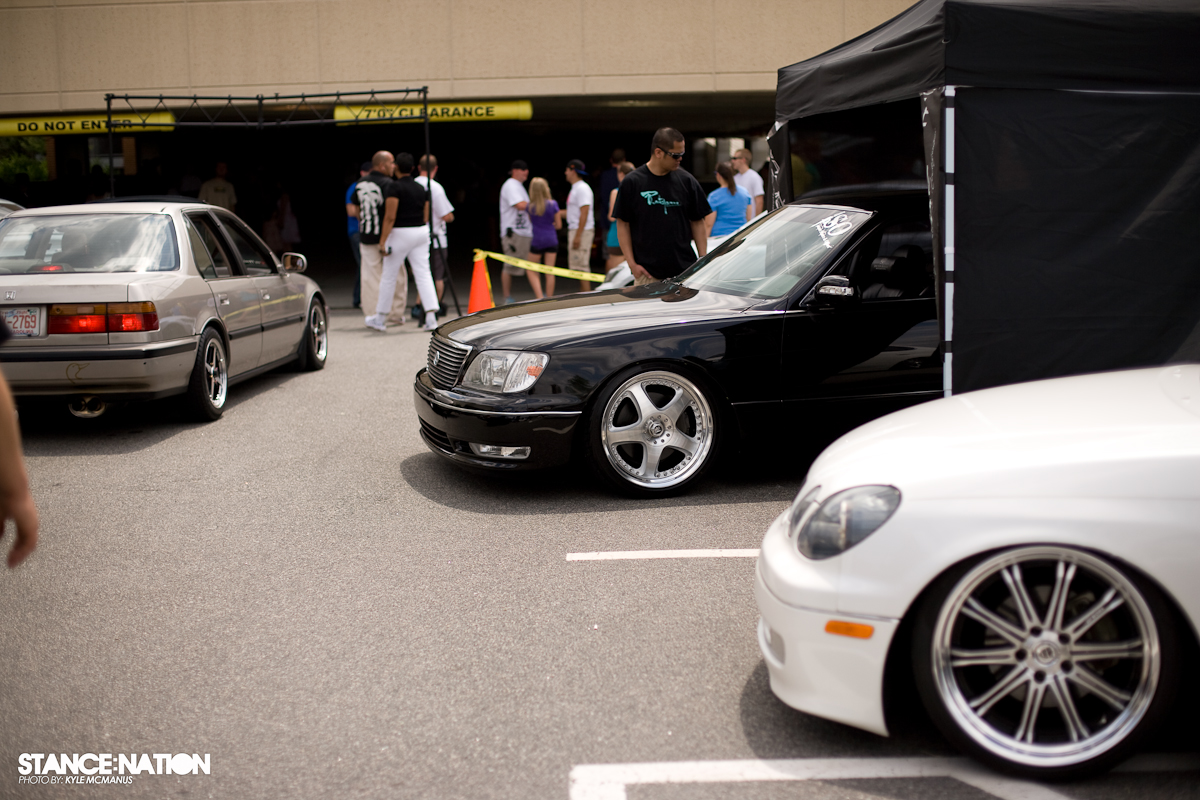
More pix to come.
View original BBCode
[IMG]http://farm5.static.flickr.com/4041/4572051139_f33acb0bc2_o.jpg[/IMG]

More pix to come.
View original BBCode
[IMG]http://farm5.static.flickr.com/4027/4569957320_32a875cc02_b.jpg[/IMG]

[IMG]http://farm5.static.flickr.com/4011/4573215027_33631afc67_b.jpg[/IMG]
damn, that last picture is SAUCY!!!
View original BBCode
damn, that last picture is SAUCY!!!
Whole car looks real nice. Bumper came out REALLY nice.
View original BBCode
Whole car looks real nice. Bumper came out REALLY nice.
romeo291;318180 wrote:
Smoothe move...and dayum, that blonde on the far right has good stance.
View original BBCode
[QUOTE=romeo291;318180][IMG]http://farm5.static.flickr.com/4027/4569957320_32a875cc02_b.jpg[/IMG][/QUOTE]
Smoothe move...and dayum, that blonde on the far right has good stance.
NELSON09;318270 wrote:Smoothe move...and dayum, that blonde on the far right has good stance.
Haha, indeed......Here's some close ups for ya dude :)


View original BBCode
[QUOTE=NELSON09;318270]Smoothe move...and dayum, that blonde on the far right has good stance.[/QUOTE]

Haha, indeed......Here's some close ups for ya dude :)

[IMG]http://farm5.static.flickr.com/4063/4569326283_29f497e125_b.jpg[/IMG]

[IMG]http://farm4.static.flickr.com/3449/4569956564_74d55c215f_b.jpg[/IMG]
bam, bahdda...thanks man!!!
View original BBCode
bam, bahdda...thanks man!!!
looks like a barbie doll... bumper came out clean yo
View original BBCode
looks like a barbie doll... bumper came out clean yo
DAMN! you making me want to fuck with my bumper this summer... DAMMIT... might have to crush shit
View original BBCode
DAMN! you making me want to fuck with my bumper this summer... DAMMIT... might have to crush shit
romeo291;318177 wrote:
More pix to come.
Anybody else think that this pic looks like a chopped top? LOL it looks pretty good....maybe a next mod for you? :biggthumpup:
View original BBCode
[QUOTE=romeo291;318177][IMG]http://farm5.static.flickr.com/4041/4572051139_f33acb0bc2_o.jpg[/IMG]

More pix to come.[/QUOTE]


Anybody else think that this pic looks like a chopped top?  LOL it looks pretty good....maybe a next mod for you? :biggthumpup:
Caoboy;318398 wrote:Anybody else think that this pic looks like a chopped top? LOL it looks pretty good....maybe a next mod for you? :biggthumpup:
Dude, my thoughts exactly when I saw that picture. Here's another pretty nice one that somebody took:
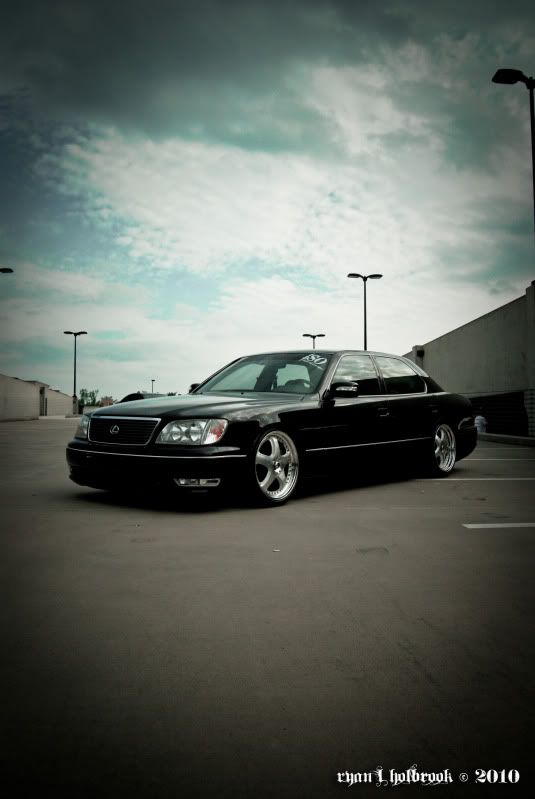
View original BBCode
[QUOTE=Caoboy;318398]Anybody else think that this pic looks like a chopped top?  LOL it looks pretty good....maybe a next mod for you? :biggthumpup:[/QUOTE]

Dude, my thoughts exactly when I saw that picture.  Here's another pretty nice one that somebody took:

[IMG]http://i840.photobucket.com/albums/zz322/ryanlholbrook/ISO/05-01-10/DSC_0100.jpg[/IMG]
official
View original BBCode
official
Looks nice. bring the girls out on the 15th
View original BBCode
Looks nice. bring the girls out on the 15th
^^ +1


-Smitty
View original BBCode
^^ +1
-Smitty
So subtle, so sexy. ahs;fa;sdkjf; SOOO JEALOUS!!! :D
View original BBCode
So subtle, so sexy. ahs;fa;sdkjf; SOOO JEALOUS!!! :D
damn!! thats hella nice!! MAD PROPS broski!!
View original BBCode
damn!! thats hella nice!! MAD PROPS broski!!
Caoboy;318398 wrote:Anybody else think that this pic looks like a chopped top? LOL it looks pretty good....maybe a next mod for you? :biggthumpup:
yah i thought it was a convertible for a sec too. the bumper looks oem, as if it came with the car. those fog lights also look sick, very nicely done :biggthumpup:
View original BBCode
[QUOTE=Caoboy;318398]Anybody else think that this pic looks like a chopped top?  LOL it looks pretty good....maybe a next mod for you? :biggthumpup:[/QUOTE]

yah i thought it was a convertible for a sec too. the bumper looks oem, as if it came with the car. those fog lights also look sick, very nicely done :biggthumpup:
wow, that is an awesome project...I think you forgot the step where you mold the bumper >.< haha
View original BBCode
wow, that is an awesome project...I think you forgot the step where you mold the bumper >.< haha
that looks really good!
looks like you got it out of the factory like that :biggthumpup:
View original BBCode
that looks really good!
looks like you got it out of the factory like that :biggthumpup: