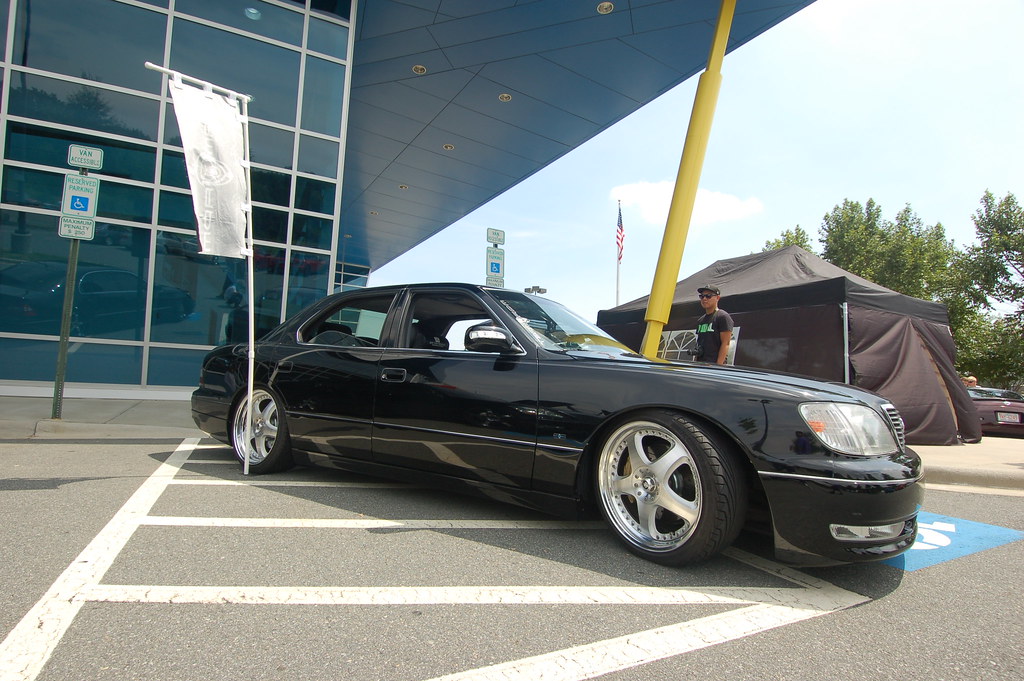
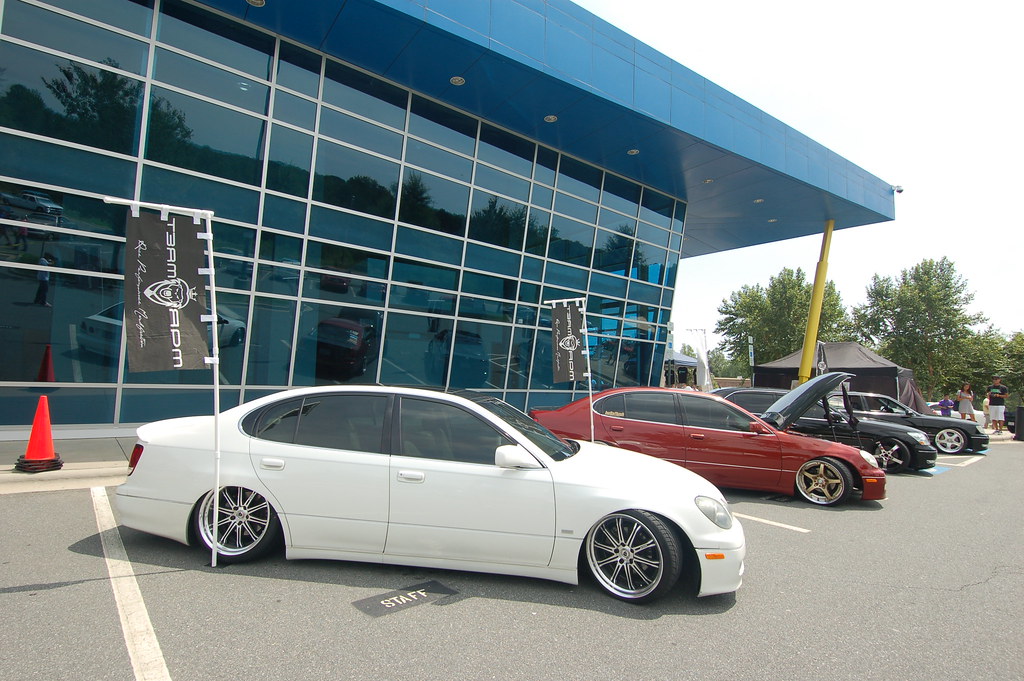
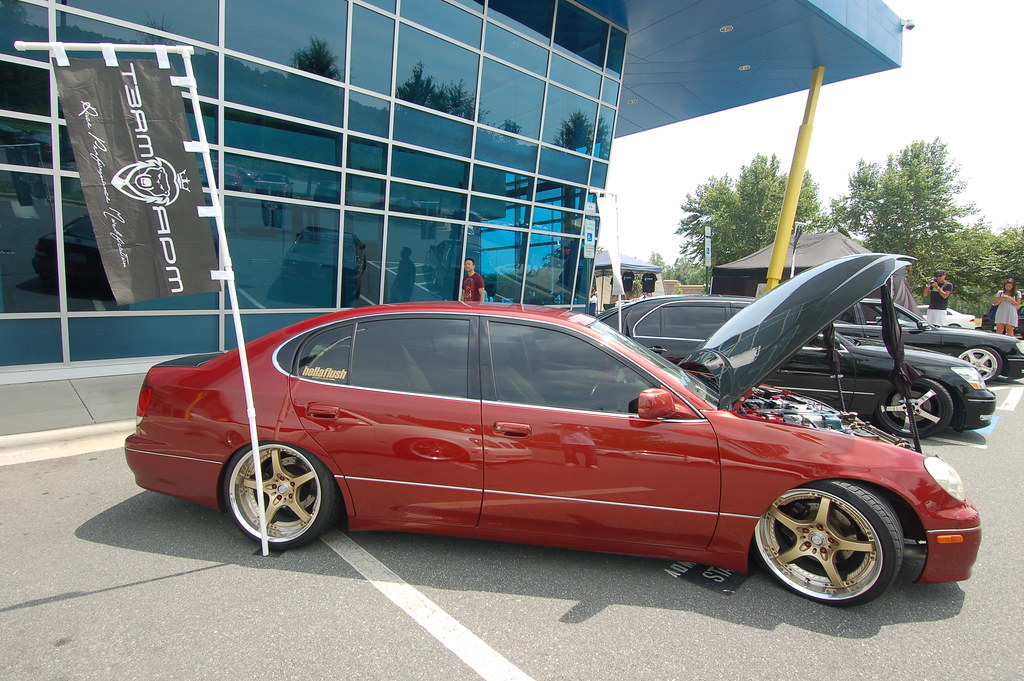
DIY: Making your own Nobori Flag & Pole
So, I am making Nobori flags with my team's logo for my upcoming ISO car meet and I thought I shared my process with you guys.
NOBORI:
1. Come up with your design in a very high resolution. Make sure whatever size you want, you design it in 300dpi. (This pretty much applies to any design you're making for any kind of printing use)
2. Get your design printed on fabric using a vendor such as www.spoonflower.com, it's cheap to get them printed, costs around $18/yard with a 48" printable area. When you upload your image on the site, you can create your own pattern off your design, so what I did was made my design really big so that when I looped the design to become a pattern, I'll have two designs. That way, I was able to make 2 flags off one yard. You can print as many colors as you like too, very legit stuff.
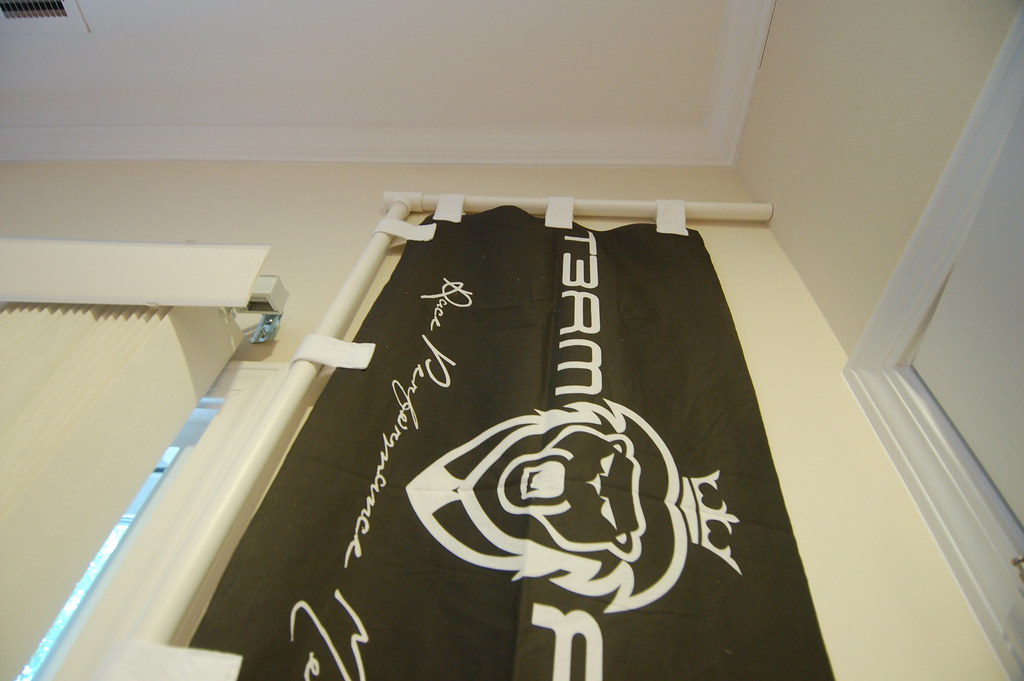
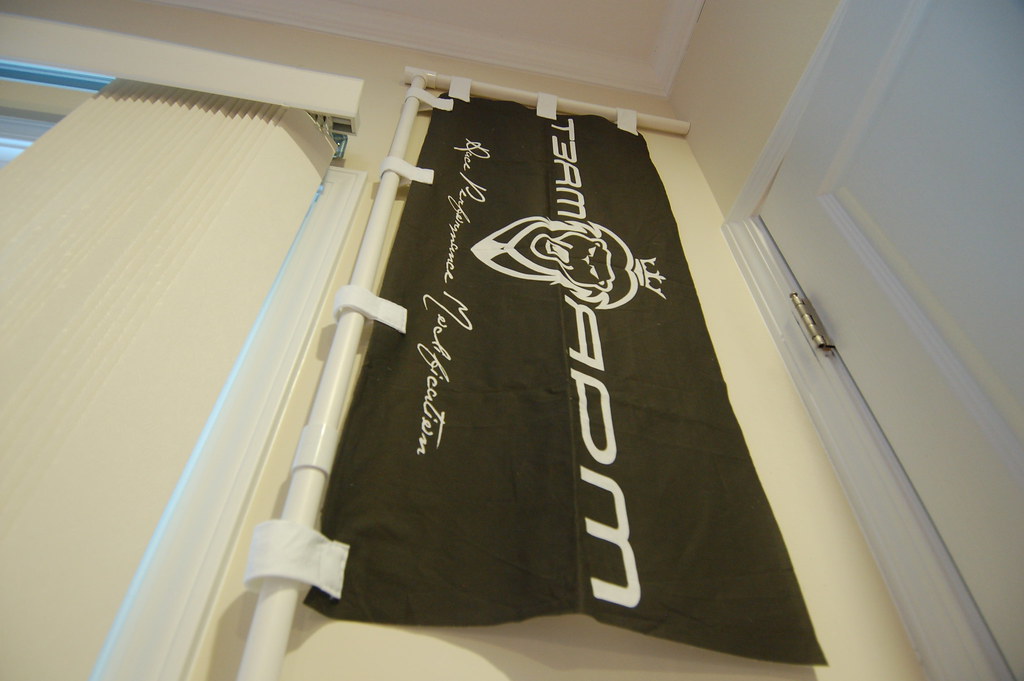
3. When you get your custom fabric in, cut it into the flag shape that you want. For mine's, I just had to cut it in half to make two flags. So each of my flags were 36" in height and 24" in width. Make sure you use a sharp pair of scissors. (I was using a semi dull one and it frayed the edges, so I had to redo my cutting)
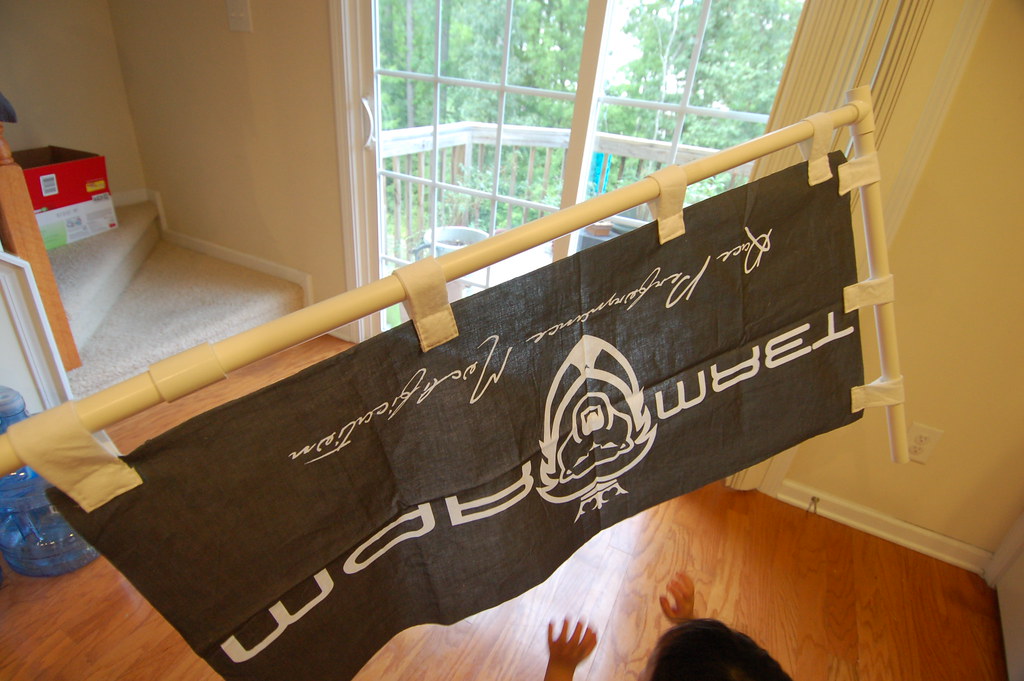
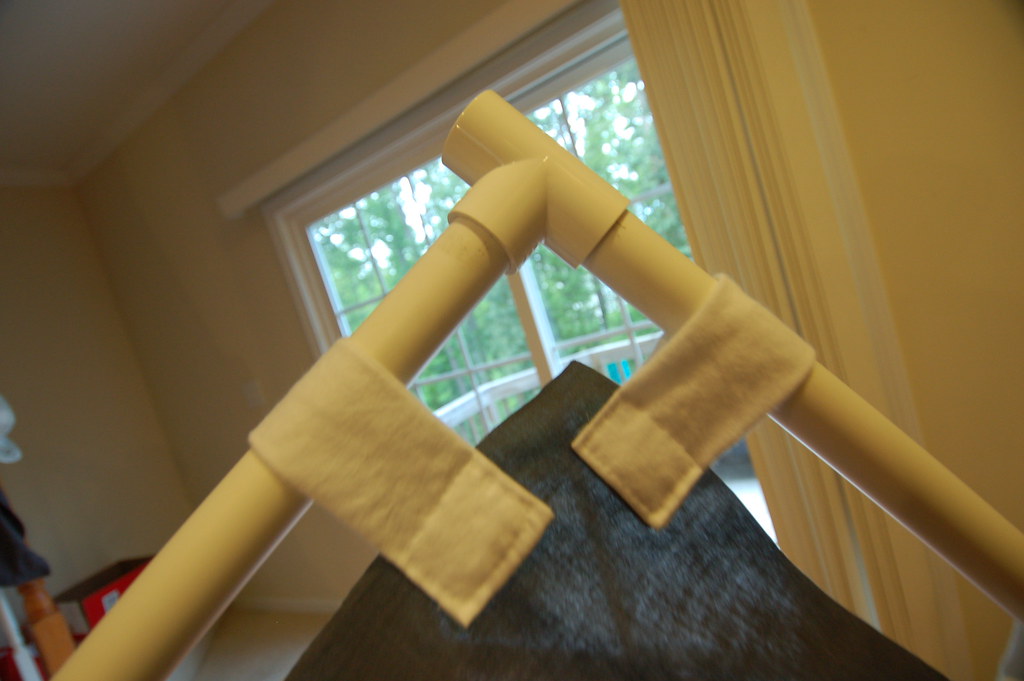
4. Buy a roll of fabric ribbons to make the loops for the flag to go around the flag pole. For my flag size, I made 3 loops equidistant from each other on the top edge, and 4 loops equidistant from each other on the side edge. (I actually didn't buy the fabric ribbons, I just cut up a pillowcase I had and made my own ribbons..........umm.........I would highly suggest you just get the fabric ribbon, your life would be much easier, haha).
5. Cut the ribbons up to make a loop and fold them over your flag (one side on the front, and the other side on the back). Then sew a box around the loop and the flag in the area that the loop meets with the flag. I didn't have a sewing machine, so I hand sew every loop, but it's mad time consuming. I don't even know how to sew, but it wasn't that bad. I would recommend using a sewing machine though, it'll be so much easier.
Pix:
 NOBORI POLE:
For the Nobori poles, you can make it any size you want but here are my specs to keep costs to about $5 to make a pole:
Materials:
*Two 3/4" x 10' pvc pipes
*Two 3/4" couplings
*One 3/4" Tee
*One 3/4" Cap
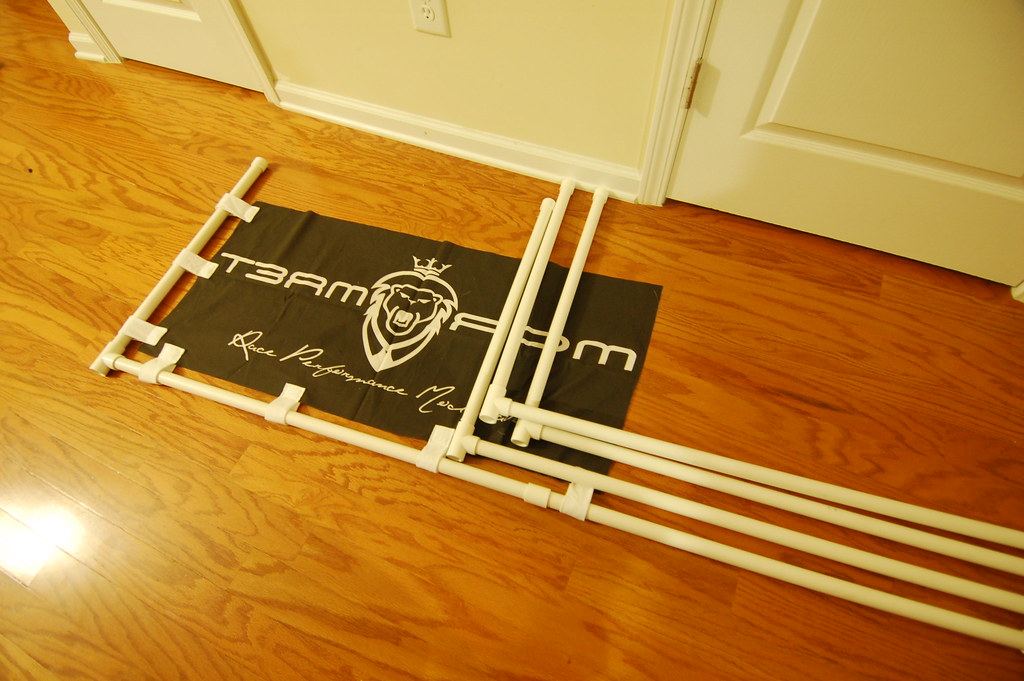
1. Take one of your pole and cut it in half.
2. Take the other pole and cut it so that you have one piece that is around 2.5' long
3. the 2.5' long pipe will connect to the tee and will go horizontally on top of the flag pole.
4. Put a cap at the other end of the 2.5' long pipe
5. Remove the text on the side of the pipes. I used a Razor Blade to scratch off the text, it comes off very easily.
6. Connect the rest of the pipes to the tee and use the couplings to extend them. The reason I cut the pieces and couple them together is so that they can break down and fit easily into my car.
Pix:
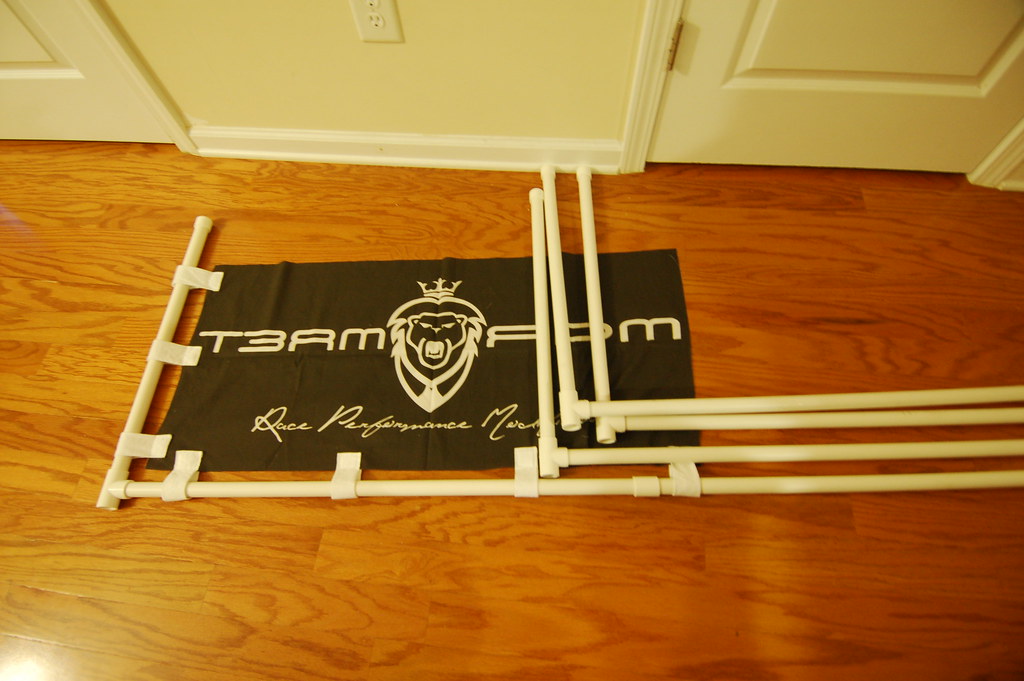
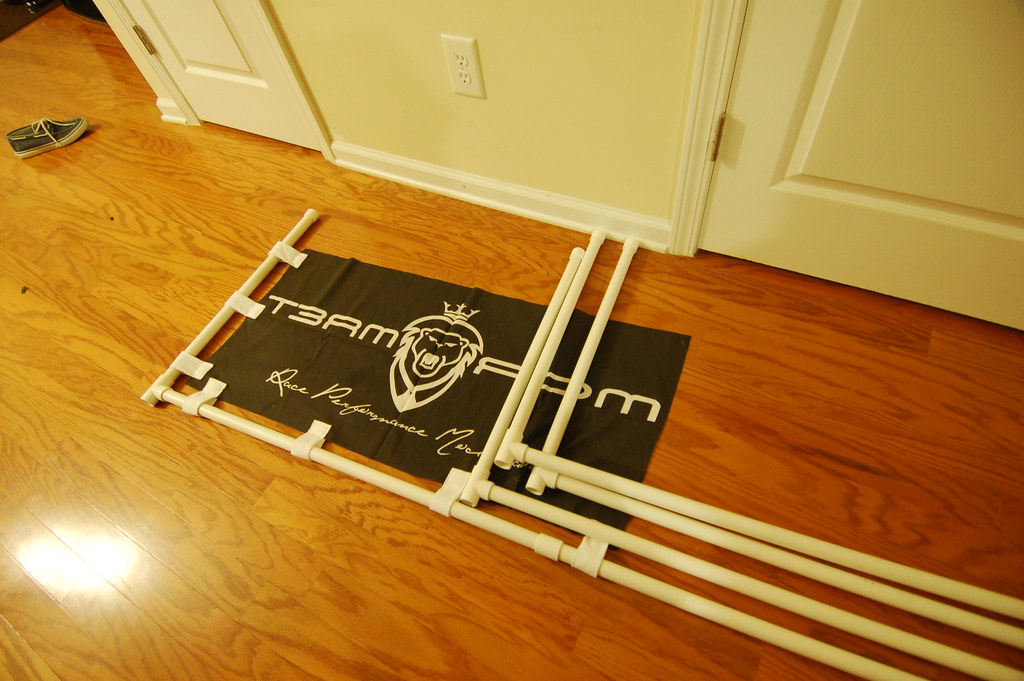
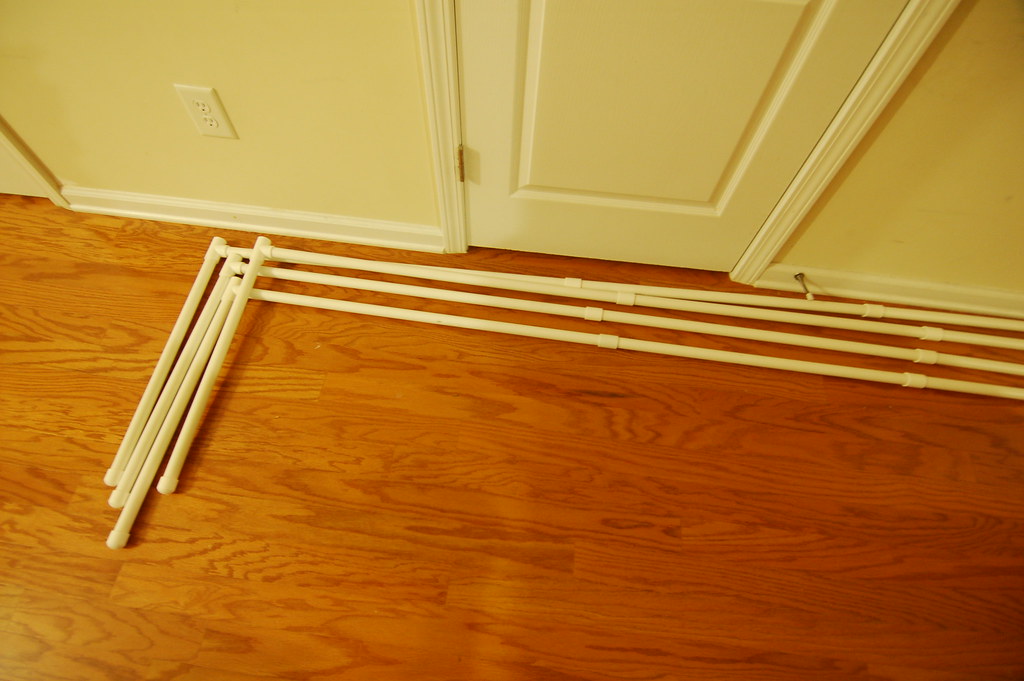
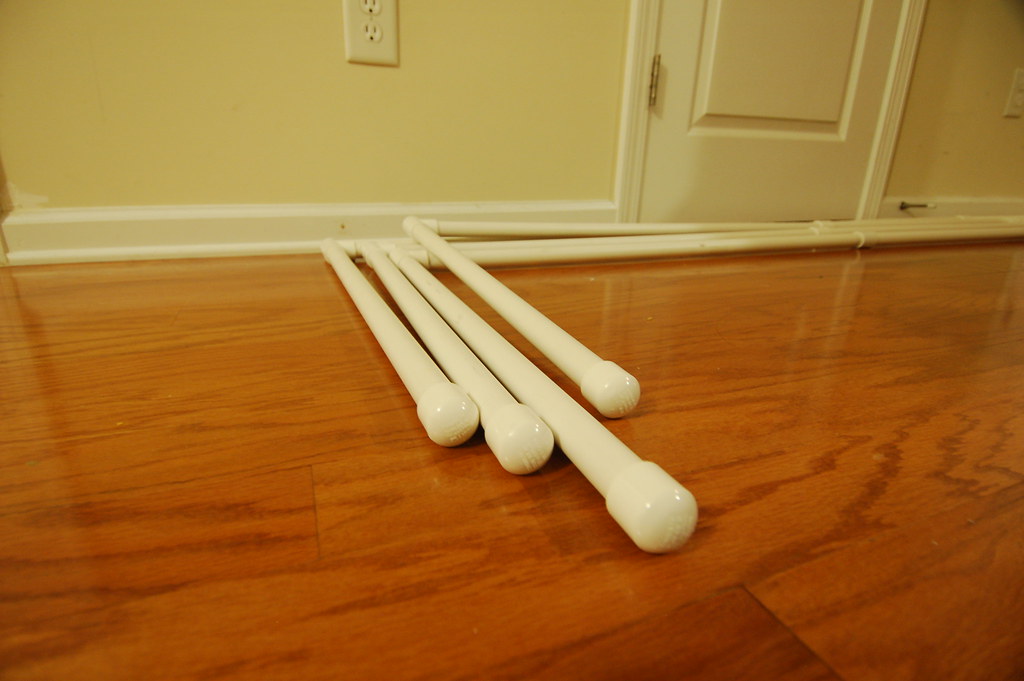

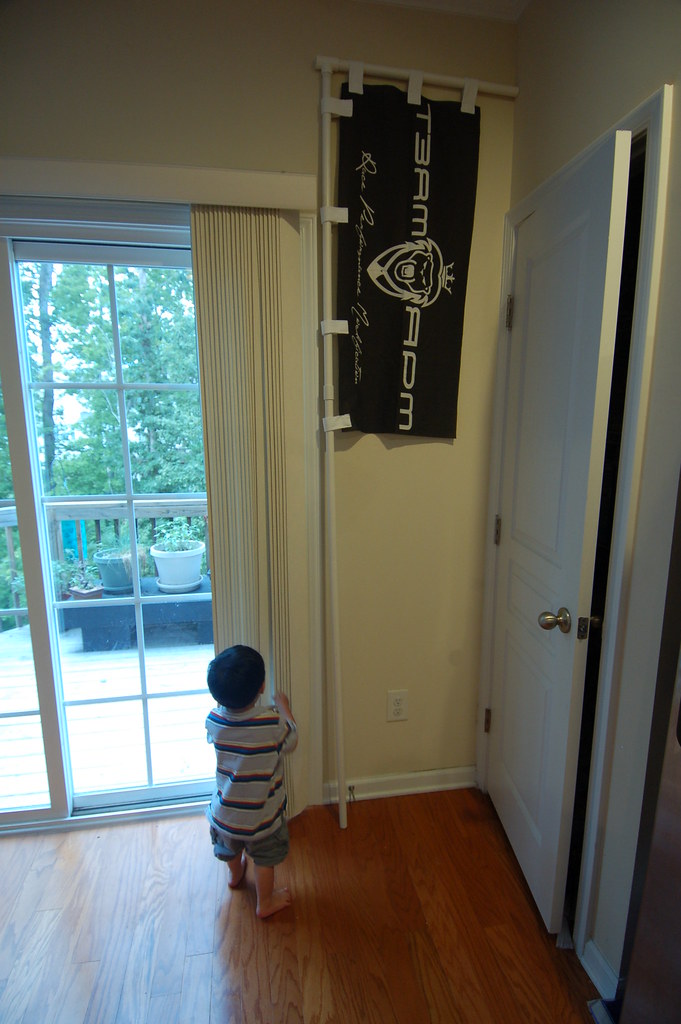

View original BBCode
So, I am making Nobori flags with my team's logo for my upcoming ISO car meet and I thought I shared my process with you guys.

[B]NOBORI[/B]:

1.  Come up with your design in a very high resolution.  Make sure whatever size you want, you design it in 300dpi.  (This pretty much applies to any design you're making for any kind of printing use)

2.  Get your design printed on fabric using a vendor such as [URL="http://www.spoonflower.com"]www.spoonflower.com[/URL], it's cheap to get them printed, costs around $18/yard with a 48" printable area.  When you upload your image on the site, you can create your own pattern off your design, so what I did was made my design really big so that when I looped the design to become a pattern, I'll have two designs.  That way, I was able to make 2 flags off one yard.  You can print as many colors as you like too, very legit stuff.

3.  When you get your custom fabric in, cut it into the flag shape that you want.  For mine's, I just had to cut it in half to make two flags.  So each of my flags were 36" in height and 24" in width.  Make sure you use a sharp pair of scissors.  (I was using a semi dull one and it frayed the edges, so I had to redo my cutting)

4.  Buy a roll of fabric ribbons to make the loops for the flag to go around the flag pole.  For my flag size, I made 3 loops equidistant from each other on the top edge, and 4 loops equidistant from each other on the side edge.  (I actually didn't buy the fabric ribbons, I just cut up a pillowcase I had and made my own ribbons..........umm.........I would highly suggest you just get the fabric ribbon, your life would be much easier, haha).

5.  Cut the ribbons up to make a loop and fold them over your flag (one side on the front, and the other side on the back).  Then sew a box around the loop and the flag in the area that the loop meets with the flag.  I didn't have a sewing machine, so I hand sew every loop, but it's mad time consuming.  I don't even know how to sew, but it wasn't that bad.  I would recommend using a sewing machine though, it'll be so much easier.

Pix:

[IMG]http://farm5.static.flickr.com/4114/4902973576_339ec9f6f7_b.jpg[/IMG]

[IMG]http://farm5.static.flickr.com/4115/4902386653_9c12f21c03_b.jpg[/IMG]

[IMG]http://farm5.static.flickr.com/4117/4902975014_d7824f0d06_b.jpg[/IMG]

[IMG]http://farm5.static.flickr.com/4143/4902393205_e6ef84f4ca_b.jpg[/IMG]

[B]NOBORI POLE:[/B]

For the Nobori poles, you can make it any size you want but here are my specs to keep costs to about $5 to make a pole:

Materials:

*Two 3/4" x 10' pvc pipes
*Two 3/4" couplings
*One 3/4" Tee
*One 3/4" Cap

1.  Take one of your pole and cut it in half.

2.  Take the other pole and cut it so that you have one piece that is around 2.5' long

3.  the 2.5' long pipe will connect to the tee and will go horizontally on top of the flag pole.

4.  Put a cap at the other end of the 2.5' long pipe

5.  Remove the text on the side of the pipes.  I used a Razor Blade to scratch off the text, it comes off very easily.

6.  Connect the rest of the pipes to the tee and use the couplings to extend them.  The reason I cut the pieces and couple them together is so that they can break down and fit easily into my car.

Pix:

[IMG]http://farm5.static.flickr.com/4118/4903545480_ff76be9e6b_b.jpg[/IMG]

[IMG]http://farm5.static.flickr.com/4097/4902958261_3925f22b4a_b.jpg[/IMG]

[IMG]http://farm5.static.flickr.com/4140/4902956147_88552a86cb_b.jpg[/IMG]

[IMG]http://farm5.static.flickr.com/4102/4903540160_c4a75d5436_b.jpg[/IMG]

[IMG]http://farm5.static.flickr.com/4075/4903537970_9be7fb3530_b.jpg[/IMG]

[IMG]http://farm5.static.flickr.com/4095/4902976800_1dd0d082e0_b.jpg[/IMG]

[IMG]http://farm5.static.flickr.com/4093/4902970334_36173de878_b.jpg[/IMG]

[IMG]http://farm5.static.flickr.com/4136/4902383269_c955c4bf2f_b.jpg[/IMG]
Nice, good writeup. Looks like thicker material would be nicer on sunny days, do they have that option at the place you got yours done? The design came out really nice.
View original BBCode
Nice, good writeup. Looks like thicker material would be nicer on sunny days, do they have that option at the place you got yours done? The design came out really nice.
firelizard;338691 wrote:Nice, good writeup. Looks like thicker material would be nicer on sunny days, do they have that option at the place you got yours done? The design came out really nice.
Yeah, the thicker material costs more, but yes they do. Originally, I was gonna sew the two sides together, but I wanted to have more flags for now and sewing them together would be wayyy too much work w/out a sewing machine.
View original BBCode
[QUOTE=firelizard;338691]Nice, good writeup. Looks like thicker material would be nicer on sunny days, do they have that option at the place you got yours done? The design came out really nice.[/QUOTE]

Yeah, the thicker material costs more, but yes they do.  Originally, I was gonna sew the two sides together, but I wanted to have more flags for now and sewing them together would be wayyy too much work w/out a sewing machine.
I run the art and sublimation departments at Simpson Race Products, we do heat transfers onto polyester material for crew shirts and we also print up banners when we're slow. Just a few things I'd point out, it doesn't need to be 300 dpi when printing on fabric (for printing on paper, yes, 300 dpi every time), 150-200 is fine and will still give very clear resolution, trust me, Nascar, Indy and NHRA teams are PICKY and we've never had complaints. Second thing, something like your design is best in Illustrator so scalability is not an issue, only issues are when using PhotoShop images. Otherwise, nice write up, the flags look great, I can't believe you hand sewed them though haha.
View original BBCode
I run the art and sublimation departments at Simpson Race Products, we do heat transfers onto polyester material for crew shirts and we also print up banners when we're slow. Just a few things I'd point out, it doesn't need to be 300 dpi when printing on fabric (for printing on paper, yes, 300 dpi every time), 150-200 is fine and will still give very clear resolution, trust me, Nascar, Indy and NHRA teams are PICKY and we've never had complaints. Second thing, something like your design is best in Illustrator so scalability is not an issue, only issues are when using PhotoShop images. Otherwise, nice write up, the flags look great, I can't believe you hand sewed them though haha.
Any particular reason you used tee's instead of 90' elbows?
View original BBCode
Any particular reason you used tee's instead of 90' elbows?
Damicci;338710 wrote:Any particular reason you used tee's instead of 90' elbows?
Yeah, in the case I need to add something on the other side for stability. You can definitely use 90° elbows though. I actually think the Tees looks better as well, just imo.
View original BBCode
[QUOTE=Damicci;338710]Any particular reason you used tee's instead of 90' elbows?[/QUOTE]

Yeah, in the case I need to add something on the other side for stability.  You can definitely use 90° elbows though.  I actually think the Tees looks better as well, just imo.
F.L.S.;338706 wrote:I run the art and sublimation departments at Simpson Race Products, we do heat transfers onto polyester material for crew shirts and we also print up banners when we're slow. Just a few things I'd point out, it doesn't need to be 300 dpi when printing on fabric (for printing on paper, yes, 300 dpi every time), 150-200 is fine and will still give very clear resolution, trust me, Nascar, Indy and NHRA teams are PICKY and we've never had complaints. Second thing, something like your design is best in Illustrator so scalability is not an issue, only issues are when using PhotoShop images. Otherwise, nice write up, the flags look great, I can't believe you hand sewed them though haha.
Thanx for the input man! I guess for me, if you're gonna design something, mind as well do it in 300dpi anyways. But yeah, in illustrator and even in photoshop, you don't really need to worry about that because it can scale up w/out losing quality.
View original BBCode
[QUOTE=F.L.S.;338706]I run the art and sublimation departments at Simpson Race Products, we do heat transfers onto polyester material for crew shirts and we also print up banners when we're slow. Just a few things I'd point out, it doesn't need to be 300 dpi when printing on fabric (for printing on paper, yes, 300 dpi every time), 150-200 is fine and will still give very clear resolution, trust me, Nascar, Indy and NHRA teams are PICKY and we've never had complaints. Second thing, something like your design is best in Illustrator so scalability is not an issue, only issues are when using PhotoShop images.  Otherwise, nice write up, the flags look great, I can't believe you hand sewed them though haha.[/QUOTE]

Thanx for the input man!  I guess for me, if you're gonna design something, mind as well do it in 300dpi anyways.  But yeah, in illustrator and even in photoshop, you don't really need to worry about that because it can scale up w/out losing quality.
Vector is the best for as much as possible, and especially easy for solid colours. Sometimes more work to do the original but it's soooooo much less work every other time you need to use it :biggthumpup:
View original BBCode
Vector is the best for as much as possible, and especially easy for solid colours. Sometimes more work to do the original but it's soooooo much less work every other time you need to use it :biggthumpup:
We sell the Japanese Nobori Flag Poles and have plenty in stock if anyone interested.
View original BBCode
We sell the Japanese Nobori Flag Poles and have plenty in stock if anyone interested.
jdmpalace;338783 wrote:We sell the Japanese Nobori Flag Poles and have plenty in stock if anyone interested.
Man, you should update this kind of stuff on your website. I was looking everywhere for a place that sells it, I ended up just making it myself. Either way, it only cost me $5 to make a pole, but still.......time = money, haha.
View original BBCode
[QUOTE=jdmpalace;338783]We sell the Japanese Nobori Flag Poles and have plenty in stock if anyone interested.[/QUOTE]

Man, you should update this kind of stuff on your website.  I was looking everywhere for a place that sells it, I ended up just making it myself.  Either way, it only cost me $5 to make a pole, but still.......time = money, haha.
romeo291;338795 wrote:Man, you should update this kind of stuff on your website. I was looking everywhere for a place that sells it, I ended up just making it myself. Either way, it only cost me $5 to make a pole, but still.......time = money, haha.
I know, it's in the work !! But yeah we will offer them as package for clubs with flags and poles and stands if needed.
View original BBCode
[QUOTE=romeo291;338795]Man, you should update this kind of stuff on your website. I was looking everywhere for a place that sells it, I ended up just making it myself. Either way, it only cost me $5 to make a pole, but still.......time = money, haha.[/QUOTE]


I know, it's in the work !! But yeah we will offer them as package for clubs with flags and poles and stands if needed.
Nice DIY but I would personally have got the poles painted black or a different color. You will have to sand down the poles a bit to get the primer to stick before laying a coat of paint. Another $12 for primer, paint and sand paper and you should be good to go lol
View original BBCode
Nice DIY but I would personally have got the poles painted black or a different color. You will have to sand down the poles a bit to get the primer to stick before laying a coat of paint. Another $12 for primer, paint and sand paper and you should be good to go lol
Pretty sure you can get pipes like that in black anyways.
View original BBCode
Pretty sure you can get pipes like that in black anyways.
widebody_Q;338856 wrote:Nice DIY but I would personally have got the poles painted black or a different color. You will have to sand down the poles a bit to get the primer to stick before laying a coat of paint. Another $12 for primer, paint and sand paper and you should be good to go lol
Yeah, you can get those pipes in black, but my preference was white though. I like the way white looks better, just my imo.
View original BBCode
[QUOTE=widebody_Q;338856]Nice DIY but I would personally have got the poles painted black or a different color.  You will have to sand down the poles a bit to get the primer to stick before laying a coat of paint.  Another $12 for primer, paint and sand paper and you should be good to go lol[/QUOTE]

Yeah, you can get those pipes in black, but my preference was white though.  I like the way white looks better, just my imo.
I vote to vinyl wrap poles and make them look like bamboo
View original BBCode
I vote to vinyl wrap poles and make them look like bamboo
Yes, JDMPalace has lot of these nobori poles in stock.
View original BBCode
Yes, JDMPalace has lot of these nobori poles in stock.
pics of jdmpalace's flag poles?
View original BBCode
pics of jdmpalace's flag poles?
I need to make a pole for mine! thanks for an awesome inspiration!

View original BBCode
I need to make a pole for mine! thanks for an awesome inspiration!
[IMG]http://img.photobucket.com/albums/v223/DrifterXL01/SA400167uras.jpg[/IMG]
The white PVC looks nice and clean. Black would make it look more like PVC IMHO.
View original BBCode
The white PVC looks nice and clean. Black would make it look more like PVC IMHO.
Cool idea...needs 90 degree bend instead of t fitting. now...what's for the base?
View original BBCode
Cool idea...needs 90 degree bend instead of t fitting. now...what's for the base?
View original BBCode
[QUOTE=speedaddict;339760]Cool idea...needs 90 degree bend instead of t fitting.  now...what's for the base?[/QUOTE]

For the base, I welded some metal rods onto a flat metal sheet that the pole goes over.  I got the idea from seeing cars in Japan do that, but they usually have it where the pole goes into a tube.........which doesn't look clean imo.  It looks better if the width is consistent the whole way through.  Here's a picture of what it looks like at my car event:

[IMG]http://farm5.static.flickr.com/4142/4923411084_15eb41ea39_b.jpg[/IMG]

[IMG]http://farm5.static.flickr.com/4102/4923405446_663173b5f2_b.jpg[/IMG]

[IMG]http://farm5.static.flickr.com/4082/4922814627_a6aea34b11_b.jpg[/IMG]
Those are sweet. Nice write definately gives me inspiration. I was thinking of making some of these. I was also thinking of making some mini ones to run on the small window poles.
View original BBCode
Those are sweet. Nice write definately gives me inspiration. I was thinking of making some of these. I was also thinking of making some mini ones to run on the small window poles.