Air Lift Front strut Rebuild- Fixing the Leak
Hey guys,
Here is My crack at repairing the infamous leaky ES front air strut for a Scion xB. This may have similar application to other cars as well, or my just provide a good basis for your similar air strut. This is a detailed DIY you can use to guide you through the air bag replacement, as well as a tutorial to show eveyone why these truts end up leaking.
Tools I used:
-Adjustable wrench (or 3/4" as Air Lift recommends)
-1/4" Aleen wrench (or some mm equivalent ~6mm)
-Flat head screwdriver (small and large)
-center punch
-Hammer (I used 2, one solid ball peene and one rubber tipped)
-Non-petroleum based lube
-Multipurpose grease
Gather your parts:
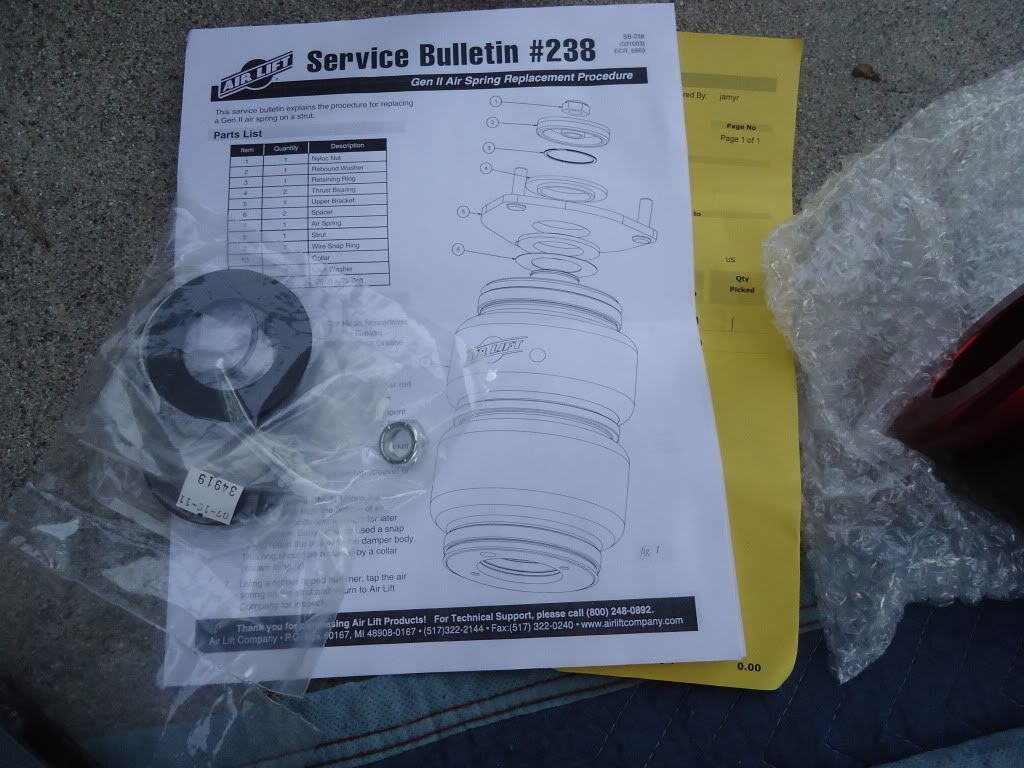
Rebuild kit and instructions
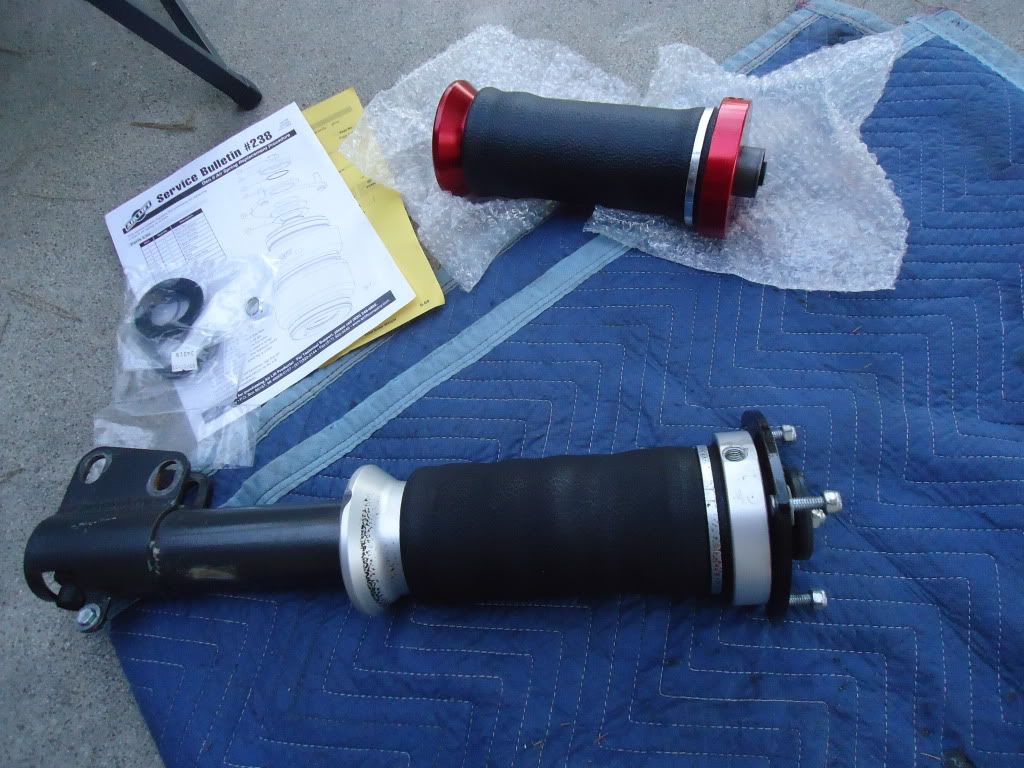
Old blown strut and replacement bag
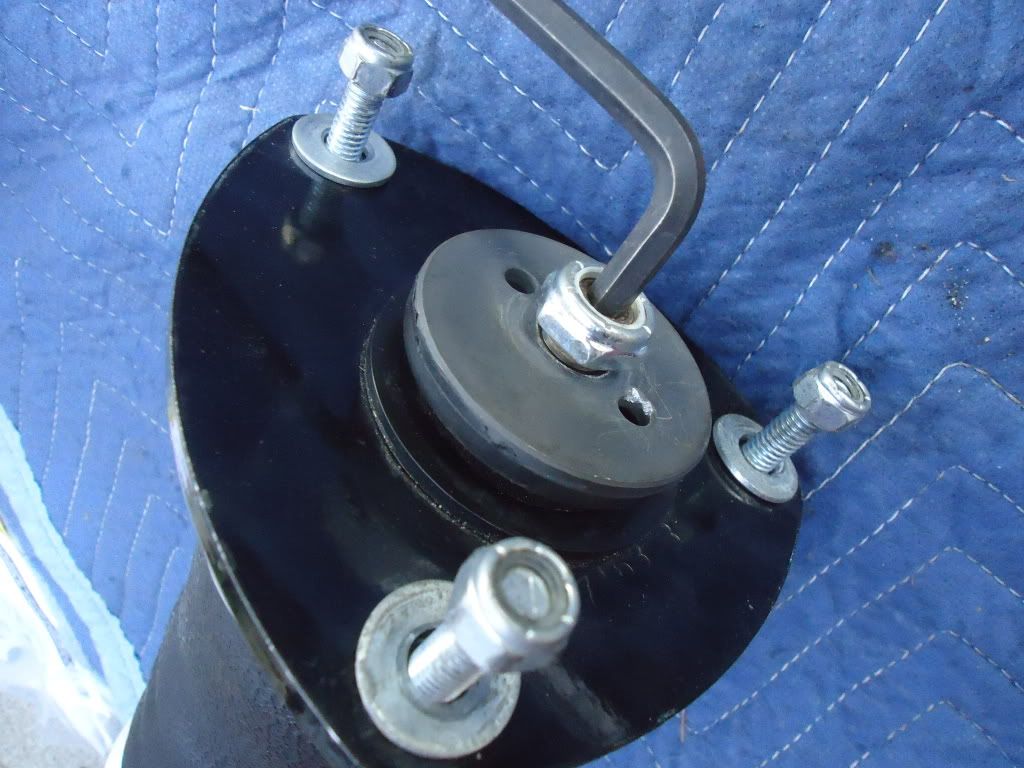
Hold shaft still with allen wrench and loosen nylon lock nut with adjustable wrench
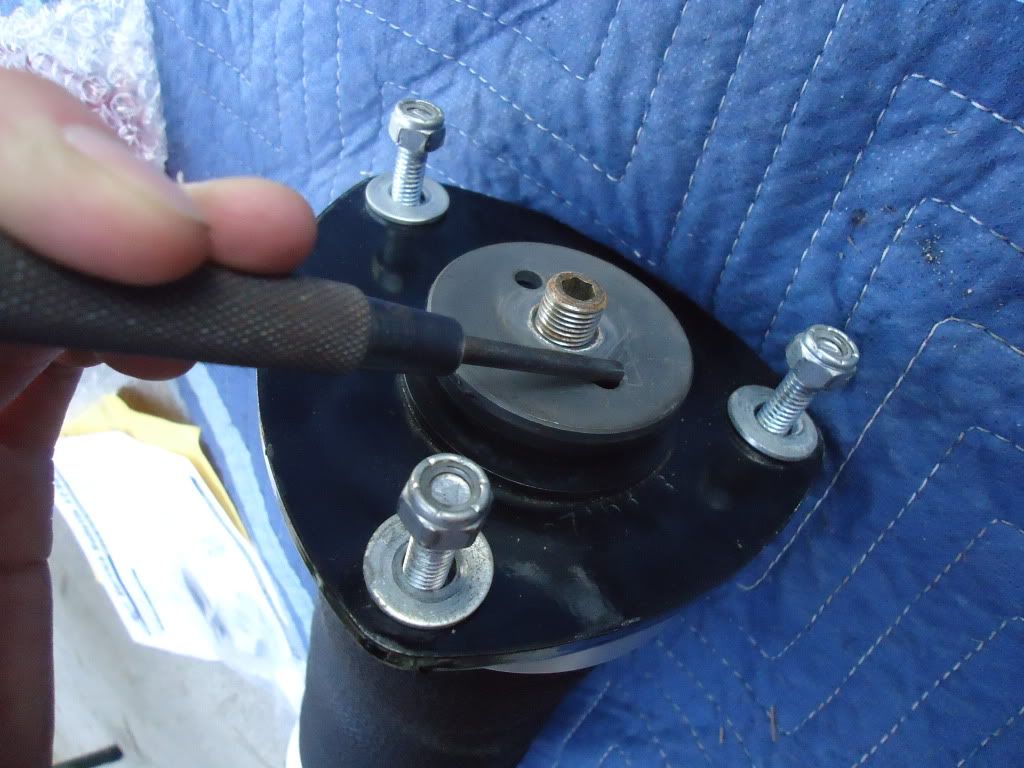
The next piece is a rebound washer and has 3 holes in the top. One of the holes is threaded onto the shaft, the other two holes are for loosening/tightening. I used a small center punch and a ball peen hammer to break the threads free.
Remove rebound washer. Should now look like this:
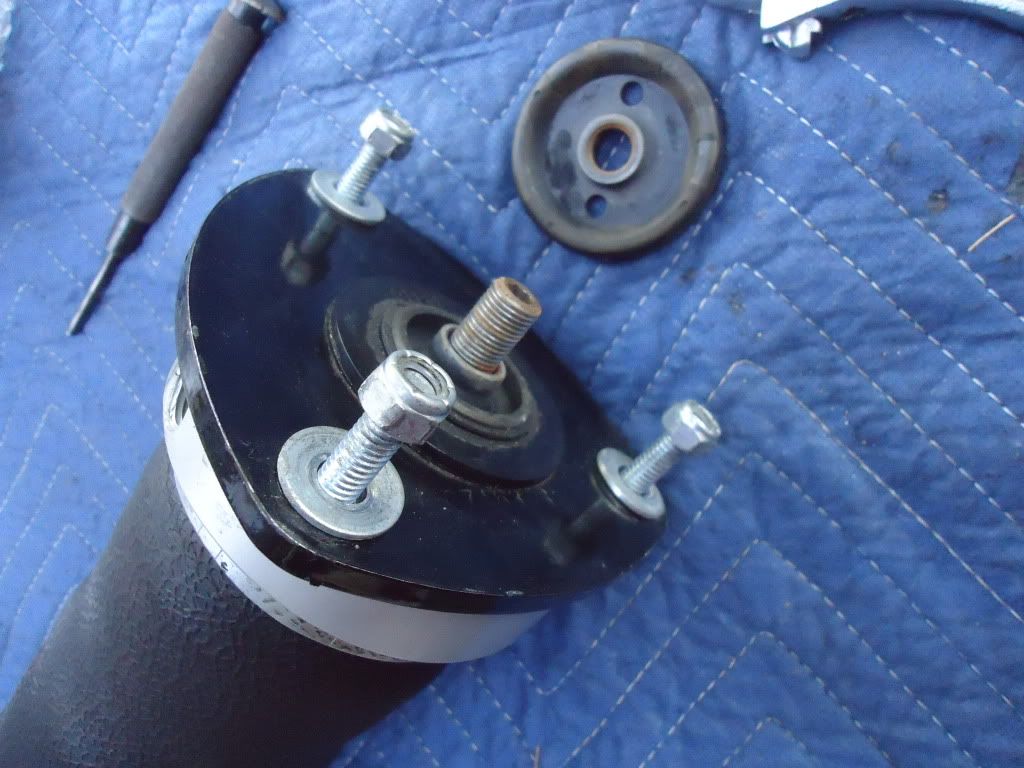
You have successfully exposed the retaining ring. This can be removed by wedging a small screwdriver behind the edge and prying parallel to the top hat(away from the shaft)


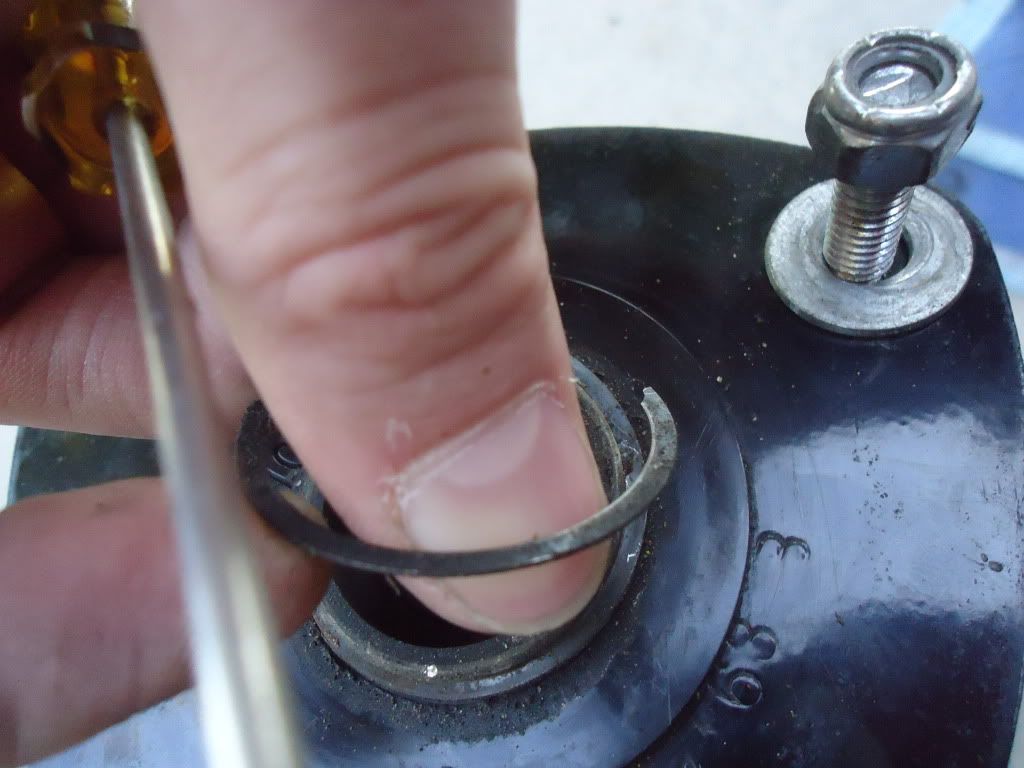
Trace the groove and remove the ring all the way around the recessed portion of the groove
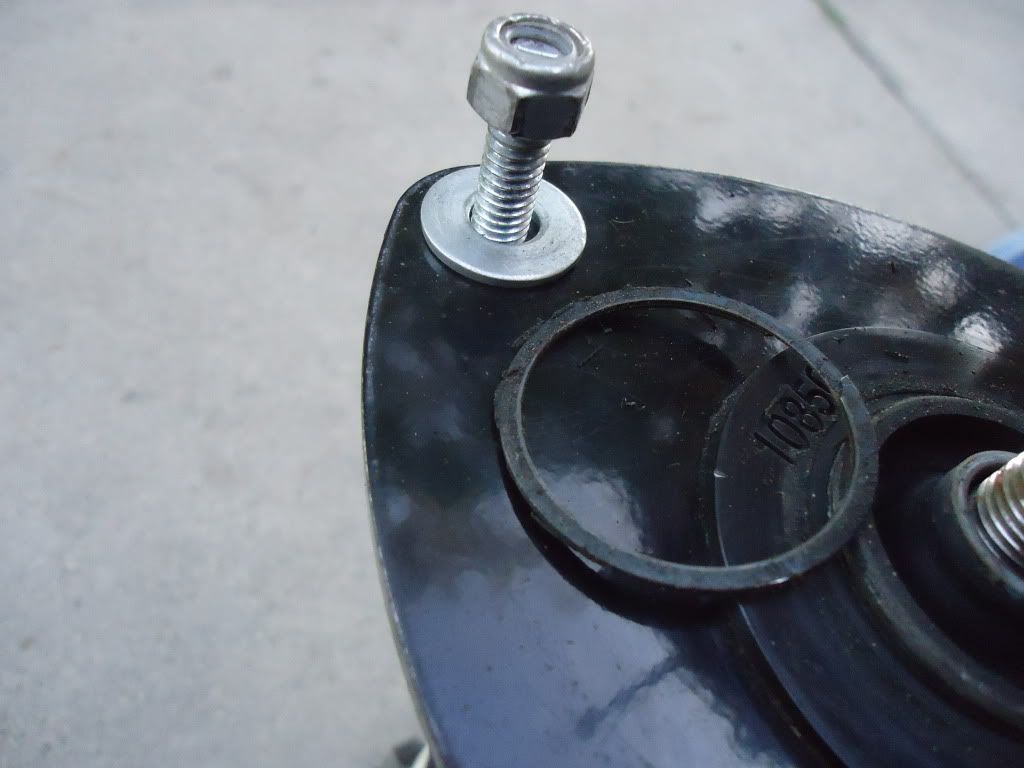
Lightly pry up on the top thrust bearing:
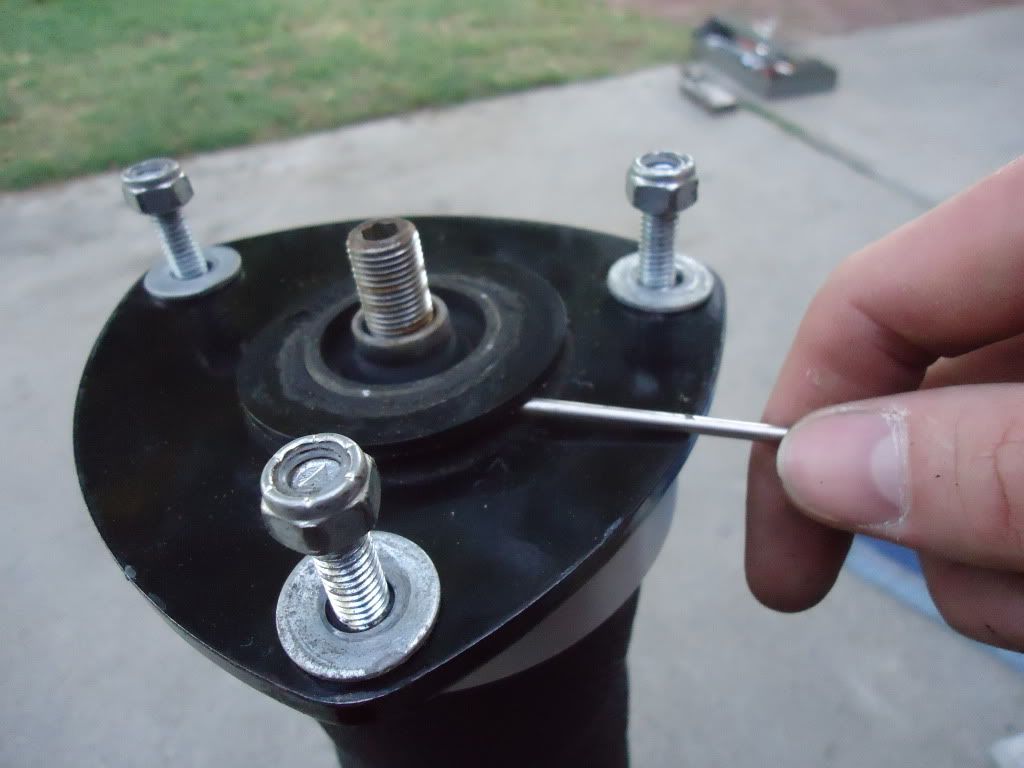
Completely remove:
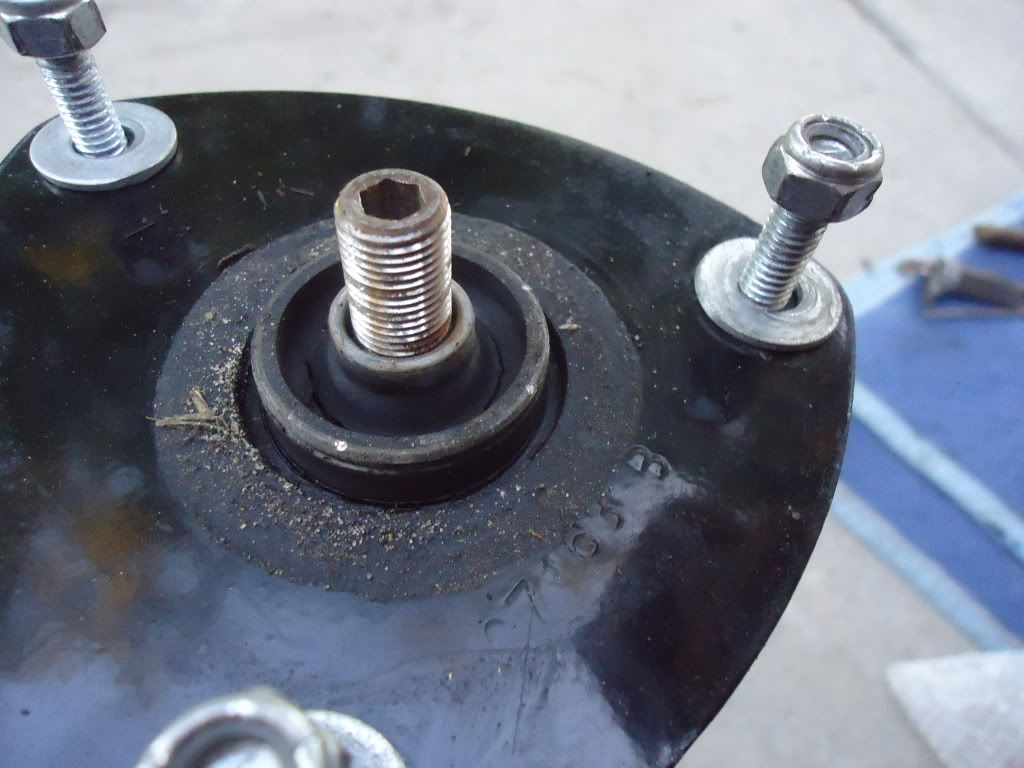
Remove top hat to expose bottom thrust bearing:
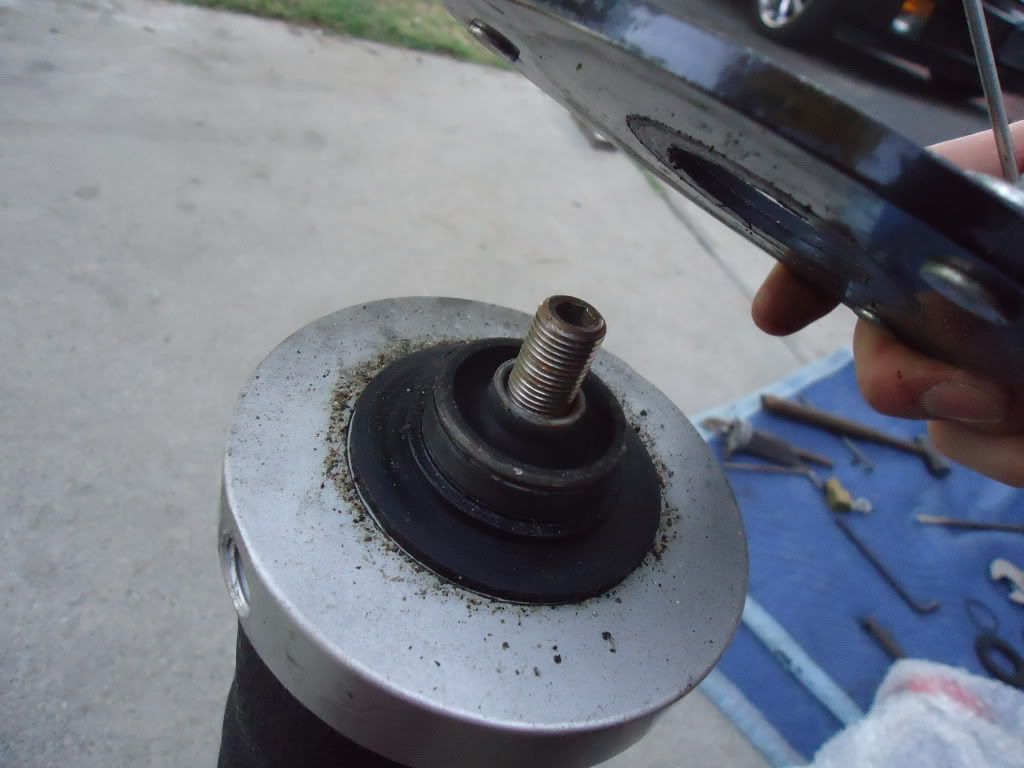
Pry up and remove that as well:

Roll call.#1 So far you should have these items removed in this order (from right to left)

View original BBCode
Hey guys,
Here is My crack at repairing the infamous leaky ES front air strut for a Scion xB.  This may have similar application to other cars as well, or my just provide a good basis for your similar air strut.  This is a detailed DIY you can use to guide you through the air bag replacement, as well as a tutorial to show eveyone why these truts end up leaking.

Tools I used:
-Adjustable wrench (or 3/4" as Air Lift recommends)
-1/4" Aleen wrench (or some mm equivalent ~6mm)
-Flat head screwdriver (small and large)
-center punch
-Hammer (I used 2, one solid ball peene and one rubber tipped)
-Non-petroleum based lube
-Multipurpose grease

Gather your parts:
Rebuild kit and instructions
[IMG]http://i246.photobucket.com/albums/gg111/szell001/ES%20strut%20repair/DSC01287.jpg[/IMG]
Old blown strut and replacement bag
[IMG]http://i246.photobucket.com/albums/gg111/szell001/ES%20strut%20repair/DSC01286.jpg[/IMG]
Hold shaft still with allen wrench and loosen nylon lock nut with adjustable wrench
[IMG]http://i246.photobucket.com/albums/gg111/szell001/ES%20strut%20repair/DSC01288.jpg[/IMG]
The next piece is a rebound washer and has 3 holes in the top.  One of the holes is threaded onto the shaft, the other two holes are for loosening/tightening.  I used a small center punch and a ball peen hammer to break the threads free.
[IMG]http://i246.photobucket.com/albums/gg111/szell001/ES%20strut%20repair/DSC01289.jpg[/IMG]
Remove rebound washer.  Should now look like this:
[IMG]http://i246.photobucket.com/albums/gg111/szell001/ES%20strut%20repair/DSC01290.jpg[/IMG]
You have successfully exposed the retaining ring.  This can be removed by wedging a small screwdriver behind the edge and prying parallel to the top hat(away from the shaft)
[IMG]http://i246.photobucket.com/albums/gg111/szell001/ES%20strut%20repair/DSC01292.jpg[/IMG]
[IMG]http://i246.photobucket.com/albums/gg111/szell001/ES%20strut%20repair/DSC01293.jpg[/IMG]
[IMG]http://i246.photobucket.com/albums/gg111/szell001/ES%20strut%20repair/DSC01294.jpg[/IMG]
[IMG]http://i246.photobucket.com/albums/gg111/szell001/ES%20strut%20repair/DSC01295.jpg[/IMG]
Trace the groove and remove the ring all the way around the recessed portion of the groove
[IMG]http://i246.photobucket.com/albums/gg111/szell001/ES%20strut%20repair/DSC01296.jpg[/IMG]
Lightly pry up on the top thrust bearing:
[IMG]http://i246.photobucket.com/albums/gg111/szell001/ES%20strut%20repair/DSC01297.jpg[/IMG]
Completely remove:
[IMG]http://i246.photobucket.com/albums/gg111/szell001/ES%20strut%20repair/DSC01298.jpg[/IMG]
Remove top hat to expose bottom thrust bearing:
[IMG]http://i246.photobucket.com/albums/gg111/szell001/ES%20strut%20repair/DSC01299.jpg[/IMG]
Pry up and remove that as well:
[IMG]http://i246.photobucket.com/albums/gg111/szell001/ES%20strut%20repair/DSC01300.jpg[/IMG]

Roll call.#1  So far you should have these items removed in this order (from right to left)
[IMG]http://i246.photobucket.com/albums/gg111/szell001/ES%20strut%20repair/DSC01301.jpg[/IMG]
You should at this point be able to move the top of the bag freely up off of the strut shaft. You can also examine the damaged portion of the bag. As you can see, the crack runs along the support part of the bag where it meets the shaft...no bueno.

Rest the bag on a soft surface(upside down) and grab the rubber tipped hammer. Strike downward on the bag's bottom hat, parallel to the strut body.

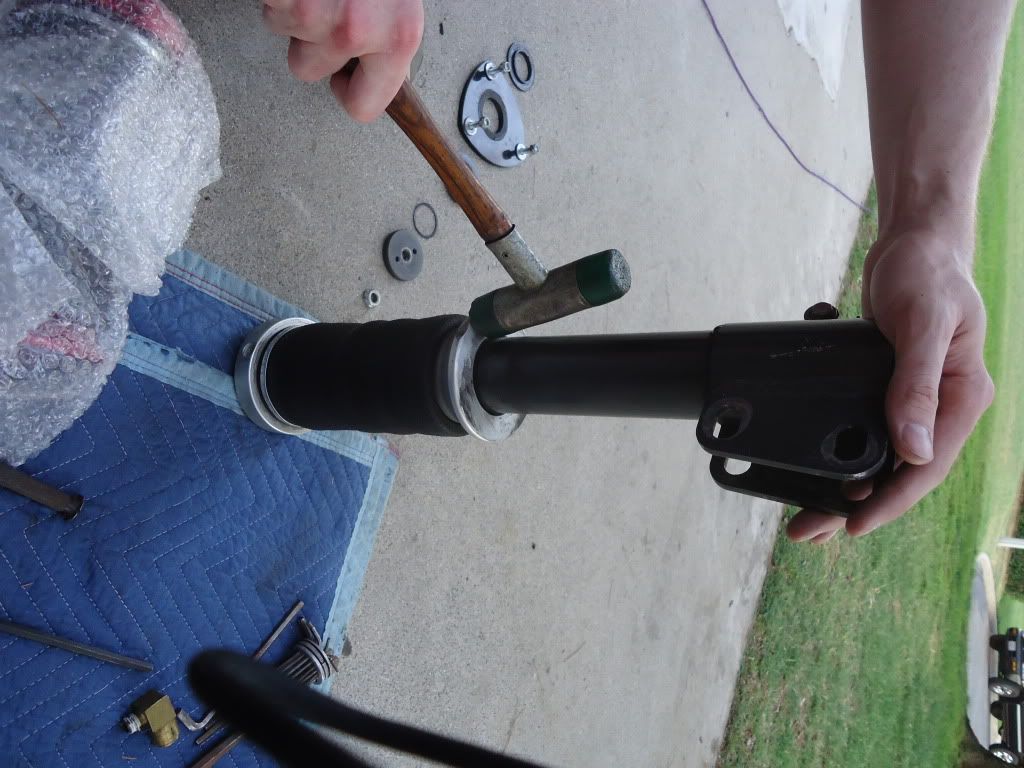
The bag should dislodge from the strut body and expose the wire snap ring:
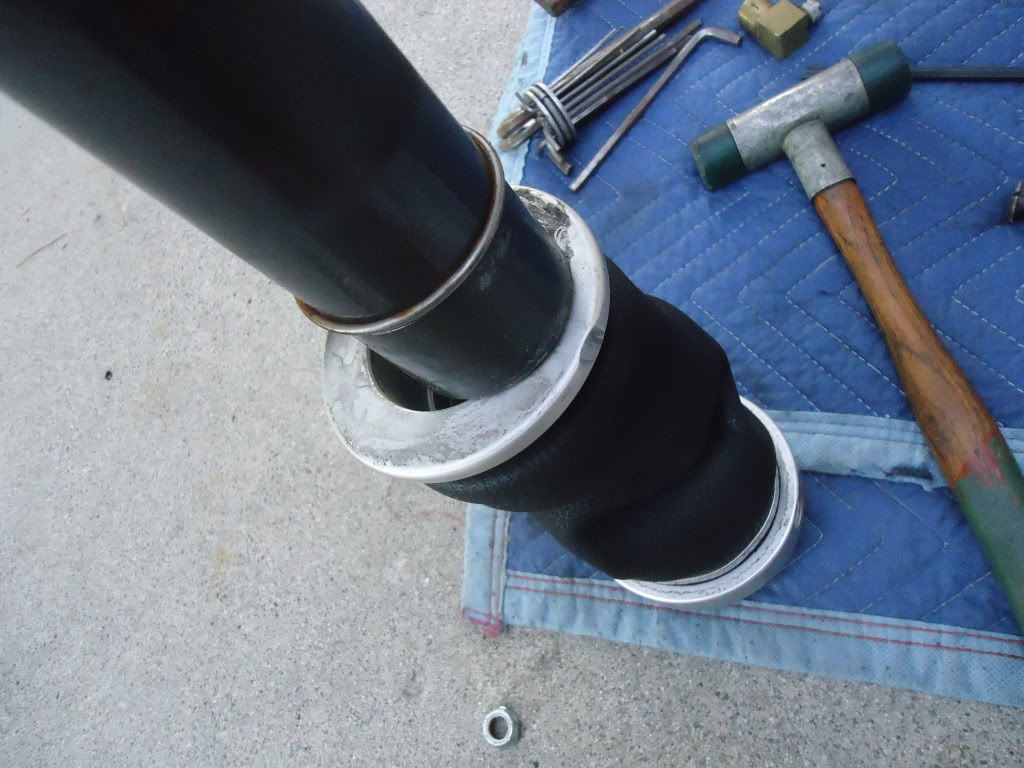
Remove bag from strut completely:
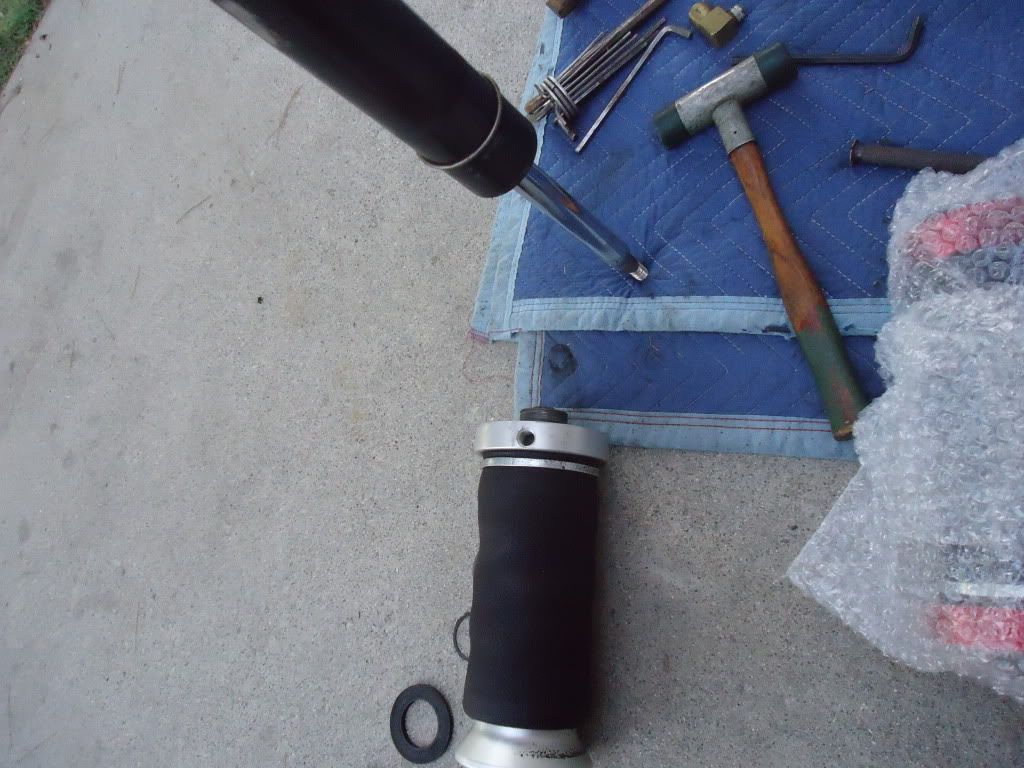
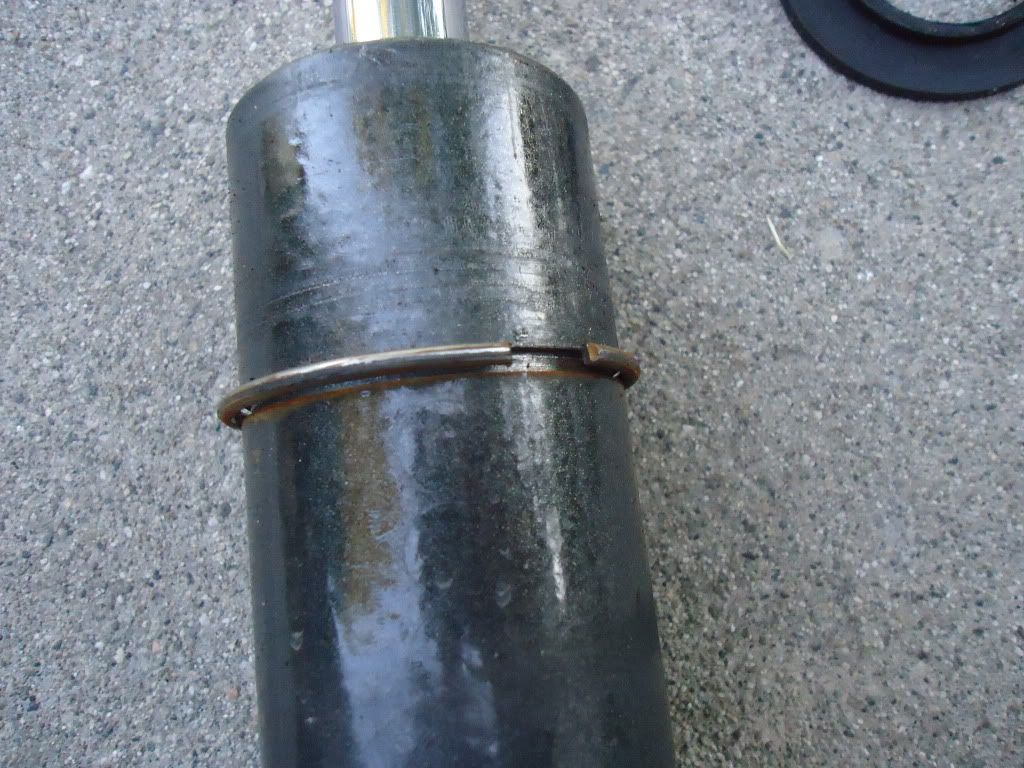
Old wire snap ring(remove over body and shaft):
Roll call #2(again right to left):

At this point, clean everything thoroughly. I used 3:1 Simple Green solution. All of the old hardware can be tossed as the repair kit Contains most of the components(not a new tophat). Air Lift recommends sandind any sharp edges if they are present.
Install new wire snap ring into groove.
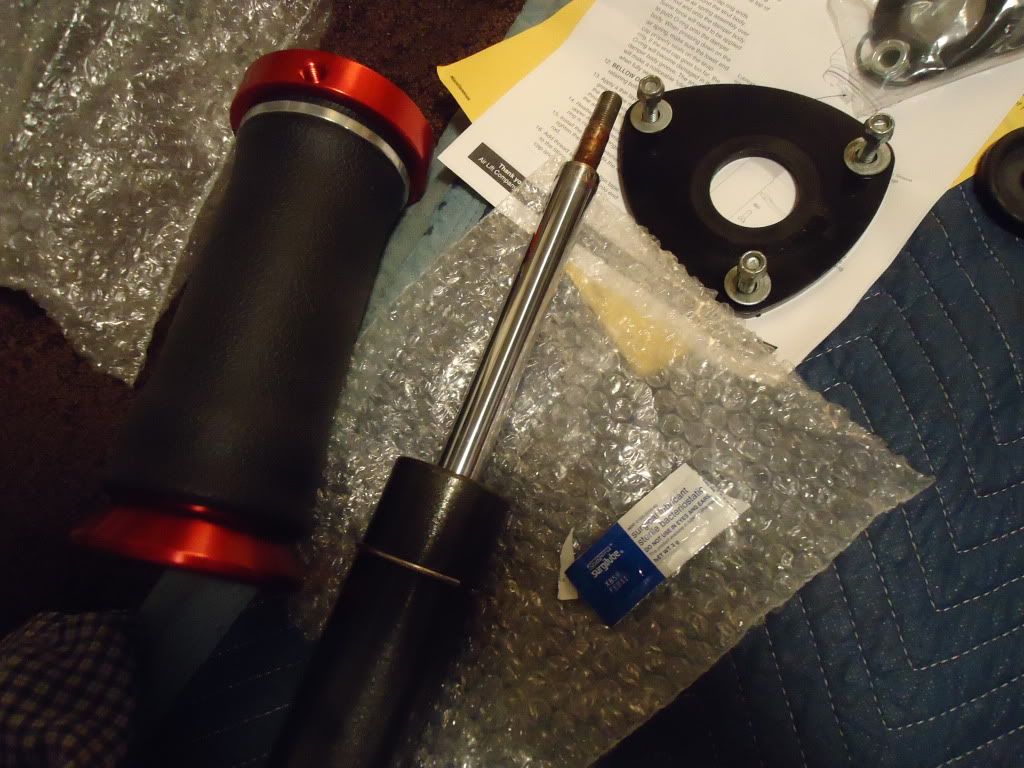
Get lube prepared and grease the strut body above the ring and
inside of bag over new rubber seal. I used a water based gel lube used at my job, KY Jelly is the same. Air lift recommends Lithium grease, but I aint got none...
Slide bag over strut and make sure snap ring remains seated
bottom:
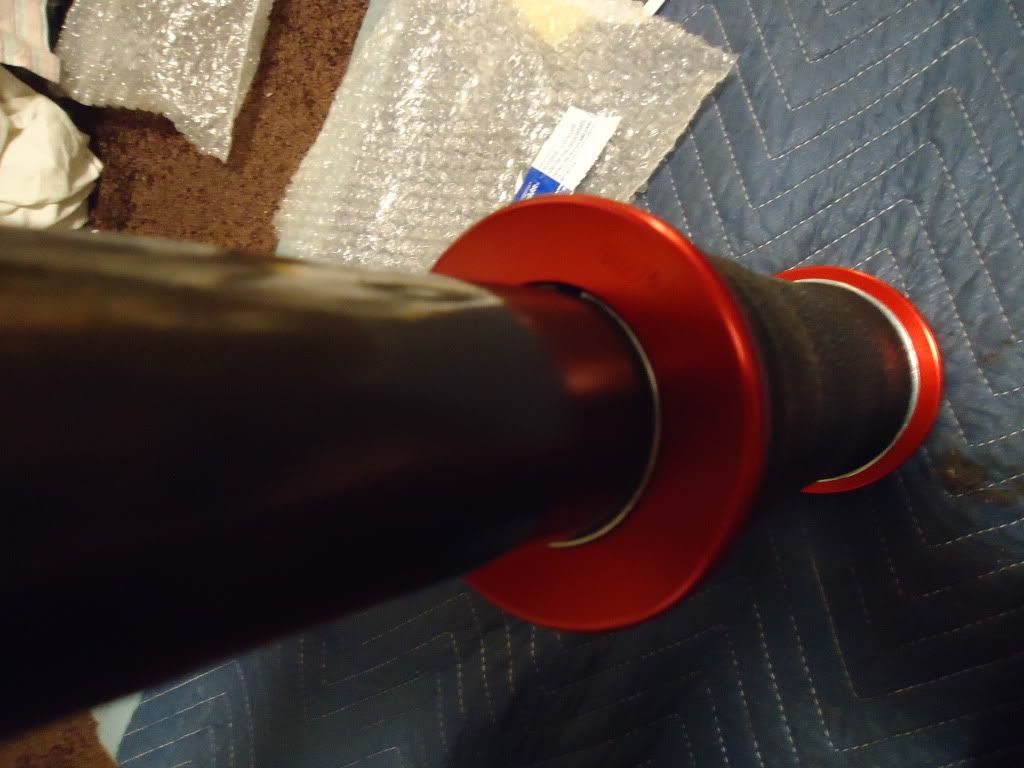
top:
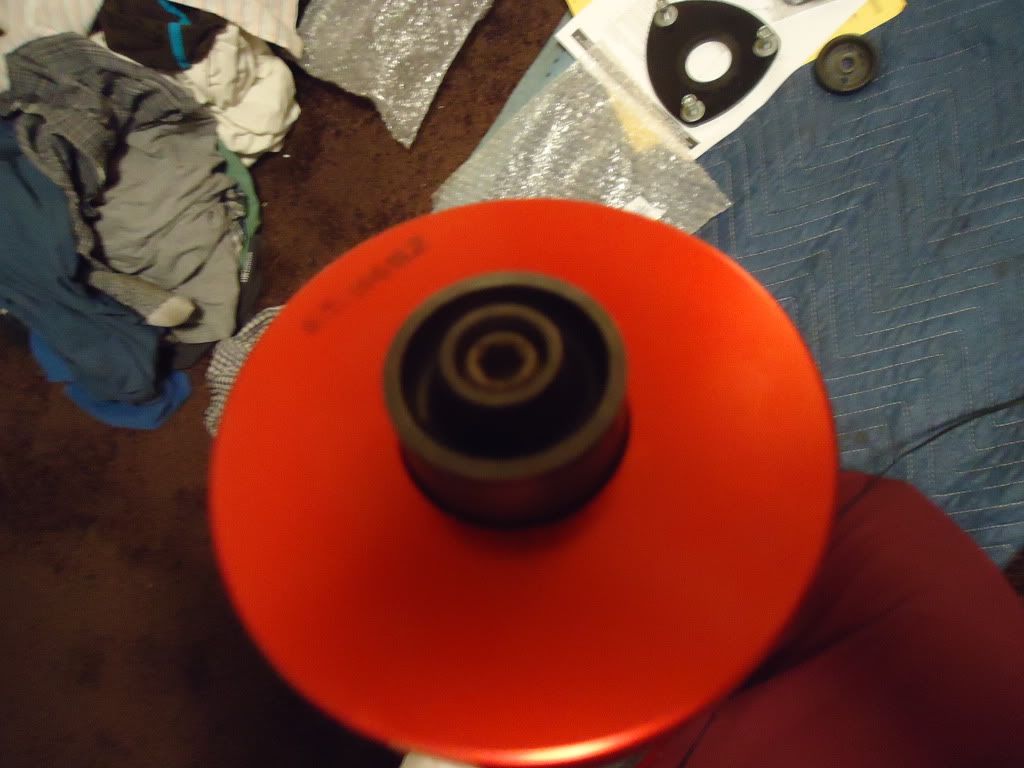
Now push downward force onto lower mount. Be gentle at first to seat the rubber ring inside of the bag collar. Then push until you feel a "click". This means the snap ring has seated in the bottom hat's groove and bag is now sealed.
Bottom(snap ring gone):
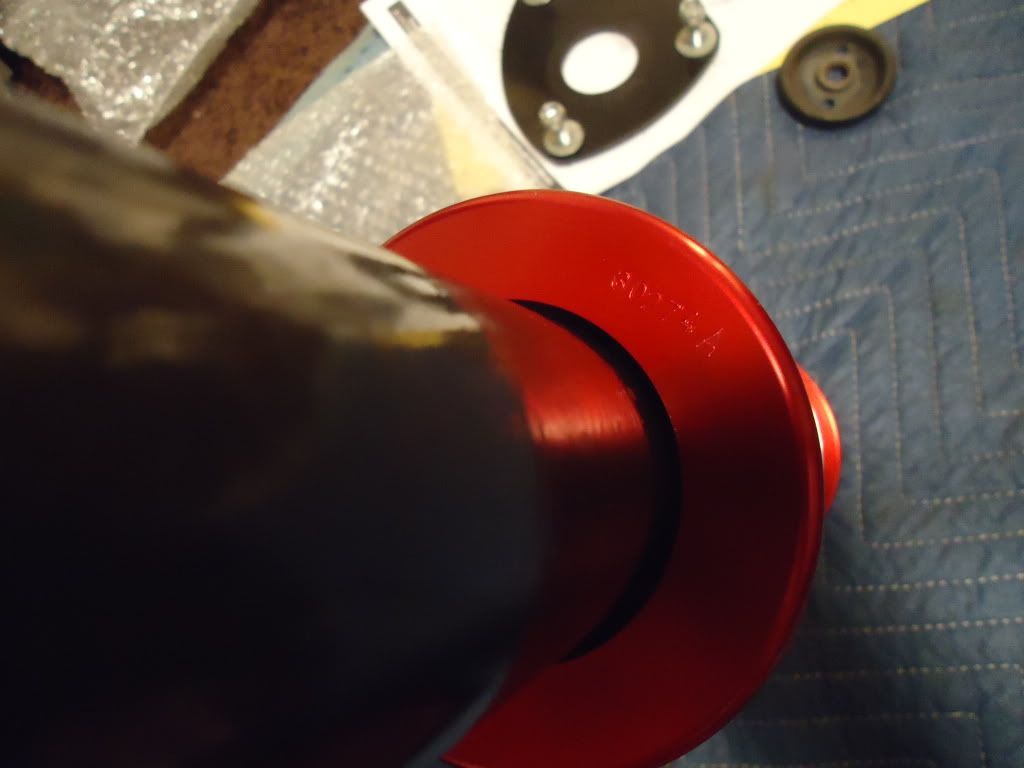
Top(threads now exposed):

Grab all purpose grease and grease all mounting surfaces. I used the heavy duty stuff. Wipe away any excess. Install is the reverse of removal.
new components:


View original BBCode
You should at this point be able to move the top of the bag freely up off of the strut shaft.  You can also examine the damaged portion of the bag.  As you can see, the crack runs along the support part of the bag where it meets the shaft...no bueno.
[IMG]http://i246.photobucket.com/albums/gg111/szell001/ES%20strut%20repair/DSC01291.jpg[/IMG]

Rest the bag on a soft surface(upside down) and grab the rubber tipped hammer.  Strike downward on the bag's bottom hat, parallel to the strut body.
[IMG]http://i246.photobucket.com/albums/gg111/szell001/ES%20strut%20repair/DSC01302.jpg[/IMG]
[IMG]http://i246.photobucket.com/albums/gg111/szell001/ES%20strut%20repair/DSC01303.jpg[/IMG]
The bag should dislodge from the strut body and expose the wire snap ring:
[IMG]http://i246.photobucket.com/albums/gg111/szell001/ES%20strut%20repair/DSC01304.jpg[/IMG]
Remove bag from strut completely:
[IMG]http://i246.photobucket.com/albums/gg111/szell001/ES%20strut%20repair/DSC01305.jpg[/IMG]
Old wire snap ring(remove over body and shaft):
[IMG]http://i246.photobucket.com/albums/gg111/szell001/ES%20strut%20repair/DSC01306.jpg[/IMG]
Roll call #2(again right to left):
[IMG]http://i246.photobucket.com/albums/gg111/szell001/ES%20strut%20repair/DSC01307.jpg[/IMG]

At this point, clean everything thoroughly.  I used 3:1 Simple Green solution.  All of the old hardware can be tossed as the repair kit Contains most of the components(not a new tophat).  Air Lift recommends sandind any sharp edges if they are present.
Install new wire snap ring into groove.
[IMG]http://i246.photobucket.com/albums/gg111/szell001/ES%20strut%20repair/DSC01308.jpg[/IMG]
Get lube prepared and grease the strut body above the ring and
inside of bag over new rubber seal.  I used a water based gel lube used at my job, KY Jelly is the same.  Air lift recommends Lithium grease, but I aint got none...

Slide bag over strut and make sure snap ring remains seated
bottom:
[IMG]http://i246.photobucket.com/albums/gg111/szell001/ES%20strut%20repair/DSC01310.jpg[/IMG]
top:
[IMG]http://i246.photobucket.com/albums/gg111/szell001/ES%20strut%20repair/DSC01311.jpg[/IMG]
Now push downward force onto lower mount.  Be gentle at first to seat the rubber ring inside of the bag collar.  Then push until you feel a "click".  This means the snap ring has seated in the bottom hat's groove and bag is now sealed.
Bottom(snap ring gone):
[IMG]http://i246.photobucket.com/albums/gg111/szell001/ES%20strut%20repair/DSC01312.jpg[/IMG]
Top(threads now exposed):
[IMG]http://i246.photobucket.com/albums/gg111/szell001/ES%20strut%20repair/DSC01313.jpg[/IMG]

Grab all purpose grease and grease all mounting surfaces.  I used the heavy duty stuff.  Wipe away any excess.  Install is the reverse of removal.
new components:
[IMG]http://i246.photobucket.com/albums/gg111/szell001/ES%20strut%20repair/DSC01316.jpg[/IMG]
[IMG]http://i246.photobucket.com/albums/gg111/szell001/ES%20strut%20repair/DSC01314.jpg[/IMG]
[IMG]http://i246.photobucket.com/albums/gg111/szell001/ES%20strut%20repair/DSC01318.jpg[/IMG]


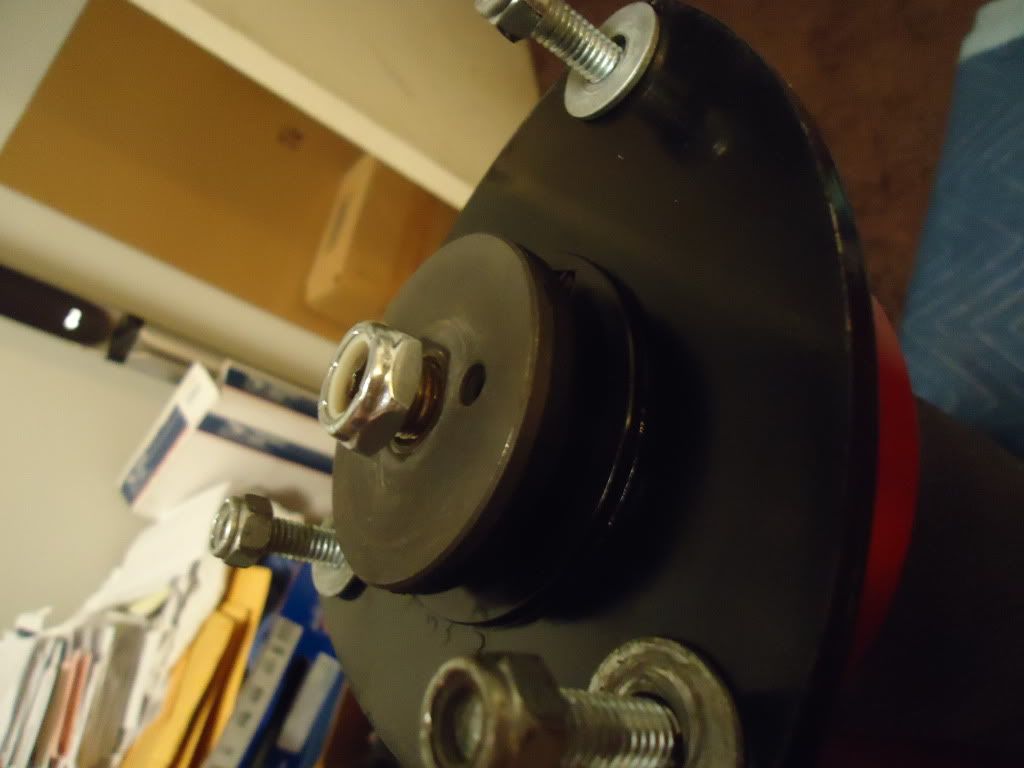
Tighten everything down.

It is recommended you pressure test everything prior to reinstalling the strut back into the car. If you get lost at all Air Lift offers technical support at (800)248-0892. There is a PDF of the instructions at:
https://mail-attachment.googleusercontent.com/attachment?ui=2&ik=13954a8c05&view=att&th=1313f88670f8008e&attid=0.1&disp=inline&safe=1&zw&saduie=AG9B_P_JR551cZLBiAdFTezornG0&sadet=1311766986457&sads=1bO7SroDynr2MxAzvamMhO8cXyU&sadssc=1
View original BBCode
[IMG]http://i246.photobucket.com/albums/gg111/szell001/ES%20strut%20repair/DSC01319.jpg[/IMG]
[IMG]http://i246.photobucket.com/albums/gg111/szell001/ES%20strut%20repair/DSC01320.jpg[/IMG]
[IMG]http://i246.photobucket.com/albums/gg111/szell001/ES%20strut%20repair/DSC01321.jpg[/IMG]
Tighten everything down.
[IMG]http://i246.photobucket.com/albums/gg111/szell001/ES%20strut%20repair/DSC01322.jpg[/IMG]

It is recommended you pressure test everything prior to reinstalling the strut back into the car.  If you get lost at all Air Lift offers technical support at (800)248-0892.  There is a PDF of the instructions at:
[URL="https://mail-attachment.googleusercontent.com/attachment?ui=2&ik=13954a8c05&view=att&th=1313f88670f8008e&attid=0.1&disp=inline&safe=1&zw&saduie=AG9B_P_JR551cZLBiAdFTezornG0&sadet=1311766986457&sads=1bO7SroDynr2MxAzvamMhO8cXyU&sadssc=1"]
https://mail-attachment.googleusercontent.com/attachment?ui=2&ik=13954a8c05&view=att&th=1313f88670f8008e&attid=0.1&disp=inline&safe=1&zw&saduie=AG9B_P_JR551cZLBiAdFTezornG0&sadet=1311766986457&sads=1bO7SroDynr2MxAzvamMhO8cXyU&sadssc=1[/URL]
