View original BBCode
What's up VSC,

Some of you guys may know me from the Club Lexus forums. Not exactly new to the whole vip style thing. Been working on my GS for almost 3 years now. It's gone through quite a few changes over the years so I'll try to sum this all up as quick as possible. Hope you don't mind me quoting everything from my CL Posts. Hopefully my training wheels are taken off soon :)

When I first bought the car back in September 2009 this is what is was. And no I didn't buy those wheels LOL

[URL="http://dl.dropbox.com/u/70793128/GS300/At%20the%20Dealer/01.jpg"][IMG]http://dl.dropbox.com/u/70793128/GS300/At%20the%20Dealer/01.jpg[/IMG][/URL][URL="http://dl.dropbox.com/u/70793128/GS300/At%20the%20Dealer/05.jpg"][IMG]http://dl.dropbox.com/u/70793128/GS300/At%20the%20Dealer/05.jpg[/IMG][/URL]

[QUOTE=YaKuZa_GS]
03-15-10

Hey guys,

Been on these forums for quite a while now, but haven't really posted much except recently. I'm recently a new owner of a black on black 2GS and just started put a few new mods on it. It's obviously still a work in progress but hopefully within the next year or two I will have it show ready. Just thought I would share a few photos with you guys.

Originally when I bought the car it came with these god awful fugly 20" wheels but the car itself was mint inside and out. There was no frame damage, all original welds, leather and interior was mint, compression test was straight across the board and all maintenance records. So my first instinct told me to get rid of the wheels, so I found a guy who was willing to trade them for stock 17" chrome 430 5 spokes. I didn't even care about the fact the 20's had brand new tires and the 17's were bald LOL. The only tasteful mod was the 01+ grille LOL


Here's a few new things I just had installed over the weekend...

Now I know we've all see JDM Toyota Crown blue wide angle mirrors before but these are wide angled and have a built in LED turn signal in the glass which is completely invisible when off.
[URL="http://photoshare.shaw.ca/image/7/e/a/234510/cimg8437-0.jpg?rev=0"][IMG]http://photoshare.shaw.ca/image/7/e/a/234510/cimg8437-0.jpg?rev=0[/IMG][/URL][URL="http://photoshare.shaw.ca/image/7/e/a/234510/cimg8438-0.jpg?rev=0"][IMG]http://photoshare.shaw.ca/image/7/e/a/234510/cimg8438-0.jpg?rev=0[/IMG][/URL]

I also picked up a set of new LED Mirrors covers with built in puddle light on the bottom. The sweet thing about these ones is that they replace the whole upper housing, its not like a cover that goes over the factory housing. They're made from ABS plastic so they're more durable than the fiberglass crap on eBay. I've been debating if I'm going to smoke the lens on the back side of the mirror. Maybe if I get the JDM black chrome headlights.
[URL="http://photoshare.shaw.ca/image/7/e/a/234510/cimg8439-0.jpg?rev=0"][IMG]http://photoshare.shaw.ca/image/7/e/a/234510/cimg8439-0.jpg?rev=0[/IMG][/URL][URL="http://photoshare.shaw.ca/image/7/e/a/234510/cimg8440-0.jpg?rev=0"][IMG]http://photoshare.shaw.ca/image/7/e/a/234510/cimg8440-0.jpg?rev=0[/IMG][/URL]
[URL="http://photoshare.shaw.ca/image/7/e/a/234510/cimg8443-0.jpg?rev=0"][IMG]http://photoshare.shaw.ca/image/7/e/a/234510/cimg8443-0.jpg?rev=0[/IMG][/URL]

I also pick up a set of Grazio&Co. black chrome emblem set with black chrome trunk bar. To match the black chrome I also picked up a set of Insurance smoked LED taillights and topped it off with super bright white LED License plate lamps
[URL="http://photoshare.shaw.ca/image/7/e/a/234510/cimg8444-0.jpg?rev=0"][IMG]http://photoshare.shaw.ca/image/7/e/a/234510/cimg8444-0.jpg?rev=0[/IMG][/URL][URL="http://photoshare.shaw.ca/image/7/e/a/234510/cimg8445-0.jpg?rev=0"][IMG]http://photoshare.shaw.ca/image/7/e/a/234510/cimg8445-0.jpg?rev=0[/IMG][/URL]

I also have a few toys I haven't installed yet and still have a long line of products I plan to pick up for my baby but she's on her way. Stay tuned! :thumbup:[/QUOTE]

[QUOTE=YaKuZa_GS]
05-14-10

I just got my DF210's installed a couple days ago. I was really happy with the drop and comfortability. This is just to hold me until I get coilovers or air ride. I just bought my 20's and I sure as hell and not planning to roll on stock height. Here are some photos of the drop with the stock 17's.

[URL="http://photoshare.shaw.ca/image/7/e/a/234510/cimg8522-0.jpg?rev=0"][IMG]http://photoshare.shaw.ca/image/7/e/a/234510/cimg8522-0.jpg?rev=0[/IMG][/URL]
[URL="http://photoshare.shaw.ca/image/7/e/a/234510/cimg8523-0.jpg?rev=0"][IMG]http://photoshare.shaw.ca/image/7/e/a/234510/cimg8523-0.jpg?rev=0[/IMG][/URL]
[URL="http://photoshare.shaw.ca/image/7/e/a/234510/cimg8524-0.jpg?rev=0G"][IMG]http://photoshare.shaw.ca/image/7/e/a/234510/cimg8524-0.jpg?rev=0G[/IMG][/URL]

EDIT:
Just finished lacing up the new shoes. Got some TrafficStar RTM's (Maya RM1's) wrapped in Falken FK-452's. The specs are 20x8.5 +36 with 225/35ZR20 in the front and in the rear they are 20x10 +47 with 255/30ZR20. But they are a real b!+ch to clean. Not sure if I really like 'em though, I may just sell 'em LOL We'll see

[URL="http://photoshare.shaw.ca/image/7/e/a/234510/cimg8538-0.jpg?rev=0"][IMG]http://photoshare.shaw.ca/image/7/e/a/234510/cimg8538-0.jpg?rev=0[/IMG][/URL]
[URL="http://photoshare.shaw.ca/image/7/e/a/234510/cimg8539-0.jpg?rev=0"][IMG]http://photoshare.shaw.ca/image/7/e/a/234510/cimg8539-0.jpg?rev=0[/IMG][/URL]
[URL="http://photoshare.shaw.ca/image/7/e/a/234510/cimg8540-0.jpg?rev=0"][IMG]http://photoshare.shaw.ca/image/7/e/a/234510/cimg8540-0.jpg?rev=0[/IMG][/URL][/QUOTE]
YaKuZa_GS; wrote:
07-06-10
I just my Garson order in from Japan. I picked up the glitter mirror, mink chain, velvet curtains, glitter shift knob, Vega cushions and Monogram seats with matching neckpads. I also got the Grazio&Co. 01+ wood steering wheel and 01+ shifter bezel. But currently debating if I should go with the JDM Black wood to have it all blacked out.
I'm just waiting on my TrafficStar RTS rims. After that will be coilovers or bags, still undecided yet.
Pardon the ****ty quality photos


YaKuZa_GS wrote:
07-30-10
I just installed the JDM black wood interior pieces and purchased some extra DAD monogram fabric to match my seats. I ended up selling my Grazio Brown wood steering wheel and get a black wood one instead to match and same for the Garson shift knob. I'm not sure if I'm sold on the JDM black wood. I mean it looks OK but not sure if I like it though (maybe too much black) and not crazy about the fitment issue with the center console area.
I also just installed my 20" Maya RT5 wheels but rubbing like crazy in the rear. Definitely need to roll that **** out. I'll get pics of that soon


YaKuZa_GS wrote:
07-31-10
The front is 20x9 +30 with 225/35ZR20 and in the rear I'm running 20x10.5 +29 with 255/30ZR20. I just need to roll or cut the rear and I'm fine. My front are rolled already. Currently on -3 degrees of camber in the rear. and its nice and flush where I want it but I cant drop it any more until I either shave or roll the rear. I'm chewing the sidewalls enough as is ;) Bringing it in the body shop hopefully this week


View original BBCode
[QUOTE=YaKuZa_GS;]
07-06-10
I just my Garson order in from Japan. I picked up the glitter mirror, mink chain, velvet curtains, glitter shift knob, Vega cushions and Monogram seats with matching neckpads. I also got the Grazio&Co. 01+ wood steering wheel and 01+ shifter bezel. But currently debating if I should go with the JDM Black wood to have it all blacked out.

I'm just waiting on my TrafficStar RTS rims. After that will be coilovers or bags, still undecided yet.

Pardon the ****ty quality photos

[IMG]http://photoshare.shaw.ca/image/7/e/a/234510/cimg8225-0.jpg?rev=0[/IMG]
[IMG]http://photoshare.shaw.ca/image/7/e/a/234510/cimg8224-0.jpg?rev=0[/IMG][/QUOTE]

[QUOTE=YaKuZa_GS]
07-30-10

I just installed the JDM black wood interior pieces and purchased some extra DAD monogram fabric to match my seats. I ended up selling my Grazio Brown wood steering wheel and get a black wood one instead to match and same for the Garson shift knob. I'm not sure if I'm sold on the JDM black wood. I mean it looks OK but not sure if I like it though (maybe too much black) and not crazy about the fitment issue with the center console area.

I also just installed my  20" Maya RT5 wheels but rubbing like crazy in the rear. Definitely need to roll that **** out. I'll get pics of that soon
[IMG]http://photoshare.shaw.ca/image/7/e/a/234510/cimg8542-0.jpg?rev=0[/IMG]
[IMG]http://photoshare.shaw.ca/image/7/e/a/234510/cimg8543-0.jpg?rev=0[/IMG]
[IMG]http://photoshare.shaw.ca/image/7/e/a/234510/cimg8264-0.jpg?rev=0[/IMG][/QUOTE]

[QUOTE=YaKuZa_GS]
07-31-10

The front is 20x9 +30 with 225/35ZR20 and in the rear I'm running 20x10.5 +29 with 255/30ZR20. I just need to roll or cut the rear and I'm fine. My front are rolled already. Currently on -3 degrees of camber in the rear. and its nice and flush where I want it but I cant drop it any more until I either shave or roll the rear. I'm chewing the sidewalls enough as is ;) Bringing it in the body shop hopefully this week

[IMG]http://photoshare.shaw.ca/image/7/e/a/234510/cimg8548-0.jpg?rev=0[/IMG]
[IMG]http://photoshare.shaw.ca/image/7/e/a/234510/cimg8551-0.jpg?rev=0[/IMG]
[IMG]http://photoshare.shaw.ca/image/7/e/a/234510/cimg8552-0.jpg?rev=0[/IMG]
[IMG]http://photoshare.shaw.ca/image/7/e/a/234510/cimg8554-1.jpg?rev=0[/IMG][/QUOTE]
YaKuZa_GS wrote:
11-29-10
So my wheels finally arrived. I ordered up a set of Aicona ALC 35 in the black with machine cut and chrome lip. To my surprise the wheels looked way better in person. I've ordered a lot of different brand wheels before but this is the first time I've seen any wheel packaged like this. The fronts are 20x9 +34 (3.5" lip) and the rear is 20x11 +33 (5.5" Lip). Its low disk in the rear with a high disk in the front in case I decide to go with a BBK in the future. I definitely hate to be the one to say it but they sure do look close to my old Maya's but much bigger dish. I'm gonna plan to run 225/35R20 front and 275/30R20 rear. It's a toss up between Falken FK-452's or Yokohama S.Drives, any suggestions? I hope its enough stretch to clear the rear fender. Now I'm just waiting on my air bags and drop this b!tc#


YaKuZa_GS wrote:
01-21-11
I still have not got around to installing my air ride or my wheels yet as my baby is still in storage for the winter so I decided to take on a new little project.
I don't know if anyone here has heard of Hasepro Magical Carbon (Yes with a name like that its gotta be JDM LOL) Basically it a its a REAL Carbon sheet with a heavy duty adhesive attached to the back side. I saw these in the just recent Tokyo Auto Salon and was really impressed with the quality


It wasn't too long ago that I installed my JDM black wood interior, dont get me wrong I like it but I really wanted to step our of the shadows as everything was completely blacked out in my interior. After driving a few euro cars at my work and noticed how nice the silver carbon was so I decided to give this "Magical Carbon" a shot, and man am I happy with the results. I'm used to applying vinyl to previous projects but man this was really hard to mold and stretch and turns rock hard once cooled down. But all in all I'm happy with the outcome. I also picked up a silver carbon 01+ steering wheel which I'll be installing shortly. I'll make sUre to snap some pics
PS: I'll be posting up all my black wood interior parts for sale including the black wood steering wheel (NO AIRBAG!) once my new one is installed. PM me if you are interested


View original BBCode
[QUOTE=YaKuZa_GS]
11-29-10

So my wheels finally arrived. I ordered up a set of Aicona ALC 35 in the black with machine cut and chrome lip. To my surprise the wheels looked way better in person.  I've ordered a lot of different brand wheels before but this is the first time I've seen any wheel packaged like this. The fronts are 20x9 +34 (3.5" lip) and the rear is 20x11 +33 (5.5" Lip). Its low disk in the rear with a high disk in the front in case I decide to go with a BBK in the future. I definitely hate to be the one to say it but they sure do look close to my old Maya's but much bigger dish. I'm gonna plan to run 225/35R20 front and 275/30R20 rear. It's a toss up between Falken FK-452's or Yokohama S.Drives, any suggestions? I hope its enough stretch to clear the rear fender. Now I'm just waiting on my air bags and drop this b!tc#
[URL="http://members.shaw.ca/Yakuza.GS/AiconaALC35/2.jpg"][IMG]http://members.shaw.ca/Yakuza.GS/AiconaALC35/2.jpg[/IMG][/URL]
[IMG]http://members.shaw.ca/Yakuza.GS/AiconaALC35/1.jpg[/IMG]
[IMG]http://members.shaw.ca/Yakuza.GS/AiconaALC35/3.jpg[/IMG][/QUOTE]

[QUOTE=YaKuZa_GS]
01-21-11

I still have not got around to installing my air ride or my wheels yet as my baby is still in storage for the winter so I decided to take on a new little project.

I don't know if anyone here has heard of Hasepro Magical Carbon (Yes with a name like that its gotta be JDM LOL) Basically it a its a REAL Carbon sheet with a heavy duty adhesive attached to the back side. I saw these in the just recent Tokyo Auto Salon and was really impressed with the quality

[URL="http://photoshare.shaw.ca/image/7/e/a/234510/img_5002-0.jpg?rev=0"][IMG]http://photoshare.shaw.ca/image/7/e/a/234510/img_5002-0.jpg?rev=0[/IMG][/URL]
[URL="http://photoshare.shaw.ca/image/7/e/a/234510/img_5005-0.jpg?rev=0"][IMG]http://photoshare.shaw.ca/image/7/e/a/234510/img_5005-0.jpg?rev=0[/IMG][/URL]

It wasn't too long ago that I installed my JDM black wood interior, dont get me wrong I like it but I really wanted to step our of the shadows as everything was completely blacked out in my interior. After driving a few euro cars at my work and noticed how nice the silver carbon was so I decided to give this "Magical Carbon" a shot, and man am I happy with the results. I'm used to applying vinyl to previous projects but man this was really hard to mold and stretch and turns rock hard once cooled down. But all in all I'm happy with the outcome. I also picked up a silver carbon 01+ steering wheel which I'll be installing shortly. I'll make sUre to snap some pics

PS: I'll be posting up all my black wood interior parts for sale including the black wood steering wheel (NO AIRBAG!) once my new one is installed. PM me if you are interested

[URL="http://photoshare.shaw.ca/image/7/e/a/234510/img_5020-0.jpg?rev=0"][IMG]http://photoshare.shaw.ca/image/7/e/a/234510/img_5020-0.jpg?rev=0[/IMG][/URL]
[URL="http://photoshare.shaw.ca/image/7/e/a/234510/img_5033-0.jpg?rev=0"][IMG]http://photoshare.shaw.ca/image/7/e/a/234510/img_5033-0.jpg?rev=0[/IMG][/URL]
[URL="http://photoshare.shaw.ca/image/7/e/a/234510/img_5034-0.jpg?rev=0"][IMG]http://photoshare.shaw.ca/image/7/e/a/234510/img_5034-0.jpg?rev=0[/IMG][/URL]
[URL="http://photoshare.shaw.ca/image/7/e/a/234510/img_5035-0.jpg?rev=0"][IMG]http://photoshare.shaw.ca/image/7/e/a/234510/img_5035-0.jpg?rev=0[/IMG][/URL]
[URL="http://photoshare.shaw.ca/image/7/e/a/234510/img_5030-0.jpg?rev=0"][IMG]http://photoshare.shaw.ca/image/7/e/a/234510/img_5030-0.jpg?rev=0[/IMG][/URL][/QUOTE]
YaKuZa_GS wrote:
02-18-11
I finally got around to installing the silver carbon steering wheel and my old blackwood steering wheel is up for grabs
http://www.clublexus.com/forums/2gen-gs430-400-300-classifieds-98-05/548473-fs-jdm-blackwood-interior-w-steering-wheel.html


YaKuZa_GS wrote:
4-11-11
Here's just a few progress sneak preview pics. I just got the car our of storage and brought it to my buddy's shop to get the air ride in stalled. We're about half way done and should be done in the next day or so.
Here is a photo of full down. Well not really we lowered the hoist as far as it will go and its still sittin on it LOL

Did as quick test fit of my new wheels in the rear and holy jeebus is it close!


side profile shot

YaKuZa_GS wrote:
04-15-11
Finally completed installing the Air Force air suspension universal kit. I'm pretty happy with the ride height, comfort and overall outcome. I installed the Dakota Digital pressure and height controller along with 8 solenoid valves for full customization, its not too pretty right now (which is why no photos of the trunk setup) but I might just opt for the Accuair VU4 Selenoid box for a cleaner install. This thing is great!! It displays the pressure on each bag as well as the air tank and holds up to 3 height presets (Low/Med/High). It can also control each individual air bag, or both front or rear at the same time or all four all at once. Now I can't wait till the rubber for my rims to come in. I'll be going for a photoshoot as soon as they come in :D


View original BBCode
[QUOTE=YaKuZa_GS]
02-18-11

I finally got around to installing the silver carbon steering wheel and my old blackwood steering wheel is up for grabs
[url]http://www.clublexus.com/forums/2gen-gs430-400-300-classifieds-98-05/548473-fs-jdm-blackwood-interior-w-steering-wheel.html[/url]

[IMG]http://photoshare.shaw.ca/image/7/e/a/234510/img_5102-0.jpg?rev=0[/IMG]
[IMG]http://photoshare.shaw.ca/image/7/e/a/234510/img_5097-0.jpg?rev=0[/IMG][/QUOTE]

[QUOTE=YaKuZa_GS]
4-11-11

Here's just a few progress sneak preview pics. I just got the car our of storage and brought it to my buddy's shop to get the air ride in stalled. We're about half way done and should be done in the next day or so.

Here is a photo of full down. Well not really we lowered the hoist as far as it will go and its still sittin on it LOL
[IMG]http://photoshare.shaw.ca/image/7/e/a/234510/richmond2011041100216-0.jpg?rev=0[/IMG]

Did as quick test fit of my new wheels in the rear and holy jeebus is it close!
[IMG]http://photoshare.shaw.ca/image/7/e/a/234510/richmond2011041100209-0.jpg?rev=0[/IMG]
[IMG]http://photoshare.shaw.ca/image/7/e/a/234510/richmond2011041100214-0.jpg?rev=0[/IMG]

side profile shot
[IMG]http://photoshare.shaw.ca/image/7/e/a/234510/richmond2011041100211-0.jpg?rev=0[/IMG][/QUOTE]

[QUOTE=YaKuZa_GS]
04-15-11

Finally completed installing the Air Force air suspension universal kit. I'm pretty happy with the ride height, comfort and overall outcome. I installed the Dakota Digital pressure and height controller along with 8 solenoid valves for full customization, its not too pretty right now (which is why no photos of the trunk setup) but I might just opt for the Accuair VU4 Selenoid box for a cleaner install. This thing is great!! It displays the pressure on each bag as well as the air tank and holds up to 3 height presets (Low/Med/High). It can also control each individual air bag, or both front or rear at the same time or all four all at once. Now I can't wait till the rubber for my rims to come in. I'll be going for a photoshoot as soon as they come in :D

[IMG]http://photoshare.shaw.ca/image/7/e/a/234510/richmond2011041500226-0.jpg?rev=0[/IMG]
[IMG]http://photoshare.shaw.ca/image/7/e/a/234510/cimg8945-0.jpg?rev=0[/IMG][/QUOTE]
YaKuZa_GS wrote:
04-28-11
My tires finally came in today. Slapped 'em on the rims and I can honestly say I was pretty satisfied with the outcome. I ended up going with Hankook Ventus V12's. I'm running a 225/35 on a 9" up front and 255/30 on the 11's in the rear. It was the perfect amount of stretch I needed for clearance. It looks really sunk in the front right now but thats with the air fully delated in the front. When I raise it back up the camber is not as negative so it kinda balances back out. I think I still might go with a 10 or 15mm spacer up front. We'll see.


YaKuZa_GS wrote:
05-06-11
Its been just over a year now since I bought my car and not long after I bought a Garson table telling myself I'm going to make it into LHD one of these days. Well after one year, that day has finally come LOL. It's been sitting in a box in my garage all this time and I just kinda forgot out about it LOL. It was really just a matter of taking it apart and tracing it backwards.
I know JP already makes tables for LHD already but personally I like the shape and detail of the Garson one better. Hopefully mine will be up to par with my standards when I'm done with it :D Don't ask me if I'll be making more because the answer is NO :p
Big thanks to Mike at Dose for helping me with this project.
Now its obviously not complete yet but its not too far away. Here are a few pics of the progress so far. Sorry about the poor quality pics


View original BBCode
[QUOTE=YaKuZa_GS]
04-28-11

My tires finally came in today. Slapped 'em on the rims and I can honestly say I was pretty satisfied with the outcome. I ended up going with Hankook Ventus V12's. I'm running a 225/35 on a 9" up front and 255/30 on the 11's in the rear. It was the perfect amount of stretch I needed for clearance. It looks really sunk in the front right now but thats with the air fully delated in the front. When I raise it back up the camber is not as negative so it kinda balances back out. I think I still might go with a 10 or 15mm spacer up front. We'll see.

[img]http://photoshare.shaw.ca/image/7/e/a/234510/coquitlam2011042800240-0.jpg?rev=0[/img]
[img]http://photoshare.shaw.ca/image/7/e/a/234510/coquitlam2011042800242-0.jpg?rev=0[/img]
[img]http://photoshare.shaw.ca/image/7/e/a/234510/coquitlam2011042800243-0.jpg?rev=0[/img][/QUOTE]

[QUOTE=YaKuZa_GS]
05-06-11

Its been just over a year now since I bought my car and not long after I bought a Garson table telling myself I'm going to make it into LHD one of these days. Well after one year, that day has finally come LOL. It's been sitting in a box in my garage all this time and I just kinda forgot out about it LOL. It was really just a matter of taking it apart and tracing it backwards.
I know JP already makes tables for LHD already but personally I like the shape and detail of the Garson one better. Hopefully mine will be up to par with my standards when I'm done with it :D Don't ask me if I'll be making more because the answer is NO :p

Big thanks to Mike at Dose for helping me with this project.

Now its obviously not complete yet but its not too far away. Here are a few pics of the progress so far. Sorry about the poor quality pics
[IMG]http://photoshare.shaw.ca/image/7/e/a/234510/newwestminster2011050300464-0.jpg?rev=0[/IMG][IMG]http://photoshare.shaw.ca/image/7/e/a/234510/newwestminster2011050300465-0.jpg?rev=0[/IMG][IMG]http://photoshare.shaw.ca/image/7/e/a/234510/newwestminster2011050300466-0.jpg?rev=0[/IMG][/QUOTE]
YaKuZa_GS;6529345 wrote:
07-12-11
Just recently went for a photo shoot. Spent the weekend driving around town trying to find more remote areas to snap a few shots. Enjoy! :)


View original BBCode
[QUOTE=YaKuZa_GS;6529345]
07-12-11

Just recently went for a photo shoot. Spent the weekend driving around town trying to find more remote areas to snap a few shots. Enjoy! :)

[IMG]http://farm7.static.flickr.com/6016/5932379282_daf6d0ed52_b.jpg[/IMG]
[IMG]http://farm7.static.flickr.com/6141/5932380180_4e87402a92_b.jpg[/IMG]
[IMG]http://farm7.static.flickr.com/6123/5929090016_37cf7d50b2_b.jpg[/IMG]
[IMG]http://farm7.static.flickr.com/6012/5929075660_9c04b351b7_b.jpg[/IMG]
[IMG]http://farm7.static.flickr.com/6132/5928522357_e36dfe340c_b.jpg[/IMG]
[IMG]http://farm7.static.flickr.com/6130/5929081688_b02b548b86_b.jpg[/IMG]
[IMG]http://farm7.static.flickr.com/6015/5928523977_b5ff472b2b_b.jpg[/IMG]
[IMG]http://farm7.static.flickr.com/6128/5932623380_a4d1c59c5d_b.jpg[/IMG]
[IMG]http://farm7.static.flickr.com/6025/5929082958_03943b0ac3_b.jpg[/IMG]
[IMG]http://farm7.static.flickr.com/6027/5929085688_603313a8b2_b.jpg[/IMG]
[IMG]http://farm7.static.flickr.com/6003/5932380974_03cbe5842a_b.jpg[/IMG]
[IMG]http://farm7.static.flickr.com/6004/5928529995_fac553b490_b.jpg[/IMG]
[IMG]http://farm7.static.flickr.com/6130/5929078152_ec275fa829_b.jpg[/IMG][/QUOTE]
YaKuZa_GS wrote:
08-03-11
Just posting up some more recent photos of the interior :)


YaKuZa_GS wrote:
09-15-11
Just did a photo shoot with a friend I recently got in contact with. Enjoy! (Desktop sizes available upon request)
Next I'll be installing my JP grille, puddle lights, illuminated door sills, LS brakes and RCA's. Gotta get 'em in and do a shoot before I storage it for winter.
EDIT: For those who want desktop sizes leave your email and which # you want in this thread. DO NOT PM! my mail box is getting packed
1.

2.

3.

4.

5.

6.

7.

8.

9.

10.

Thanks again Kevin Uy (aka moky)
www.kevinkinguy.com/automobilia
View original BBCode
[QUOTE=YaKuZa_GS]
08-03-11

Just posting up some more recent photos of the interior :)

[IMG]http://farm7.static.flickr.com/6142/5969091428_39b0d3b567_b.jpg[/IMG]
[IMG]http://farm7.static.flickr.com/6125/5968537357_73584f252e_b.jpg[/IMG]
[IMG]http://farm7.static.flickr.com/6010/5968535645_32da2bb0f1_b.jpg[/IMG]
[IMG]http://farm7.static.flickr.com/6133/5969093380_6938346dd4_b.jpg[/IMG][/QUOTE]

[QUOTE=YaKuZa_GS]
09-15-11

Just did a photo shoot with a friend I recently got in contact with. Enjoy! (Desktop sizes available upon request)

Next I'll be installing my JP grille, puddle lights, illuminated door sills, LS brakes and RCA's. Gotta get 'em in and do a shoot before I storage it for winter.

EDIT: For those who want desktop sizes leave your email and which # you want in this thread. [COLOR="Red"][B][U]DO NOT PM![/U][/B][/COLOR] my mail box is getting packed

1.
[IMG]http://farm7.static.flickr.com/6074/6152273536_f22564b9b3_b.jpg[/IMG]

2.
[IMG]http://farm7.static.flickr.com/6159/6151729681_0625f38965_b.jpg[/IMG]

3.
[IMG]http://farm7.static.flickr.com/6156/6152276426_0b8ce4d65b_b.jpg[/IMG]

4.
[IMG]http://farm7.static.flickr.com/6071/6151736199_88b027960e_b.jpg[/IMG]

5.
[IMG]http://farm7.static.flickr.com/6195/6152274318_9d80b12f02_b.jpg[/IMG]

6.
[IMG]http://farm7.static.flickr.com/6062/6152277502_6b3b6186fb_b.jpg[/IMG]

7.
[IMG]http://farm7.static.flickr.com/6170/6152278824_bc791be8d8_b.jpg[/IMG]

8.
[IMG]http://farm7.static.flickr.com/6087/6151734955_2250ed9b25_b.jpg[/IMG]

9.
[IMG]http://farm7.static.flickr.com/6198/6151736973_43830c1864_b.jpg[/IMG]

10.
[IMG]http://farm7.static.flickr.com/6181/6151734085_96951d3486_b.jpg[/IMG]

Thanks again Kevin Uy (aka [URL="http://www.clublexus.com/forums/members/65758-moky.html"][B]moky[/B][/URL])
[url]www.kevinkinguy.com/automobilia[/url][/QUOTE]
YaKuZa_GS wrote:
12-22-11
Just got my LS calipers back from the powder coaters and I have to say I'm very happy with the results. :) They look brand spanking new. Now I'm just waiting on my StopTech cross/slotted rotors, SS lines and FIGS RCA. Such a pain in the ass to take these apart and rebuild them


YaKuZa_GS wrote:
01-30-12
Well its been a while now since I last updated you guys on any recent progress. My car has been in hibernation for the winter. I don't know about you guys but every time I put my car away I get as giddy as a schoolgirl when it comes time to take her out again. Anytime put my car into storage, I want it to feel like a new experience when I take it out. So what do you do when you can't drive your car? You buy s#!t for it LOL!!!
As some of you guys know I recently had my brakes disassembled to have them powder coated. (photos here)I finally had time to get the rebuild kits and slap them back together. I also picked up a pair of CNC'ed caliper emblems and had them polished to give it that final touch. I haven't decided if I'll put the "L" logo on the rears or not yet. All in all I think they turned out pretty good.


While I was at it I figured I would get a set of SS brake lines, drilled/slotted rotors, pads and FIGS 17mm RCAs for clearance. I also got the uber rare illuminated door sills (don't even ask :p)

I also picked up and just finished installing a set of Monarch puddle lights

Many have asked me "why I've never changed out my stereo?". I actually had no excuse for this LOL. Even when I bought the car, only half of the LCD from the radio worked LOL. I couldn't even see what station I was on or volume. Every time I had to disconnect the battery to work on something it took me like 30mins to preset all my stations haha. Anyways, so I had enough and finally coughed up for a Pioneer AVIC-X930BT w/OEM Toyota 2DIN kit and also picked up a 09+ Camry backup camera and Compustar alarm. I was always on the fence about whether or not to get windows visors or not. It's not like I hated them, but I wasn;t in love with them either, but oh well I figured I'd give 'em a try. And if I don't like them I'm sure you guys would be all over them like white on rice LOL.

And now saving the best for last. The granddaddy of all 2GS grilles. After many weeks of waiting my Junction Produce grille finally arrives. I damn near blew my load when I opened the box.

The weather is finally starting to clear up a little in my area, so I'll be able to finally taker her our of hibernation. I'll post up some pics once the parts are installed.
View original BBCode
[QUOTE=YaKuZa_GS]
12-22-11

Just got my LS calipers back from the powder coaters and I have to say I'm very happy with the results. :) They look brand spanking new. Now I'm just waiting on my StopTech cross/slotted rotors, SS lines and FIGS RCA. Such a pain in the ass to take these apart and rebuild them

[IMG]http://photoshare.shaw.ca/image/7/e/a/234510/img_6865-0.jpg[/IMG]
[IMG]http://photoshare.shaw.ca/image/7/e/a/234510/img_6866-0.jpg[/IMG][/QUOTE]

[QUOTE=YaKuZa_GS]
01-30-12

Well its been a while now since I last updated you guys on any recent progress. My car has been in hibernation for the winter. I don't know about you guys but every time I put my car away I get as giddy as a schoolgirl when it comes time to take her out again. Anytime put my car into storage, I want it to feel like a new experience when I take it out. So what do you do when you can't drive your car? You buy s#!t for it LOL!!!

As some of you guys know I recently had my brakes disassembled to have them powder coated. ([URL="http://www.clublexus.com/forums/6899054-post301.html"]photos here[/URL])I finally had time to get the rebuild kits and slap them back together. I also picked up a pair of CNC'ed caliper emblems and had them polished to give it that final touch. I haven't decided if I'll put the "L" logo on the rears or not yet. All in all I think they turned out pretty good.
[IMG]http://photoshare.shaw.ca/image/7/e/a/234510/img_6877-0.jpg?rev=0[/IMG]
[IMG]http://photoshare.shaw.ca/image/7/e/a/234510/img_6879-0.jpg?rev=0[/IMG]

While I was at it I figured I would get a set of SS brake lines, drilled/slotted rotors, pads and FIGS 17mm RCAs for clearance. I also got the uber rare illuminated door sills (don't even ask :p)
[IMG]http://photoshare.shaw.ca/image/7/e/a/234510/img_6876-0.jpg?rev=0[/IMG]

I also picked up and just finished installing a set of Monarch puddle lights
[IMG]http://photoshare.shaw.ca/image/7/e/a/234510/puddlelights-0.jpg?rev=0[/IMG]

Many have asked me "why I've never changed out my stereo?". I actually had no excuse for this LOL. Even when I bought the car, only half of the LCD from the radio worked LOL. I couldn't even see what station I was on or volume. Every time I had to disconnect the battery to work on something it took me like 30mins to preset all my stations haha. Anyways, so I had enough and finally coughed up for a Pioneer AVIC-X930BT w/OEM Toyota 2DIN kit and also picked up a 09+ Camry backup camera and Compustar alarm. I was always on the fence about whether or not to get windows visors or not. It's not like I hated them, but I wasn;t in love with them either, but oh well I figured I'd give 'em a try. And if I don't like them I'm sure you guys would be all over them like white on rice LOL.

[IMG]http://photoshare.shaw.ca/image/7/e/a/234510/img_6875-0.jpg?rev=0[/IMG]

And now saving the best for last. The granddaddy of all 2GS grilles. After many weeks of waiting my Junction Produce grille finally arrives. I damn near blew my load when I opened the box.
[IMG]http://photoshare.shaw.ca/image/7/e/a/234510/img_6871-0.jpg?rev=0[/IMG]

The weather is finally starting to clear up a little in my area, so I'll be able to finally taker her our of hibernation. I'll post up some pics once the parts are installed.[/quote]
YaKuZa_GS wrote:
07-25-12
Sup guys, it's been a while since any updates, but I've been in the lab trying to figure out my next steps. I finally got all my ducks in a row and let me tell you, it will not be the same car coming out as it was going in. It's gonna be a while till I get it back, so be prepared for the reckoning!

YaKuZa_GS wrote:
09-17-12
Here's a few teaser sneak peeks at the new shoes. Haters gon' hate!
Equal lip size front and rear oughta do the trick. Just gonna pull the rear just SLIGHTLY so I can still fully deflate the rear bags.


View original BBCode
[QUOTE=YaKuZa_GS]
07-25-12

Sup guys, it's been a while since any updates, but I've been in the lab trying to figure out my next steps. I finally got all my ducks in a row and let me tell you, it will not be the same car coming out as it was going in. It's gonna be a while till I get it back, so be prepared for the reckoning!

[URL="http://dl.dropbox.com/u/70793128/5-05-12%20Team%20Empire/7153575873_edcf4da22f_k.jpg"][IMG]http://dl.dropbox.com/u/70793128/5-05-12%20Team%20Empire/7153575873_edcf4da22f_k.jpg[/IMG][/URL][/QUOTE]

[QUOTE=YaKuZa_GS]
09-17-12

Here's a few teaser sneak peeks at the new shoes. Haters gon' hate!

Equal lip size front and rear oughta do the trick. Just gonna pull the rear just SLIGHTLY so I can still fully deflate the rear bags.

[IMG]https://dl.dropbox.com/u/70793128/GS300/Upgrades/IMG_1770.JPG[/IMG]
[IMG]https://dl.dropbox.com/u/70793128/GS300/Upgrades/IMG_1774.JPG[/IMG]
[IMG]https://dl.dropbox.com/u/70793128/GS300/Upgrades/IMG_1775.JPG[/IMG][/QUOTE]
i like it. different than what i'm used to seeing on vsc, and much different than what i'm used to seeing coming out of cl, but lots of style, attention to detail, and creativity in the details.
View original BBCode
i like it. different than what i'm used to seeing on vsc, and much different than what i'm used to seeing coming out of cl, but lots of style, attention to detail, and creativity in the details.
OG;464637 wrote:i like it. different than what i'm used to seeing on vsc, and much different than what i'm used to seeing coming out of cl, but lots of style, attention to detail, and creativity in the details.
Thanks man. Ya it seems the hottest vip trend on CL is a rep TTE lip and Varrstoens LOL. As for the way my car looks now, that will all change in the next week hehe. Keeping everything under wraps until after inMotion car show Sep 29th.
View original BBCode
[QUOTE=OG;464637]i like it. different than what i'm used to seeing on vsc, and much different than what i'm used to seeing coming out of cl, but lots of style, attention to detail, and creativity in the details.[/QUOTE]


Thanks man. Ya it seems the hottest vip trend on CL is a rep TTE lip and Varrstoens LOL. As for the way my car looks now, that will all change in the next week hehe. Keeping everything under wraps until after inMotion car show Sep 29th.
looks awesome. very clean 2GS
View original BBCode
looks awesome. very clean 2GS
Looking good yak, welcome to life outside of replica TTE and fusa forum
View original BBCode
Looking good yak, welcome to life outside of replica TTE and fusa forum
Thanks guys. That actually means a lot coming from both of you. I've been following your guys builds from way back when you guys started out. Super inspirational.

When I first started mine off, I wasn't really planning much as its just a daily driver. But one thing leads to another. You guys know what I mean. Once you get a taste its like heroin, you just can't stop LOL
View original BBCode
Thanks guys. That actually means a lot coming from both of you. I've been following your guys builds from way back when you guys started out. Super inspirational.
When I first started mine off, I wasn't really planning much as its just a daily driver. But one thing leads to another. You guys know what I mean. Once you get a taste its like heroin, you just can't stop LOL
love it:biggthumpup:
View original BBCode
love it:biggthumpup:
looking forward to more!!
View original BBCode
looking forward to more!!
kush all day bro
View original BBCode
kush all day bro
In my top 5 favorite interiors for sure
View original BBCode
In my top 5 favorite interiors for sure
Dropped by the bodyshop yesterday to see progess on the body.
Before the rears were just rolled, but it was too thick still to get the ideal fitment. So I ended up cutting the lip off completely and pulled the rear quarters juuuuust enough to clear the wheel so I can fully deflate the air bags and rewelded the double wall back together.

Custom mounted fogs for the new bumper. So excited I get the car back on Wednesday

View original BBCode
Dropped by the bodyshop yesterday to see progess on the body.

Before the rears were just rolled, but it was too thick still to get the ideal fitment. So I ended up cutting the lip off completely and pulled the rear quarters juuuuust enough to clear the wheel so I can fully deflate the air bags and rewelded the double wall back together.

[URL="https://dl.dropbox.com/u/70793128/GS300/Upgrades/Photo%202012-09-22%204%2046%2054%20PM.jpg"][IMG]https://dl.dropbox.com/u/70793128/GS300/Upgrades/Photo%202012-09-22%204%2046%2054%20PM.jpg[/IMG][/URL]

Custom mounted fogs for the new bumper. So excited I get the car back on Wednesday

[URL="https://dl.dropbox.com/u/70793128/GS300/Upgrades/Photo%202012-09-22%204%2020%2019%20PM.jpg"][IMG]https://dl.dropbox.com/u/70793128/GS300/Upgrades/Photo%202012-09-22%204%2020%2019%20PM.jpg[/IMG][/URL]
This is a really awesome build. Car sure came a long way & great idea in posting all progress pic.

Good job, bro!!
View original BBCode
This is a really awesome build. Car sure came a long way & great idea in posting all progress pic.
Good job, bro!!
I like what I see :biggthumpup:
View original BBCode
I like what I see :biggthumpup:
View original BBCode
The Saga Continues!...Alright enough of the teasers. For those of you who have been following and subscribed to this thread, you'll be happy to know I just got the car out of the workshop. After a little bit of blood sweat and tears here's the beginning of what is just scratching the surface of the new chapter. I have a whole lot of new things in the process for the new year as it will be going into storage for the winter. I'll be doing a photo/video shoots in the next week or so, so stay tuned for that :)


I wanna give a big thanks to Fusion Auto for custom fabricating the front bumper and pulling and shaping the quarter panels and retrofitting the crazy bright 6000k LED rings into the fogs.
[URL="http://dl.dropbox.com/u/70793128/GS300/Upgrades/IMG_7465.JPG"][IMG]http://dl.dropbox.com/u/70793128/GS300/Upgrades/IMG_7465.JPG[/IMG][/URL]
[URL="http://dl.dropbox.com/u/70793128/GS300/Upgrades/IMG_7466.JPG"][IMG]http://dl.dropbox.com/u/70793128/GS300/Upgrades/IMG_7466.JPG[/IMG][/URL]

I also changed the taillights from the Insurance taillights as they are becoming a little too common to the Braga Type-3's
[IMG]https://dl.dropbox.com/u/70793128/GS300/Upgrades/IMG_7589.JPG[/IMG]


The shoes have been changed to Trafficstar STR. Still the same widths as my previous setup but more aggressive offsets
[URL="http://dl.dropbox.com/u/70793128/GS300/Upgrades/IMG_7576.JPG"][IMG]http://dl.dropbox.com/u/70793128/GS300/Upgrades/IMG_7576.JPG[/IMG][/URL]


Its a little hard to see from this angle but the rear quarter panels have been pulled. I truly love the stock lines of the original body, but with the new shoes there was no way to avoid pulling. Personally the thought of flared/rolled out fenders makes me cringe.  So I thought to myself how do I make a pull not look like a pull. So after a hard look at the front fenders I noticed they're not as flat as the rears. So I had them pulled shaped so they replicate the same curves as the front fenders. I really think This is how it should have come from the factory. Currently there's about 3mm clearance from the fender to the rim :D
[URL="http://dl.dropbox.com/u/70793128/GS300/Upgrades/IMG_7591.JPG"][IMG]http://dl.dropbox.com/u/70793128/GS300/Upgrades/IMG_7591.JPG[/IMG][/URL]
[URL="http://dl.dropbox.com/u/70793128/GS300/Upgrades/IMG_7588.JPG"][IMG]http://dl.dropbox.com/u/70793128/GS300/Upgrades/IMG_7588.JPG[/IMG][/URL]


[URL="http://dl.dropbox.com/u/70793128/GS300/Upgrades/IMG_7595.JPG"][IMG]http://dl.dropbox.com/u/70793128/GS300/Upgrades/IMG_7595.JPG[/IMG][/URL]
[URL="http://dl.dropbox.com/u/70793128/GS300/Upgrades/IMG_7592.JPG"][IMG]http://dl.dropbox.com/u/70793128/GS300/Upgrades/IMG_7592.JPG[/IMG][/URL]
love it!! REALLY like those traffic stars
View original BBCode
love it!! REALLY like those traffic stars
Extremely classy pull on the rear. How much inner fender work needed to tuck the rears?
View original BBCode
Extremely classy pull on the rear. How much inner fender work needed to tuck the rears?
daaaang. i really really hate it when the factory line is done away with, but this is the exception that proves the rule. that rear quarter looks money!
View original BBCode
daaaang. i really really hate it when the factory line is done away with, but this is the exception that proves the rule. that rear quarter looks money!
WOW!! Your G looks on point!! Congrats on a bad ass build
View original BBCode
WOW!! Your G looks on point!! Congrats on a bad ass build
Here's a quick photo of me and my buddy Kenji this past weekend at inMotion Fitment vs. Function Car Show hosted by NWMotiv.
Big thanks to Armin Ausejo Photography for the dope photos!


View original BBCode
Here's a quick photo of me and my buddy Kenji this past weekend at inMotion Fitment vs. Function Car Show hosted by NWMotiv.
Big thanks to Armin Ausejo Photography for the dope photos!
[IMG]https://dl.dropbox.com/u/70793128/kenjijustin-1.jpg[/IMG]
[IMG]https://dl.dropbox.com/u/70793128/kenjijustin-2.jpg[/IMG]
car looks really good justin! I'm loving the changes!!
View original BBCode
car looks really good justin! I'm loving the changes!!
Swanky. I could never keep my interior that clean.
View original BBCode
Swanky. I could never keep my interior that clean.
Looks exceptional very tastefully done...the pics with both cars could be an add you guys both did your thing
View original BBCode
Looks exceptional very tastefully done...the pics with both cars could be an add you guys both did your thing
Very nice look, both GS's
View original BBCode
Very nice look, both GS's
dope
View original BBCode
dope
Looking Fresh!
View original BBCode
Looking Fresh!
Thanks for the compliments guys. I got a few things in the wood works when it goes into hibernation for the winter.
View original BBCode
Thanks for the compliments guys. I got a few things in the wood works when it goes into hibernation for the winter.
I wish mine will be that sexy some day!!!!!!
View original BBCode
I wish mine will be that sexy some day!!!!!!
So a year later I finally got around to wiring up the table to get the LED mirror tunnel effect going. I tapped it to the light in the glove box so it automatically goes with my low beams. At first I thought it was going to effect my vision driving by reflecting off the windshield or passenger window when I'm driving. But turns out I cant see it at all while driving so it worked out perfectly.


View original BBCode
So a year later I finally got around to wiring up the table to get the LED mirror tunnel effect going. I tapped it to the light in the glove box so it automatically goes with my low beams. At first I thought it was going to effect my vision driving by reflecting off the windshield or passenger window when I'm driving. But turns out I cant see it at all while driving so it worked out perfectly.


[IMG]https://dl.dropbox.com/u/70793128/GS300/Upgrades/IMG_7671.JPG[/IMG]
[IMG]https://dl.dropbox.com/u/70793128/GS300/Upgrades/IMG_7672.JPG[/IMG]
That's DOPE :biggthumpup:
View original BBCode
That's DOPE :biggthumpup:
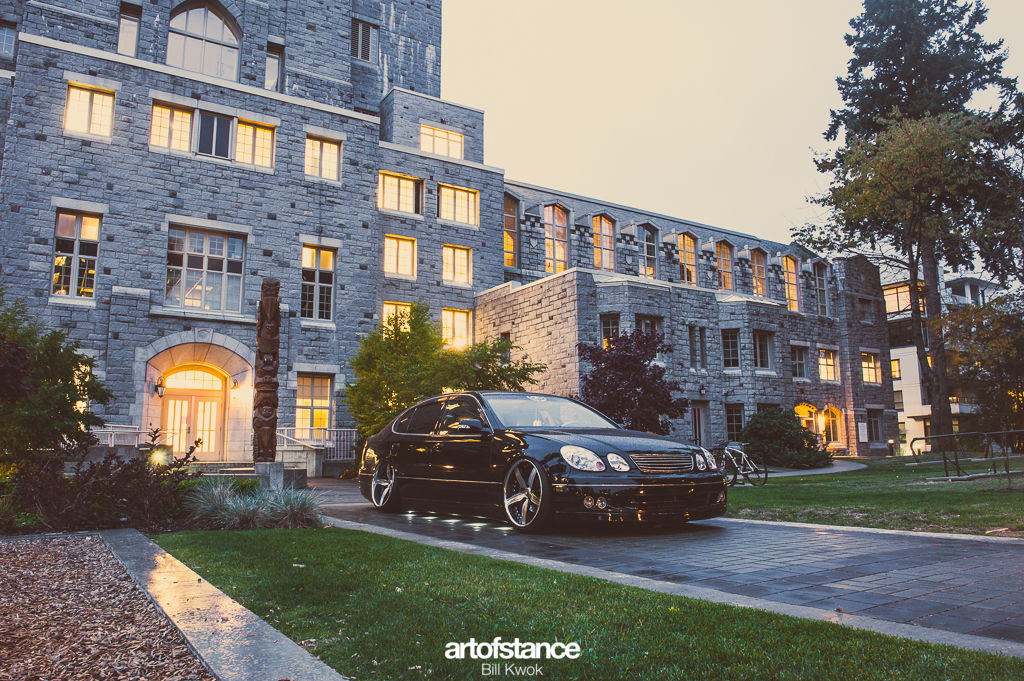
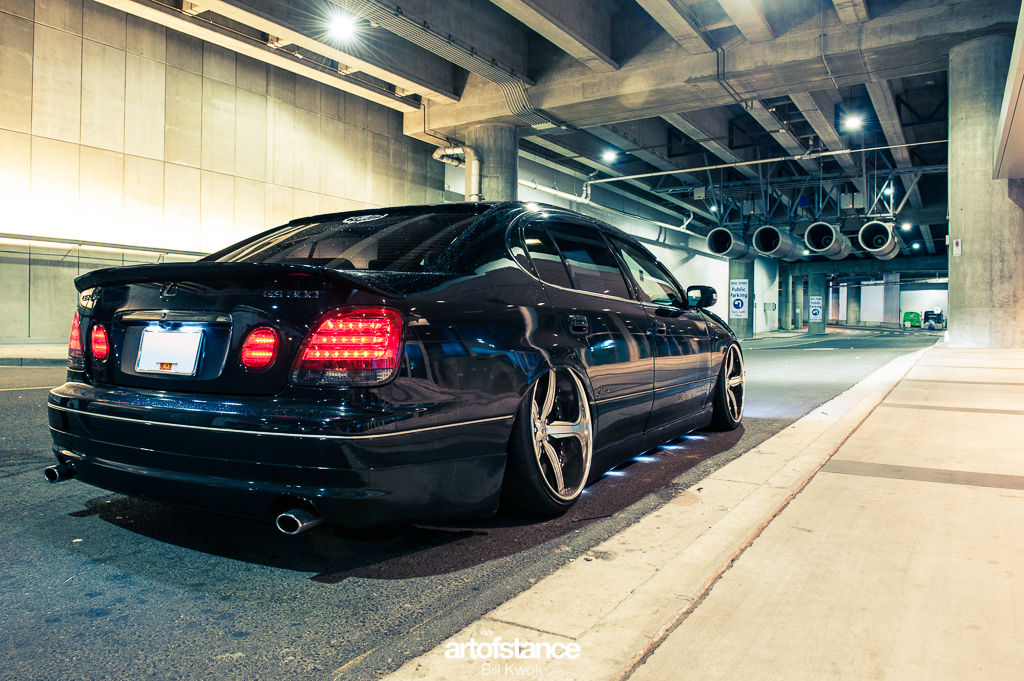
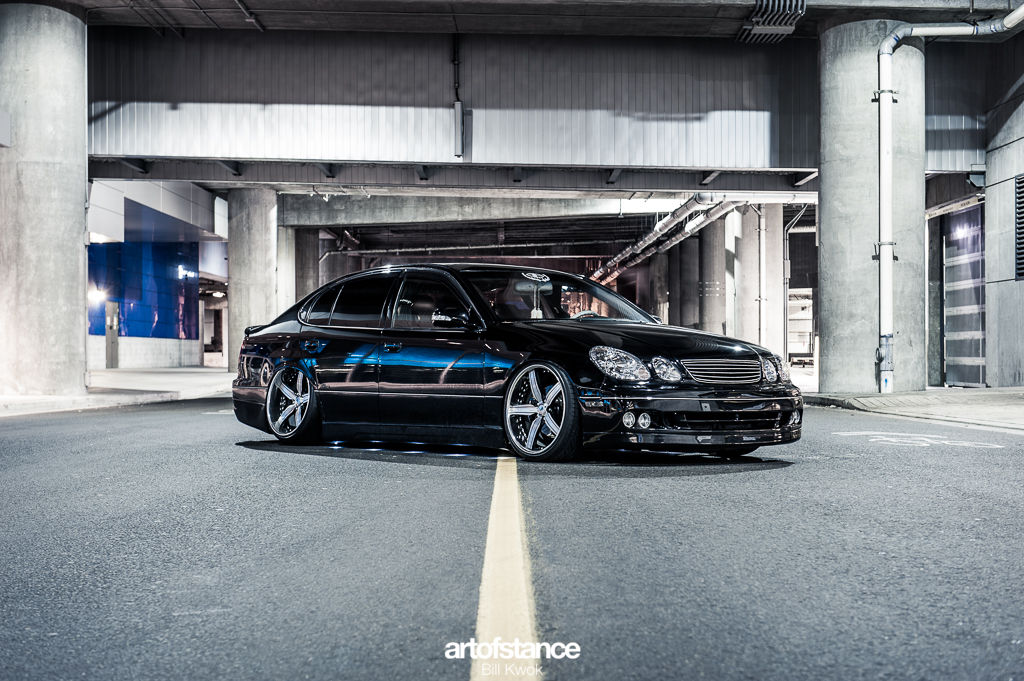
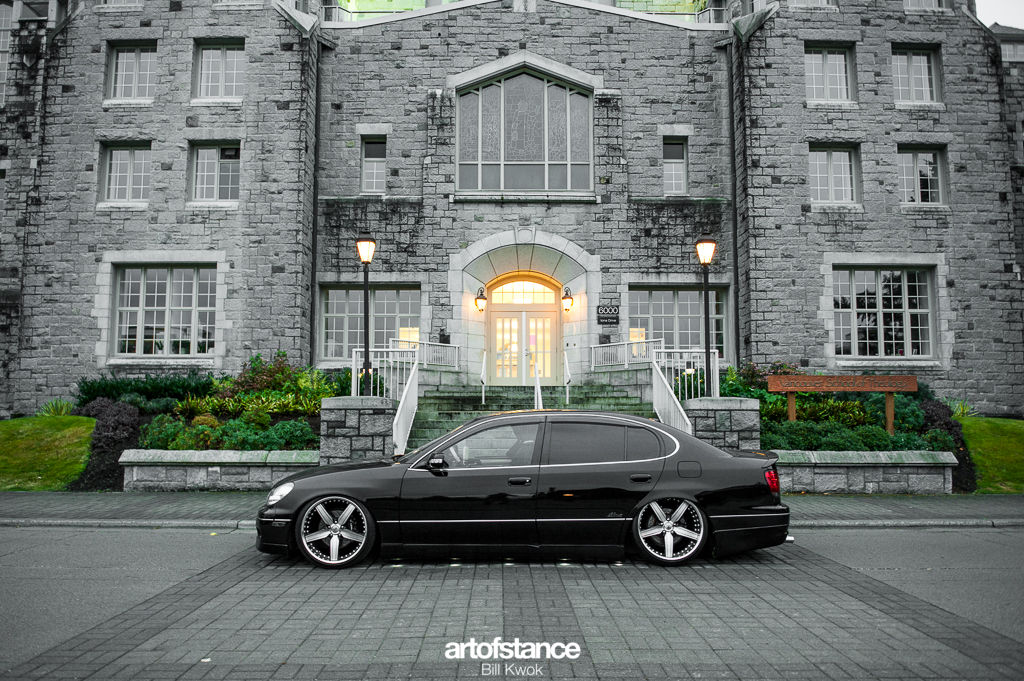
Just came back from from my first feature on a couple Canadian auto blogs. Went on a photoshoot with Bill Kwok of
artofstance and Devan Francis of
DODOlogic. This was the last time I took the car out before putting it into storage for the winter. I got a few things in the works during the downtime. It too bad that it just started to rain during the evening shots. :cry:
This is just a teaser trailer. Full one coming soon.
[video=youtube;hqXm15mbNKc]http://www.youtube.com/watch?v=hqXm15mbNKc[/video]
Full article and photos can be found here.
http://www.artofstance.com/vip-lexus-gs300/
View original BBCode
Just came back from from my first feature on a couple Canadian auto blogs. Went on a photoshoot with Bill Kwok of [B][U][URL="http://www.artofstance.com/"]artofstance[/URL][/U][/B] and Devan Francis of [URL="http://www.dodologic.ca"][B][U]DODOlogic[/U][/B][/URL]. This was the last time I took the car out before putting it into storage for the winter. I got a few things in the works during the downtime. It too bad that it just started to rain during the evening shots. :cry:


This is just a teaser trailer. Full one coming soon.
[video=youtube;hqXm15mbNKc]http://www.youtube.com/watch?v=hqXm15mbNKc[/video]


[SIZE=3]Full article and photos can be found here.
[URL]http://www.artofstance.com/vip-lexus-gs300/[/URL][/SIZE]


[URL="http://www.artofstance.com/wp-content/uploads/2012/10/gs300-4.jpg"][IMG]http://www.artofstance.com/wp-content/uploads/2012/10/gs300-4.jpg[/IMG][/URL]
[img]http://www.artofstance.com/wp-content/uploads/2012/10/gs300-6.jpg[/img]
[img]http://www.artofstance.com/wp-content/uploads/2012/10/gs300-7.jpg[/img]
[img]http://www.artofstance.com/wp-content/uploads/2012/10/gs300-8.jpg[/img]
Nice, I can digg it
View original BBCode
Nice, I can digg it
Foglights and table look dope!!
View original BBCode
Foglights and table look dope!!
Ballin!
View original BBCode
Ballin!
lovin the fogs and the puddle lights along the side. clean.
View original BBCode
lovin the fogs and the puddle lights along the side. clean.
Looks sick!!! I digg it...where did you get the LED Mirrors covers with built in puddle light on the bottom that replaces the factory covers and the mirrors with built in turn signal
View original BBCode
Looks sick!!! I digg it...where did you get the LED Mirrors covers with built in puddle light on the bottom that replaces the factory covers and the mirrors with built in turn signal
Alright guys, its been a while since I've done any updates since I storage my car for the winter season. And as per every winter I always like to get a few goodies during the downtime (makes it feel like a new experience each time I take it back out :)
So I've never really showcased my trunk as there was nothing really to show off besides a fat back tank with some messy brass plumbing. So I switched from a 5gal fat black tank to a long skinny chrome 5gal. I also switched my brass plumbing to a Accuair VU4 as its way more compact and cleaner.

When I took my car out of storage I came a across a small little issue. My compressors couldn't pump air into my tank. It was either a leak somewhere between the compressor and or the motor was shot. I could hear the motor running but even after waiting 10 mins it wouldn't raise the pressure by even 1 PSI. Turns out the check valves were f****d. So I ended up upgrading my old Viair 450C to the 444C with some SMC check valves.

Since I'm already dressing up the trunk a bit, I figured I might as well step it up a notch. Ever since I upgraded my head unit to the AVIC-X930BT I've been without the factory sub. And I don't have to explain how much that sucked! My buddy over at Dose Audio helped install a custom trunk enclosure for me. It looks rough right now but far from finished! Just wait :)


Also working on a concept for custom illuminated door sills. This is just a prototype, but will be pretty similar when complete.

I've also sent out my carbon panels to have redone by FX Auto. I wasn't happy with what my local guy who originally did them. But I heard good things with FX so I gave them a shot. So far the center console and ashtray are done. Just waiting on my door panels. So far looking good.

View original BBCode
Alright guys, its been a while since I've done any updates since I storage my car for the winter season. And as per every winter I always like to get a few goodies during the downtime (makes it feel like a new experience each time I take it back out :)


So I've never really showcased my trunk as there was nothing really to show off besides a fat back tank with some messy brass plumbing. So I switched from a 5gal fat black tank to a long skinny chrome 5gal. I also switched my brass plumbing to a Accuair VU4 as its way more compact and cleaner.


[URL="http://dl.dropbox.com/u/70793128/GS300/Upgrades/IMG_7820.JPG"][IMG]http://dl.dropbox.com/u/70793128/GS300/Upgrades/IMG_7820.JPG[/IMG][/URL]


When I took my car out of storage I came a across a small little issue. My compressors couldn't pump air into my tank. It was either a leak somewhere between the compressor and or the motor was shot. I could hear the motor running but even after waiting 10 mins it wouldn't raise the pressure by even 1 PSI. Turns out the check valves were f****d. So I ended up upgrading my old Viair 450C to the 444C with some SMC check valves.


[URL="http://dl.dropbox.com/u/70793128/GS300/Upgrades/IMG_1998.JPG"][IMG]http://dl.dropbox.com/u/70793128/GS300/Upgrades/IMG_1998.JPG[/IMG][/URL]


Since I'm already dressing up the trunk a bit, I figured I might as well step it up a notch. Ever since I upgraded my head unit to the AVIC-X930BT I've been without the factory sub. And I don't have to explain how much that sucked! My buddy over at Dose Audio helped install a custom trunk enclosure for me. It looks rough right now but far from finished! Just wait :)


[URL="http://dl.dropbox.com/u/70793128/GS300/Upgrades/IMG_1995.JPG"][IMG]http://dl.dropbox.com/u/70793128/GS300/Upgrades/IMG_1995.JPG[/IMG][/URL]
[URL="http://dl.dropbox.com/u/70793128/GS300/Upgrades/IMG_1997.JPG"][IMG]http://dl.dropbox.com/u/70793128/GS300/Upgrades/IMG_1997.JPG[/IMG][/URL]


Also working on a concept for custom illuminated door sills. This is just a prototype, but will be pretty similar when complete.


[URL="http://dl.dropbox.com/u/70793128/GS300/Upgrades/IMG_2037.JPG"][IMG]http://dl.dropbox.com/u/70793128/GS300/Upgrades/IMG_2037.JPG[/IMG][/URL]


I've also sent out my carbon panels to have redone by FX Auto. I wasn't happy with what my local guy who originally did them. But I heard good things with FX so I gave them a shot. So far the center console and ashtray are done. Just waiting on my door panels. So far looking good.
[URL="http://dl.dropbox.com/u/70793128/GS300/Upgrades/DSC02997.JPG"][IMG]http://dl.dropbox.com/u/70793128/GS300/Upgrades/DSC02997.JPG[/IMG][/URL]
Recently went on a shoot this past weekend for NWMotiv with Josh Mackey. Here's a couple shots for the up coming feature.


View original BBCode
Recently went on a shoot this past weekend for NWMotiv with Josh Mackey. Here's a couple shots for the up coming feature.


[IMG]http://dl.dropbox.com/u/70793128/883345_10151310826581968_1829706450_o.jpg[/IMG]
[IMG]http://dl.dropbox.com/u/70793128/901936_558980357466110_212466622_o.jpg[/IMG]
good build, shows much attention to detail and overall good mix of parts! love it!
View original BBCode
good build, shows much attention to detail and overall good mix of parts! love it!
now this, this is a build thread. GREAT work.
View original BBCode
now this, this is a build thread. GREAT work.
looks good
View original BBCode
looks good
View original BBCode
Thanks guys. I really hope I can finish my build this year. With my new place currently in development soon after gonna be working on a family, not sure if I'll be able to indulge as much into my hobby.

So trunk setup is just about done. There's a few things here and there I wanna change up. But here is how its looking so far.


[URL="https://dl.dropbox.com/u/70793128/GS300/Upgrades/IMG_8026.jpg"][IMG]https://dl.dropbox.com/u/70793128/GS300/Upgrades/IMG_8026.jpg[/IMG][/URL]
[URL="https://dl.dropbox.com/u/70793128/GS300/Upgrades/IMG_8015.jpg"][IMG]https://dl.dropbox.com/u/70793128/GS300/Upgrades/IMG_8015.jpg[/IMG][/URL]
[URL="https://dl.dropbox.com/u/70793128/GS300/Upgrades/IMG_8017.jpg"][IMG]https://dl.dropbox.com/u/70793128/GS300/Upgrades/IMG_8017.jpg[/IMG][/URL]


[SIZE=3]But when the lights do down and the volume goes up[/SIZE] :runcoold::dance::tounged::crunksd::hsughd3::hswiggle_2::eek5r2:


[URL="https://dl.dropbox.com/u/70793128/GS300/Upgrades/IMG_8025.jpg"][IMG]https://dl.dropbox.com/u/70793128/GS300/Upgrades/IMG_8025.jpg[/IMG][/URL]
[URL="https://dl.dropbox.com/u/70793128/GS300/Upgrades/IMG_8022.jpg"][IMG]https://dl.dropbox.com/u/70793128/GS300/Upgrades/IMG_8022.jpg[/IMG][/URL]
[URL="https://dl.dropbox.com/u/70793128/GS300/Upgrades/IMG_8001.jpg"][IMG]https://dl.dropbox.com/u/70793128/GS300/Upgrades/IMG_8001.jpg[/IMG][/URL]
Im diggin the stealthy trunk setup!
View original BBCode
Im diggin the stealthy trunk setup!
I think I've seen you on CL but HOLY. Never saw your build till now, and it is amazing.
View original BBCode
I think I've seen you on CL but HOLY. Never saw your build till now, and it is amazing.
Dope trunk!
View original BBCode
Dope trunk!
i may be in the minority here, but i really really like your wheel selection on this car.
View original BBCode
i may be in the minority here, but i really really like your wheel selection on this car.
I gotta ask where you got the side mirror glasses. I want. :3
View original BBCode
I gotta ask where you got the side mirror glasses. I want. :3
One of my fav wheels and a super clean trunk setup. Good job man. Gives me inspiration to work on mine.
View original BBCode
One of my fav wheels and a super clean trunk setup. Good job man. Gives me inspiration to work on mine.
dope build!!
View original BBCode
dope build!!
Thanks for the compliments guys. Here's just a few little updates to the interior for you guys.
If you've been following my thread I originally had all my wood panels wrapped with Hasepro dry silver carbon. Although I liked it I wanted to give it a little more pop, so I had it redone in the traditional wet carbon look so it has that gloss shine. I sent them to a local guy who works with fiberglass and carbon composites. He told me it's his first time working with silver carbon (which is thicker than traditional black carbon making it a little harder to conform to certain shapes), but was assured it would be a top notch job. I was told for custom jobs like this they need to be paid in advance which I obliged (BIG MISTAKE!). When I got the parts back not only was the work really sloppy, it wasn't even vacuum sealed (which is a must otherwise you get air bubbles or separation down the line.)
For those who are curious on how the process is done....Once you have the parts wrapped you need to layer the resin, sand to a smooth surface and repeat until you feel the resin is thick enough then apply cleat coat, wet sand and polish to a smooth shine. Well in my case the guy who was doing the sanding, sanded right through the carbon so there was patches of carbon missing in some areas. Not only that, when he dremeled out the holes for the buttons on the center console it was sloppy and uneven. With only a couples days of owning them air bubbles were popping up everywhere on the center console. It was truly a nightmare. I would have rather stuck with the original dry carbon look.
Here's some photos of the terrible craftsmanship.


Anyways I b***hed and complained to these ass clowns and they said they can have the parts redone but I can already tell they could never achieve the quality I'm looking for. I had to take my loses and move on.
So after doing some research and reading the Cluc Lexus boards trying to source other shops to do a proper job. I came across
FX Auto Design which seemed to have some good reviews. After sending the photos to Chris, he was confident he can salvage the parts instead of sending him whole new set which I had lying around. I was told the parts are sent off you their factory in Asia and takes about 2-3 weeks to get back. It turns out they had to send it back again because the weave angle was different from how I described I wanted it to be, so it was a little longer to get back than anticipated, but well worth it. Chris explained due to some of the shapes and that the thickness of the silver carbon was harder to work with. They were very professional and lots of communication back and forth to ensure everything was correct. I was surprised and pleased with their service.
These are how they turned out.


This was the original weave angle they got back. But I specifically requested to have the weave angle the same as the end. It was most likely just a small miscommunication. But it was all good as they got it all corrected in the next photo.

These are the corrected pieces. Call me OCD but its the small attention to details that can really make things stand out.

Now since half of my center console was gone I would dress up the rest of it just a little. I was trying to think of other ways to update the look of the dash. I've always been a fan of the Sport Design silver panels, so I gave it some thought and decided to step it up a notch. I picked up 2 yards pf brushed titanium vinyl and wrapped the A/C unit, 2DIN head unit frame and shifter/cupholder area.
3 things you definitely need. An X-Acto knife, a steady hand and a lot of patience. One little screw up and its back from scratch.

And VOILA!
 BEFORE
 AFTER
AFTER


View original BBCode
Thanks for the compliments guys. Here's just a few little updates to the interior for you guys.


If you've been following my thread I originally had all my wood panels wrapped with Hasepro dry silver carbon. Although I liked it I wanted to give it a little more pop, so I had it redone in the traditional wet carbon look so it has that gloss shine. I sent them to a local guy who works with fiberglass and carbon composites. He told me it's his first time working with silver carbon (which is thicker than traditional black carbon making it a little harder to conform to certain shapes), but was assured it would be a top notch job. I was told for custom jobs like this they need to be paid in advance which I obliged (BIG MISTAKE!). When I got the parts back not only was the work really sloppy, it wasn't even vacuum sealed (which is a must otherwise you get air bubbles or separation down the line.)


For those who are curious on how the process is done....Once you have the parts wrapped you need to layer the resin, sand to a smooth surface and repeat until you feel the resin is thick enough then apply cleat coat, wet sand and polish to a smooth shine. Well in my case the guy who was doing the sanding, sanded right through the carbon so there was patches of carbon missing in some areas. Not only that, when he dremeled out the holes for the buttons on the center console it was sloppy and uneven. With only a couples days of owning them air bubbles were popping up everywhere on the center console. It was truly a nightmare. I would have rather stuck with the original dry carbon look.


Here's some photos of the terrible craftsmanship.
[URL="https://dl.dropboxusercontent.com/u/70793128/GS300/bad%20carbon/photo%201.JPG"][IMG]https://dl.dropboxusercontent.com/u/70793128/GS300/bad%20carbon/photo%201.JPG[/IMG][/URL]
[URL="https://dl.dropboxusercontent.com/u/70793128/GS300/bad%20carbon/photo%202.JPG"][IMG]https://dl.dropboxusercontent.com/u/70793128/GS300/bad%20carbon/photo%202.JPG[/IMG][/URL]
[URL="https://dl.dropboxusercontent.com/u/70793128/GS300/bad%20carbon/photo%204.JPG"][IMG]https://dl.dropboxusercontent.com/u/70793128/GS300/bad%20carbon/photo%204.JPG[/IMG][/URL]
[URL="https://dl.dropboxusercontent.com/u/70793128/GS300/bad%20carbon/photo%205.JPG"][IMG]https://dl.dropboxusercontent.com/u/70793128/GS300/bad%20carbon/photo%205.JPG[/IMG][/URL]


Anyways I b***hed and complained to these ass clowns and they said they can have the parts redone but I can already tell they could never achieve the quality I'm looking for. I had to take my loses and move on.


So after doing some research and reading the Cluc Lexus boards trying to source other shops to do a proper job. I came across [URL="http://www.fxautodesign.com/"][B][U]FX Auto Design[/U][/B][/URL] which seemed to have some good reviews. After sending the photos to Chris, he was confident he can salvage the parts instead of sending him whole new set which I had lying around. I was told the parts are sent off you their factory in Asia and takes about 2-3 weeks to get back. It turns out they had to send it back again because the weave angle was different from how I described I wanted it to be, so it was a little longer to get back than anticipated, but well worth it. Chris explained due to some of the shapes and that the thickness of the silver carbon was harder to work with. They were very professional and lots of communication back and forth to ensure everything was correct. I was surprised and pleased with their service.


These are how they turned out.
[URL="https://dl.dropboxusercontent.com/u/70793128/GS300/Upgrades/DSC02997.JPG"][IMG]https://dl.dropboxusercontent.com/u/70793128/GS300/Upgrades/DSC02997.JPG[/IMG][/URL]
[URL="https://dl.dropboxusercontent.com/u/70793128/GS300/Upgrades/DSC02996.JPG"][IMG]https://dl.dropboxusercontent.com/u/70793128/GS300/Upgrades/DSC02996.JPG[/IMG][/URL]


This was the original weave angle they got back. But I specifically requested to have the weave angle the same as the end. It was most likely just a small miscommunication. But it was all good as they got it all corrected in the next photo.
[URL="https://dl.dropboxusercontent.com/u/70793128/GS300/Upgrades/DSC02992.jpg"][IMG]https://dl.dropboxusercontent.com/u/70793128/GS300/Upgrades/DSC02992.jpg[/IMG][/URL]


These are the corrected pieces. Call me OCD but its the small attention to details that can really make things stand out.
[URL="https://dl.dropboxusercontent.com/u/70793128/GS300/Upgrades/DSC03018.jpg"][IMG]https://dl.dropboxusercontent.com/u/70793128/GS300/Upgrades/DSC03018.jpg[/IMG][/URL]


Now since half of my center console was gone I would dress up the rest of it just a little. I was trying to think of other ways to update the look of the dash. I've always been a fan of the Sport Design silver panels, so I gave it some thought and decided to step it up a notch. I picked up 2 yards pf brushed titanium vinyl and wrapped the A/C unit, 2DIN head unit frame and shifter/cupholder area.


3 things you definitely need. An X-Acto knife, a steady hand and a lot of patience. One little screw up and its back from scratch.
[URL="https://dl.dropboxusercontent.com/u/70793128/GS300/Upgrades/IMG_2147.jpg"][IMG]https://dl.dropboxusercontent.com/u/70793128/GS300/Upgrades/IMG_2147.jpg[/IMG][/URL]


And VOILA!
[URL="https://dl.dropboxusercontent.com/u/70793128/GS300/Upgrades/IMG_2148.jpg"][IMG]https://dl.dropboxusercontent.com/u/70793128/GS300/Upgrades/IMG_2148.jpg[/IMG][/URL]


[B]BEFORE[/B]
[URL="http://photoshare.shaw.ca/image/7/e/a/234510/img_5020-0.jpg?rev=0"][IMG]http://photoshare.shaw.ca/image/7/e/a/234510/img_5020-0.jpg?rev=0[/IMG][/URL]
[URL="https://dl.dropboxusercontent.com/u/70793128/GS300/bad%20carbon/IMG_5029.jpg"][IMG]https://dl.dropboxusercontent.com/u/70793128/GS300/bad%20carbon/IMG_5029.jpg[/IMG][/URL]


[B]AFTER[/B]
[URL="https://dl.dropboxusercontent.com/u/70793128/GS300/Upgrades/IMG_8045.jpg"][IMG]https://dl.dropboxusercontent.com/u/70793128/GS300/Upgrades/IMG_8045.jpg[/IMG][/URL]
[URL="https://dl.dropboxusercontent.com/u/70793128/GS300/Upgrades/IMG_2151.jpg"][IMG]https://dl.dropboxusercontent.com/u/70793128/GS300/Upgrades/IMG_2151.jpg[/IMG][/URL]
[URL="https://dl.dropboxusercontent.com/u/70793128/GS300/Upgrades/IMG_2149.jpg"][IMG]https://dl.dropboxusercontent.com/u/70793128/GS300/Upgrades/IMG_2149.jpg[/IMG][/URL]
How much is the cost for everything all done up? For the trim
View original BBCode
How much is the cost for everything all done up? For the trim
Wow that makes an awesome difference!
View original BBCode
Wow that makes an awesome difference!
OK so here's a little update for you forum fiends out there.
For the past couple months in my spare time I've been working on a custom set of illuminated door sills for my car.I really wanted to do a DIY write-up but I was already half way through when I thought of it LOL. Also a few concepts I wasn't too sure of.
They actually weren't that hard to make. Here's basically the steps
1) Pop out the original door sills.
- Each door sill has 3 clips (One on each end and one in the center). If you're having a tough time getting your fingers under the plastic, try masking a flat head screwdriver with electrical tape to pop them off.
2) Take out the stainless insert from the door sill.
- This part is pretty easy. If you bend black the plastic, you should see the stainless separating. It's only held by epoxy. You can also use a flat head to wedge between the plastic and stainless if you're having trouble separating the two.
3) Now come the measuring.
- Each front is roughly 633mm (top) / 626mm (bottom) / 23mm (height). The rears are roughly 381mm (top) 376mm (bottom) / 23mm (height)
4) Now we need to make new inserts.
- My material of choice was 1/16th think sheet of plexi-glass. Had I done it again I would have chosen thinner (1/32" thickness). Being that I used 1/16" thickness I had the plastic shop cut them to the appropriate sizes. If I had done it by hand it would take quite a bit of time. For those who want to go with the 1/32" an X-acto or box cutter should go through it pretty easily. USE A RULER or FLAT EDGE to guide your cut. If you try to freehand it, it most likely wont be straight and look F'd up. Be sure to round the corners of the plexi for a cleaner look. Once you are done your cuts, test fit them into the plastic sill to ensure they fit correctly.
5) Now we need to apply texture to the plexi
- I brought the plexi strip to my vinyl guy who had some brushed stainless steel vinyl. He measured the original strips to ensure the LEXUS cutout positioning was the same. Once they were cut out and the logos weeded out, its just a matter of laying it down on the plexi. I also used a frosted clear vinyl on the backside of the LEXUS lettering so it wasn't completely see through.
6) Cutting out holes for the light.
- Now that your vinyl is laid down on the plexi, you can see where you need to cut your hole in the bottom plastic trim to allow the light to pass through. You can use a razor or box cutter to cut through this.
7) Now you need to attach the light
- There are many light sources you can use. You can use LED strips or EL tape. What I did was buy a cheap set of illuminated door sills for a Civic and ripped it apart and robbed the plastic LED panel inside. I applied the LED panel to the bottom of the plastic door sill, secured it with hot glue and sealed it with aluminum tape.
8) Now lets install and power it up!
- This part is the longest part and definitely easier said than done. Take your door panels off and follow the wire coming from your door light. Strip the wire to tap in, then solder and shrink tube/electrical tape and you should be good to go. Put all your panels back, clip everything in and you're done.
Sorry I didn't have photos of the process. I know a picture is worth a thousand words. Anyways, here's how it turned out.


The last two photos above looks a lot brighter in the photo than in person. I guess its the camera. In reality its closer to this photo below. (maybe a little brighter)

View original BBCode
OK so here's a little update for you forum fiends out there.


For the past couple months in my spare time I've been working on a custom set of illuminated door sills for my car.I really wanted to do a DIY write-up but I was already half way through when I thought of it LOL. Also a few concepts I wasn't too sure of.


They actually weren't that hard to make. Here's basically the steps


[B]1) [/B]Pop out the original door sills.
 - Each door sill has 3 clips (One on each end and one in the center). If you're having a tough time getting your fingers under the plastic, try masking a flat head screwdriver with electrical tape to pop them off.


[B]2)[/B] Take out the stainless insert from the door sill.
 - This part is pretty easy. If you bend black the plastic, you should see the stainless separating. It's only held by epoxy. You can also use a flat head to wedge between the plastic and stainless if you're having trouble separating the two.


[B]3)[/B] Now come the measuring.
 - Each front is roughly 633mm (top) / 626mm (bottom) / 23mm (height). The rears are roughly 381mm (top) 376mm (bottom) / 23mm (height)


[B]4)[/B] Now we need to make new inserts.
 - My material of choice was 1/16th think sheet of plexi-glass. Had I done it again I would have chosen thinner (1/32" thickness). Being that I used 1/16" thickness I had the plastic shop cut them to the appropriate sizes. If I had done it by hand it would take quite a bit of time. For those who want to go with the 1/32" an X-acto or box cutter should go through it pretty easily. USE A RULER or FLAT EDGE to guide your cut. If you try to freehand it, it most likely wont be straight and look F'd up. Be sure to round the corners of the plexi for a cleaner look. Once you are done your cuts, test fit them into the plastic sill to ensure they fit correctly.


[B]5)[/B] Now we need to apply texture to the plexi
 - I brought the plexi strip to my vinyl guy who had some brushed stainless steel vinyl. He measured the original strips to ensure the LEXUS cutout positioning was the same. Once they were cut out and the logos weeded out, its just a matter of laying it down on the plexi. I also used a frosted clear vinyl on the backside of the LEXUS lettering so it wasn't completely see through.


[B]6)[/B] Cutting out holes for the light.
 - Now that your vinyl is laid down on the plexi, you can see where you need to cut your hole in the bottom plastic trim to allow the light to pass through. You can use a razor or box cutter to cut through this.


[B]7)[/B] Now you need to attach the light
 - There are many light sources you can use. You can use LED strips or EL tape. What I did was buy a cheap set of illuminated door sills for a Civic and ripped it apart and robbed the plastic LED panel inside. I applied the LED panel to the bottom of the plastic door sill, secured it with hot glue and sealed it with aluminum tape.


[B]8)[/B] Now lets install and power it up!
 - This part is the longest part and definitely easier said than done. Take your door panels off and follow the wire coming from your door light. Strip the wire to tap in, then solder and shrink tube/electrical tape and you should be good to go. Put all your panels back, clip everything in and you're done.


Sorry I didn't have photos of the process. I know a picture is worth a thousand words. Anyways, here's how it turned out.


[IMG]https://dl.dropboxusercontent.com/u/70793128/GS300/Upgrades/IMG_2188.jpg[/IMG]
[IMG]https://dl.dropboxusercontent.com/u/70793128/GS300/Upgrades/IMG_2190.jpg[/IMG]
[IMG]https://dl.dropboxusercontent.com/u/70793128/GS300/Upgrades/IMG_2192.jpg[/IMG]
[IMG]https://dl.dropboxusercontent.com/u/70793128/GS300/Upgrades/IMG_2194.jpg[/IMG]


The last two photos above looks a lot brighter in the photo than in person. I guess its the camera. In reality its closer to this photo below. (maybe a little brighter)
[IMG]https://dl.dropboxusercontent.com/u/70793128/GS300/Upgrades/IMG_8068.jpg[/IMG]
pretty cool DIY. should've used mini HIDs to light them up LOL
View original BBCode
pretty cool DIY. should've used mini HIDs to light them up LOL
brainneeded;492116 wrote:pretty cool DIY. should've used mini HIDs to light them up LOL
Thanks man. I'm currently talking with a machine shop that might have stainless panels cut out by water jet.
View original BBCode
[QUOTE=brainneeded;492116]pretty cool DIY. should've used mini HIDs to light them up LOL[/QUOTE]

Thanks man. I'm currently talking with a machine shop that might have stainless panels cut out by water jet.
YaKuZa_GS;492197 wrote:Thanks man. I'm currently talking with a machine shop that might have stainless panels cut out by water jet.
wrd that vinyl doesn't look very durable
View original BBCode
[QUOTE=YaKuZa_GS;492197]Thanks man. I'm currently talking with a machine shop that might have stainless panels cut out by water jet.[/QUOTE]
wrd that vinyl doesn't look very durable
interior looks a lot better with the cleared carbon and vinyl
View original BBCode
interior looks a lot better with the cleared carbon and vinyl
Good call on the re-do of the carbon door panel inserts. Huge improvement. Or maybe I have the same O.C.D.
View original BBCode
Good call on the re-do of the carbon door panel inserts. Huge improvement. Or maybe I have the same O.C.D.
brainneeded;492212 wrote:wrd that vinyl doesn't look very durable
The durability is actually pretty good, but I guess I just wanted to see a metal plate.
View original BBCode
[QUOTE=brainneeded;492212]wrd that vinyl doesn't look very durable[/QUOTE]

The durability is actually pretty good, but I guess I just wanted to see a metal plate.
Hey guys, I just wanted to share a little update. I was getting bored, so I decided to step up my table game. Added the 2-Way crystal table rings, coasters and light kit.


View original BBCode
Hey guys, I just wanted to share a little update. I was getting bored, so I decided to step up my table game. Added the 2-Way crystal table rings, coasters and light kit.

[IMG]https://dl.dropboxusercontent.com/u/70793128/GS300/Upgrades/IMG_8426.jpg[/IMG]
[IMG]https://dl.dropboxusercontent.com/u/70793128/GS300/Upgrades/IMG_8424.jpg[/IMG]
YaKuZa_GS;496486 wrote:Hey guys, I just wanted to share a little update. I was getting bored, so I decided to step up my table game. Added the 2-Way crystal table rings, coasters and light kit.
Wow... mind blowingly awesome
View original BBCode
[QUOTE=YaKuZa_GS;496486]Hey guys, I just wanted to share a little update. I was getting bored, so I decided to step up my table game. Added the 2-Way crystal table rings, coasters and light kit.

[URL="https://dl.dropboxusercontent.com/u/70793128/GS300/Upgrades/IMG_8426.jpg"][IMG]https://dl.dropboxusercontent.com/u/70793128/GS300/Upgrades/IMG_8426.jpg[/IMG][/URL]
[URL="https://dl.dropboxusercontent.com/u/70793128/GS300/Upgrades/IMG_8424.jpg"][IMG]https://dl.dropboxusercontent.com/u/70793128/GS300/Upgrades/IMG_8424.jpg[/IMG][/URL][/QUOTE]


Wow... mind blowingly awesome
Damm nice !


Sent from my iPhone using VIPStyleCars
View original BBCode
Damm nice !
Sent from my iPhone using VIPStyleCars
Daaaaaaamn! Perfect
View original BBCode
Daaaaaaamn! Perfect
i love how the light in the flat portion adds a 3D effect to the surface. reflection on reflection!
View original BBCode
i love how the light in the flat portion adds a 3D effect to the surface. reflection on reflection!
Just a little update on the trunk. I had the side panels re-trimmed so the holes for the subs were smaller. I wasn;t happy with how large they were before. I also added some plexi rings made to go around the subs and had it etched so it really pops when the LED hits it.

View original BBCode
Just a little update on the trunk. I had the side panels re-trimmed so the holes for the subs were smaller. I wasn;t happy with how large they were before. I also added some plexi rings made to go around the subs and had it etched so it really pops when the LED hits it.

[IMG]https://dl.dropboxusercontent.com/u/70793128/GS300/Upgrades/IMG_8586.JPG[/IMG]
Trunk setup came out tits


Sent from my SGH-T999 using Tapatalk 2
View original BBCode
Trunk setup came out tits
Sent from my SGH-T999 using Tapatalk 2
One last cruise before she goes to hibernation for he winter. Got big plans for winter season...Stay tuned ;)


Big thanks to DF Films & DODOLogic for taking the time to do this shoot
[video=youtube;HFIeRB0Zm6o]http://www.youtube.com/watch?v=HFIeRB0Zm6o[/video]
View original BBCode
One last cruise before she goes to hibernation for he winter. Got big plans for winter season...Stay tuned ;)
Big thanks to DF Films & DODOLogic for taking the time to do this shoot
[video=youtube;HFIeRB0Zm6o]http://www.youtube.com/watch?v=HFIeRB0Zm6o[/video]
I love how this video turned out. You and Devan killed it!
View original BBCode
I love how this video turned out. You and Devan killed it!
So I just got my first five minutes of fame in this upcoming issue of Import Tuner. If you guys have been following this thread, you'll probably notice the pics are from a little while back. I still have yet to get my hands on a copy. I hit up every newsstand in my neighborhood but no luck yet. All my buddies are like "hey congrats on the feature" and all I can think is why does everybody have a copy except me
Full online feature
http://www.importtuner.com/features/1405_2000_lexus_gs300/
Full Gallery
http://www.importtuner.com/features/1405_2000_lexus_gs300/photo_24.html
Here's a digital from the magazine


View original BBCode
So I just got my first five minutes of fame in this upcoming issue of Import Tuner. If you guys have been following this thread, you'll probably notice the pics are from a little while back. I still have yet to get my hands on a copy. I hit up every newsstand in my neighborhood but no luck yet. All my buddies are like "hey congrats on the feature" and all I can think is why does everybody have a copy except me

Full online feature
[url]http://www.importtuner.com/features/1405_2000_lexus_gs300/[/url]

Full Gallery
[url]http://www.importtuner.com/features/1405_2000_lexus_gs300/photo_24.html[/url]

Here's a digital from the magazine

[IMG]https://dl.dropboxusercontent.com/u/70793128/GS300/ImportTuner1.jpg[/IMG]

[IMG]https://dl.dropboxusercontent.com/u/70793128/GS300/ImportTuner2.jpg[/IMG]

[IMG]https://dl.dropboxusercontent.com/u/70793128/GS300/ImportTuner3.jpg[/IMG]
congrats! your car is definitely different than most builds here, love it.


Sent from my iPad using VIPStyleCars
View original BBCode
congrats! your car is definitely different than most builds here, love it.
Sent from my iPad using VIPStyleCars
congrats in the feature, love the outcome!
View original BBCode
congrats in the feature, love the outcome!
One of my favorite builds. Garson Yo..


Sent from PASSION VIP GUAM
View original BBCode
One of my favorite builds. Garson Yo..
Sent from PASSION VIP GUAM
CONGRATULATION:::
STRONG BUILT
SMOOTH LOOK::
View original BBCode
CONGRATULATION:::
STRONG BUILT
SMOOTH LOOK::
Now that I have joined this site, I can let you know I am another person who loves this build!!!! I also absolutely lover the table!
View original BBCode
Now that I have joined this site, I can let you know I am another person who loves this build!!!! I also absolutely lover the table!
Thanks guys. I've had a lot of work done during the winter. I'll be posting them up pretty soon
View original BBCode
Thanks guys. I've had a lot of work done during the winter. I'll be posting them up pretty soon
Alright alright alright. I've kept you guys in the dark for long enough (maybe even long enough you forgot about me HAH!). I've been a hella busy **** these past few months getting ready for show season again.
At the beginning of this year I started collecting for some new parts for heart transplant I had in store for my baby.
First things first was getting the new heart. I decided to go with the Aristo VVT-i. Got a pretty decent deal on a full swap kit, although I wish I knew there were a few pieces missing (driveshaft, downpipe, MAF sensor, TRC ECU, intercooler) but no big deal that couldn't be fixed.

I bought a second set of the OE piping to get all polished up to make 'er nice 'n purdy. After hour and hours and hours of sanding and polishing (I kid you not, I was sweating more than a hooker in church). But the end result... shiiiiiiiiiet

Since my swap kit didn't come with a intercooler, I decided to pick up a GReddy Type-LS. Being that I'll be running the stock twins, I didn't feel the need tp go with Spec-V or R
I also fount a pretty good deal on a used ARC intake. When I got it, it was the standard blushed aluminum but was pretty pitted. So I decided to break out the elbow grease and sand and polish the b**** out. I couldn't get all the pits out but got it definitely more presentable than when i first got it.

I had the intake manifold removed to get it power coated matte black. I was gonna polish it too, but being as coarse as it isand its size I knew it was going to take forever sanding so I took the easy way out LOL. But love how it turned out.

This is how it looked as of February of this year. Bone stock as the day it drove off the showroom floor. She was good to me, but I had to dump her for her twin sister.

Down to business. Old with the old and in with the equally old but new to me :)


I figured this was going to be the best time to get the timing belt and serpentine belt. I figured I would change the pulleys and cam gear at the same time. I went with Gates Racing for both belts. As for the cam gears and pulleys, I should have chose more wisely and went with a more reputable brand. (Which I later did, as I found out these were not precise.

Now comes the cooling. Sure I coooould have stayed with the stock radiator but I only plan to take it out once ;) I went with a Koyo designed for the IS300. I didn't wanna go Mishimoto as I've heard not so great things about them. I know a lot of members go for the Supra one, but by going with the IS300 model I can use the stock electric fans and has the coolant reservoir built in. I just had to change to a IS300 fan shroud. The fans itself the GS and IS share the same part number so they fit direct with the shroud making it a clean install. I didn't was switch to a belt or buy an after market electric ones as the OE are pretty good. There was only minimal modifications need to make it fit. For one, the posts at the bottom needed to be moved. And second the radiator is about 1" shorter so the stock top rad brackets didn't acutally contact the radiator to hold it in place so I had to have a couple fab'd up and custom aluminum rad pipe.

Since the radiator is designed for the MT IS I picked up a Earl's 13 row oil cooler to use as a tranny cooler. I mad the mistake of getting one with a AN -10 fitting with stainless lines. I found out later the -10 lines are too thick and the the pressure is not strong enough to push through so I had to downsize. I had the -10 ends chopped off and threaded in smaller fittings. I also installed a 10 row oil cooler but the sandwich that came with wasn't a thermostatic one so now my oil is running too cold. Currently waiting on a Mocal thermo sandwich. Its too bad the new intercooler prevents putting back the front rebar :(

While the motor was being swapped I sent out the plug, ecu, fuse and relay covers as well as the JDM Aristo strut tower bar out to get painted metallic red

I had to get my original driveshaft cut and welded and balanced to fit the Aristo transmission. I also had a custom 3" downpipe made since my swap kit didn't come with one.
Call me crazy but once I installed the covers I wasn't really digging the look. But I stuck with it until my new cam gear and pulleys came in. Turns out I needed to replace my crank pulley too. F***in 2JZ crank pulley doesn't come cheap! :cry:

I ended up installing Tomei cam gears, Poncams, GReddy pulleys, HKS SSQV, EVC, SLD and FCD and harmonic balancer. During the instalI had the covers are repainted to a true candy apple red, which I think is the true look I was going to initially. I fell in love with the finish instantly and loved how it shines under sunlight.

We'll get to the finished product soon LOL :D
View original BBCode
Alright alright alright. I've kept you guys in the dark for long enough (maybe even long enough you forgot about me HAH!). I've been a hella busy **** these past few months getting ready for show season again.


At the beginning of this year I started collecting for some new parts for heart transplant I had in store for my baby.


First things first was getting the new heart. I decided to go with the Aristo VVT-i. Got a pretty decent deal on a full swap kit, although I wish I knew there were a few pieces missing (driveshaft, downpipe, MAF sensor, TRC ECU, intercooler) but no big deal that couldn't be fixed.
[URL="https://dl.dropboxusercontent.com/u/70793128/GS300/Upgrades/IMG_0470.JPG"][IMG]https://dl.dropboxusercontent.com/u/70793128/GS300/Upgrades/IMG_0470.JPG[/IMG][/URL]


I bought a second set of the OE piping to get all polished up to make 'er nice 'n purdy. After hour and hours and hours of sanding and polishing (I kid you not, I was sweating more than a hooker in church). But the end result... shiiiiiiiiiet
[URL="https://dl.dropboxusercontent.com/u/70793128/GS300/Upgrades/IMG_8984.JPG"][IMG]https://dl.dropboxusercontent.com/u/70793128/GS300/Upgrades/IMG_8984.JPG[/IMG][/URL]


Since my swap kit didn't come with a intercooler, I decided to pick up a GReddy Type-LS. Being that I'll be running the stock twins, I didn't feel the need tp go with Spec-V or R


I also fount a pretty good deal on a used ARC intake. When I got it, it was the standard blushed aluminum but was pretty pitted. So I decided to break out the elbow grease and sand and polish the b**** out. I couldn't get all the pits out but got it definitely more presentable than when i first got it.
[URL="https://dl.dropboxusercontent.com/u/70793128/GS300/Upgrades/Photo%201-30-2014%2C%204%2000%2026%20PM.jpg"][IMG]https://dl.dropboxusercontent.com/u/70793128/GS300/Upgrades/Photo%201-30-2014%2C%204%2000%2026%20PM.jpg[/IMG][/URL]


I had the intake manifold removed to get it power coated matte black. I was gonna polish it too, but being as coarse as it isand its size I knew it was going to take forever sanding so I took the easy way out LOL. But love how it turned out.
[URL="https://dl.dropboxusercontent.com/u/70793128/GS300/Upgrades/Photo%202-17-2014%2C%205%2056%2028%20PM.jpg"][IMG]https://dl.dropboxusercontent.com/u/70793128/GS300/Upgrades/Photo%202-17-2014%2C%205%2056%2028%20PM.jpg[/IMG][/URL]


This is how it looked as of February of this year. Bone stock as the day it drove off the showroom floor. She was good to me, but I had to dump her for her twin sister.
[URL="https://dl.dropboxusercontent.com/u/70793128/GS300/Upgrades/Photo%202-14-2014%2C%201%2058%2055%20PM.jpg"][IMG]https://dl.dropboxusercontent.com/u/70793128/GS300/Upgrades/Photo%202-14-2014%2C%201%2058%2055%20PM.jpg[/IMG][/URL]


Down to business. Old with the old and in with the equally old but new to me :)
[URL="https://dl.dropboxusercontent.com/u/70793128/GS300/Upgrades/Photo%202-17-2014%2C%205%2051%2033%20PM.jpg"][IMG]https://dl.dropboxusercontent.com/u/70793128/GS300/Upgrades/Photo%202-17-2014%2C%205%2051%2033%20PM.jpg[/IMG][/URL]
[URL="https://dl.dropboxusercontent.com/u/70793128/GS300/Upgrades/Photo%202-17-2014%2C%205%2055%2055%20PM.jpg"][IMG]https://dl.dropboxusercontent.com/u/70793128/GS300/Upgrades/Photo%202-17-2014%2C%205%2055%2055%20PM.jpg[/IMG][/URL]


I figured this was going to be the best time to get the timing belt and serpentine belt. I figured I would change the pulleys and cam gear at the same time. I went with Gates Racing for both belts. As for the cam gears and pulleys, I should have chose more wisely and went with a more reputable brand. (Which I later did, as I found out these were not precise.
[URL="https://dl.dropboxusercontent.com/u/70793128/GS300/Upgrades/Photo%202-21-2014%2C%209%2051%2054%20AM.jpg"][IMG]https://dl.dropboxusercontent.com/u/70793128/GS300/Upgrades/Photo%202-21-2014%2C%209%2051%2054%20AM.jpg[/IMG][/URL]


Now comes the cooling. Sure I coooould have stayed with the stock radiator but I only plan to take it out once ;)  I went with a Koyo designed for the IS300. I didn't wanna go Mishimoto as I've heard not so great things about them. I know a lot of members go for the Supra one, but by going with the IS300 model I can use the stock electric fans and has the coolant reservoir built in. I just had to change to a IS300 fan shroud. The fans itself the GS and IS share the same part number so they fit direct with the shroud making it a clean install. I didn't was switch to a belt or buy an after market electric ones as the OE are pretty good. There was only minimal modifications need to make it fit. For one, the posts at the bottom needed to be moved. And second the radiator is about 1" shorter so the stock top rad brackets didn't acutally contact the radiator to hold it in place so I had to have a couple fab'd up and custom aluminum rad pipe.
[URL="https://dl.dropboxusercontent.com/u/70793128/GS300/Upgrades/IMG_0575.JPG"][IMG]https://dl.dropboxusercontent.com/u/70793128/GS300/Upgrades/IMG_0575.JPG[/IMG][/URL]


Since the radiator is designed for the MT IS I picked up a Earl's 13 row oil cooler to use as a tranny cooler. I mad the mistake of getting one with a AN -10 fitting with stainless lines. I found out later the -10 lines are too thick and the the pressure is not strong enough to push through so I had to downsize. I had the -10 ends chopped off and threaded in smaller fittings. I also installed a 10 row oil cooler but the sandwich that came with wasn't a thermostatic one so now my oil is running too cold. Currently waiting on a Mocal thermo sandwich. Its too bad the new intercooler prevents putting back the front rebar :(
[URL="https://dl.dropboxusercontent.com/u/70793128/GS300/Upgrades/IMG_0574.JPG"][IMG]https://dl.dropboxusercontent.com/u/70793128/GS300/Upgrades/IMG_0574.JPG[/IMG][/URL]


While the motor was being swapped I sent out the plug, ecu, fuse and relay covers as well as the JDM Aristo strut tower bar out to get painted metallic red
[URL="https://dl.dropboxusercontent.com/u/70793128/GS300/Upgrades/Photo%202-28-2014%2C%2011%2009%2031%20AM.jpg"][IMG]https://dl.dropboxusercontent.com/u/70793128/GS300/Upgrades/Photo%202-28-2014%2C%2011%2009%2031%20AM.jpg[/IMG][/URL]


I had to get my original driveshaft cut and welded and balanced to fit the Aristo transmission. I also had a custom 3" downpipe made since my swap kit didn't come with one.


Call me crazy but once I installed the covers I wasn't really digging the look. But I stuck with it until my new cam gear and pulleys came in. Turns out I needed to replace my crank pulley too. F***in 2JZ crank pulley doesn't come cheap!  :cry:
[URL="https://dl.dropboxusercontent.com/u/70793128/GS300/Upgrades/Photo%202-28-2014%2C%203%2037%2034%20PM.jpg"][IMG]https://dl.dropboxusercontent.com/u/70793128/GS300/Upgrades/Photo%202-28-2014%2C%203%2037%2034%20PM.jpg[/IMG][/URL]


I ended up installing Tomei cam gears, Poncams, GReddy pulleys, HKS SSQV, EVC, SLD and FCD and harmonic balancer. During the instalI had the covers are repainted to a true candy apple red, which I think is the true look I was going to initially. I fell in love with the finish instantly and loved how it shines under sunlight.
[URL="https://dl.dropboxusercontent.com/u/70793128/GS300/Upgrades/IMG_0878.JPG"][IMG]https://dl.dropboxusercontent.com/u/70793128/GS300/Upgrades/IMG_0878.JPG[/IMG][/URL]


We'll get to the finished product soon LOL :D
Now that the heart transplant was a success I figured I would go for some eye surgery :woohoo:
I picked up the LuxuryMods Q45 brackets (I know, I know, its been done a million times before, but I still love how they look :) But I'm gonna put a slight twist on it and best believe I'll be the first here to do it :cool: . BTW the LuxuryMods DIY sucks ass. They left out the hardest part which is where to trim the housing to make he Q45 projector fit.
Since the brackets aren't stainless steel I had then painted to prevent them from rusting (there was already surface rust when I got them in the mail).

I was experimenting with these LED tubes that work as a switch back for amber too like the new Audis. Since they wrap around the sides I thought it would be great as a turn signal. My only problem was that the LED strip comes in a thick white silicone tube which helps diffuse the light evenly but because its thick its not as bright as I would want it to be. In the photo below they look really bright, but not so much in person.


I ended up taking the LED strip out of the white silicone tube and pulled it through a clear one. Unfortunately you can now see the individual LEDs but the light output was now close to double maybe triple which is what I really wanted. I also had the housing painted black chrome to match the smoked side markers and all the black chrome emblems and trunk garnish.

AND NOW FOR WHAT YOU'VE BEEN WAITING FOR!!


View original BBCode
Now that the heart transplant was a success I figured I would go for some eye surgery :woohoo:


I picked up the LuxuryMods Q45 brackets (I know, I know, its been done a million times before, but I still love how they look :) But I'm gonna put a slight twist on it and best believe I'll be the first here to do it :cool: . BTW the LuxuryMods DIY sucks ass. They left out the hardest part which is where to trim the housing to make he Q45 projector fit.
Since the brackets aren't stainless steel I had then painted to prevent them from rusting (there was already surface rust when I got them in the mail).
[URL="https://dl.dropboxusercontent.com/u/70793128/GS300/Upgrades/IMG_0804%5B1%5D.JPG"][IMG]https://dl.dropboxusercontent.com/u/70793128/GS300/Upgrades/IMG_0804%5B1%5D.JPG[/IMG][/URL]


I was experimenting with these LED tubes that work as a switch back for amber too like the new Audis. Since they wrap around the sides I thought it would be great as a turn signal. My only problem was that the LED strip comes in a thick white silicone tube which helps diffuse the light evenly but because its thick its not as bright as I would want it to be. In the photo below they look really bright, but not so much in person.
[URL="https://dl.dropboxusercontent.com/u/70793128/GS300/Upgrades/IMG_0806%5B1%5D.JPG"][IMG]https://dl.dropboxusercontent.com/u/70793128/GS300/Upgrades/IMG_0806%5B1%5D.JPG[/IMG][/URL]
[URL="https://dl.dropboxusercontent.com/u/70793128/GS300/Upgrades/IMG_0807%5B1%5D.JPG"][IMG]https://dl.dropboxusercontent.com/u/70793128/GS300/Upgrades/IMG_0807%5B1%5D.JPG[/IMG][/URL]


I ended up taking the LED strip out of the white silicone tube and pulled it through a clear one. Unfortunately you can now see the individual LEDs but the light output was now close to double maybe triple which is what I really wanted. I also had the housing painted black chrome to match the smoked side markers and all the black chrome emblems and trunk garnish.
[URL="https://dl.dropboxusercontent.com/u/70793128/GS300/Upgrades/IMG_0870%5B1%5D.JPG"][IMG]https://dl.dropboxusercontent.com/u/70793128/GS300/Upgrades/IMG_0870%5B1%5D.JPG[/IMG][/URL]


AND NOW FOR WHAT YOU'VE BEEN WAITING FOR!!
[URL="https://dl.dropboxusercontent.com/u/70793128/GS300/Upgrades/IMG_9506.JPG"][IMG]https://dl.dropboxusercontent.com/u/70793128/GS300/Upgrades/IMG_9506.JPG[/IMG][/URL]
[URL="https://dl.dropboxusercontent.com/u/70793128/GS300/Upgrades/IMG_9475.JPG"][IMG]https://dl.dropboxusercontent.com/u/70793128/GS300/Upgrades/IMG_9475.JPG[/IMG][/URL]
[URL="https://dl.dropboxusercontent.com/u/70793128/GS300/Upgrades/IMG_9512.JPG"][IMG]https://dl.dropboxusercontent.com/u/70793128/GS300/Upgrades/IMG_9512.JPG[/IMG][/URL]
[IMG]https://dl.dropboxusercontent.com/u/70793128/GS300/Upgrades/IMG_9523.JPG[/IMG]
the led tubes are a nice touch
View original BBCode
the led tubes are a nice touch
very nice build...headlights are insane!paint scheme is perfect
View original BBCode
very nice build...headlights are insane!paint scheme is perfect
Sweet.. Loving the headlights..


Sent from PASSION VIP GUAM
View original BBCode
Sweet.. Loving the headlights..
Sent from PASSION VIP GUAM
Pure Sex!
View original BBCode
Pure Sex!
it's weird 'cause the overall styling of the car doesn't do much for me but the mods individually are impressive. usually when i don't like something i just don't like it, but i guess this is what they mean by "not my style, but i respect the work put in". keep[ it up!
View original BBCode
it's weird 'cause the overall styling of the car doesn't do much for me but the mods individually are impressive. usually when i don't like something i just don't like it, but i guess this is what they mean by "not my style, but i respect the work put in". keep[ it up!
How did you get the housings painted black chrome? Is it a special process?

Love all the mods on this car. Great attention to detail.
View original BBCode
How did you get the housings painted black chrome? Is it a special process?
Love all the mods on this car. Great attention to detail.
beachbum-1;511278 wrote:very nice build...headlights are insane!paint scheme is perfect
cdplayer;511280 wrote:Sweet.. Loving the headlights..
Loud1;511290 wrote:Pure Sex!
Thanks guys, I know the Q45s aren't the most unique retro, but I wanted to do the dual led strips for a while now. I haven't seen it done on a 2GS yet and I only wanted to open the lights once, so I took the quick route and did the Q45 projectors.
OG;511312 wrote:it's weird 'cause the overall styling of the car doesn't do much for me but the mods individually are impressive. usually when i don't like something i just don't like it, but i guess this is what they mean by "not my style, but i respect the work put in". keep[ it up!
Thanks dude. Yeah I get it. I'm kinda the same way when I go to car shows. I always respect a build when you can really see a lot of time and care was put into it even if its "not my style." :)
chrispy;511320 wrote:How did you get the housings painted black chrome? Is it a special process?
Love all the mods on this car. Great attention to detail.
Its definitely tricky and you only get one chance at it. It;s not a black chrome paint. Its a clear coat mixed with a little paint, so when its sprayed its a tinted clear coat. My body shop painted over the original chrome. But here's he catch! Unlike paint, where you primer it and blast a few coats and make sure you get every square inch and then clear coat it... With this process you only get one shot. You must coat everything evenly per coat. Each layer of tinted clear coat you put on gets darker and darker. So if you spray too much you're fucked. There is no redo. So its best to have a test piece to work with so you don't screw it up.
I just finished installing IS350 paddle shifter to my steering wheel. My GS originally doesn't have e-shift but later found out ALL GS/Aristo ECUs support the e-shift option. But you'll need a few things. First you'll need the clock spring from a model with e-shift. 2nd you need the paddle shifter from the IS350 and plugs. I was going to get them from the IS-F but I wasn't feeling the blue +/- . 3rd you will need to make your brackets to make them mount the the steering wheel.
I made my brackets with a 1" wide strip of 1/8" thick aluminum. It's not really that difficult but does take a bit of time. I did all the work myself at my buddy's shop as he has access to way more tools than I do. Once you cut the strip to the appropriate length, I put it in a vice about half way and hammered it about 45 degrees. Put one if the sides up to the mounting holes of the paddles on to the plate of the aluminum and find where you need to drill to join the bracket and paddles. Once you have the holes drilled, bolt the paddles onto the bracket and place it up against the steering wheel (steering wheel already removed and disassembled) to make sure you have the right angle and where you will be drilling the other side of the aluminum and where on the steering wheel you will be drilling. Throw the bracket back into the vice to drill the 2 new holes to mate the bracket and steering wheel. Bring it back to the steering wheel and mark the steering wheel frame where it needs drilling. Now this part is a little tricky. The metal on the steering wheel is a quite thick. I wouldn't advise putting a long bolt through and putting a nut on the end as its very tight behind the airbag. So what I did was drilled my 2 holes each side all the way through and used a thread tap so that the bolt would thread right into the steering wheel itself without passing through the other end. So now you should be able to bolt the paddles and brackets on finally. The only thing left to do before putting the steering wheel back together is to trim the back cover to make it fit over brackets. Once the back cover is trimmed you can finally put the steering wheel back together and on the car. If your vehicle is already equipped with e-shift then its just a matter of tapping the paddle lines to the original e-shift lines and you're done. If you're converting your car to e-shift like I did, you just need to replace the clock spring with the 6pin version and plug the shifters to the 2 unused pins. From the other side of the clock spring run the wiring through the firewall to the shift up/down pins in the ECU and you're done.
This is probably a lot to take in and hard to picture. I'll see what I can do about taking photos and showing a step by step.
BIG THANKS to PMP 300 from ClubLexus for inspiring and helping me through this mod!
http://www.clublexus.com/forums/gs-second-generation/702716-na-to-tt-in-2-days-3.html
Here's pics of the final product! I'm really glad I got them positioned perfectly between the wheel on combo switches. If it was any further back it would be too close to the switches and any closer i wouldn't be able to run hand between. So all in all I'm really happy with the outcome


View original BBCode
[QUOTE=beachbum-1;511278]very nice build...headlights are insane!paint scheme is perfect[/QUOTE]

[QUOTE=cdplayer;511280]Sweet.. Loving the headlights..[/QUOTE]

[QUOTE=Loud1;511290]Pure Sex![/QUOTE]

Thanks guys, I know the Q45s aren't the most unique retro, but I wanted to do the dual led strips for a while now. I haven't seen it done on a 2GS yet and I only wanted to open the lights once, so I took the quick route and did the Q45 projectors.

[QUOTE=OG;511312]it's weird 'cause the overall styling of the car doesn't do much for me but the mods individually are impressive. usually when i don't like something i just don't like it, but i guess this is what they mean by "not my style, but i respect the work put in". keep[ it up![/QUOTE]
Thanks dude. Yeah I get it. I'm kinda the same way when I go to car shows. I always respect a build when you can really see a lot of time and care was put into it even if its "not my style." :)

[QUOTE=chrispy;511320]How did you get the housings painted black chrome? Is it a special process?

Love all the mods on this car. Great attention to detail.[/QUOTE]

Its definitely tricky and you only get one chance at it. It;s not a black chrome paint. Its a clear coat mixed with a little paint, so when its sprayed its a tinted clear coat. My body shop painted over the original chrome. But here's he catch! Unlike paint, where you primer it and blast a few coats and make sure you get every square inch and then clear coat it... With this process you only get one shot. You must coat everything evenly per coat. Each layer of tinted clear coat you put on gets darker and darker. So if you spray too much you're fucked. There is no redo. So its best to have a test piece to work with so you don't screw it up.


I just finished installing IS350 paddle shifter to my steering wheel. My GS originally doesn't have e-shift but later found out ALL GS/Aristo ECUs support the e-shift option. But you'll need a few things. First you'll need the clock spring from a model with e-shift. 2nd you need the paddle shifter from the IS350 and plugs. I was going to get them from the IS-F but I wasn't feeling the blue +/- . 3rd you will need to make your brackets to make them mount the the steering wheel.


I made my brackets with a 1" wide strip of 1/8" thick aluminum. It's not really that difficult but does take a bit of time. I did all the work myself at my buddy's shop as he has access to way more tools than I do. Once you cut the strip to the appropriate length, I put it in a vice about half way and hammered it about 45 degrees. Put one if the sides up to the mounting holes of the paddles on to the plate of the aluminum and find where you need to drill to join the bracket and paddles. Once you have the holes drilled, bolt the paddles onto the bracket and place it up against the steering wheel (steering wheel already removed and disassembled) to make sure you have the right angle and where you will be drilling the other side of the aluminum and where on the steering wheel you will be drilling. Throw the bracket back into the vice to drill the 2 new holes to mate the bracket and steering wheel. Bring it back to the steering wheel and mark the steering wheel frame where it needs drilling. Now this part is a little tricky. The metal on the steering wheel is a quite thick. I wouldn't advise putting a long bolt through and putting a nut on the end as its very tight behind the airbag. So what I did was drilled my 2 holes each side all the way through and used a thread tap so that the bolt would thread right into the steering wheel itself without passing through the other end. So now you should be able to bolt the paddles and brackets on finally. The only thing left to do before putting the steering wheel back together is to trim the back cover to make it fit over brackets. Once the back cover is trimmed you can finally put the steering wheel back together and on the car. If your vehicle is already equipped with e-shift then its just a matter of tapping the paddle lines to the original e-shift lines and you're done. If you're converting your car to e-shift like I did, you just need to replace the clock spring with the 6pin version and plug the shifters to the 2 unused pins. From the other side of the clock spring run the wiring through the firewall to the shift up/down pins in the ECU and you're done.


This is probably a lot to take in and hard to picture. I'll see what I can do about taking photos and showing a step by step.
BIG THANKS to PMP 300 from ClubLexus for inspiring and helping me through this mod!
[url]http://www.clublexus.com/forums/gs-second-generation/702716-na-to-tt-in-2-days-3.html[/url]


Here's pics of the final product! I'm really glad I got them positioned perfectly between the wheel on combo switches. If it was any further back it would be too close to the switches and any closer i wouldn't be able to run hand between. So all in all I'm really happy with the outcome


[IMG]https://dl.dropboxusercontent.com/u/70793128/GS300/Upgrades/IMG_9545.JPG[/IMG]
[IMG]https://dl.dropboxusercontent.com/u/70793128/GS300/Upgrades/IMG_9544.JPG[/IMG]
[IMG]https://dl.dropboxusercontent.com/u/70793128/GS300/Upgrades/IMG_9542.JPG[/IMG]
Great work man!
View original BBCode
Great work man!
I just finished installing the JDM chrome door handles and my team pinstripe. The fronts were a breeze but the rear is a ****ing b**** to get the actuator out. I'm still on the fence about the handles. I'm not sure if its too much chrome. I might just have the outer painted black and keep just the handle chrome. Any thoughts or comments?


View original BBCode
I just finished installing the JDM chrome door handles and my team pinstripe. The fronts were a breeze but the rear is a ****ing b**** to get the actuator out. I'm still on the fence about the handles. I'm not sure if its too much chrome. I might just have the outer painted black and keep just the handle chrome. Any thoughts or comments?


[IMG]https://dl.dropboxusercontent.com/u/70793128/Photo%206-25-2014%2C%209%2005%2025%20AM.jpg[/IMG]
[IMG]https://dl.dropboxusercontent.com/u/70793128/Photo%206-25-2014%2C%209%2005%2039%20AM.jpg[/IMG]
personally i like the chrome handles. then again idk what it would look like with the outers painted black. so it may be nice.
but dude, your car is such an inspiration.
View original BBCode
personally i like the chrome handles. then again idk what it would look like with the outers painted black. so it may be nice.
but dude, your car is such an inspiration.
Changes... are... coming!

View original BBCode
Changes... are... coming!
[img]https://db.tt/O9YK3hsW[/img]
Ooo. What is it? Love your build btw. Alot of crazy details and it's appreciated that you take the time to share

Side note: not really feeling the chrome handles, a little too much going on with them being chrome
View original BBCode
Ooo. What is it? Love your build btw. Alot of crazy details and it's appreciated that you take the time to share
Side note: not really feeling the chrome handles, a little too much going on with them being chrome
View original BBCode
Sent out my fog lights overseas to get full chasing LEDs :cool::eek2:


[URL="https://dl.dropboxusercontent.com/u/70793128/GS300/Upgrades/fogs1.jpg"][IMG]https://dl.dropboxusercontent.com/u/70793128/GS300/Upgrades/fogs1.jpg[/IMG][/URL]


[URL="https://dl.dropboxusercontent.com/u/70793128/GS300/Upgrades/fogs2.jpg"][IMG]https://dl.dropboxusercontent.com/u/70793128/GS300/Upgrades/fogs2.jpg[/IMG][/URL]


[URL="https://dl.dropboxusercontent.com/u/70793128/GS300/Upgrades/fogs3.jpg"][IMG]https://dl.dropboxusercontent.com/u/70793128/GS300/Upgrades/fogs3.jpg[/IMG][/URL]


[URL="https://dl.dropboxusercontent.com/u/70793128/GS300/Upgrades/fogs4.jpg"][IMG]https://dl.dropboxusercontent.com/u/70793128/GS300/Upgrades/fogs4.jpg[/IMG][/URL]


[video=youtube;3jjwOVylGOc]https://www.youtube.com/watch?v=3jjwOVylGOc[/video]
Badass!


Sent from my iPhone using Tapatalk
View original BBCode
Badass!
Sent from my iPhone using Tapatalk
nice car, not sure why i never noticed this build thread before. how did you get the garson fabric, i wasn't aware they sold it like that? also are those entire seats or just the fabric from garson?
View original BBCode
nice car, not sure why i never noticed this build thread before. how did you get the garson fabric, i wasn't aware they sold it like that? also are those entire seats or just the fabric from garson?
The entire seats are from Garson not just the fabric.
View original BBCode
The entire seats are from Garson not just the fabric.
that must not have been cheap. i know they make covers galor but don't recall seeing entire seats in their last catalog. i love that black monogram fabric idea though. i've been rocking those headrests and floor mats for a few years now and think it would really look nice with matching seats or side fabric. maybe even a headliner, but that might be overkill.
View original BBCode
that must not have been cheap. i know they make covers galor but don't recall seeing entire seats in their last catalog. i love that black monogram fabric idea though. i've been rocking those headrests and floor mats for a few years now and think it would really look nice with matching seats or side fabric. maybe even a headliner, but that might be overkill.
I meant entire seat cover (not just inserts) sorry about the confusion. I would have done the floor mats too but they don't have the layout for LHD
View original BBCode
I meant entire seat cover (not just inserts) sorry about the confusion. I would have done the floor mats too but they don't have the layout for LHD

Hmmmm..... What's going on here?
View original BBCode
[img]http://cimg7.ibsrv.net/gimg/www.clublexus.com-vbulletin/2000x1504/80-img_1404_cbec5ce3e56081d331690aaff4a4ccda84d918b2.jpg[/img]

Hmmmm..... What's going on here?
bling bling?
View original BBCode
bling bling?
I ended up stripping it and sanding it right down to the bare steel. Thank God for no rock chips or dings, otherwise this idea would not be possible.

From here, I let the artistic juices flow and bring my vision to life to bring you guys something completely fresh


[video=youtube;ODGCT-4TfRk]https://www.youtube.com/watch?v=ODGCT-4TfRk[/video]
After repainting the center and adding the clear coat, my dream was finally a reality :woohoo: I added a little bit of black paint to the clear coat, to give it a little more smoked look.

Some people will like it and some will hate it. But that's the fun part about a true BUILD. Innovate, create and bringing your concept to life. :thumbup:
Forgive the dark photo. I picked up the car this past Saturday at 9pm from the body shop to bring it down to the Hot Import Daze in Monroe, WA the next day. In the sun it really shines. I'll try to snap some today

Oh right...... and also I got a Mode Parfume Phantom full body kit and exhaust :cool:


View original BBCode
I ended up stripping it and sanding it right down to the bare steel. Thank God for no rock chips or dings, otherwise this idea would not be possible.


[URL="https://dl.dropboxusercontent.com/u/70793128/GS300/Upgrades/IMG_1410.JPG"][IMG]https://dl.dropboxusercontent.com/u/70793128/GS300/Upgrades/IMG_1410.JPG[/IMG][/URL]


From here, I let the artistic juices flow and bring my vision to life to bring you guys something completely fresh


[URL="https://dl.dropboxusercontent.com/u/70793128/GS300/Upgrades/IMG_1417.JPG"][IMG]https://dl.dropboxusercontent.com/u/70793128/GS300/Upgrades/IMG_1417.JPG[/IMG][/URL]
[URL="https://dl.dropboxusercontent.com/u/70793128/GS300/Upgrades/IMG_1425.JPG"][IMG]https://dl.dropboxusercontent.com/u/70793128/GS300/Upgrades/IMG_1425.JPG[/IMG][/URL]


[video=youtube;ODGCT-4TfRk]https://www.youtube.com/watch?v=ODGCT-4TfRk[/video]


After repainting the center and adding the clear coat, my dream was finally a reality :woohoo: I added a little bit of black paint to the clear coat, to give it a little more smoked look.


[URL="https://dl.dropboxusercontent.com/u/70793128/GS300/Upgrades/IMG_1506.JPG"][IMG]https://dl.dropboxusercontent.com/u/70793128/GS300/Upgrades/IMG_1506.JPG[/IMG][/URL]


Some people will like it and some will hate it. But that's the fun part about a true BUILD. Innovate, create and bringing your concept to life. :thumbup:


Forgive the dark photo. I picked up the car this past Saturday at 9pm from the body shop to bring it down to the Hot Import Daze in Monroe, WA the next day. In the sun it really shines. I'll try to snap some today
[URL="https://dl.dropboxusercontent.com/u/70793128/GS300/Upgrades/IMG_1529.JPG"][IMG]https://dl.dropboxusercontent.com/u/70793128/GS300/Upgrades/IMG_1529.JPG[/IMG][/URL]


Oh right...... and also I got a Mode Parfume Phantom full body kit and exhaust :cool:


[URL="https://dl.dropboxusercontent.com/u/70793128/GS300/Upgrades/IMG_1523.JPG"][IMG]https://dl.dropboxusercontent.com/u/70793128/GS300/Upgrades/IMG_1523.JPG[/IMG][/URL]
[URL="https://dl.dropboxusercontent.com/u/70793128/GS300/Upgrades/IMG_1527.JPG"][IMG]https://dl.dropboxusercontent.com/u/70793128/GS300/Upgrades/IMG_1527.JPG[/IMG][/URL]
[URL="https://dl.dropboxusercontent.com/u/70793128/GS300/Upgrades/IMG_1526.JPG"][IMG]https://dl.dropboxusercontent.com/u/70793128/GS300/Upgrades/IMG_1526.JPG[/IMG][/URL]
[video=youtube;czVBSkOxvuo]https://www.youtube.com/watch?v=czVBSkOxvuo[/video]
View original BBCode
[video=youtube;czVBSkOxvuo]https://www.youtube.com/watch?v=czVBSkOxvuo[/video]
Looks killer dude, haven't seen that done outside of Japan
View original BBCode
Looks killer dude, haven't seen that done outside of Japan
Here's a better shot of how it shines in the sun

View original BBCode
Here's a better shot of how it shines in the sun
[img]http://cimg4.ibsrv.net/gimg/www.clublexus.com-vbulletin/2000x1504/80-img_1560_73a0434cf2b1912b9f13400d3f60e1e61bee890b.jpg[/img]
That really looks nice, especially with the smoked clear on it
View original BBCode
That really looks nice, especially with the smoked clear on it
Just installed my new front negative RCAs to get the front camber to match my rear. Feel free to follow on IG @J_WALLACE :)

View original BBCode
Just installed my new front negative RCAs to get the front camber to match my rear. Feel free to follow on IG @J_WALLACE :)

[img]https://scontent-sea1-1.xx.fbcdn.net/hphotos-xat1/v/t1.0-9/11998945_528303687317499_4039995970339990280_n.jpg?oh=f4fd45ab12af72a6097f6db4fe9f47b8&oe=567901C7[/img]
Currently getting custom metal fenders fabbed up by BabyBearGangsters out in Thailand.
[video=youtube;qfvZ2xG3MvI]https://www.youtube.com/watch?v=qfvZ2xG3MvI[/video]
I designed the fenders myself about a year or two ago. I printed out a couple side shots of a GS and just starting messing around sketching up a bunch of ideas. I eventually settled on this one

Sent the pics our to the guys at BBG in Thailand and decided to make my vision a reality


But it doesn't stop here. To be continued ..... ;)
View original BBCode
Currently getting custom metal fenders fabbed up by BabyBearGangsters out in Thailand.
[video=youtube;qfvZ2xG3MvI]https://www.youtube.com/watch?v=qfvZ2xG3MvI[/video]

I designed the fenders myself about a year or two ago. I printed out a couple side shots of a GS and just starting messing around sketching up a bunch of ideas. I eventually settled on this one
[img]https://dl.dropboxusercontent.com/u/70793128/GS300/Upgrades/Photo%202015-08-24%2C%201%2030%2015%20PM.jpg[/img]

Sent the pics our to the guys at BBG in Thailand and decided to make my vision a reality
[img]https://dl.dropboxusercontent.com/u/70793128/GS300/Upgrades/Photo%202015-08-24%2C%201%2022%2008%20PM.jpg[/img]
[img]https://dl.dropboxusercontent.com/u/70793128/GS300/Upgrades/Photo%202015-08-31%2C%2010%2017%2029%20AM.jpg[/img]
[img]https://dl.dropboxusercontent.com/u/70793128/GS300/Upgrades/Photo%202015-09-08%2C%207%2017%2049%20PM.jpg[/img]
[img]https://dl.dropboxusercontent.com/u/70793128/GS300/Upgrades/Photo%202015-09-13%2C%209%2026%2056%20AM.jpg[/img]

But it doesn't stop here. To be continued ..... ;)
Just some test fitting before primer and shipping


View original BBCode
Just some test fitting before primer and shipping


[img]https://dl.dropboxusercontent.com/u/70793128/GS300/Upgrades/Photo%202015-09-17%2C%209%2039%2053%20PM.jpg[/img]


[img]https://dl.dropboxusercontent.com/u/70793128/GS300/Upgrades/Photo%202015-09-18%2C%2011%2007%2046%20PM.jpg[/img]
All primed and ready to be shipped out :)


View original BBCode
All primed and ready to be shipped out :)


[img]https://dl.dropboxusercontent.com/u/70793128/GS300/Upgrades/Photo%202015-09-28%2C%208%2027%2026%20AM.jpg[/img]
[img]https://dl.dropboxusercontent.com/u/70793128/GS300/Upgrades/Photo%202015-09-28%2C%208%2027%2032%20AM.jpg[/img]
Looks awesome! Can't wait to see the fenders on there
View original BBCode
Looks awesome! Can't wait to see the fenders on there
Great work..


Sent from PASSION VIP GUAM
View original BBCode
Great work..
Sent from PASSION VIP GUAM
View original BBCode
Fenders are just about complete

[img]https://dl.dropboxusercontent.com/u/70793128/GS300/Upgrades/Photo%202016-02-12%2C%203%2010%2047%20PM.jpg[/img]
[img]https://dl.dropboxusercontent.com/u/70793128/GS300/Upgrades/Photo%202016-02-12%2C%203%2006%2038%20PM.jpg[/img]
[img]https://dl.dropboxusercontent.com/u/70793128/GS300/Upgrades/Photo%202016-03-12%2C%207%2055%2017%20PM.jpg[/img]
[img]https://dl.dropboxusercontent.com/u/70793128/GS300/Upgrades/Photo%202016-03-12%2C%207%2055%2021%20PM.jpg[/img]
I had a set a Vishunus I picked up in Japan last year. I wanted to have them custom finished so I shipped them out to VR Wheels in Cali to have it done and I gotta say I'm pretty impressed with the outcome!
Lip = Black Nickel Plated
Disk = High Polished with brushed face and tinted clear power coat
Barrel = Gloss Black Powder Coat
Had the hardware are cleaned up and here's the final product.
[video=youtube;-PODHcdBhXw]https://www.youtube.com/watch?v=-PODHcdBhXw[/video]
I'm waiting for my new brushed Kranze caps to come in from Japan. I think they'll match better

View original BBCode
I had a set a Vishunus I picked up in Japan last year. I wanted to have them custom finished so I shipped them out to VR Wheels in Cali to have it done and I gotta say I'm pretty impressed with the outcome!


Lip = Black Nickel Plated
Disk = High Polished with brushed face and tinted clear power coat
Barrel = Gloss Black Powder Coat


Had the hardware are cleaned up and here's the final product.


[video=youtube;-PODHcdBhXw]https://www.youtube.com/watch?v=-PODHcdBhXw[/video]


I'm waiting for my new brushed Kranze caps to come in from Japan. I think they'll match better
[URL="http://kranze.jp/images/option_centercap_kranze_type1_1.jpg"][IMG]http://kranze.jp/images/option_centercap_kranze_type1_1.jpg[/IMG][/URL]
View original BBCode
Totally forgot to post the updated pics :)

[img]https://dl.dropboxusercontent.com/u/70793128/GS300/Dylan%20photoshoot/desktop/1.jpg[/img]
[img]https://dl.dropboxusercontent.com/u/70793128/GS300/Dylan%20photoshoot/desktop/2.jpg[/img]
[img]https://dl.dropboxusercontent.com/u/70793128/GS300/Dylan%20photoshoot/desktop/4.jpg[/img]
[img]https://dl.dropboxusercontent.com/u/70793128/GS300/Dylan%20photoshoot/desktop/5.jpg[/img]
[img]https://dl.dropboxusercontent.com/u/70793128/GS300/Dylan%20photoshoot/desktop/6.jpg[/img]
[img]https://dl.dropboxusercontent.com/u/70793128/GS300/Dylan%20photoshoot/desktop/7.jpg[/img]
[img]https://dl.dropboxusercontent.com/u/70793128/GS300/Dylan%20photoshoot/desktop/8.jpg[/img]
[img]https://dl.dropboxusercontent.com/u/70793128/GS300/Dylan%20photoshoot/desktop/9.jpg[/img]
[img]https://dl.dropboxusercontent.com/u/70793128/GS300/Dylan%20photoshoot/desktop/10.jpg[/img]
Very Beautiful man


Enviado do meu iPhone usando o VIPStyleCars
View original BBCode
Very Beautiful man
Enviado do meu iPhone usando o VIPStyleCars
Wow! Car looks amazing. Love the interior, have any pics of the front seats?

Sent from my SM-N910V using VIPStyleCars mobile app
View original BBCode
Wow! Car looks amazing. Love the interior, have any pics of the front seats?
Sent from my SM-N910V using VIPStyleCars mobile app
🤔👌

Sent from my E6653 using Tapatalk
View original BBCode
🤔👌
Sent from my E6653 using Tapatalk



