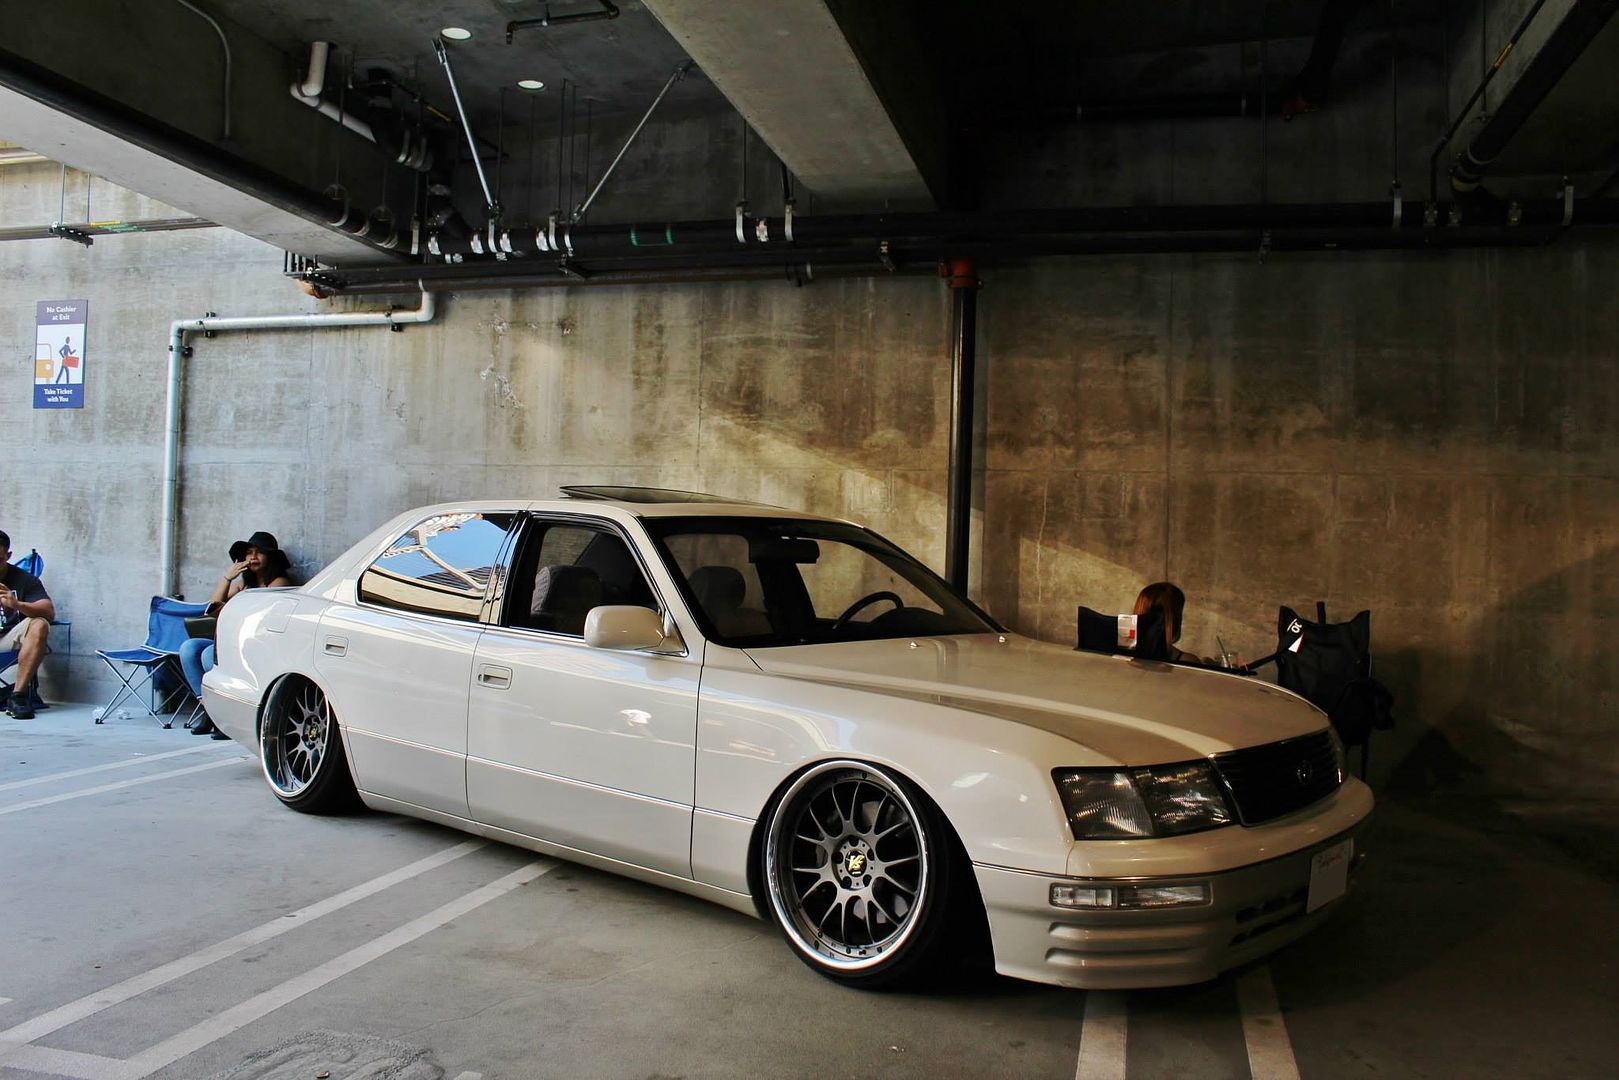
air suspension setup UCF20
i found that there isn't a lot of coverage regarding air suspension setups for the LS400, though the install is pretty straightforward. the following will briefly describe my adventure installing a system in my 97 UCF20.
my parts list:
- BC Racing BR-type coilovers
- Universal Air Suspension Aero Sport bags w/brackets
- 1/4" airline
- SMC 3/8" valves
- dual Firestone compressors
- 5gal chrome tank
- Norgren water traps
- Viair 165/200psi tank pressure switch
- Air Ride Technologies digital gauge (made by Dakota Digital)
- Dakota Digital pressure senders
- EAI switchbox
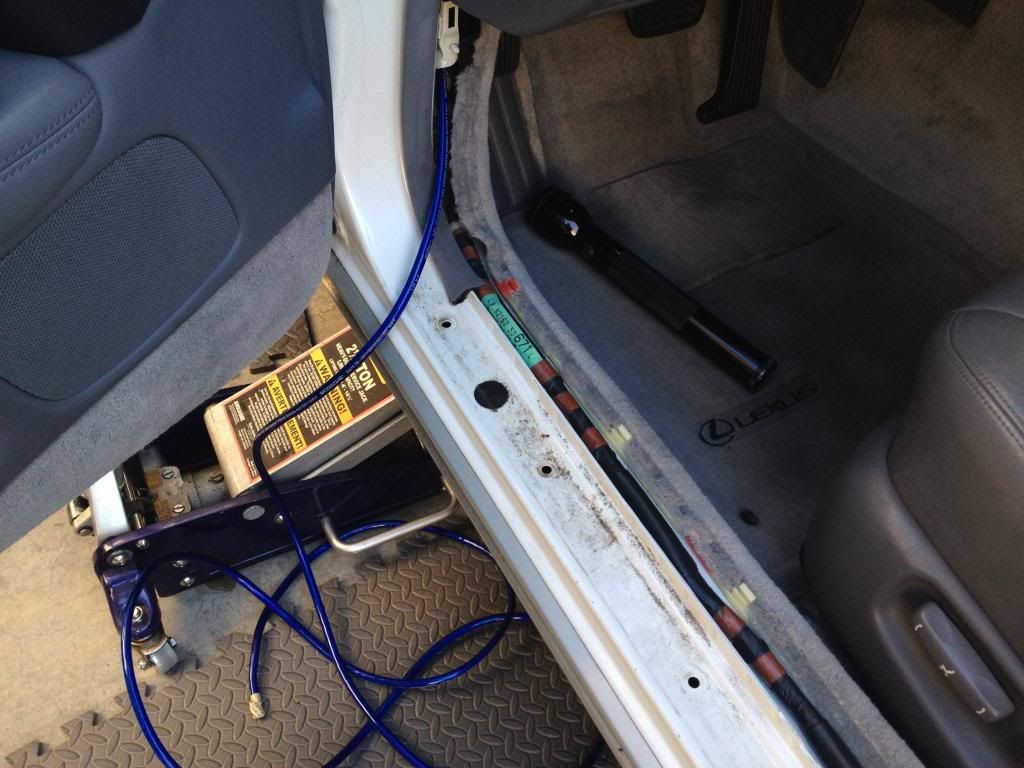
since i am running dual compressors, i utilized a 4 gauge power wire which needs to run from the battery to the trunk. i found a main harness that enters the cabin located behind the front fender. this was the perfect spot to get the wire through the firewall.

i ran it under the door sills.
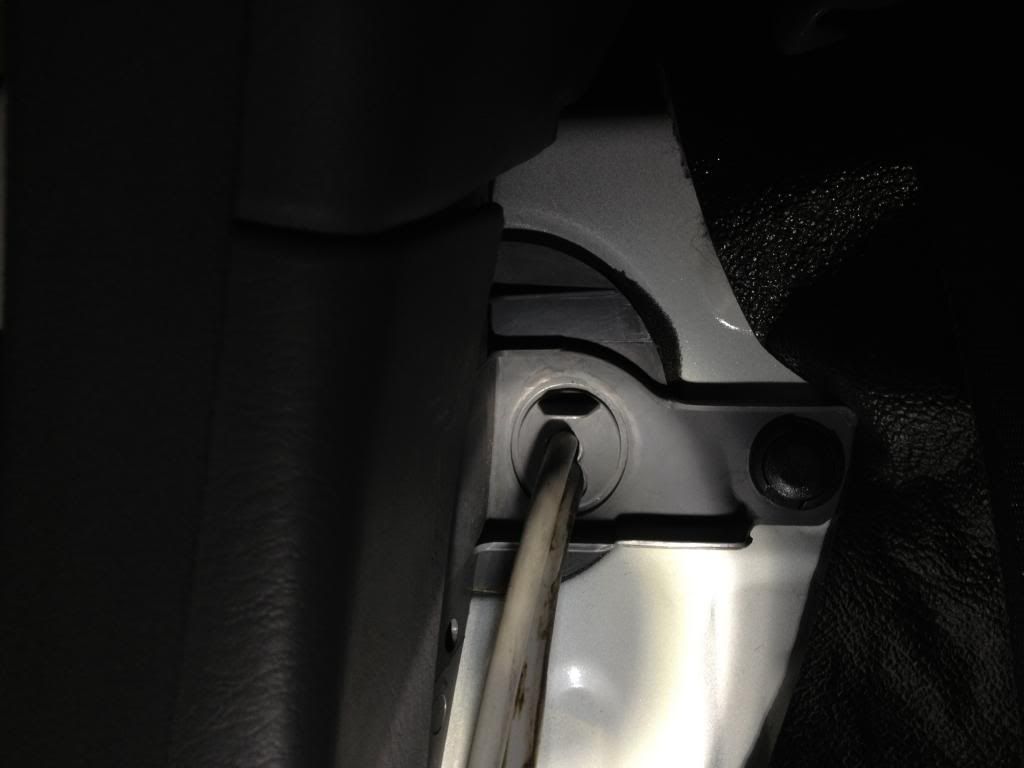
the rear seats need to be removed to go through yet another firewall to the trunk. i opted to drill a hole in a plastic cover neat the seatbelt.

i preran my wires for my digital gauge and switchbox which reside under the center console and under the passenger side seat respectively. i ran their wires on the passenger side of the car, again under the door sills and through the rear firewall.
speaking of digital gauge, i opted to place it in the ashtray which fit perfectly. i don't have any details on this part so i apologize. i had to make sure the wires don't bind when the door is pivoted. the center console is very tight so the wires were ran with caution, so much as to not hinder the cupholder hide movement.

View original BBCode
i found that there isn't a lot of coverage regarding air suspension setups for the LS400, though the install is pretty straightforward. the following will briefly describe my adventure installing a system in my 97 UCF20.

my parts list:
- BC Racing BR-type coilovers
- Universal Air Suspension Aero Sport bags w/brackets
- 1/4" airline
- SMC 3/8" valves
- dual Firestone compressors
- 5gal chrome tank
- Norgren water traps
- Viair 165/200psi tank pressure switch
- Air Ride Technologies digital gauge (made by Dakota Digital)
- Dakota Digital pressure senders
- EAI switchbox

since i am running dual compressors, i utilized a 4 gauge power wire which needs to run from the battery to the trunk. i found a main harness that enters the cabin located behind the front fender. this was the perfect spot to get the wire through the firewall.
[URL="http://i27.photobucket.com/albums/c194/timmy0toole/Air%20Suspension/IMG_2915_zps54003d13.jpg"][IMG]http://i27.photobucket.com/albums/c194/timmy0toole/Air%20Suspension/IMG_2915_zps54003d13.jpg[/IMG][/URL]

i ran it under the door sills.
[URL="http://i27.photobucket.com/albums/c194/timmy0toole/Air%20Suspension/IMG_2919_zps4889d190.jpg"][IMG]http://i27.photobucket.com/albums/c194/timmy0toole/Air%20Suspension/IMG_2919_zps4889d190.jpg[/IMG][/URL]

the rear seats need to be removed to go through yet another firewall to the trunk. i opted to drill a hole in a plastic cover neat the seatbelt.
[URL="http://i27.photobucket.com/albums/c194/timmy0toole/Air%20Suspension/IMG_3104_zpsc0050b32.jpg"][IMG]http://i27.photobucket.com/albums/c194/timmy0toole/Air%20Suspension/IMG_3104_zpsc0050b32.jpg[/IMG][/URL]

i preran my wires for my digital gauge and switchbox which reside under the center console and under the passenger side seat respectively. i ran their wires on the passenger side of the car, again under the door sills and through the rear firewall.
[URL="http://i27.photobucket.com/albums/c194/timmy0toole/Air%20Suspension/IMG_3105_zps0a4d940b.jpg"][IMG]http://i27.photobucket.com/albums/c194/timmy0toole/Air%20Suspension/IMG_3105_zps0a4d940b.jpg[/IMG][/URL]

speaking of digital gauge, i opted to place it in the ashtray which fit perfectly. i don't have any details on this part so i apologize. i had to make sure the wires don't bind when the door is pivoted. the center console is very tight so the wires were ran with caution, so much as to not hinder the cupholder hide movement.
[URL="http://i27.photobucket.com/albums/c194/timmy0toole/Air%20Suspension/IMG_3121_zps43f51c0c.jpg"][IMG]http://i27.photobucket.com/albums/c194/timmy0toole/Air%20Suspension/IMG_3121_zps43f51c0c.jpg[/IMG][/URL]
View original BBCode
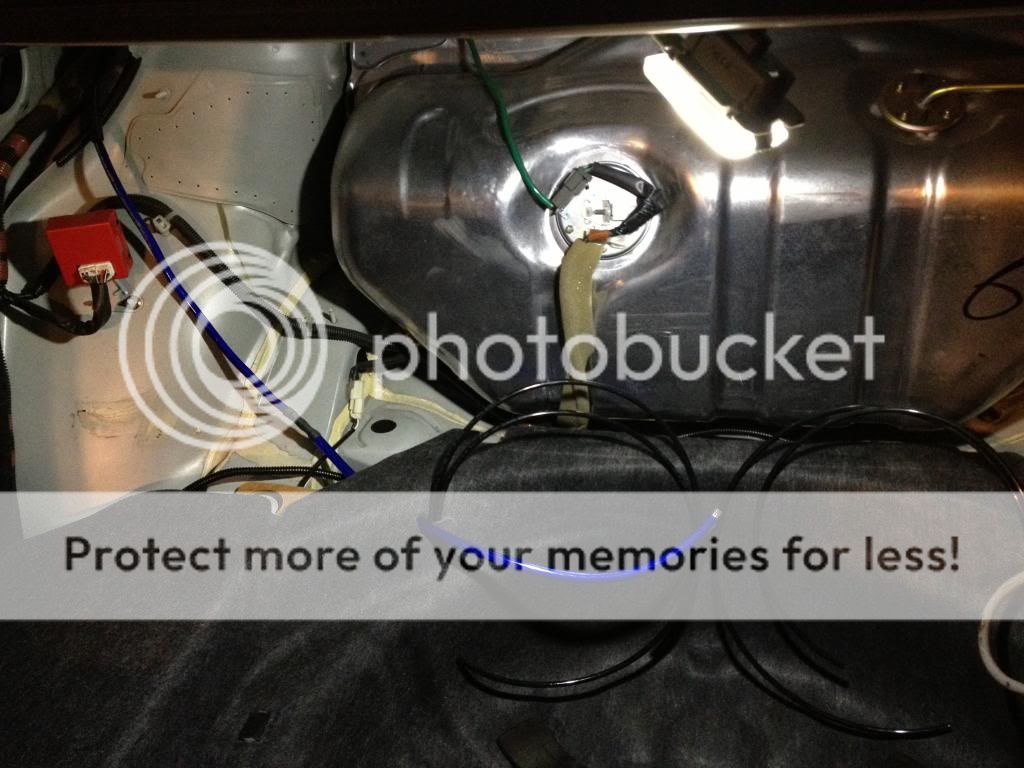
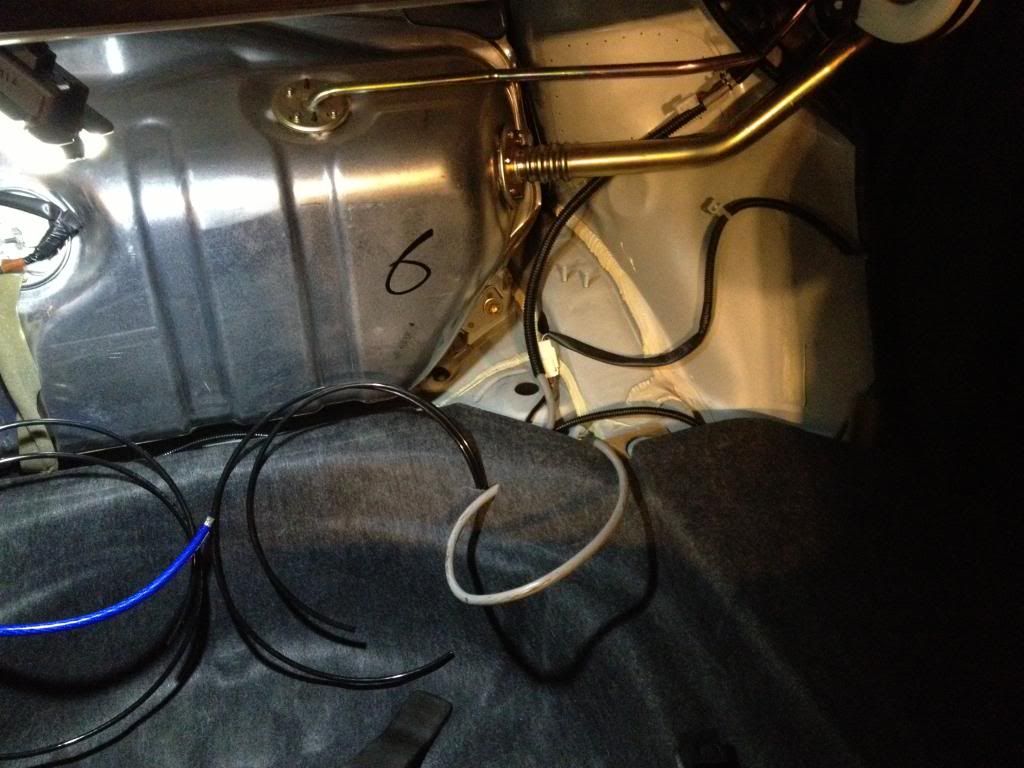
i removed the rear trunk liner to gain better access. there is a sharp part of the frame on both sides that i covered with loom to prevent any chaffing on the wires. an exposed wire will cause a short, or worse the adjacent gas tank to catch on fire!
[IMG]http://i27.photobucket.com/albums/c194/timmy0toole/Air%20Suspension/IMG_3107_zps2faf54d8.jpg[/IMG]
[IMG]http://i27.photobucket.com/albums/c194/timmy0toole/Air%20Suspension/IMG_3108_zps74bb1d16.jpg[/IMG]

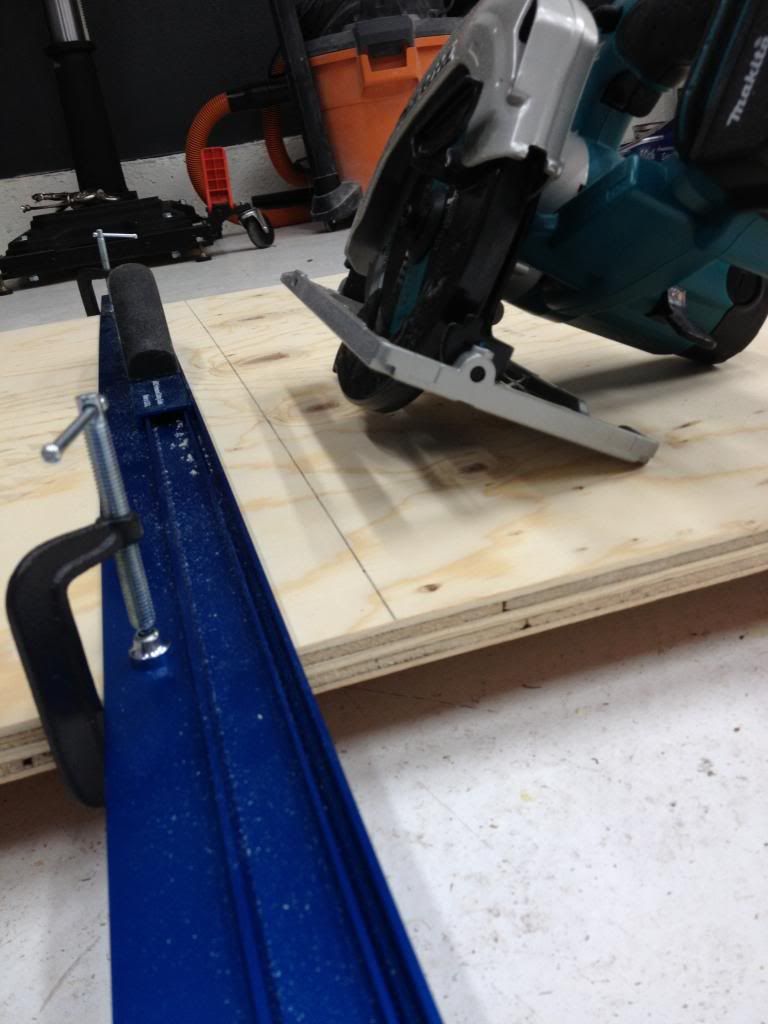
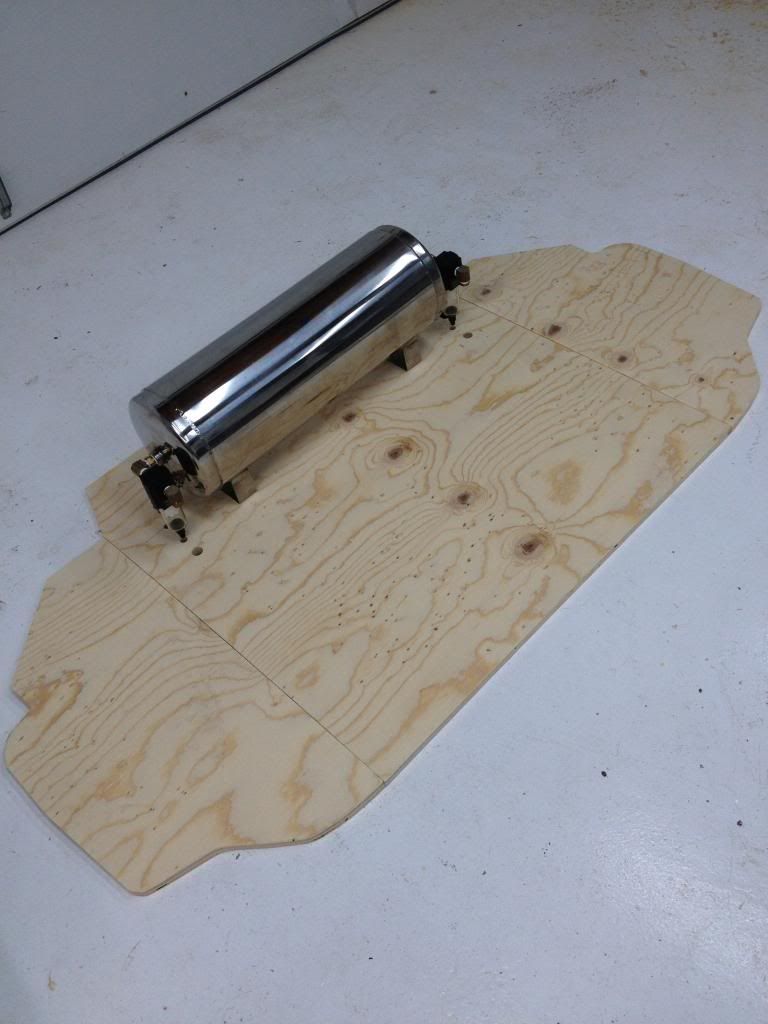
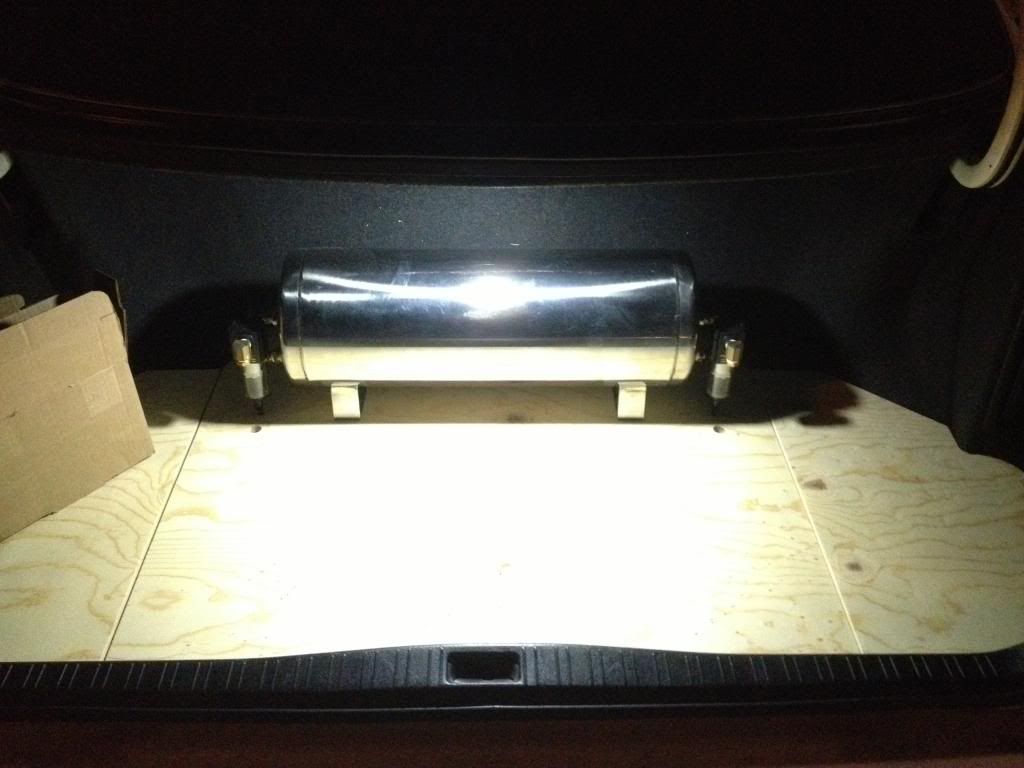
after some thought i chose to run a new floor to hold the tank, while the valves and compressors would reside where the spare tire used to be. i used some plywood scraps from home depot.
[IMG]http://i27.photobucket.com/albums/c194/timmy0toole/Air%20Suspension/IMG_2959_zps58b99afd.jpg[/IMG]
[IMG]http://i27.photobucket.com/albums/c194/timmy0toole/Air%20Suspension/IMG_2961_zps4ed59a34.jpg[/IMG]
[IMG]http://i27.photobucket.com/albums/c194/timmy0toole/Air%20Suspension/IMG_2963_zps498d8f94.jpg[/IMG]

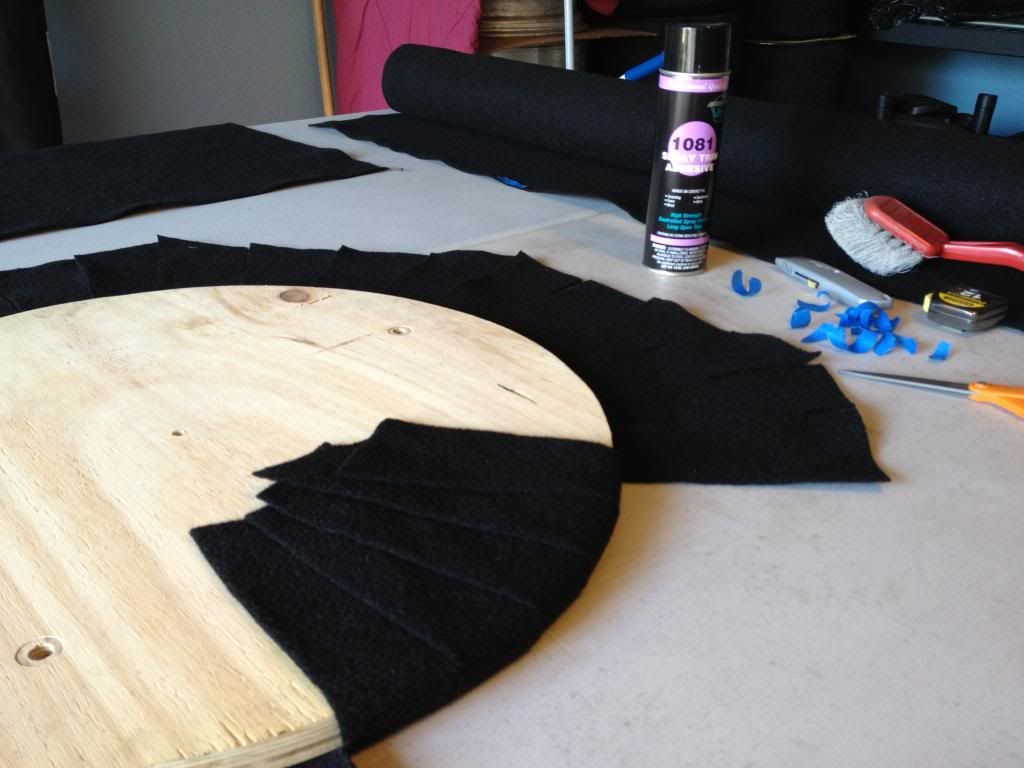
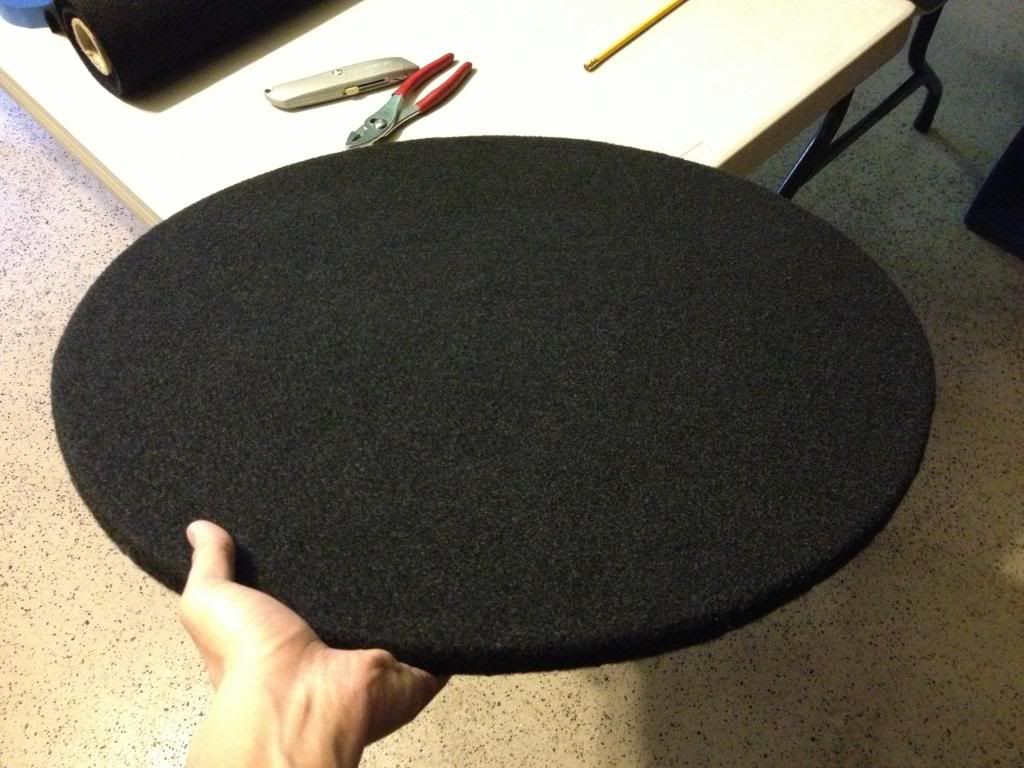
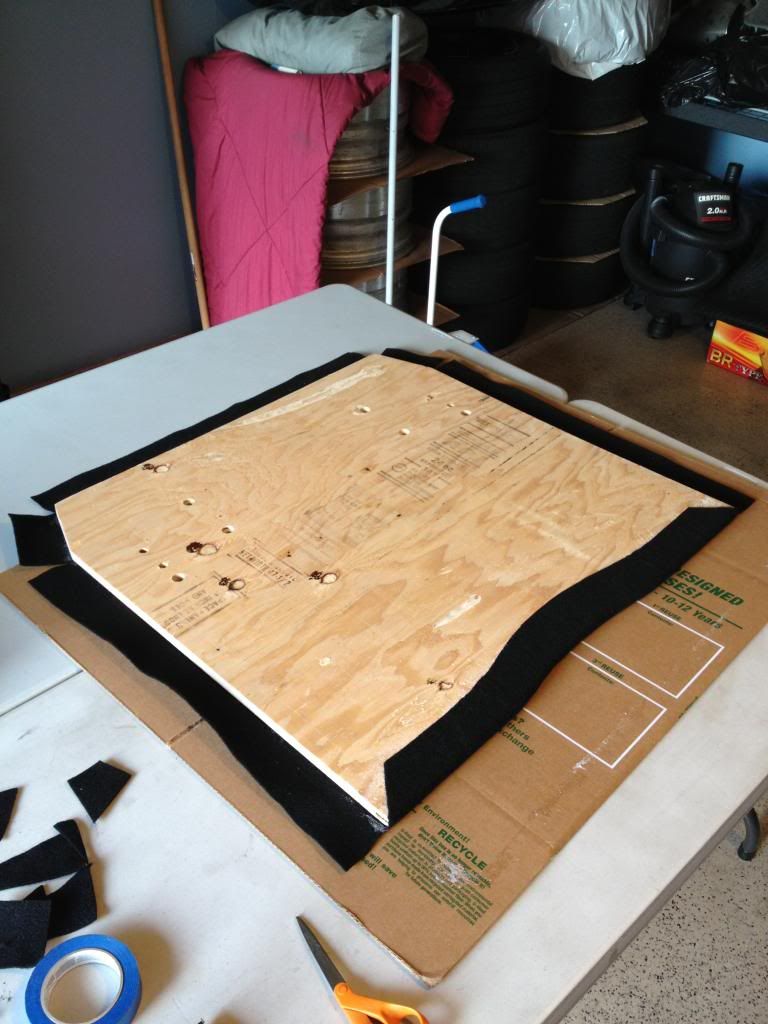
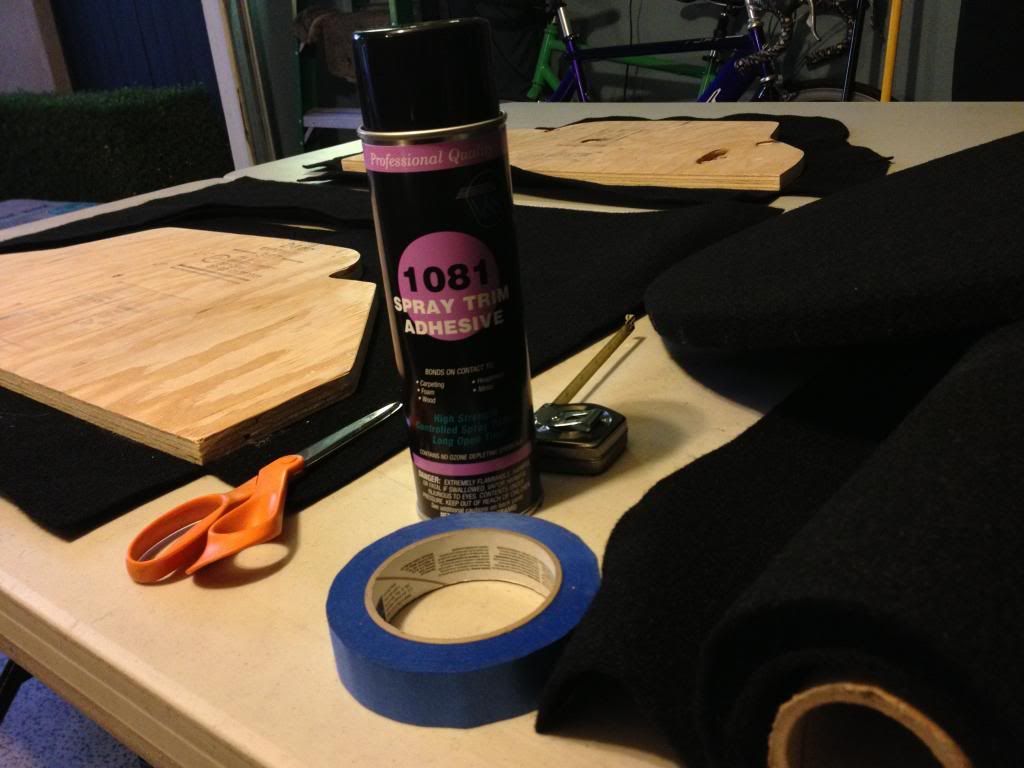
i wrapped the wood in black speaker cabinet carpet. i should have ordered dark gray instead for a better match.
[IMG]http://i27.photobucket.com/albums/c194/timmy0toole/Air%20Suspension/IMG_3041_zpsb8038221.jpg[/IMG]
[IMG]http://i27.photobucket.com/albums/c194/timmy0toole/Air%20Suspension/IMG_3043_zps3c4b85a2.jpg[/IMG]
[IMG]http://i27.photobucket.com/albums/c194/timmy0toole/Air%20Suspension/IMG_3071_zpsb10c6d3d.jpg[/IMG]

i highly recommend V&S 1081 adhesive over 3M. this stuff works better, especially when tackling a headliner.
[IMG]http://i27.photobucket.com/albums/c194/timmy0toole/Air%20Suspension/IMG_3042_zps1dc52e7c.jpg[/IMG]
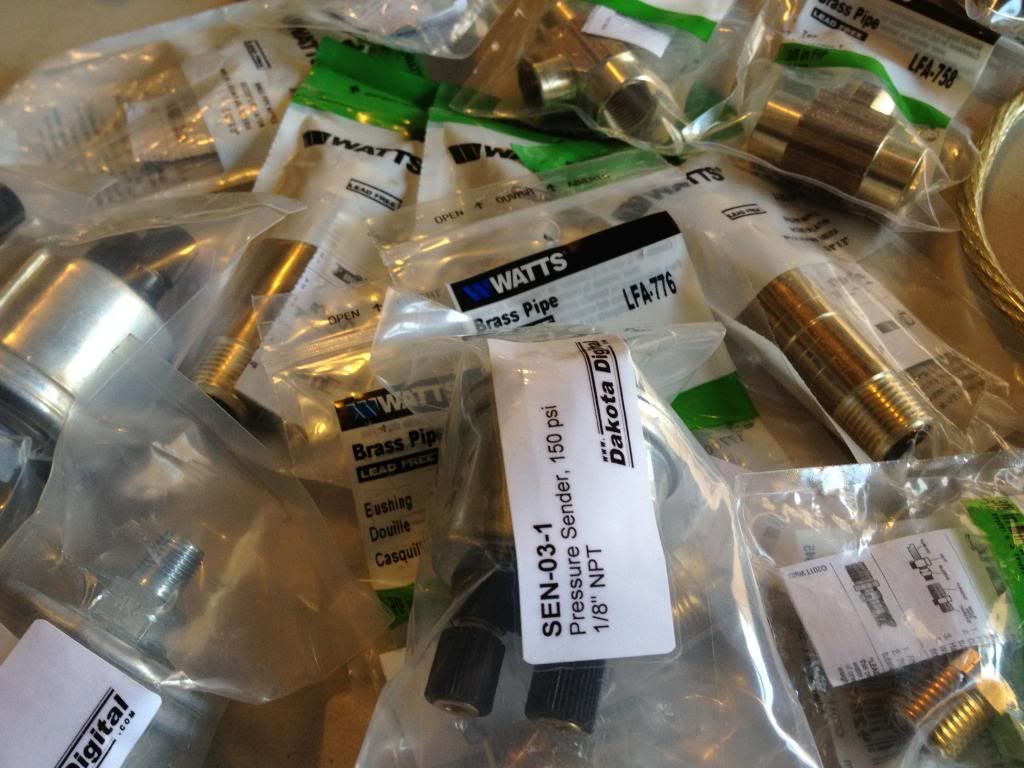
next was to build the valves. since i used these valves on my previous car they were already 90% assembled. i simply needed to add extra fittings for the pressure senders. these were sourced from home depot as well.
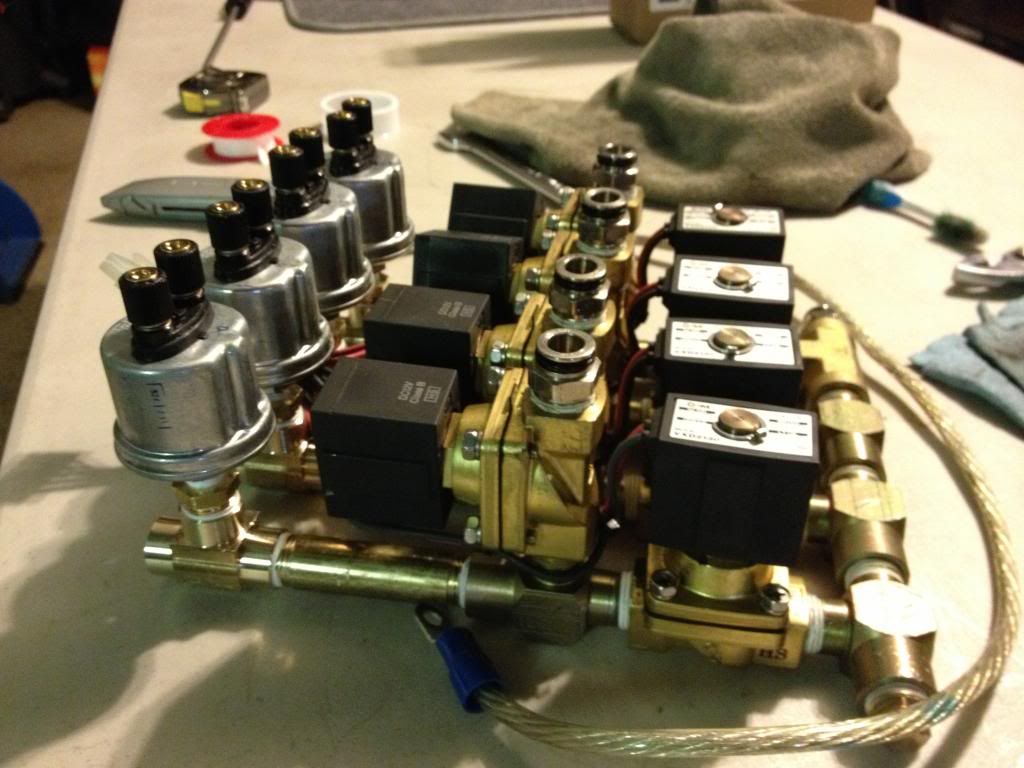
here is how the valves are plumbed where the vertical valves are for dump.
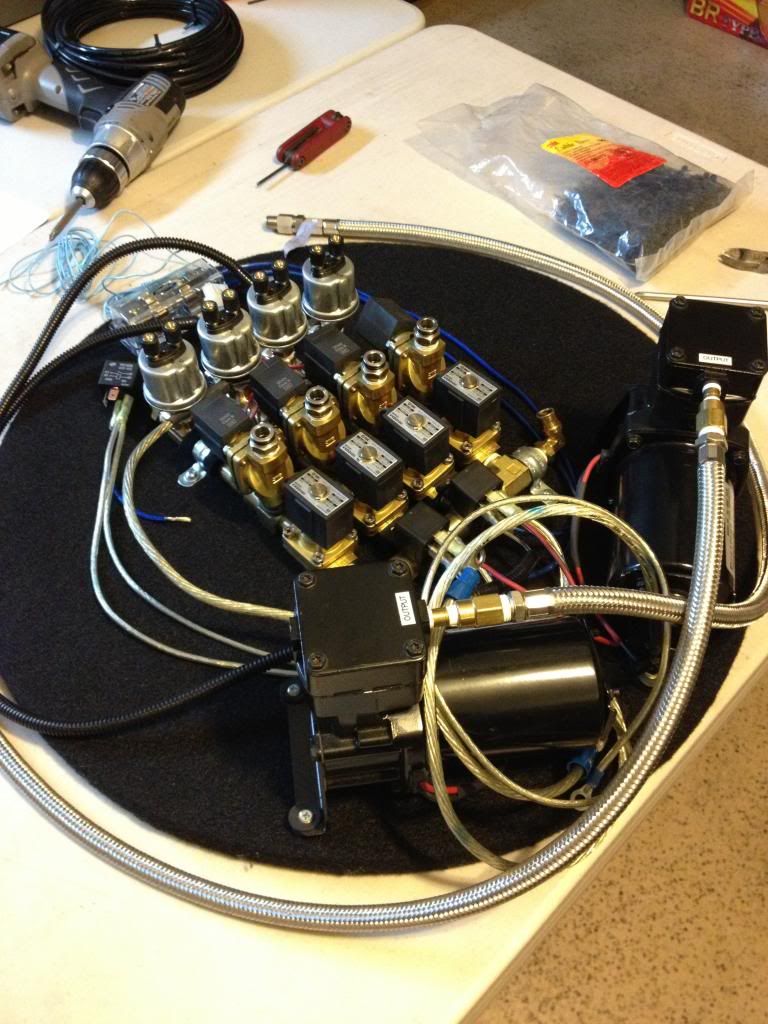
after the adhesive had dried, the valves, compressors, relays, etc were installed onto the wood.
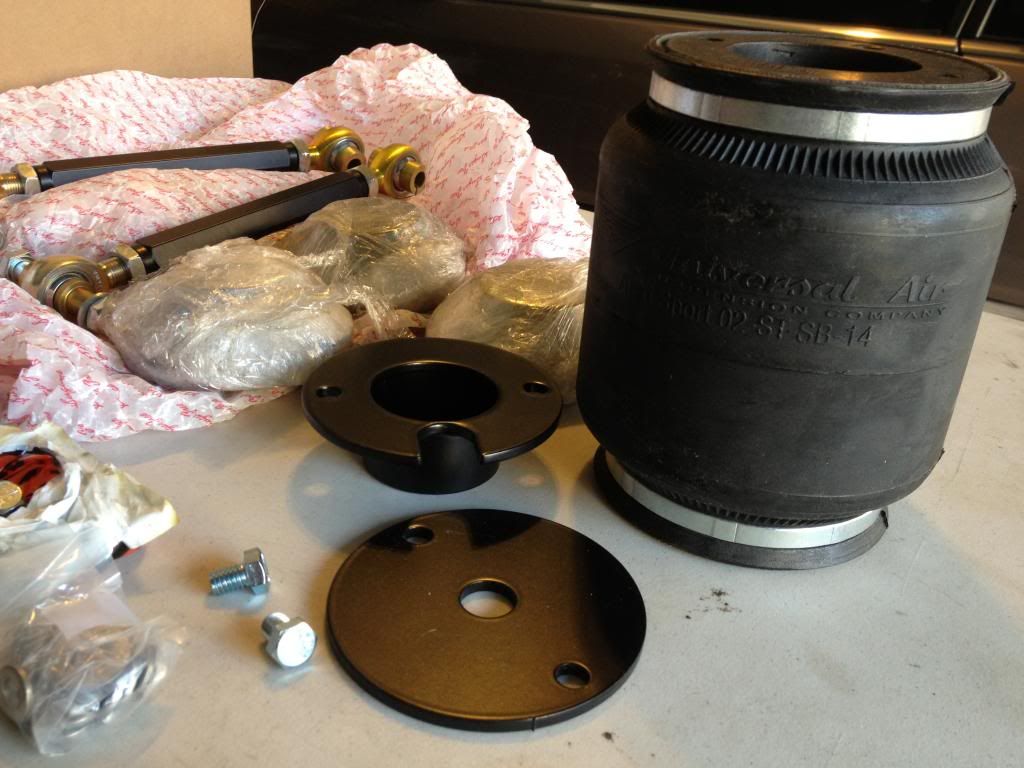
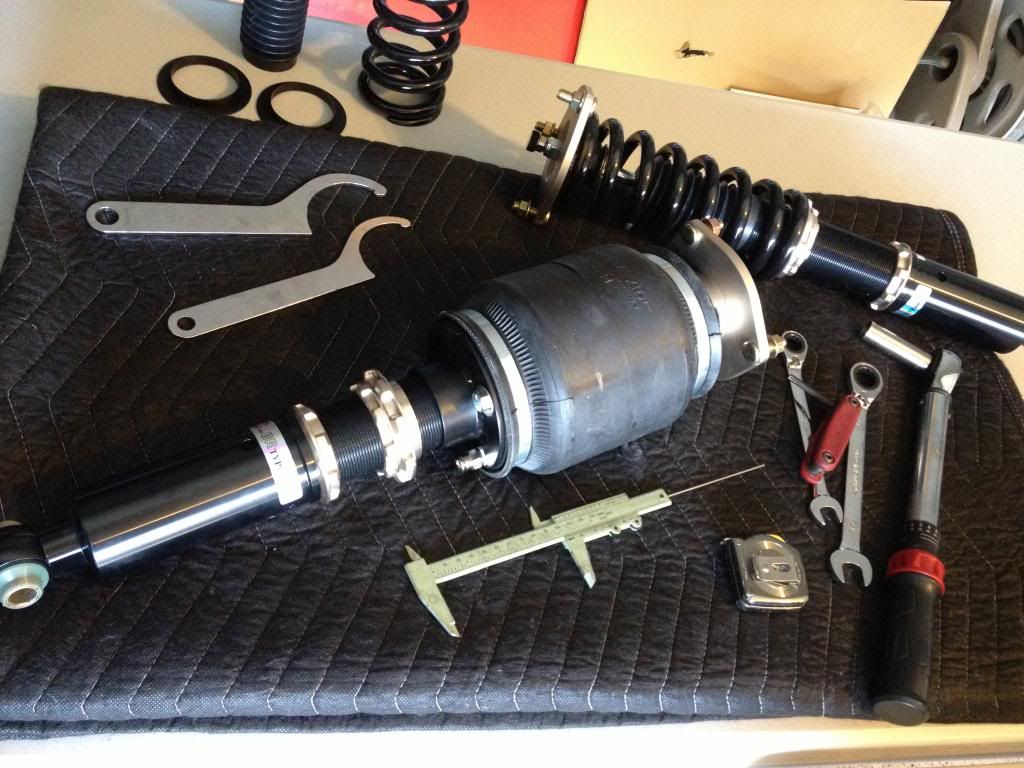
now to the coilovers! it is as simple as replacing the springs with the bags, with some slight perch height changes. the bag brackets i received from UAS were bare metal. i could have used spray paint but wanted a more durable finish so i had them powdercoated matte black. i even redid the studio/battle version adjustable toe arms in the same finish.
when installing the brackets to the coilovers, i used some threadlock sealant though it may not be necessary. i added a flat washer to minimize marring the finish.

i removed the springs from the coilover assembly and lowered the perches 4" from the end of the shock body, per recommendation of UAS.
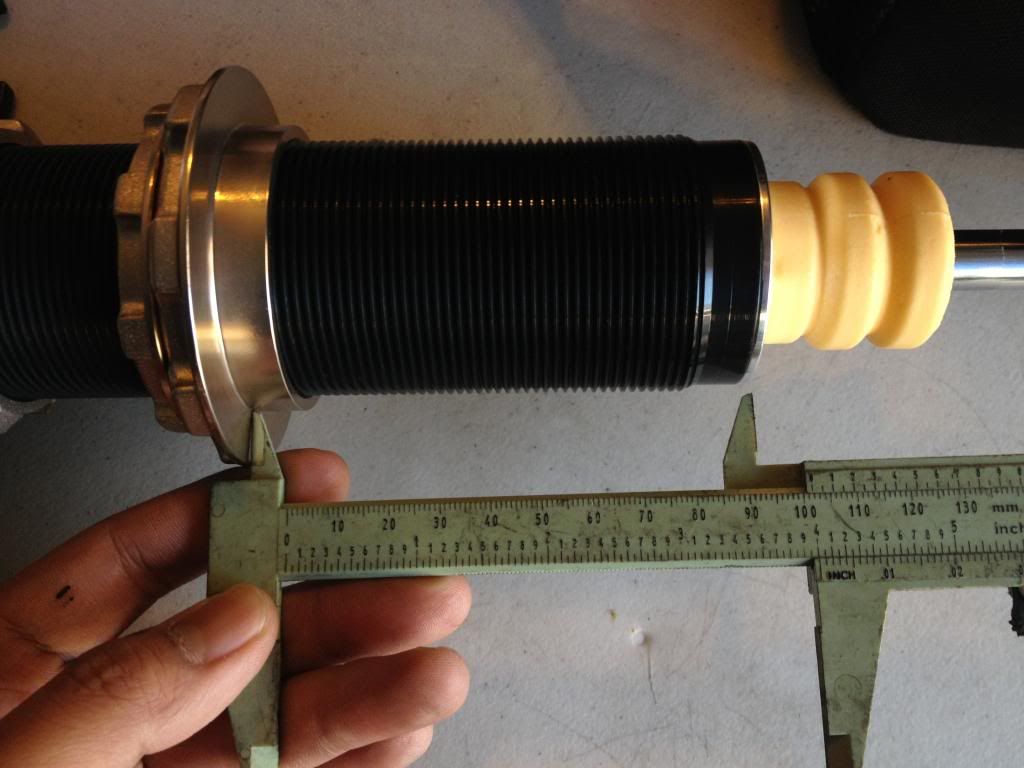
i then put together the whole bag w/bracket assembly onto the shock body. the parts removed were the spring, the two plastic spring isolators, and the dust boot as seen in the top of the picture.
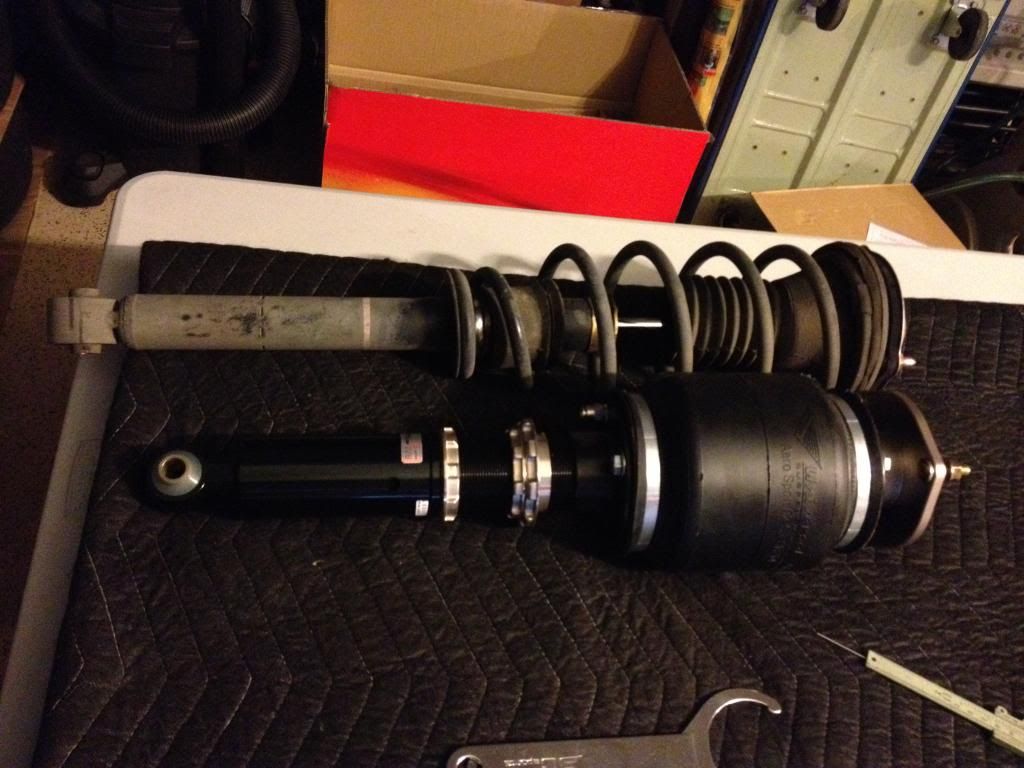
here is the stock rear versus the new setup. i ended up lengthening the coilover 2" more when i installed it in the car since it was too short. the coilovers were originally intended for a 90-94 UCF10 so this may explain the difference.
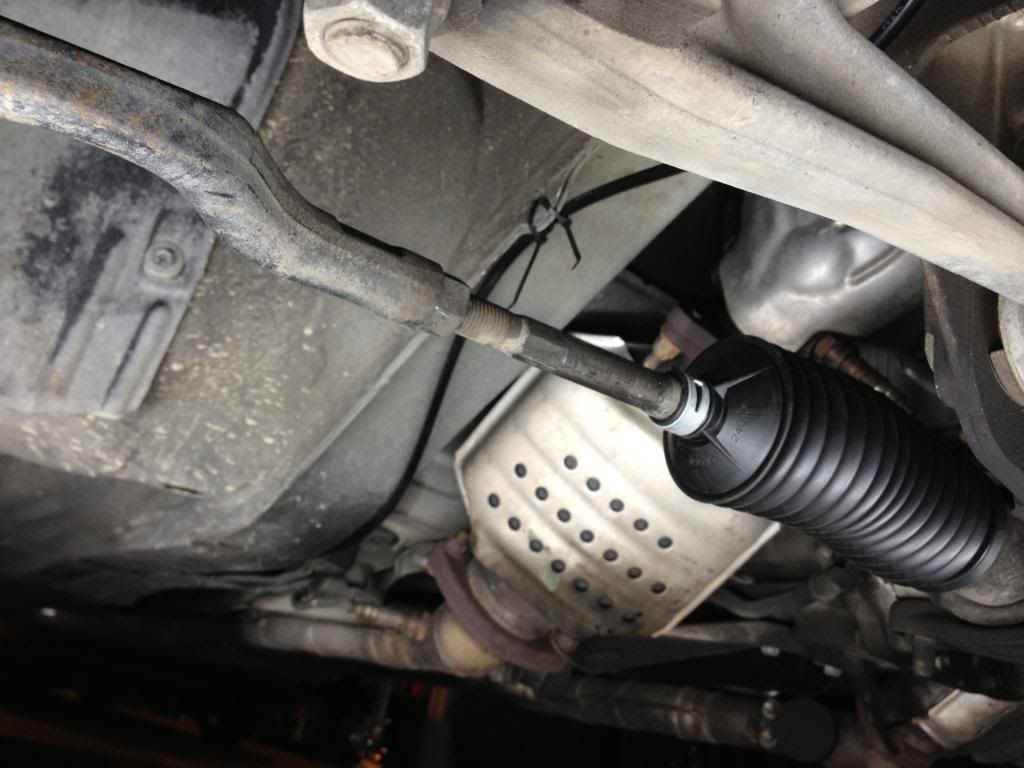
i failed to take pictures of the coilovers on the car. next was to run the air lines. here is the front passenger side line running down and into the underside wiring tray. there are two trays, one on each side running from the front to the back. they make running the lines much easier and symmetrical.
View original BBCode
next was to build the valves. since i used these valves on my previous car they were already 90% assembled. i simply needed to add extra fittings for the pressure senders. these were sourced from home depot as well.
[IMG]http://i27.photobucket.com/albums/c194/timmy0toole/Air%20Suspension/IMG_3038_zpsbeecc69d.jpg[/IMG]

here is how the valves are plumbed where the vertical valves are for dump.
[IMG]http://i27.photobucket.com/albums/c194/timmy0toole/Air%20Suspension/IMG_3039_zpsab453837.jpg[/IMG]

after the adhesive had dried, the valves, compressors, relays, etc were installed onto the wood.
[IMG]http://i27.photobucket.com/albums/c194/timmy0toole/Air%20Suspension/IMG_3074_zps6e8a8594.jpg[/IMG]

now to the coilovers! it is as simple as replacing the springs with the bags, with some slight perch height changes. the bag brackets i received from UAS were bare metal. i could have used spray paint but wanted a more durable finish so i had them powdercoated matte black. i even redid the studio/battle version adjustable toe arms in the same finish.
[IMG]http://i27.photobucket.com/albums/c194/timmy0toole/Air%20Suspension/IMG_3098_zpsae8ff289.jpg[/IMG]

when installing the brackets to the coilovers, i used some threadlock sealant though it may not be necessary. i added a flat washer to minimize marring the finish.
[IMG]http://i27.photobucket.com/albums/c194/timmy0toole/Air%20Suspension/IMG_3102_zpse38d510f.jpg[/IMG]

i removed the springs from the coilover assembly and lowered the perches 4" from the end of the shock body, per recommendation of UAS.
[IMG]http://i27.photobucket.com/albums/c194/timmy0toole/Air%20Suspension/IMG_3100_zps9bbff134.jpg[/IMG]

i then put together the whole bag w/bracket assembly onto the shock body. the parts removed were the spring, the two plastic spring isolators, and the dust boot as seen in the top of the picture.
[IMG]http://i27.photobucket.com/albums/c194/timmy0toole/Air%20Suspension/IMG_3101_zpsb31aac2a.jpg[/IMG]

here is the stock rear versus the new setup. i ended up lengthening the coilover 2" more when i installed it in the car since it was too short. the coilovers were originally intended for a 90-94 UCF10 so this may explain the difference.
[IMG]http://i27.photobucket.com/albums/c194/timmy0toole/Air%20Suspension/IMG_3103_zps7934e103.jpg[/IMG]

i failed to take pictures of the coilovers on the car. next was to run the air lines. here is the front passenger side line running down and into the underside wiring tray. there are two trays, one on each side running from the front to the back. they make running the lines much easier and symmetrical.
[IMG]http://i27.photobucket.com/albums/c194/timmy0toole/Air%20Suspension/IMG_3106_zps6515f9d2.jpg[/IMG]
i routed the air lines around the exhaust behind the heat shields, above the axles, and into the trunk area using existing holes plugged up by a rubber grommet. there is one on each side near the ABS sensors. it is ideal to run the air lines the same length between left and right so the same amount of volume can move in and out of the bags.
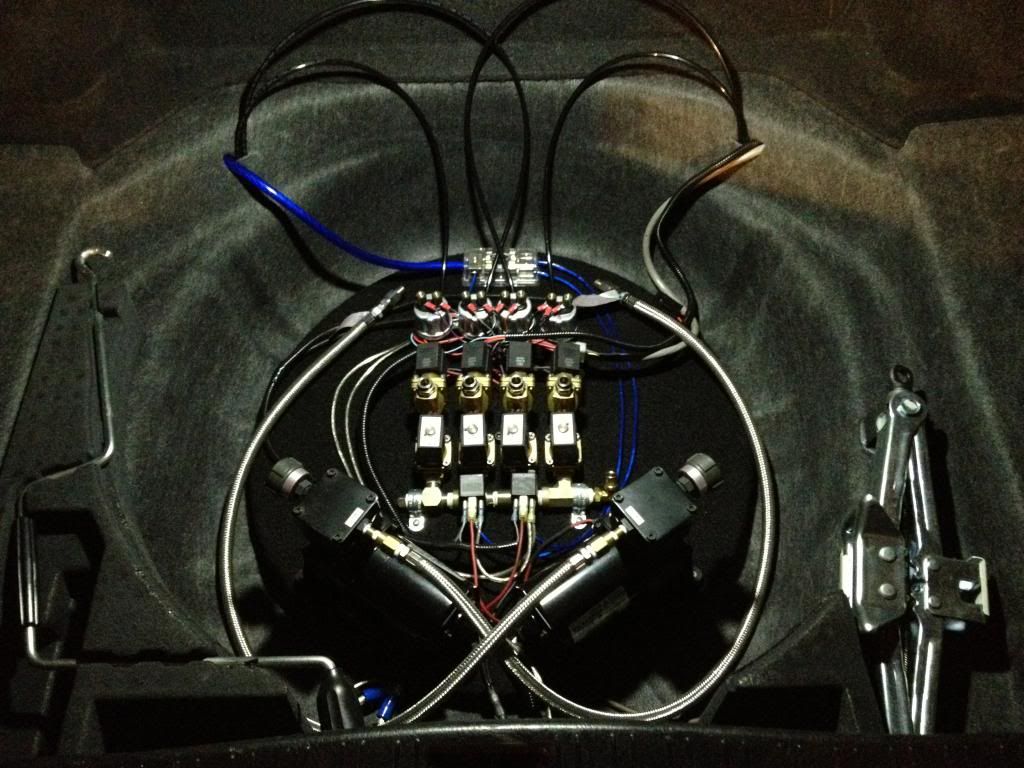
finished all the wiring to the valves and senders

finished wiring the compressors and relays, one per compressor and a third one for accessory power
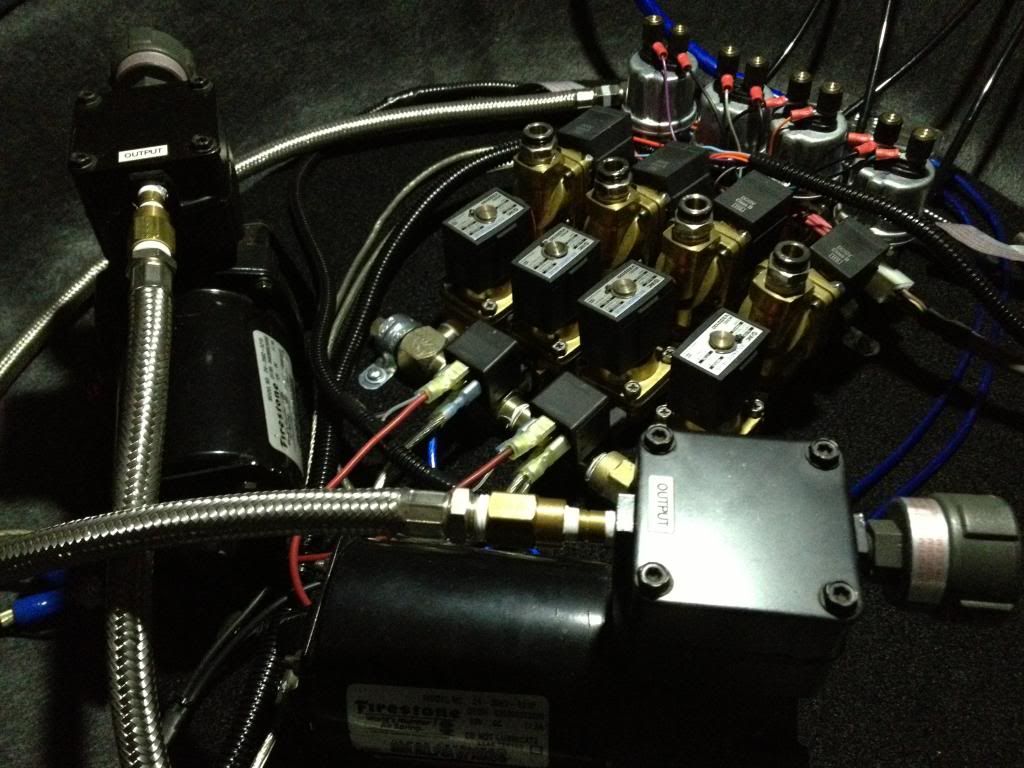
i grouped all the grounds together to a single wire. you can see the type of compressor i'm running as well. this is the same compressor that Air Runner uses.

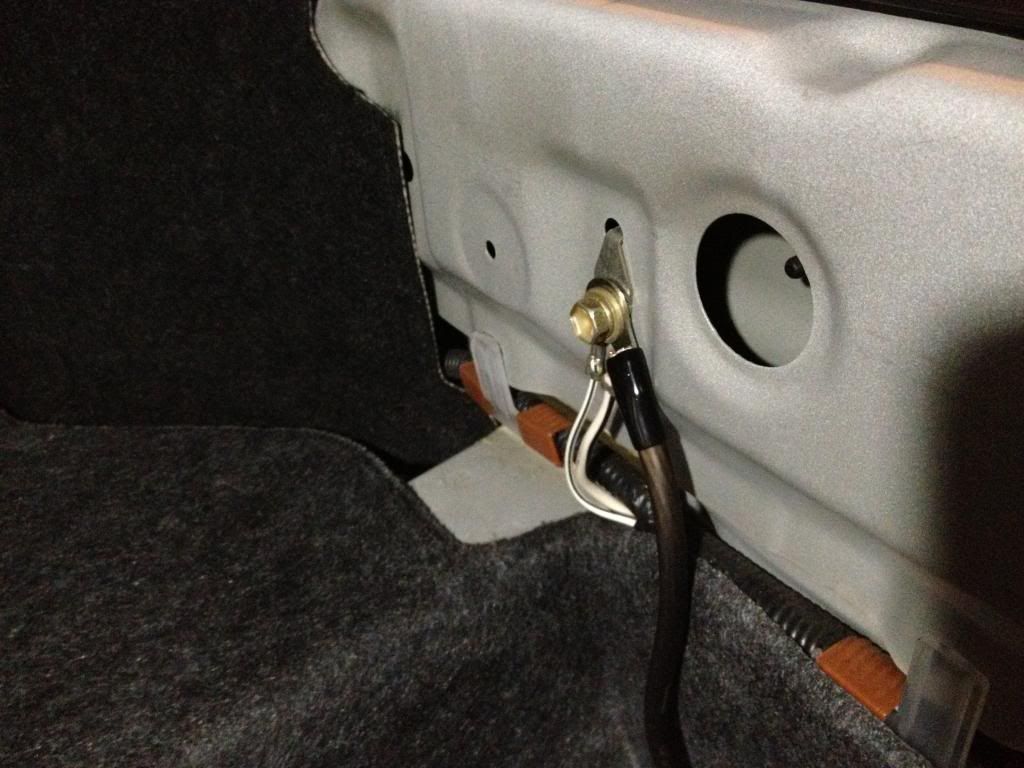
there is a nice ground point behind the trunk liner on the right side of the trunk latch.
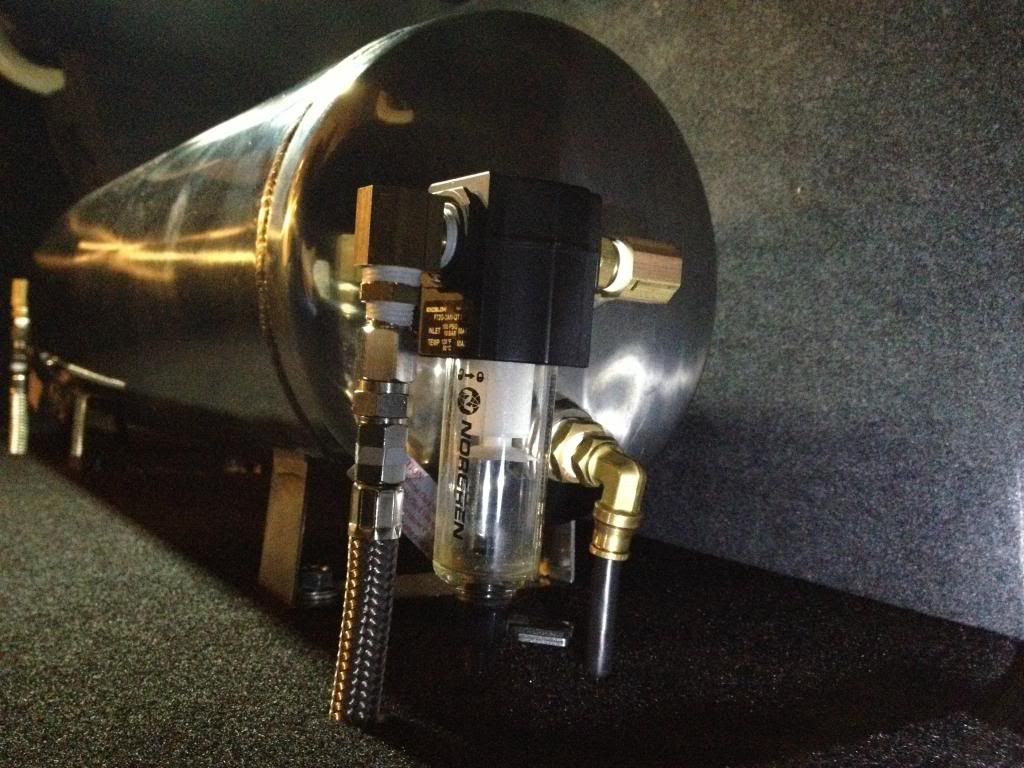
last step was to plumb the tank.
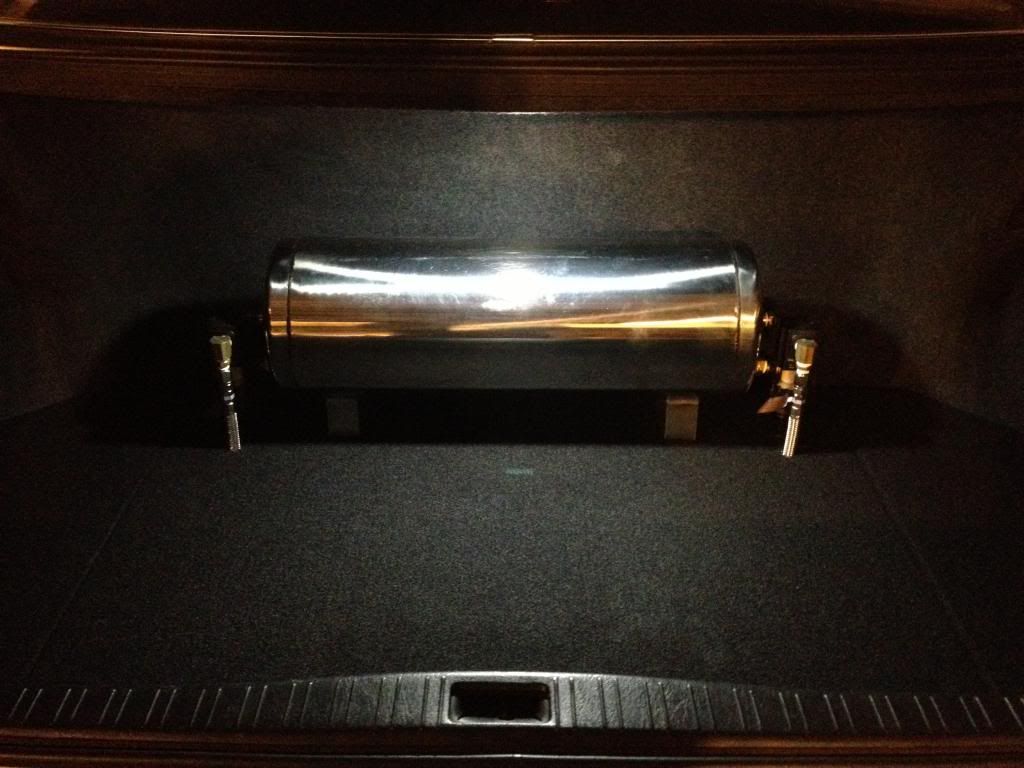
tank feed side
tank pressure switch side (which was disconnected prior to testing)
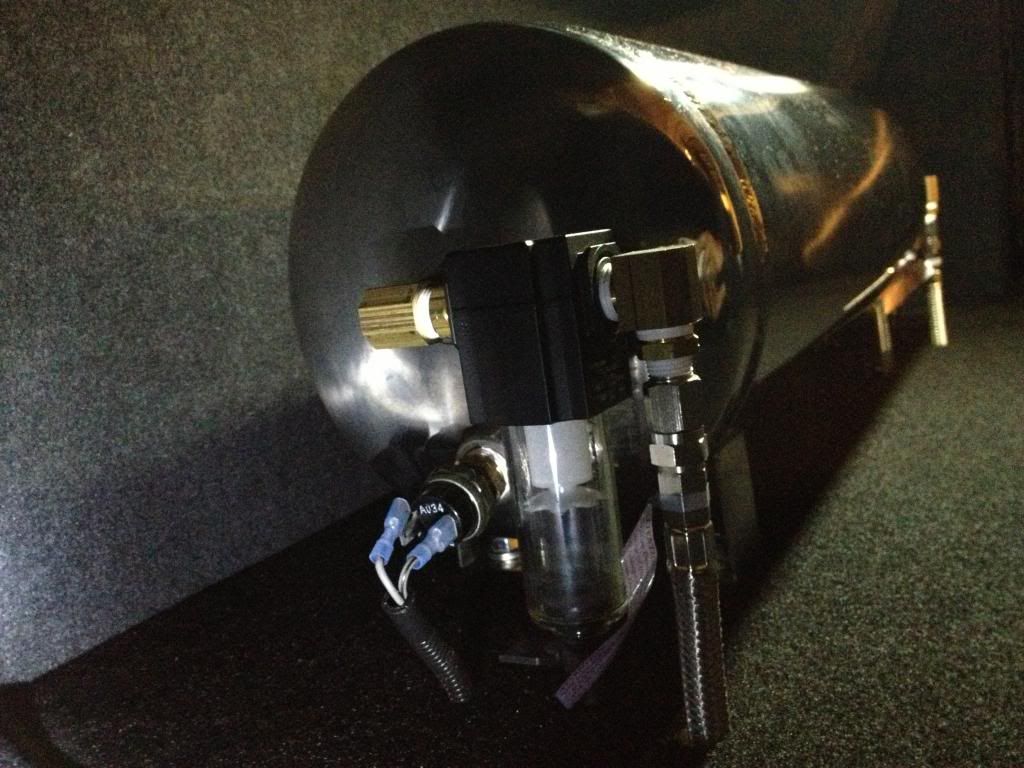
View original BBCode
i routed the air lines around the exhaust behind the heat shields, above the axles, and into the trunk area using existing holes plugged up by a rubber grommet. there is one on each side near the ABS sensors. it is ideal to run the air lines the same length between left and right so the same amount of volume can move in and out of the bags.
[IMG]http://i27.photobucket.com/albums/c194/timmy0toole/Air%20Suspension/IMG_3111_zpscadafa79.jpg[/IMG]

finished all the wiring to the valves and senders
[IMG]http://i27.photobucket.com/albums/c194/timmy0toole/Air%20Suspension/IMG_3112_zps97329a98.jpg[/IMG]

finished wiring the compressors and relays, one per compressor and a third one for accessory power
[IMG]http://i27.photobucket.com/albums/c194/timmy0toole/Air%20Suspension/IMG_3113_zpsc73e7623.jpg[/IMG]

i grouped all the grounds together to a single wire. you can see the type of compressor i'm running as well. this is the same compressor that Air Runner uses.
[IMG]http://i27.photobucket.com/albums/c194/timmy0toole/Air%20Suspension/IMG_3095_zpsd2d5e9ee.jpg[/IMG]

there is a nice ground point behind the trunk liner on the right side of the trunk latch.
[IMG]http://i27.photobucket.com/albums/c194/timmy0toole/Air%20Suspension/IMG_3110_zps25fa3d28.jpg[/IMG]

last step was to plumb the tank.
[IMG]http://i27.photobucket.com/albums/c194/timmy0toole/Air%20Suspension/IMG_3114_zps1dfbeb44.jpg[/IMG]

tank feed side
[IMG]http://i27.photobucket.com/albums/c194/timmy0toole/Air%20Suspension/IMG_3116_zps44c3fb24.jpg[/IMG]

tank pressure switch side (which was disconnected prior to testing)
[IMG]http://i27.photobucket.com/albums/c194/timmy0toole/Air%20Suspension/IMG_3120_zpsc1bda0d8.jpg[/IMG]
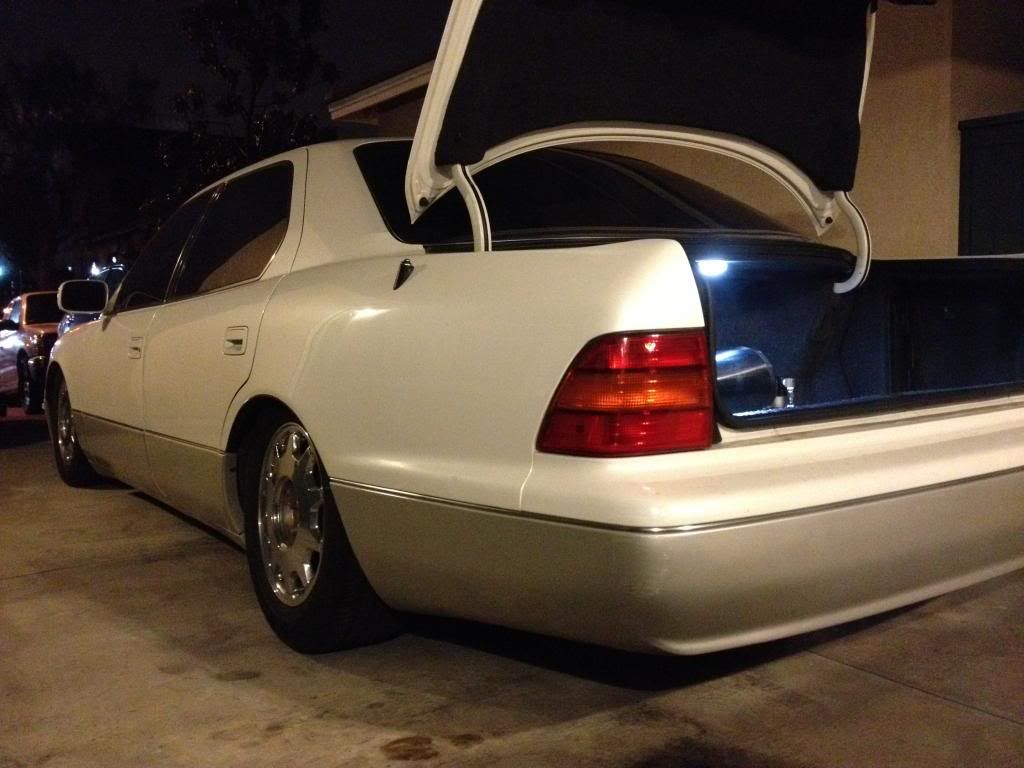
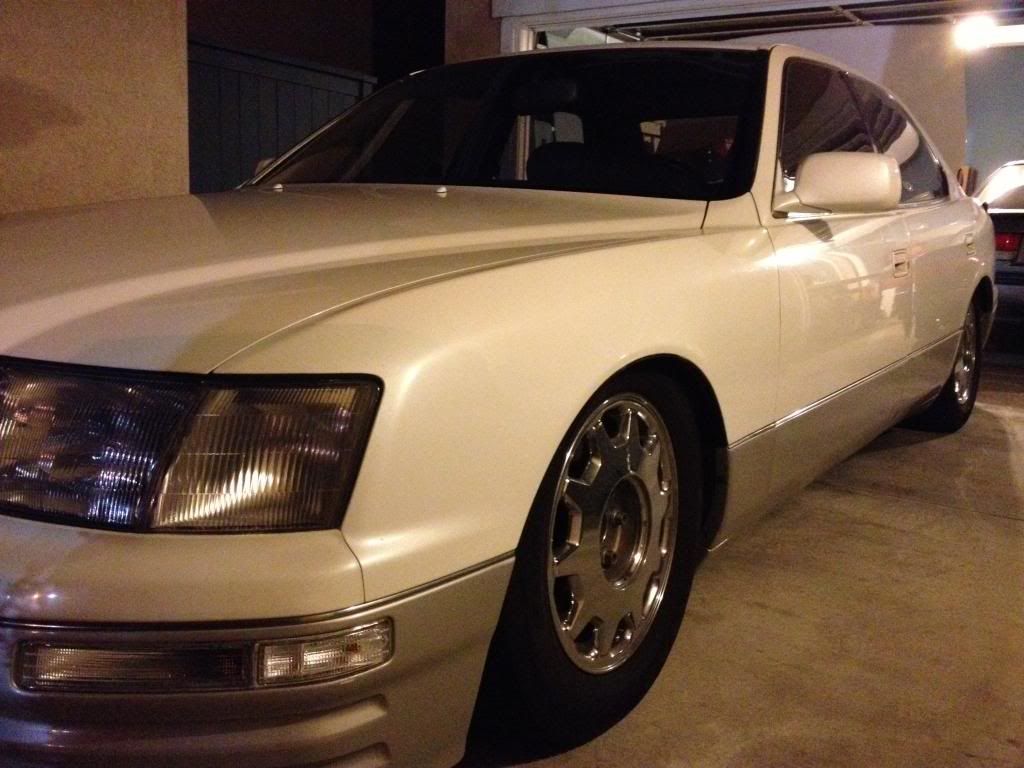
here are the initial aired out pictures. the upper a-arms are hitting the frame up front. i am unsure what is stopping the rear.

i have yet to take a test drive and play with the dampening settings on the coils. from factory they were set to 25 front 25 rear (30 being the stiffest). i brought the rear to 20 for now. also i am uncertain as to what bag pressure feels and works the best. i may have to adjust the height settings on the coils to lessen the strain on the bags especially up front. i haven't even checked for leaks!
View original BBCode
here are the initial aired out pictures. the upper a-arms are hitting the frame up front. i am unsure what is stopping the rear.
[IMG]http://i27.photobucket.com/albums/c194/timmy0toole/Air%20Suspension/IMG_3122_zps3cc9bd2f.jpg[/IMG]
[IMG]http://i27.photobucket.com/albums/c194/timmy0toole/Air%20Suspension/IMG_3123_zps9918eee0.jpg[/IMG]
[IMG]http://i27.photobucket.com/albums/c194/timmy0toole/Air%20Suspension/IMG_3124_zpsf9a7b9fc.jpg[/IMG]

i have yet to take a test drive and play with the dampening settings on the coils. from factory they were set to 25 front 25 rear (30 being the stiffest). i brought the rear to 20 for now. also i am uncertain as to what bag pressure feels and works the best. i may have to adjust the height settings on the coils to lessen the strain on the bags especially up front. i haven't even checked for leaks!
here is some followup information that i thought was valuable.
why did i run these valves?
i already had these valves from my previous setup and they work great. why spend more? the SMC valves are made in japan and are rebuildable (at the cost of deplumbing everything).
why not accuair or autopilot?
cost is precisely why i stayed away from accuair, autopilot, etc. i love the manifold valve setups but i just couldn't spring the money to get one. they would have made the install much easier and cleaner for sure!
what will i do in case of a flat?
in case of a flat i simply call AAA. even if i had a spare, i just have it towed. i'd rather not deal with that on the side of the road. risky i know.
are 1/4" lines too slow?
i ran 3/8" lines before in my other car and it was too fast so i told myself i would run 1/4" this time around (my comparison is a boba straw vs a regular straw). i had to run speed controls to slow it all down, since it was hopping up (this was on a much lighter accord)! glad i went smaller since i feel the speed is very nice and controlled. i am running 200psi tank pressure where most folks run at 150-175psi. also running 1/4" lines through the car is much easier since it's smaller and more flexible.
View original BBCode
here is some followup information that i thought was valuable.

[I]why did i run these valves?[/I]
i already had these valves from my previous setup and they work great. why spend more? the SMC valves are made in japan and are rebuildable (at the cost of deplumbing everything).

[I]why not accuair or autopilot?[/I]
cost is precisely why i stayed away from accuair, autopilot, etc. i love the manifold valve setups but i just couldn't spring the money to get one. they would have made the install much easier and cleaner for sure!

[I]what will i do in case of a flat?[/I]
in case of a flat i simply call AAA. even if i had a spare, i just have it towed. i'd rather not deal with that on the side of the road. risky i know.

[I]are 1/4" lines too slow?[/I]
i ran 3/8" lines before in my other car and it was too fast so i told myself i would run 1/4" this time around (my comparison is a boba straw vs a regular straw). i had to run speed controls to slow it all down, since it was hopping up (this was on a much lighter accord)! glad i went smaller since i feel the speed is very nice and controlled. i am running 200psi tank pressure where most folks run at 150-175psi. also running 1/4" lines through the car is much easier since it's smaller and more flexible.
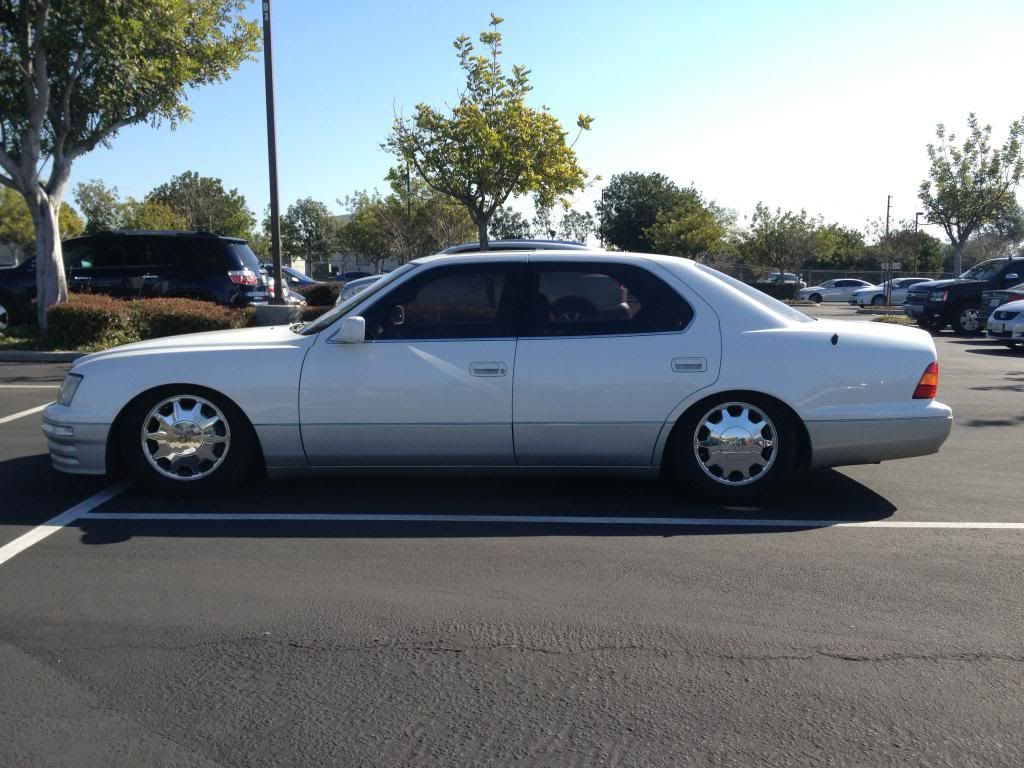
the wheels i already have, just need to save up for the tires and massage the fenders a bit. you can see the wheels stacked in the background when i was doing the carpet installation (tease).
here is a pic when i took her on her maiden voyage this morning. i found that running 90psi up front and 45psi out back works well. it's pretty stiff so i'll adjust the dampening. there is also some knocking coming from the rear. i suspect the top hats. so far the pressures are holding constant!
View original BBCode
[FONT="]the wheels i already have, just need to save up for the tires and massage the fenders a bit. you can see the wheels stacked in the background when i was doing the carpet installation (tease).[/FONT]
[FONT="] [/FONT]
[FONT="]here is a pic when i took her on her maiden voyage this morning. i found that running 90psi up front and 45psi out back works well. it's pretty stiff so i'll adjust the dampening. there is also some knocking coming from the rear. i suspect the top hats. so far the pressures are holding constant![/FONT]
[FONT="][IMG]http://i27.photobucket.com/albums/c194/timmy0toole/Air%20Suspension/IMG_3127_zps511a12fb.jpg[/IMG][/FONT]
nice diy!!! i love it when people take the time out of their install to snap a couple pictures. i try to when i do installs and such, but when things start going the wrong way, it starts becoming frustrating and you're just trying to finish what you're doing.
View original BBCode
nice diy!!! i love it when people take the time out of their install to snap a couple pictures. i try to when i do installs and such, but when things start going the wrong way, it starts becoming frustrating and you're just trying to finish what you're doing.
Crucial write-up! And great pics. Should help allot of folks out when installing air .
View original BBCode
Crucial write-up! And great pics. Should help allot of folks out when installing air .
Nice write up timmy!
View original BBCode
Nice write up timmy!
I´m not a fan of air, but this write-up is great !! I used to have the same set up, and the ride was super!
BTW, check the rear lower coilover body: at 0psi it rubs against the upper arm. SS kit solves the problem.
View original BBCode
I´m not a fan of air, but this write-up is great !! I used to have the same set up, and the ride was super!
BTW, check the rear lower coilover body: at 0psi it rubs against the upper arm. SS kit solves the problem.
Nice write-up! i'm gonna save it for reference
View original BBCode
Nice write-up! i'm gonna save it for reference
:biggthumpup:
View original BBCode
:biggthumpup:
brainneeded;484040 wrote:nice diy!!! i love it when people take the time out of their install to snap a couple pictures. i try to when i do installs and such, but when things start going the wrong way, it starts becoming frustrating and you're just trying to finish what you're doing.
exactly! i just wanted to finish so i continued on then :pat: when i forgot to take pics along the way. i forgot to take pics of all four bag/coils and them installed in the car! when i check for leaks i'll take more pics.
~~sperm~bomb~~;484046 wrote:Crucial write-up! And great pics. Should help allot of folks out when installing air .
that's my goal! the LS400 community is growing as the car is getting more affordable so i would be happy to aid in anyone trying to do this themselves.
Dranom;484050 wrote:Nice write up timmy!
i appreciate that! i still feel it's lacking a few details that may answer those common questions.
silos5;484086 wrote:I´m not a fan of air, but this write-up is great !! I used to have the same set up, and the ride was super!
BTW, check the rear lower coilover body: at 0psi it rubs against the upper arm. SS kit solves the problem.
yes!!! i suspected that when i was installing them and simulating suspension movement with the jack. thank you for the clarification. now to find an SS kit...
View original BBCode
[QUOTE=brainneeded;484040]nice diy!!! i love it when people take the time out of their install to snap a couple pictures. i try to when i do installs and such, but when things start going the wrong way, it starts becoming frustrating and you're just trying to finish what you're doing.[/QUOTE]
exactly! i just wanted to finish so i continued on then :pat: when i forgot to take pics along the way. i forgot to take pics of all four bag/coils and them installed in the car! when i check for leaks i'll take more pics.

[QUOTE=~~sperm~bomb~~;484046]Crucial write-up! And great pics. Should help allot of folks out when installing air .[/QUOTE]
that's my goal! the LS400 community is growing as the car is getting more affordable so i would be happy to aid in anyone trying to do this themselves.

[QUOTE=Dranom;484050]Nice write up timmy![/QUOTE]
i appreciate that! i still feel it's lacking a few details that may answer those common questions.

[QUOTE=silos5;484086]I´m not a fan of air, but this write-up is great !! I used to have the same set up, and the ride was super!
BTW, check the rear lower coilover body: at 0psi it rubs against the upper arm. SS kit solves the problem.[/QUOTE]
yes!!! i suspected that when i was installing them and simulating suspension movement with the jack. thank you for the clarification. now to find an SS kit...
ikadburry;484276 wrote:Nice write-up! i'm gonna save it for reference
OG;484284 wrote::biggthumpup:
thank you gents!
View original BBCode
[QUOTE=ikadburry;484276]Nice write-up! i'm gonna save it for reference[/QUOTE]

[QUOTE=OG;484284]:biggthumpup:[/QUOTE]

thank you gents!
air suspension setup UCF20
Thanks for this post, we are doing by bros car next week and i was concerned on how the bags mount to the struts, i appreciate your detailed write up, thanks again!!!
View original BBCode
Thanks for this post, we are doing by bros car next week and i was concerned on how the bags mount to the struts, i appreciate your detailed write up, thanks again!!!
looks awesome bro! what wheels are going on?
View original BBCode
looks awesome bro! what wheels are going on?
any particular reason you went with firestone vs. viair? just wondering.
View original BBCode
any particular reason you went with firestone vs. viair? just wondering.
Does the compressors turns on even without a key?
View original BBCode
Does the compressors turns on even without a key?
nice, thanks for the write up!
View original BBCode
nice, thanks for the write up!
ray316;484304 wrote:looks awesome bro! what wheels are going on?
wheels are your classic ssr vienna kreis i obtained from GS300ToM almost a year ago! i was waiting on finishing this before i set of to get them on.
brainneeded;484311 wrote:any particular reason you went with firestone vs. viair? just wondering.
the firestone compressors i found used for a deal so i jumped at it. only after did i know that they were the same ones airrunner uses. they are very quiet, easy to maintain, and compact.
Dranom;484318 wrote:Does the compressors turns on even without a key?
you can wire it to run w/o a key, but i opted not to for theft reasons. also this would drain your battery if you had a leak in the tank, since the compressors would turn on even when the car is parked and off.
View original BBCode
[QUOTE=ray316;484304]looks awesome bro! what wheels are going on?[/QUOTE]
wheels are your classic ssr vienna kreis i obtained from GS300ToM almost a year ago! i was waiting on finishing this before i set of to get them on.

[QUOTE=brainneeded;484311]any particular reason you went with firestone vs. viair? just wondering.[/QUOTE]
the firestone compressors i found used for a deal so i jumped at it. only after did i know that they were the same ones airrunner uses. they are very quiet, easy to maintain, and compact.

[QUOTE=Dranom;484318]Does the compressors turns on even without a key?[/QUOTE]
you can wire it to run w/o a key, but i opted not to for theft reasons. also this would drain your battery if you had a leak in the tank, since the compressors would turn on even when the car is parked and off.
mrbrian8;484294 wrote:Thanks for this post, we are doing by bros car next week and i was concerned on how the bags mount to the struts, i appreciate your detailed write up, thanks again!!!
happy to have helped. keep in mind if your brackets have or have a longer tube on it, you'll need to adjust accordingly. it's not so bad. the tube is just to give clearance for the fittings since certain coilover collars are bulkier than others.
Vincent;484502 wrote:nice, thanks for the write up!
so will i be seeing your ride on air soon? =)
View original BBCode
[QUOTE=mrbrian8;484294]Thanks for this post, we are doing by bros car next week and i was concerned on how the bags mount to the struts, i appreciate your detailed write up, thanks again!!![/QUOTE]
happy to have helped. keep in mind if your brackets have or have a longer tube on it, you'll need to adjust accordingly. it's not so bad. the tube is just to give clearance for the fittings since certain coilover collars are bulkier than others.

[QUOTE=Vincent;484502]nice, thanks for the write up![/QUOTE]
so will i be seeing your ride on air soon? =)
This make it seem so easy, and makes me want to run out to the garage and start an Air install. Nice work, every nicer write up.
View original BBCode
This make it seem so easy, and makes me want to run out to the garage and start an Air install. Nice work, every nicer write up.
Nice write up Tim! Good to finally see the LS getting worked on!!
View original BBCode
Nice write up Tim! Good to finally see the LS getting worked on!!
great write up. i really like how you setup your valves and it takes up a lot less space. i'll be refering to this once i start on my air setup
View original BBCode
great write up. i really like how you setup your valves and it takes up a lot less space. i'll be refering to this once i start on my air setup
Re: air suspension setup UCF20
Awesome write up, this should aide me in the next few weeks

Sent from my Galaxy Note 2 using Tapatalk
View original BBCode
Awesome write up, this should aide me in the next few weeks
Sent from my Galaxy Note 2 using Tapatalk
timmy0tool;484593 wrote:
you can wire it to run w/o a key, but i opted not to for theft reasons. also this would drain your battery if you had a leak in the tank, since the compressors would turn on even when the car is parked and off.
Another option is to run em with a simple switch and relay, that way you can operate the system with out keys... just need to put the switch some unobvious place in the center console so thieves can't lift it to drive even when they got your key or jigglers.
View original BBCode
[QUOTE=timmy0tool;484593]
you can wire it to run w/o a key, but i opted not to for theft reasons. also this would drain your battery if you had a leak in the tank, since the compressors would turn on even when the car is parked and off.[/QUOTE]
Another option is to run em with a simple switch and relay, that way you can operate the system with out keys... just need to put the switch some unobvious place in the center console so thieves can't lift it to drive even when they got your key or jigglers.
Nice write up and clean set up!
View original BBCode
Nice write up and clean set up!
love the writeup tim, didnt know you picked up an ls.
View original BBCode
love the writeup tim, didnt know you picked up an ls.
good stuff man!
View original BBCode
good stuff man!
gh0st;484597 wrote:This make it seem so easy, and makes me want to run out to the garage and start an Air install. Nice work, every nicer write up.
thank you it is easy, just time consuming. all that work took about 4 weekends for me since i was working alone (poor me haha). i am very particular so you can go as intricate or as simple as you want. air rex setups i heard can be installed in under 5 hrs!
mrfobbyaccent;486085 wrote:Nice write up Tim! Good to finally see the LS getting worked on!!
i can't be as cool as you running that low and static haha! good to hear from you!
LowStyle400;486114 wrote:great write up. i really like how you setup your valves and it takes up a lot less space. i'll be refering to this once i start on my air setup
i can't take all the credit for the valve setup. i bought it that way used, but just cleaned up the wiring and added the pressure sensors. glad i could be of some assistance to others. if you have more questions, ask!
evilchargerfan;486141 wrote:Awesome write up, this should aide me in the next few weeks
thank you, glad the thread is helping folks!
View original BBCode
[QUOTE=gh0st;484597]This make it seem so easy, and makes me want to run out to the garage and start an Air install. Nice work, every nicer write up.[/QUOTE]
thank you it is easy, just time consuming. all that work took about 4 weekends for me since i was working alone (poor me haha). i am very particular so you can go as intricate or as simple as you want. air rex setups i heard can be installed in under 5 hrs!

[QUOTE=mrfobbyaccent;486085]Nice write up Tim! Good to finally see the LS getting worked on!![/QUOTE]
i can't be as cool as you running that low and static haha! good to hear from you!

[QUOTE=LowStyle400;486114]great write up. i really like how you setup your valves and it takes up a lot less space. i'll be refering to this once i start on my air setup[/QUOTE]
i can't take all the credit for the valve setup. i bought it that way used, but just cleaned up the wiring and added the pressure sensors. glad i could be of some assistance to others. if you have more questions, ask!

[QUOTE=evilchargerfan;486141]Awesome write up, this should aide me in the next few weeks[/QUOTE]
thank you, glad the thread is helping folks!
Juzzo;486212 wrote:Another option is to run em with a simple switch and relay, that way you can operate the system with out keys... just need to put the switch some unobvious place in the center console so thieves can't lift it to drive even when they got your key or jigglers.
hmm good point! i do want a cutoff so the compressors aren't on while i start the car. it puts less strain on the battery during starter engagement. thanks!
Redline26;486213 wrote:Nice write up and clean set up!
i appreciate that man!
OCVIPAristo;486319 wrote:love the writeup tim, didnt know you picked up an ls.
you follow me on instagram tony haha! well i suppose i haven't posted a pic of the actual car i was working on. thank you brotha!
Lextacy671;486341 wrote:good stuff man!
thanks, now to get the wheels on!
View original BBCode
[QUOTE=Juzzo;486212]Another option is to run em with a simple switch and relay, that way you can operate the system with out keys... just need to put the switch some unobvious place in the center console so thieves can't lift it to drive even when they got your key or jigglers.[/QUOTE]
hmm good point! i do want a cutoff so the compressors aren't on while i start the car. it puts less strain on the battery during starter engagement. thanks!

[QUOTE=Redline26;486213]Nice write up and clean set up![/QUOTE]
i appreciate that man!

[QUOTE=OCVIPAristo;486319]love the writeup tim, didnt know you picked up an ls.[/QUOTE]
you follow me on instagram tony haha! well i suppose i haven't posted a pic of the actual car i was working on. thank you brotha!

[QUOTE=Lextacy671;486341]good stuff man![/QUOTE]
thanks, now to get the wheels on!
did you cut the dust boot to get it off? My BC's came today and I'm putting the bags on them now. >:)

Also the longer struts are the rears right? Or vice versa?
View original BBCode
did you cut the dust boot to get it off? My BC's came today and I'm putting the bags on them now. >:)
Also the longer struts are the rears right? Or vice versa?
AustinY;488161 wrote:did you cut the dust boot to get it off? My BC's came today and I'm putting the bags on them now. >:)
Also the longer struts are the rears right? Or vice versa?
you can cut them sure but when you remove the springs, you can slide them off easily when the top hats are removed. the longer struts are in the rear yes. there should be a sticker on the shock body telling you "F" or "R". ;)
View original BBCode
[QUOTE=AustinY;488161]did you cut the dust boot to get it off? My BC's came today and I'm putting the bags on them now. >:)

Also the longer struts are the rears right? Or vice versa?[/QUOTE]
you can cut them sure but when you remove the springs, you can slide them off easily when the top hats are removed. the longer struts are in the rear yes. there should be a sticker on the shock body telling you "F" or "R". ;)
I found the sticker lol

And my coils were for the 95-00 and had a nice little washer type thing that didnt come off after I took off the tophat (under the tophat) so the dust boot had to be cut, just a little slit though it's all good. :D
View original BBCode
I found the sticker lol
And my coils were for the 95-00 and had a nice little washer type thing that didnt come off after I took off the tophat (under the tophat) so the dust boot had to be cut, just a little slit though it's all good. :D
that washer type can come off with a light tap of a wrench or hammer. it is position specific (up should be up) since the hole has a slight bevel to retain it on the shaft. but you cut the boots off anyways, so no worries ha!

my coils were for a 90-94. should still work out the same regardless. glad you found the sticker!
View original BBCode
that washer type can come off with a light tap of a wrench or hammer. it is position specific (up should be up) since the hole has a slight bevel to retain it on the shaft. but you cut the boots off anyways, so no worries ha!
my coils were for a 90-94. should still work out the same regardless. glad you found the sticker!
All in all great writeup, and I could've guessed but didn't bother hitting it with a hammer, as I literally pulled them out of the box to take them apart lol
View original BBCode
All in all great writeup, and I could've guessed but didn't bother hitting it with a hammer, as I literally pulled them out of the box to take them apart lol
the bag mount should go under that washer. here's a video that shows the proper way to disassemble your coilovers:

[video=youtube_share;HlqOA35NmAw]http://youtu.be/HlqOA35NmAw[/video]
View original BBCode
the bag mount should go under that washer. here's a video that shows the proper way to disassemble your coilovers:
[video=youtube_share;HlqOA35NmAw]http://youtu.be/HlqOA35NmAw[/video]
air suspension setup UCF20
I was literally asking that in my head OG, thanks for the psychic answer. Ill post a picture up later tonight to confirm I'm doing it correctly
View original BBCode
I was literally asking that in my head OG, thanks for the psychic answer. Ill post a picture up later tonight to confirm I'm doing it correctly
i just noticed another thing. the perches go 4" down (+1" for the lower bracket) from the damper when fully compressed. it may happen to be 4" from the top of the body, but i would do the measurments to be safe. if you compress the shock, with the spring off obviouslly, it will leave a barely visable line. measure from that line up to the bottom of the tophat (washer) and subtract that measurement from 5". set the lower spring perch to that measurment. if you set it too low it will allow the damper to bottom out instead of the internal sleeve in the bag. i don't compensate for the thickness of the bag brackets for a little breathing room.
View original BBCode
i just noticed another thing. the perches go 4" down (+1" for the lower bracket) from the damper when fully compressed. it may happen to be 4" from the top of the body, but i would do the measurments to be safe. if you compress the shock, with the spring off obviouslly, it will leave a barely visable line. measure from that line up to the bottom of the tophat (washer) and subtract that measurement from 5". set the lower spring perch to that measurment. if you set it too low it will allow the damper to bottom out instead of the internal sleeve in the bag. i don't compensate for the thickness of the bag brackets for a little breathing room.
OG;488253 wrote:the bag mount should go under that washer. here's a video that shows the proper way to disassemble your coilovers:
thanks for this clarification OG. i failed to install the mount below that washer (mine is currently on top). i was afraid that the bag would be too loose around the shock but i can see how having the bracket below the washer would work a bit better. ideally the best way would be to mount both top and bottom brackets solid, so they don't slide at all on the shock body. this would require more custom fab.
OG;488256 wrote:i just noticed another thing. the perches go 4" down (+1" for the lower bracket) from the damper when fully compressed. it may happen to be 4" from the top of the body, but i would do the measurments to be safe. if you compress the shock, with the spring off obviouslly, it will leave a barely visable line. measure from that line up to the bottom of the tophat (washer) and subtract that measurement from 5". set the lower spring perch to that measurment. if you set it too low it will allow the damper to bottom out instead of the internal sleeve in the bag. i don't compensate for the thickness of the bag brackets for a little breathing room.
i understand this and hope others as well. i felt 4" from the top worked well with my application since the bottom bracket is 1" tall so in reality i compensated for only 3" from the top. in addition, the lower bracket actually rests on the small shoulder portion of the collar, not the main outer surface of the collar (i don't like this but it works regardless). this adds another maybe 0.5". the key is to have the bag bottom out before the damper does (which is what you said OG) =) . thanks again bud!
View original BBCode
[QUOTE=OG;488253]the bag mount should go under that washer. here's a video that shows the proper way to disassemble your coilovers:[/QUOTE]

thanks for this clarification OG. i failed to install the mount below that washer (mine is currently on top). i was afraid that the bag would be too loose around the shock but i can see how having the bracket below the washer would work a bit better. ideally the best way would be to mount both top and bottom brackets solid, so they don't slide at all on the shock body. this would require more custom fab.

[QUOTE=OG;488256]i just noticed another thing. the perches go 4" down (+1" for the lower bracket) from the damper when fully compressed. it may happen to be 4" from the top of the body, but i would do the measurments to be safe. if you compress the shock, with the spring off obviouslly, it will leave a barely visable line. measure from that line up to the bottom of the tophat (washer) and subtract that measurement from 5". set the lower spring perch to that measurment. if you set it too low it will allow the damper to bottom out instead of the internal sleeve in the bag. i don't compensate for the thickness of the bag brackets for a little breathing room.[/QUOTE]

i understand this and hope others as well. i felt 4" from the top worked well with my application since the bottom bracket is 1" tall so in reality i compensated for only 3" from the top. in addition, the lower bracket actually rests on the small shoulder portion of the collar, not the main outer surface of the collar (i don't like this but it works regardless). this adds another maybe 0.5". the key is to have the bag bottom out before the damper does (which is what you said OG) =) . thanks again bud!
So I snapped a few pictures, and they came out SUPER blurry lol but the coils are already back together so no re-do's :P
However this shows the line OG mentioned to use as a measuring point, I then measured the distance to the washer (.5") and set the collars including the bag mount 3.5" from the top.

One more question that I have is, I had to thread down the actual strut body to get the distance for the fronts, as you can see in the picture now there are no threads showing, just wondering if I should thread the body up for the rears? I'm not the most experienced with this if you couldn't tell, I've taken apart coils and had custom springs on my old car, but just did things without knowing if they were bad or not, so I'm asking this time around. ;)

The rears for reference.

View original BBCode
So I snapped a few pictures, and they came out SUPER blurry lol but the coils are already back together so no re-do's :P

However this shows the line OG mentioned to use as a measuring point, I then measured the distance to the washer (.5") and set the collars including the bag mount 3.5" from the top.

[URL="http://media.tumblr.com/08d589cb01bffc71842c95c93e489e94/tumblr_inline_mjzidj86Pd1qz4rgp.jpg"][IMG]http://media.tumblr.com/08d589cb01bffc71842c95c93e489e94/tumblr_inline_mjzidj86Pd1qz4rgp.jpg[/IMG][/URL]

One more question that I have is, I had to thread down the actual strut body to get the distance for the fronts, as you can see in the picture now there are no threads showing, just wondering if I should thread the body up for the rears? I'm not the most experienced with this if you couldn't tell, I've taken apart coils and had custom springs on my old car, but just did things without knowing if they were bad or not, so I'm asking this time around. ;)

[URL="http://media.tumblr.com/895cd92229a1cc93587809ba793a655c/tumblr_inline_mjzido9Ol51qz4rgp.jpg"][IMG]http://media.tumblr.com/895cd92229a1cc93587809ba793a655c/tumblr_inline_mjzido9Ol51qz4rgp.jpg[/IMG][/URL]

The rears for reference.

[URL="http://media.tumblr.com/68825ce6e3aed6a231a28fcf2b15b57e/tumblr_inline_mjzidwI1o51qz4rgp.jpg"][IMG]http://media.tumblr.com/68825ce6e3aed6a231a28fcf2b15b57e/tumblr_inline_mjzidwI1o51qz4rgp.jpg[/IMG][/URL]
Hey bud would you be able to point me in the direction of wiring the ignition source?
View original BBCode
Hey bud would you be able to point me in the direction of wiring the ignition source?
if you thread the body low (showing less thread) you will require additional pressure to ride at height, if you expose more thread you will need less pressure to ride height. depends on if you want to ride high and dump for shows or if you want to ride low.
View original BBCode
if you thread the body low (showing less thread) you will require additional pressure to ride at height, if you expose more thread you will need less pressure to ride height. depends on if you want to ride high and dump for shows or if you want to ride low.
AustinY;489926 wrote:Hey bud would you be able to point me in the direction of wiring the ignition source?
for ignition source i used the cig lighter since i was already running wires for the digital air pressure gauge to the ashtray. you can also get ignition wires from the radio harness, the power wire for the retracting antenna (if you have one), or the under dash fuse box.
View original BBCode
[QUOTE=AustinY;489926]Hey bud would you be able to point me in the direction of wiring the ignition source?[/QUOTE]
for ignition source i used the cig lighter since i was already running wires for the digital air pressure gauge to the ashtray. you can also get ignition wires from the radio harness, the power wire for the retracting antenna (if you have one), or the under dash fuse box.
brainneeded;489929 wrote:if you thread the body low (showing less thread) you will require additional pressure to ride at height, if you expose more thread you will need less pressure to ride height. depends on if you want to ride high and dump for shows or if you want to ride low.
correct! more pressure means stiffer which is nice esp when riding low. low pressure gives much nicer ride comfort. you'll find a compromise between the two.
View original BBCode
[QUOTE=brainneeded;489929]if you thread the body low (showing less thread) you will require additional pressure to ride at height, if you expose more thread you will need less pressure to ride height. depends on if you want to ride high and dump for shows or if you want to ride low.[/QUOTE]
correct! more pressure means stiffer which is nice esp when riding low. low pressure gives much nicer ride comfort. you'll find a compromise between the two.
should be 5" including brackets so 4.5" from top of damper body. doing less than this may limit lift.

best way to set it up is to install it and set up ride height at the psi you want to drive at.

if the amount of thread showing keeps you from going as low as you want you can remove everything accept one locking ring and still retain the same travel. just make sure the locking ring and lower bracket are 4.5" below the top of the damper body.

no reason to thread the bag up on the rears. the uas bags are ~2.25" longer when inflated than they are as they sit there.
View original BBCode
should be 5" including brackets so 4.5" from top of damper body. doing less than this may limit lift.
best way to set it up is to install it and set up ride height at the psi you want to drive at.
if the amount of thread showing keeps you from going as low as you want you can remove everything accept one locking ring and still retain the same travel. just make sure the locking ring and lower bracket are 4.5" below the top of the damper body.
no reason to thread the bag up on the rears. the uas bags are ~2.25" longer when inflated than they are as they sit there.
here is a brief update since i was able to do a lot to the car these past few weeks working up to a local show here called wekfest. signing up for the show was more of a motivation to finally put my wheels on, which i've had for over a year now.
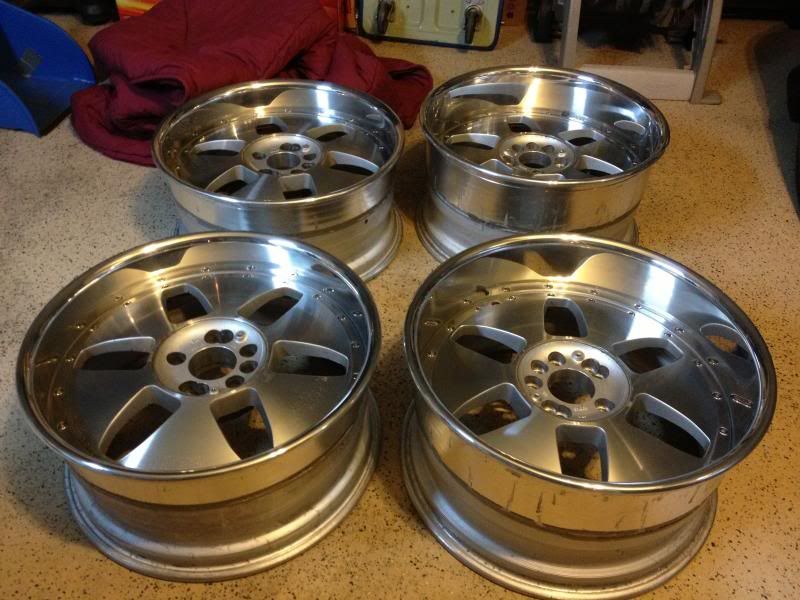
here is my wheel of choice, SSR Vienna Kreis for that original VIP look that i am going after, and yes i have the center caps as well. lots of work went into cleaning the wheels w/o actually fully disassembling them. the diamond cut faces though slightly oxidized are all original.
19x9 +6 hi disk to clear the calipers
19x10 -1 lo disk for maximum lip
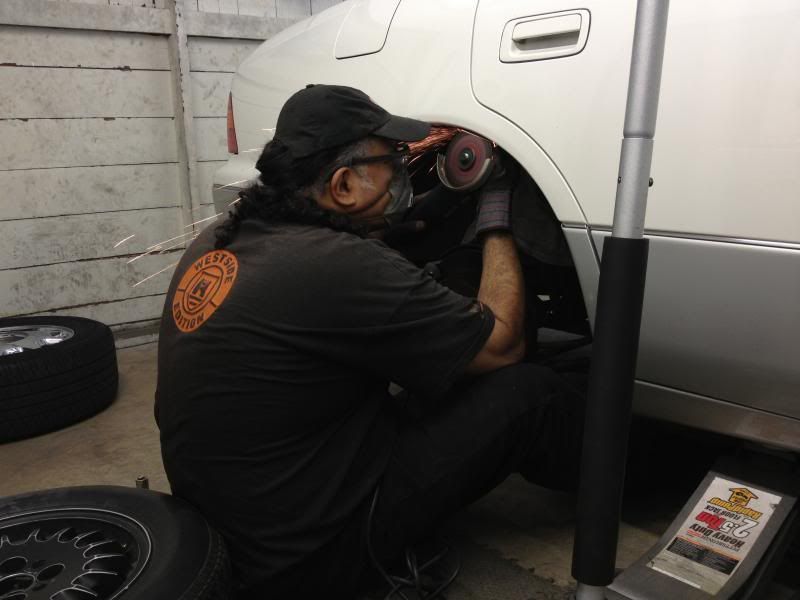
next was to get the fenders worked on. i wanted to keep the stock lines of the car and didn't want to do any crazy pulls or flares so i opted to cut the fenders as advised by the person performing the fender work. btw if you're in the greater socal area i highly recommend tony (google his name and you'll see his work). he showed me that there are weak points on the edges (due to the stamped holes for the trim) that has a potential to cause dimples when rolled. once dimpled, the fenders will need major work to be repaired.
armed with a 4.5" angle grinder, off to town he went on all four corners!
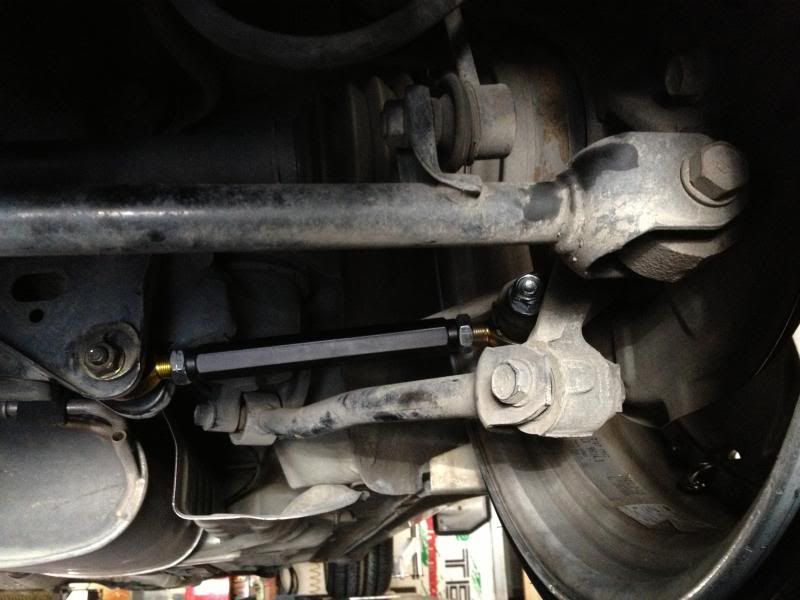
next was to install the adjustable toe arms made by studio. the toe correction can only go so far when going too low, so these extend beyond the factory eccentric bolts can allow. as stated in my air suspension thread, i had them powder-coated matte black for more subtlety.
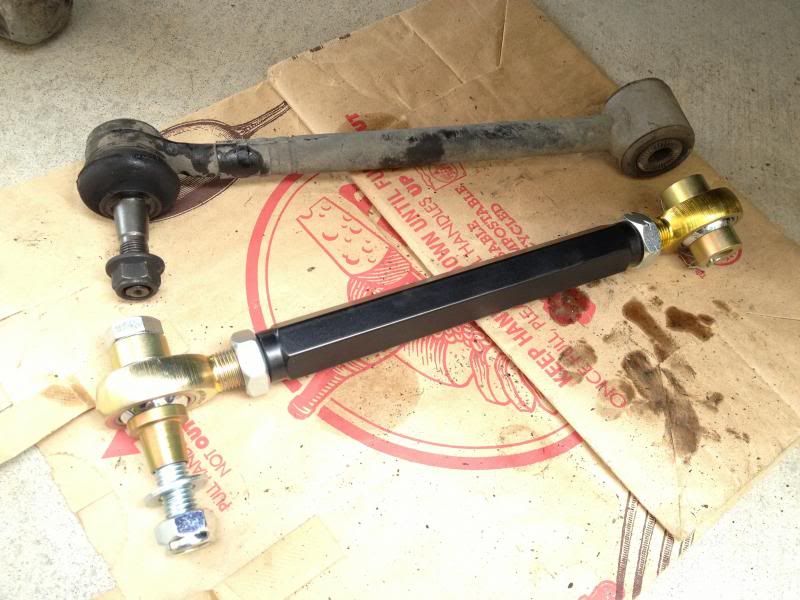
here they are installed. i set them a bit longer than stock then adjusted using the eccentric bolts. when the bolts are maxed i can go even further for toe out! for now they are set to factory specs. they will definitely limit the wear on the brand new tires.
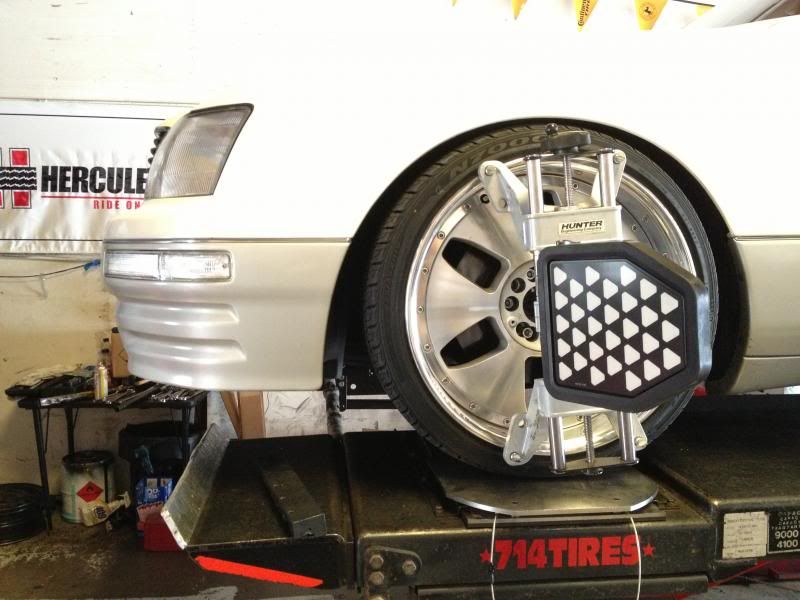
the tires were mounted (went with 225/35 and 235/35 respectively), and then the whole car was aligned at ride height. thanks to 714 tires for the awesome work! camber is maxed out using factory adjustments on all corners.
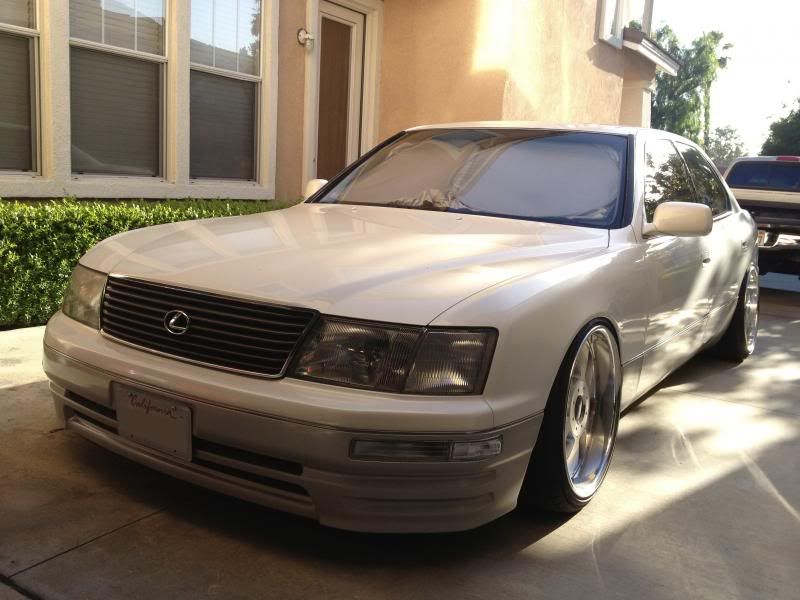
aired down. i chose the wrong tire size so every fender is actually resting on the tires. i shortened the rear coilovers so the wheels can actually tuck IF the tires could clear which it doesn't at the moment. for now i'm pretty happy with the outcome. i just have to be careful when airing down!
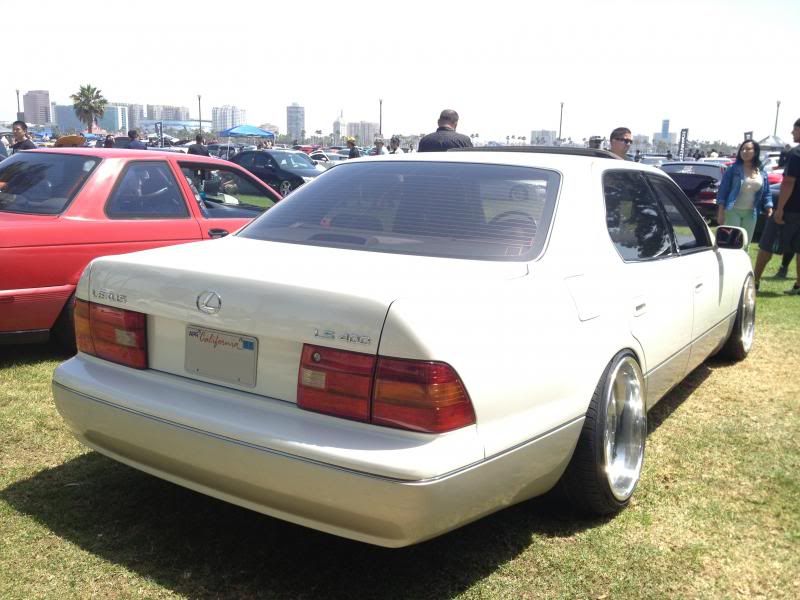
lastly here she is at wekfest amongst the giants. you can't really see but i also installed some piano black b-pillar covers.
View original BBCode
here is a brief update since i was able to do a  lot to the car these past few weeks working up to a local show here  called wekfest. signing up for the show was more of a motivation to  finally put my wheels on, which i've had for over a year now.

here is my wheel of choice, SSR Vienna Kreis for that original VIP look  that i am going after, and yes i have the center caps as well. lots of  work went into cleaning the wheels w/o actually fully disassembling  them. the diamond cut faces though slightly oxidized are all original.
19x9 +6 hi disk to clear the calipers
19x10 -1 lo disk for maximum lip
[URL="http://i27.photobucket.com/albums/c194/timmy0toole/Kimberly/IMG_3500_zps18e96a39.jpg"][IMG]http://i27.photobucket.com/albums/c194/timmy0toole/Kimberly/IMG_3500_zps18e96a39.jpg[/IMG][/URL]

next was to get the fenders worked on. i wanted to keep the stock lines  of the car and didn't want to do any crazy pulls or flares so i opted to  cut the fenders as advised by the person performing the fender work.  btw if you're in the greater socal area i highly recommend tony (google  his name and you'll see his work). he showed me that there are weak  points on the edges (due to the stamped holes for the trim) that has a  potential to cause dimples when rolled. once dimpled, the fenders will  need major work to be repaired.

armed with a 4.5" angle grinder, off to town he went on all four corners!
[URL="http://i27.photobucket.com/albums/c194/timmy0toole/Kimberly/IMG_3458_zps4750db80.jpg"][IMG]http://i27.photobucket.com/albums/c194/timmy0toole/Kimberly/IMG_3458_zps4750db80.jpg[/IMG][/URL]

next was to install the adjustable toe arms made by studio. the toe  correction can only go so far when going too low, so these extend beyond  the factory eccentric bolts can allow. as stated in my air suspension  thread, i had them powder-coated matte black for more subtlety.
[URL="http://i27.photobucket.com/albums/c194/timmy0toole/Kimberly/IMG_3502_zpsab4d7123.jpg"][IMG]http://i27.photobucket.com/albums/c194/timmy0toole/Kimberly/IMG_3502_zpsab4d7123.jpg[/IMG][/URL]

here they are installed. i set them a bit longer than stock then  adjusted using the eccentric bolts. when the bolts are maxed i can go  even further for toe out! for now they are set to factory specs. they  will definitely limit the wear on the brand new tires.
[URL="http://i27.photobucket.com/albums/c194/timmy0toole/Kimberly/IMG_3508_zpse3835c88.jpg"][IMG]http://i27.photobucket.com/albums/c194/timmy0toole/Kimberly/IMG_3508_zpse3835c88.jpg[/IMG][/URL]

the tires were mounted (went with 225/35 and 235/35 respectively), and  then the whole car was aligned at ride height. thanks to 714 tires for  the awesome work! camber is maxed out using factory adjustments on all  corners.
[URL="http://i27.photobucket.com/albums/c194/timmy0toole/Kimberly/IMG_3507_zps3be82023.jpg"][IMG]http://i27.photobucket.com/albums/c194/timmy0toole/Kimberly/IMG_3507_zps3be82023.jpg[/IMG][/URL]

aired down. i chose the wrong tire size so every fender is actually  resting on the tires. i shortened the rear coilovers so the wheels can  actually tuck IF the tires could clear which it doesn't at the moment.  for now i'm pretty happy with the outcome. i just have to be careful  when airing down!
[URL="http://i27.photobucket.com/albums/c194/timmy0toole/Kimberly/IMG_3526_zpsa8f8a0f3.jpg"][IMG]http://i27.photobucket.com/albums/c194/timmy0toole/Kimberly/IMG_3526_zpsa8f8a0f3.jpg[/IMG][/URL]

lastly here she is at wekfest amongst the giants. you can't really see but i also installed some piano black b-pillar covers.
[URL="http://i27.photobucket.com/albums/c194/timmy0toole/Kimberly/IMG_3513_zps04c94f85.jpg"][IMG]http://i27.photobucket.com/albums/c194/timmy0toole/Kimberly/IMG_3513_zps04c94f85.jpg[/IMG][/URL]
Im becoming a fan of tucking rear wheels so lets see some pics!
Nice pick-up on the studio arms too. I dont know why people seem to be bashing them on here, I think theyre really well made.
View original BBCode
Im becoming a fan of tucking rear wheels so lets see some pics!
Nice pick-up on the studio arms too. I dont know why people seem to be bashing them on here, I think theyre really well made.
~~sperm~bomb~~;492592 wrote:Im becoming a fan of tucking rear wheels so lets see some pics!
Nice pick-up on the studio arms too. I dont know why people seem to be bashing them on here, I think theyre really well made.
i agree, the studio arms are great and much MUCH better than megan. just check out those spherical joints! if i could tuck i would, BUT my tires are not allowing me to unfortunately. you can see the fenders resting on the tires here. time to do some massaging!
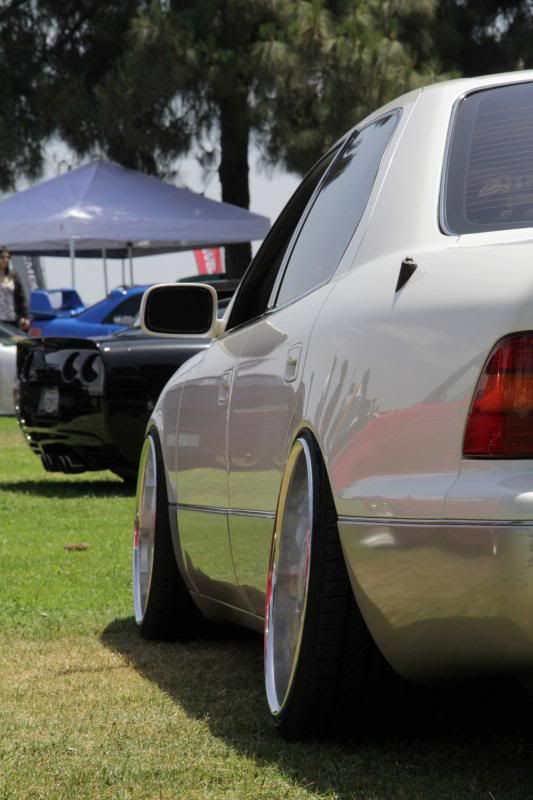
and one more to show the wheel faces!
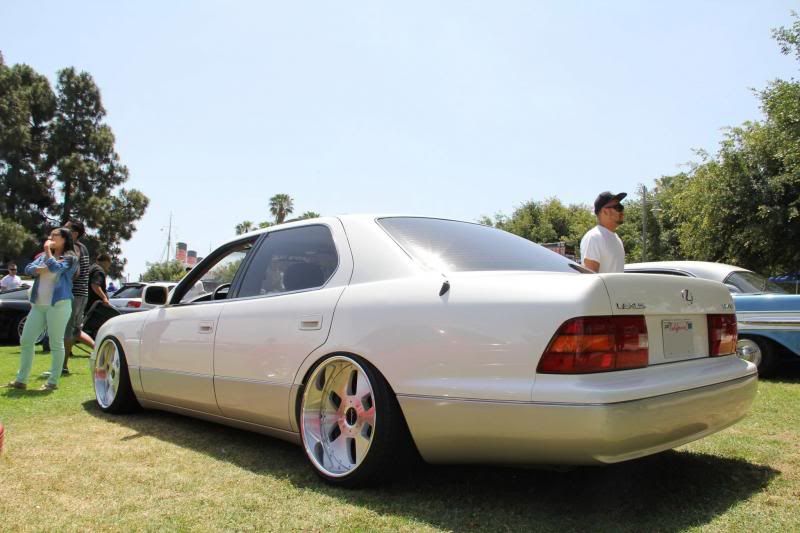
View original BBCode
[QUOTE=~~sperm~bomb~~;492592]Im becoming a fan of tucking rear wheels so lets see some pics!
Nice pick-up on the studio arms too. I dont know why people seem to be bashing them on here, I think theyre really well made.[/QUOTE]
i agree, the studio arms are great and much MUCH better than megan. just check out those spherical joints! if i could tuck i would, BUT my tires are not allowing me to unfortunately. you can see the fenders resting on the tires here. time to do some massaging!
[URL="http://i27.photobucket.com/albums/c194/timmy0toole/Kimberly/469128_10151522145144902_1263059337_o_zps17ba97b3.jpg"][IMG]http://i27.photobucket.com/albums/c194/timmy0toole/Kimberly/469128_10151522145144902_1263059337_o_zps17ba97b3.jpg[/IMG][/URL]

and one more to show the wheel faces!
[URL="http://i27.photobucket.com/albums/c194/timmy0toole/Kimberly/467669_10151522153149902_1202030529_o_zpsa4d65cc4.jpg"][IMG]http://i27.photobucket.com/albums/c194/timmy0toole/Kimberly/467669_10151522153149902_1202030529_o_zpsa4d65cc4.jpg[/IMG][/URL]
Looks good so far very classic look put the front tires on the rear wheels and get some 215/35's for the front should help with clearance also a little more camber would set it off IMO
View original BBCode
Looks good so far very classic look put the front tires on the rear wheels and get some 215/35's for the front should help with clearance also a little more camber would set it off IMO
~~sperm~bomb~~;492592 wrote:Nice pick-up on the studio arms too. I dont know why people seem to be bashing them on here, I think theyre really well made.
i've never seen anyone bash them, and anyone who does probably doesn't know what they're talking about. the studio arms are actually battle version made. they're not fancy but they are well contsructed. the bearings are a lower line of the same brand that some high end u.s. companies use. the steel is dom. the welds are mig but they are good. some of the components used are off the shelf, but they are designed for track use and can withstand abuse. sure it's cool to have full nagisa, t-demand, etc. multilink but it's also cool to have a dependable, relatively affordable, u.s. made option. no shame in that.
View original BBCode
[QUOTE=~~sperm~bomb~~;492592]Nice pick-up on the studio arms too. I dont know why people seem to be bashing them on here, I think theyre really well made.[/QUOTE]

i've never seen anyone bash them, and anyone who does probably doesn't know what they're talking about. the studio arms are actually battle version made. they're not fancy but they are well contsructed. the bearings are a lower line of the same brand that some high end u.s. companies use. the steel is dom. the welds are mig but they are good. some of the components used are off the shelf, but they are designed for track use and can withstand abuse. sure it's cool to have full nagisa, t-demand, etc. multilink but it's also cool to have a dependable, relatively affordable, u.s. made option. no shame in that.
OG;492695 wrote:i've never seen anyone bash them, and anyone who does probably doesn't know what they're talking about. the studio arms are actually battle version made. they're not fancy but they are well contsructed. the bearings are a lower line of the same brand that some high end u.s. companies use. the steel is dom. the welds are mig but they are good. some of the components used are off the shelf, but they are designed for track use and can withstand abuse. sure it's cool to have full nagisa, t-demand, etc. multilink but it's also cool to have a dependable, relatively affordable, u.s. made option. no shame in that.
Maybe bashing was too harsh of a term. And Im basing my comment on a few remarks made on here that went something along the lines of "Well if you cant have BRAND J (nagisa, T-demand); then you just have to settle for battle version" as if this is some kind of compromise. So having recently received a few battle version components for my GS I can verify that they are built like a tank and worth every penny. I would have bought front components as well but I guess the demand (no pun) isnt strong enough here in the USofA to justify starting production. Also, I think allot of people just go for "good enough" so that spending $3-500 on a set of control arms to get you that 6mm tighter fitment just isnt worth it to them. So let me just say that having personally held some megan arms in my hands that they look and feel kind of cheap. Then after examining the battle version I could tell that there is a world of difference in construction and build quality. I havent had any hands on experience with any of the Japanese brands (yet)but in pictures they look exotic as fucking hell,,,,,,but so is the price. I guess the vip scene is still growing here and we will have to wait to see where it goes and how big it gets before we have competing US companies to choose from.
View original BBCode
[QUOTE=OG;492695]i've never seen anyone bash them, and anyone who does probably doesn't know what they're talking about. the studio arms are actually battle version made. they're not fancy but they are well contsructed. the bearings are a lower line of the same brand that some high end u.s. companies use. the steel is dom. the welds are mig but they are good. some of the components used are off the shelf, but they are designed for track use and can withstand abuse. sure it's cool to have full nagisa, t-demand, etc. multilink but it's also cool to have a dependable, relatively affordable, u.s. made option. no shame in that.[/QUOTE]


Maybe bashing was too harsh of a term. And Im basing my comment on a few remarks made on here that went something along the lines of "Well if you cant have BRAND J (nagisa, T-demand); then you just have to settle for battle version" as if this is some kind of compromise. So having recently received a few battle version components for my GS I can verify that they are built like a tank and worth every penny. I would have bought front components as well but I guess the demand (no pun) isnt strong enough here in the USofA to justify starting production. Also, I think allot of people just go for "good enough" so that spending $3-500 on a set of control arms to get you that 6mm tighter fitment just isnt worth it to them. So let me just say that having personally held some megan arms in my hands that they look and feel kind of cheap. Then after examining the battle version I could tell that there is a world of difference in construction and build quality. I havent had any hands on experience with any of the Japanese brands (yet)but in pictures they look exotic as fucking hell,,,,,,but so is the price.  I guess the vip scene is still growing here and we will have to wait to see where it goes and how big it gets before we have competing US companies to choose from.
~~sperm~bomb~~;492735 wrote: Also, I think allot of people just go for "good enough" so that spending $3-500 on a set of control arms to get you that 6mm tighter fitment just isnt worth it to them.
And this is one point I don't understand, people slam their old cars with worn bushings and just expect to sail smoothly. When in fact the first thing they ought to do (after slamming) is to start upgrading ALL their susp. mounts/bushes to get the car to ride as it should and not twitching and squeaking at every minor road imperfection. And lets face it, components used in say Battle V. arms are more suitable for the kind of abuse they're getting on a daily basis than any oem(ish) part with weaker use angles. Also there isn't much of a price difference between Battle vs. oem(type) replacement arms.
View original BBCode
[QUOTE=~~sperm~bomb~~;492735] Also, I think allot of people just go for "good enough" so that spending $3-500 on a set of control arms to get you that 6mm tighter fitment just isnt worth it to them.[/QUOTE]
And this is one point I  don't understand, people slam their old cars with worn bushings and just expect to sail smoothly. When in fact the first thing they ought to do (after slamming) is to start upgrading ALL their susp. mounts/bushes to get the car to ride as it should and not twitching and squeaking at every minor road imperfection. And lets face it, components used in say Battle V. arms are more suitable for the kind of abuse they're getting on a daily basis than any oem(ish) part with weaker use angles. Also there isn't much of a price difference between Battle vs. oem(type) replacement arms.
ray316;492693 wrote:Looks good so far very classic look put the front tires on the rear wheels and get some 215/35's for the front should help with clearance also a little more camber would set it off IMO
thanks, that's exactly what i'm going for, a classic VIP look! as for the tires we'll see how it will all look when i install my front negative camber RCAs from studio. i like having meatier rubbers!
to the rest regarding the studio arms, yes there are indeed made by battle version (they came packaged and labelled as such) but i purchased them through studio. regardless i understand most people simply sticks with good enough. for me it all has to function well and last. unfortunately most people cannot justify spending hundreds on arms and bushings on such an old car where the benefit isn't seen. in other words most go with form over function, all too common nowadays. i would have loved to get my hands on nagisa, tdemand, and the like but why when there are local company's that can provide the same function and reliability at a more reasonable cost?
View original BBCode
[QUOTE=ray316;492693]Looks good so far very classic look put the front tires on the rear wheels and get some 215/35's for the front should help with clearance also a little more camber would set it off IMO[/QUOTE]
thanks, that's exactly what i'm going for, a classic VIP look! as for the tires we'll see how it will all look when i install my front negative camber RCAs from studio. i like having meatier rubbers!


to the rest regarding the studio arms, yes there are indeed made by battle version (they came packaged and labelled as such) but i purchased them through studio. regardless i understand most people simply sticks with good enough. for me it all has to function well and last. unfortunately most people cannot justify spending hundreds on arms and bushings on such an old car where the benefit isn't seen. in other words most go with form over function, all too common nowadays. i would have loved to get my hands on nagisa, tdemand, and the like but why when there are local company's that can provide the same function and reliability at a more reasonable cost?
Battle version arms are legit and very well made
View original BBCode
Battle version arms are legit and very well made
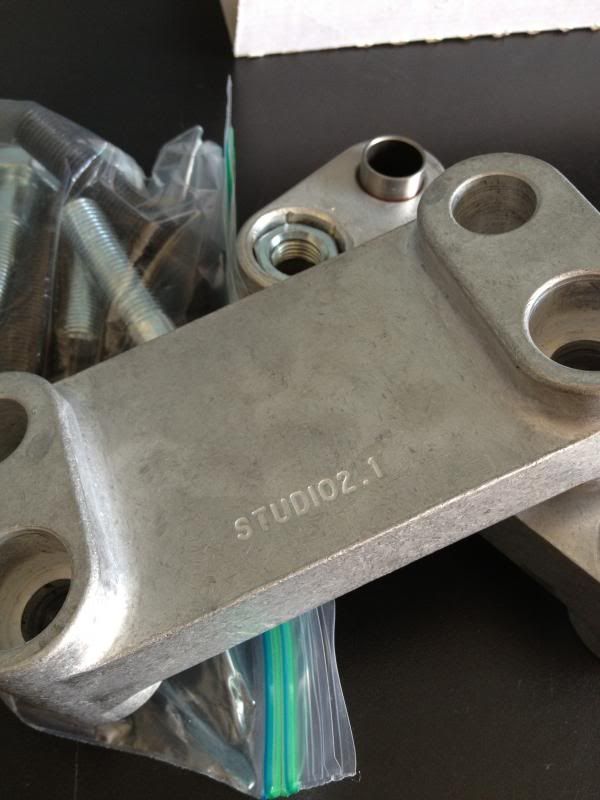
more studio parts acquired! i need to get new ball joints before installing these. what should i get, OEM or aftermarket moog, etc?
View original BBCode
more studio parts acquired! i need to get new ball joints before installing these. what should i get, OEM or aftermarket moog, etc?

[IMG]http://i27.photobucket.com/albums/c194/timmy0toole/Kimberly/IMG_3577_zpsf5c80d5a.jpg[/IMG]
Dranom;492838 wrote:Battle version arms are legit and very well made
i wish i can say the same
timmy0tool;493028 wrote:more studio parts acquired! i need to get new ball joints before installing these. what should i get, OEM or aftermarket moog, etc?
like your LS bro its clean and simple. Can't wait to see the studio parts in.
View original BBCode
[QUOTE=Dranom;492838]Battle version arms are legit and very well made[/QUOTE]

i wish i can say the same


[QUOTE=timmy0tool;493028]more studio parts acquired! i need to get new ball joints before installing these. what should i get, OEM or aftermarket moog, etc?

[IMG]http://i27.photobucket.com/albums/c194/timmy0toole/Kimberly/IMG_3577_zpsf5c80d5a.jpg[/IMG][/QUOTE]

like your LS bro its clean and simple. Can't wait to see the studio parts in.
the following will show my results during installation, driving impressions, etc.
unfortunately studio only made camber RCAs for 95-00 LS models. these are the studio RCA kit version 2.1. from what ian, the owner of studio, told me, the previous versions had more offset by about 0.25in which meant more camber. they were also left in a raw state rather than deburred as shown below.
i decided to replace my lower ball joints with OEM while i was already there. my old ones had no play but i took precaution.
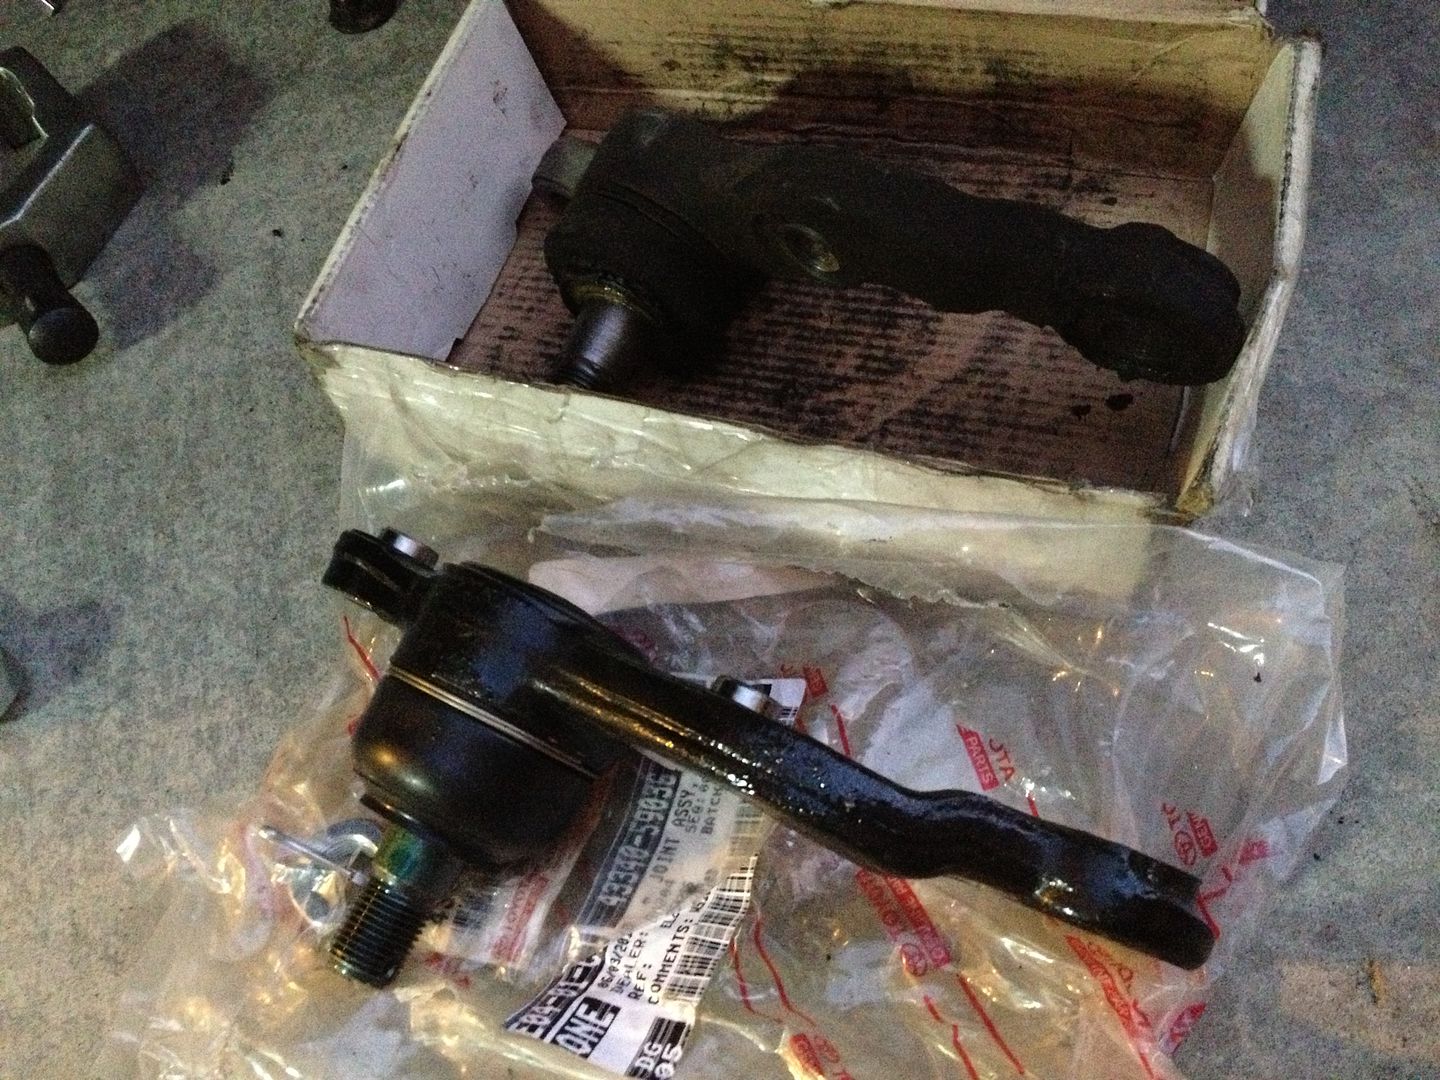
the RCA kit came with hardware:
- 4 bolts (12x50mm 1.25 pitch 8.8 grade hex head) to bolt the RCA to the ball joints
- 4 flat washers
- 4 bolts (12x50mm 1.25 pitch 12.9 grade allen head) to bolt the knuckle to the RCA
- 4 flat washers
with all the recent failures of bolts breaking and shearing off on other memeber's RCAs (also from studio) i took more precaution and replaced the 8.8 grade hex bolts with 12.9 grade allen bolts.
this was taken from another thread regarding my going with 12.9 grade. for now i have not changed my choice but am open for further discussion. this is very relevant information and worth the reiteration.
chrispy;8076803 wrote:Everyone having trouble with the RCAs should read this thread.
http://m.clublexus.com/forums/showthread.php?t=406600
There's a lot of stress on those bolts especially when they're offset and cambered. Although a high grade bolt like a 12.9 is strong, it is brittle as well. OEM suspension uses grade 8.8 or 10.9 because it is relatively flexible but strong at the same time.
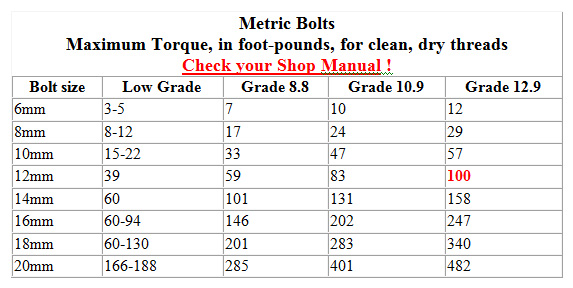
I would only torque it maybe 10 ft/lbs past the stock torque spec max. They are just like your wheel studs. Too much torque and they will snap. Use some medium thread lock and retorque after 50 miles or so. Hope this doesn't happen to anyone else.
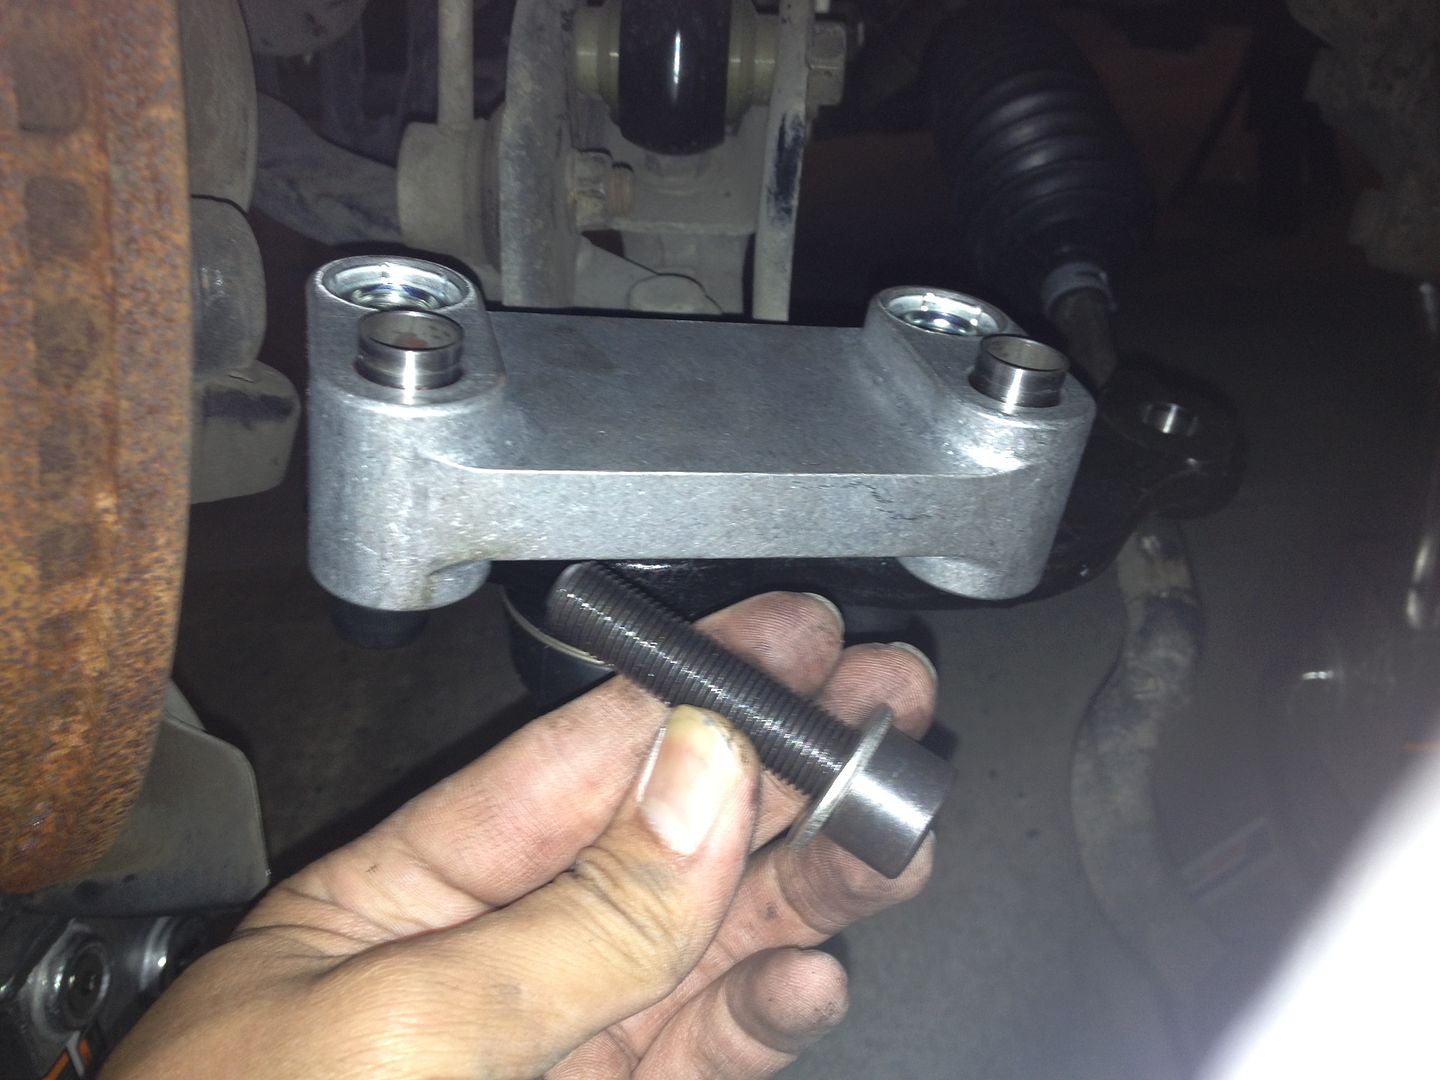
here is the RCA half way bolted up to the ball joint using the replaced hardware.

you can see the amount of offset the holes are in, which repositions the knuckle outward for more negative camber.
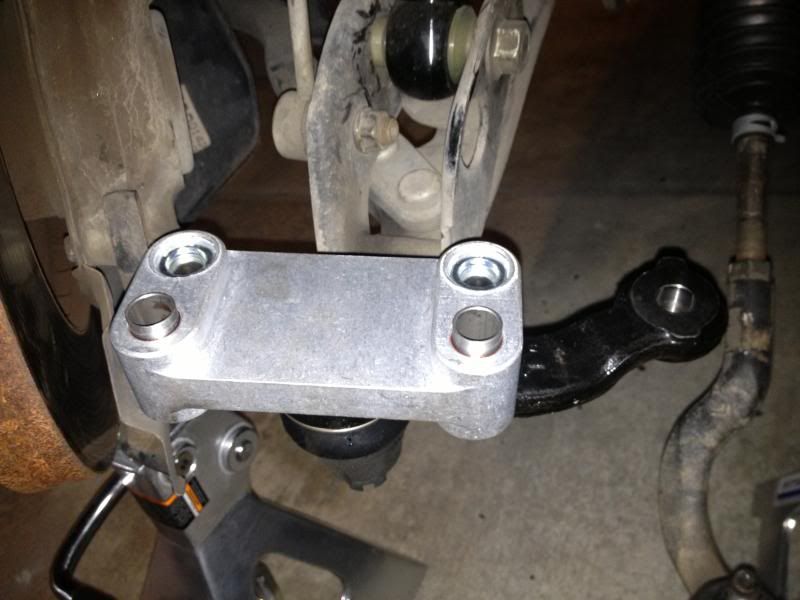
all bolted down, the RCA is 35mm tall. i torqued everything to 83ft-lbs evenly which is the factory spec.
 IMPORTANT:
 from the above picture note by the RED arrow the bolt coming from the RCA then through the knuckle protruding upwards. on the other side of the knuckle, there is no exit hole for the bolt to protrude. the 50mm long bolt is probably 5mm too long so i will either need to cut the tip off the bolt or buy a shorter one. ian warned me that this may happen as some knuckles are threaded deeper than others. i have yet to fix this!
with the wheels on, the RCAs not only added camber, they pushed my wheels out by probably 10mm or so!

it's hard to see but from the height shown the camber is almost the same as the rear now. i want to get it all to tuck, but the tires are stopping me.
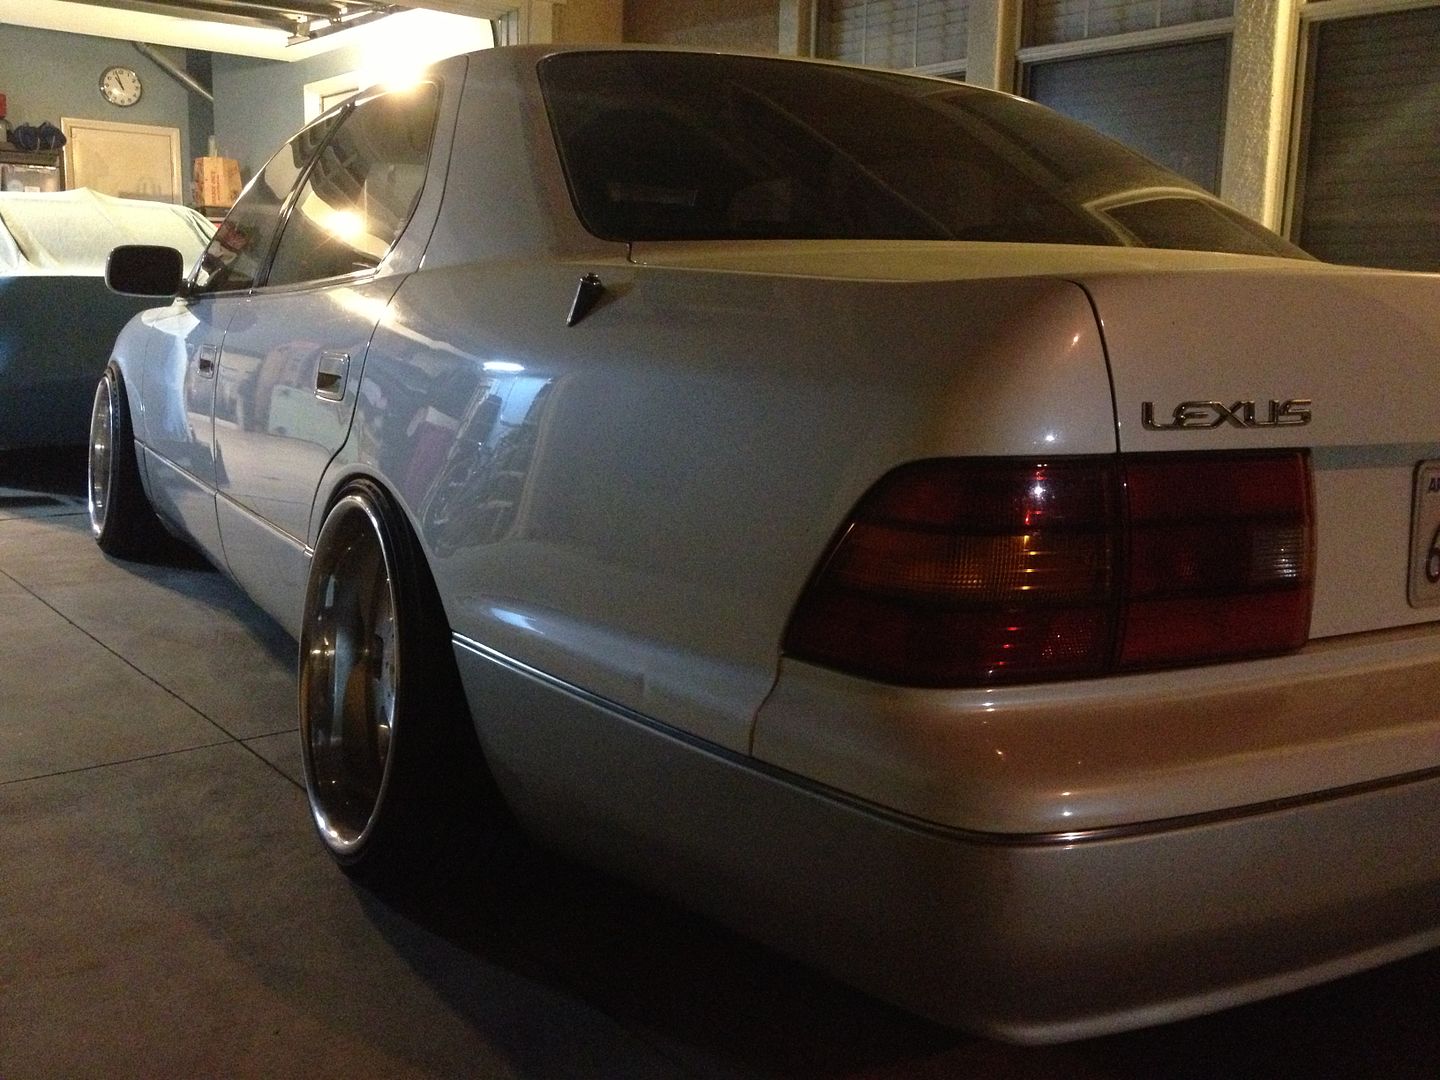
time to get smaller tires (currently 225/35/19), and/or do some fender pulling.
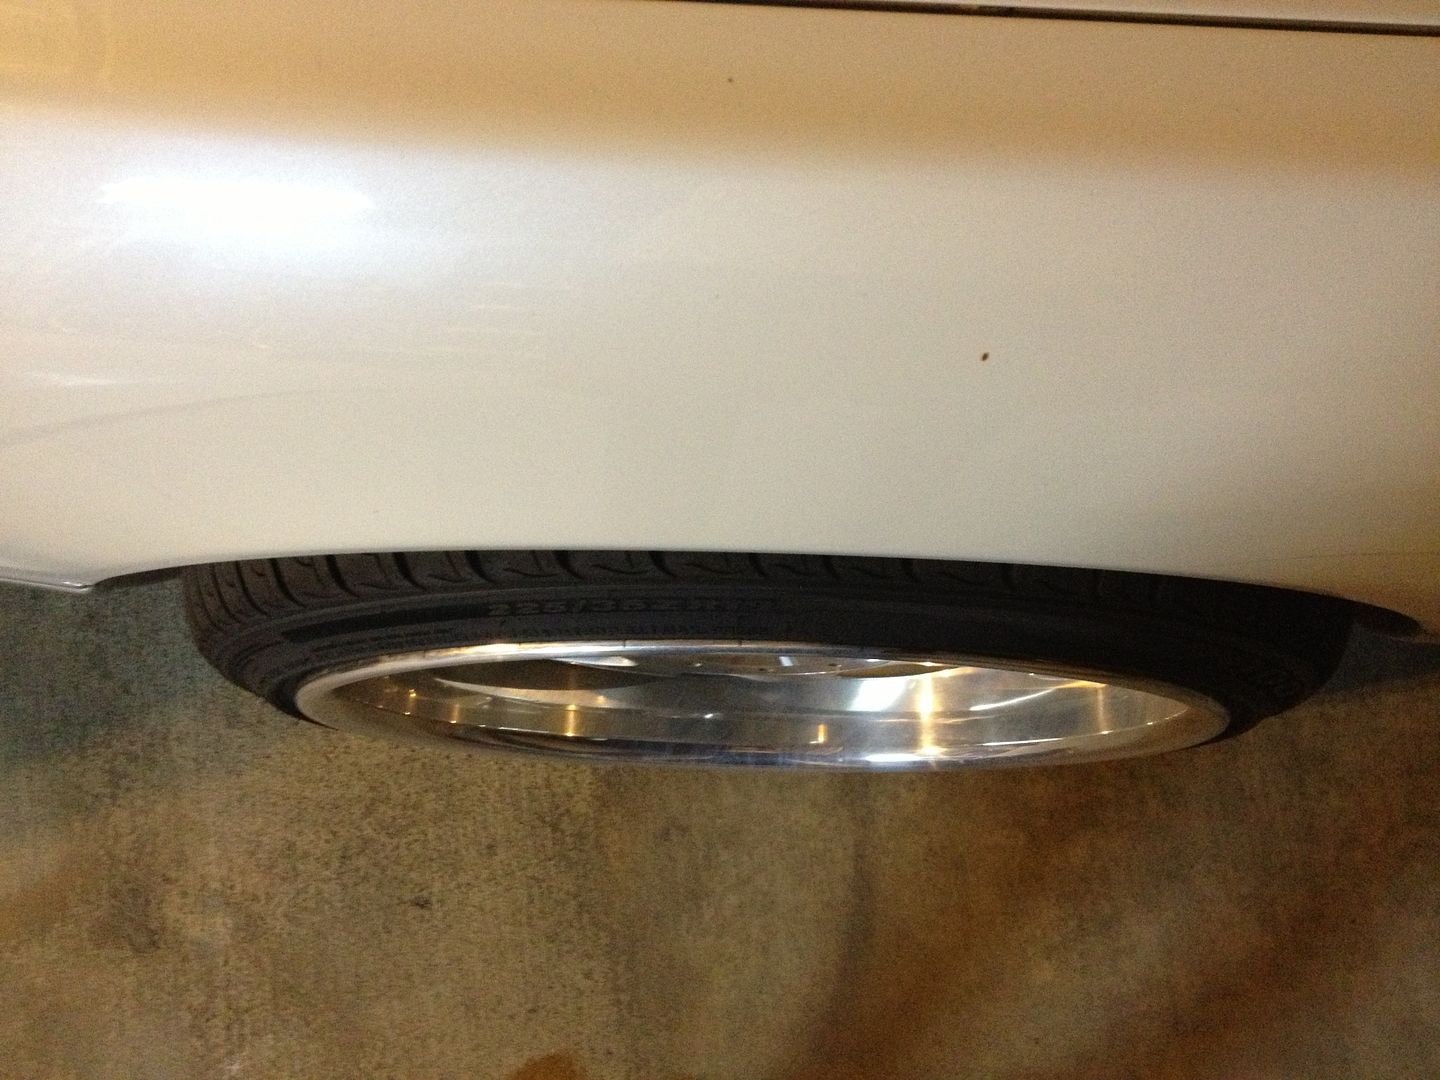

for comparison this is w/o the RCAs.
i have yet to do a test drive. the fact that the bolt is too long and probably did not tightened properly is currently stopping me from driving. when i was repositioning the car on the driveway, i got a few metallic creaks and squeaks! more to come soon.
View original BBCode
the following will show my results during installation, driving impressions, etc.

unfortunately studio only made camber RCAs for 95-00 LS models. these are the studio RCA kit version 2.1. from what ian, the owner of studio, told me, the previous versions had more offset by about 0.25in which meant more camber. they were also left in a raw state rather than deburred as shown below.
[URL="http://i27.photobucket.com/albums/c194/timmy0toole/Kimberly/IMG_3577_zpsf5c80d5a.jpg"][IMG]http://i27.photobucket.com/albums/c194/timmy0toole/Kimberly/IMG_3577_zpsf5c80d5a.jpg[/IMG][/URL]

i decided to replace my lower ball joints with OEM while i was already there. my old ones had no play but i took precaution.
[URL="http://i27.photobucket.com/albums/c194/timmy0toole/Kimberly/IMG_3799_zps5461022e.jpg"][IMG]http://i27.photobucket.com/albums/c194/timmy0toole/Kimberly/IMG_3799_zps5461022e.jpg[/IMG][/URL]

the RCA kit came with hardware:
- 4 bolts (12x50mm 1.25 pitch 8.8 grade hex head) to bolt the RCA to the ball joints
- 4 flat washers
- 4 bolts (12x50mm 1.25 pitch 12.9 grade allen head) to bolt the knuckle to the RCA
- 4 flat washers

with all the recent failures of bolts breaking and shearing off on other memeber's RCAs (also from studio) i took more precaution and replaced the 8.8 grade hex bolts with 12.9 grade allen bolts.
[URL="http://i27.photobucket.com/albums/c194/timmy0toole/Kimberly/IMG_3800_zpse7b6ad60.jpg"][IMG]http://i27.photobucket.com/albums/c194/timmy0toole/Kimberly/IMG_3800_zpse7b6ad60.jpg[/IMG][/URL]

this was taken from another thread regarding my going with 12.9 grade. for now i have not changed my choice but am open for further discussion. this is very relevant information and worth the reiteration.
[QUOTE=chrispy;8076803]Everyone having trouble with the RCAs should read this thread.

[URL]http://m.clublexus.com/forums/showthread.php?t=406600[/URL]

There's a lot of stress on those bolts especially when they're offset and cambered. Although a high grade bolt like a 12.9 is strong, it is brittle as well. OEM suspension uses grade 8.8 or 10.9 because it is relatively flexible but strong at the same time.

[URL="http://m.clublexus.com/forums/attachment.php?attachmentid=194133&stc=1&d=1292585899"][IMG]http://m.clublexus.com/forums/attachment.php?attachmentid=194133&stc=1&d=1292585899[/IMG][/URL]

I would only torque it maybe 10 ft/lbs past the stock torque spec max. They are just like your wheel studs. Too much torque and they will snap. Use some medium thread lock and retorque after 50 miles or so. Hope this doesn't happen to anyone else.[/QUOTE]

here is the RCA half way bolted up to the ball joint using the replaced hardware.
[URL="http://i27.photobucket.com/albums/c194/timmy0toole/Kimberly/IMG_3802_zps8752819c.jpg"][IMG]http://i27.photobucket.com/albums/c194/timmy0toole/Kimberly/IMG_3802_zps8752819c.jpg[/IMG][/URL]

you can see the amount of offset the holes are in, which repositions the knuckle outward for more negative camber.
[URL="http://i27.photobucket.com/albums/c194/timmy0toole/Kimberly/IMG_3804_zpse8e02922.jpg"][IMG]http://i27.photobucket.com/albums/c194/timmy0toole/Kimberly/IMG_3804_zpse8e02922.jpg[/IMG][/URL]

all bolted down, the RCA is 35mm tall. i torqued everything to 83ft-lbs evenly which is the factory spec.
[URL="http://i27.photobucket.com/albums/c194/timmy0toole/Kimberly/IMG_3808rev_zps72df6d77.jpg"][IMG]http://i27.photobucket.com/albums/c194/timmy0toole/Kimberly/IMG_3808rev_zps72df6d77.jpg[/IMG][/URL]

[B]IMPORTANT:[/B] from the above picture note by the RED arrow the bolt coming from the RCA then through the knuckle protruding upwards. on the other side of the knuckle, there is no exit hole for the bolt to protrude. the 50mm long bolt is probably 5mm too long so i will either need to cut the tip off the bolt or buy a shorter one. ian warned me that this may happen as some knuckles are threaded deeper than others. i have yet to fix this!

with the wheels on, the RCAs not only added camber, they pushed my wheels out by probably 10mm or so!
[URL="http://i27.photobucket.com/albums/c194/timmy0toole/Kimberly/IMG_3809_zps4470253e.jpg"][IMG]http://i27.photobucket.com/albums/c194/timmy0toole/Kimberly/IMG_3809_zps4470253e.jpg[/IMG][/URL]

it's hard to see but from the height shown the camber is almost the same as the rear now. i want to get it all to tuck, but the tires are stopping me.
[URL="http://i27.photobucket.com/albums/c194/timmy0toole/Kimberly/IMG_3812_zpsaae84954.jpg"][IMG]http://i27.photobucket.com/albums/c194/timmy0toole/Kimberly/IMG_3812_zpsaae84954.jpg[/IMG][/URL]

time to get smaller tires (currently 225/35/19), and/or do some fender pulling.
[URL="http://i27.photobucket.com/albums/c194/timmy0toole/Kimberly/IMG_3810_zps5a2e7a8c.jpg"][IMG]http://i27.photobucket.com/albums/c194/timmy0toole/Kimberly/IMG_3810_zps5a2e7a8c.jpg[/IMG][/URL]
[URL="http://i27.photobucket.com/albums/c194/timmy0toole/Kimberly/IMG_3811_zps9f3c65c7.jpg"][IMG]http://i27.photobucket.com/albums/c194/timmy0toole/Kimberly/IMG_3811_zps9f3c65c7.jpg[/IMG][/URL]

for comparison this is w/o the RCAs.
[URL="http://i27.photobucket.com/albums/c194/timmy0toole/Kimberly/IMG_3526_zpsa8f8a0f3.jpg"][IMG]http://i27.photobucket.com/albums/c194/timmy0toole/Kimberly/IMG_3526_zpsa8f8a0f3.jpg[/IMG][/URL]

i have yet to do a test drive. the fact that the bolt is too long and probably did not tightened properly is currently stopping me from driving. when i was repositioning the car on the driveway, i got a few metallic creaks and squeaks! more to come soon.
i was PMd stating that 95-105 ft-lb is a good torque for the studio parts. from what i gathered so far, i will be torquing at 95 ft-lbs.
i found this pic from elvis' build thread. the RCAs look to be the older version but it is stamped "version 2.1" as well. notice the raw finish! the offset does look bigger than what i have as i mentioned before.

my fav pic from his build shows the front negative camber setting! :thumbup:

View original BBCode
i was PMd stating that 95-105 ft-lb is a good torque for the studio parts. from what i gathered so far, i will be torquing at 95 ft-lbs.

i found this pic from elvis' build thread. the RCAs look to be the older version but it is stamped "version 2.1" as well. notice the raw finish! the offset does look bigger than what i have as i mentioned before.
[img]http://img812.imageshack.us/img812/1346/85403206.jpg[/img]

my fav pic from his build shows the front negative camber setting! :thumbup:
[img]http://img850.imageshack.us/img850/9941/47699642.jpg[/img]
small update.
instead of shortening one of the 50mm bolts, i was able to get a 40mm long bolt. to reiterate, the 50mm bolt was too long and did not thread in all the way into the knuckle.
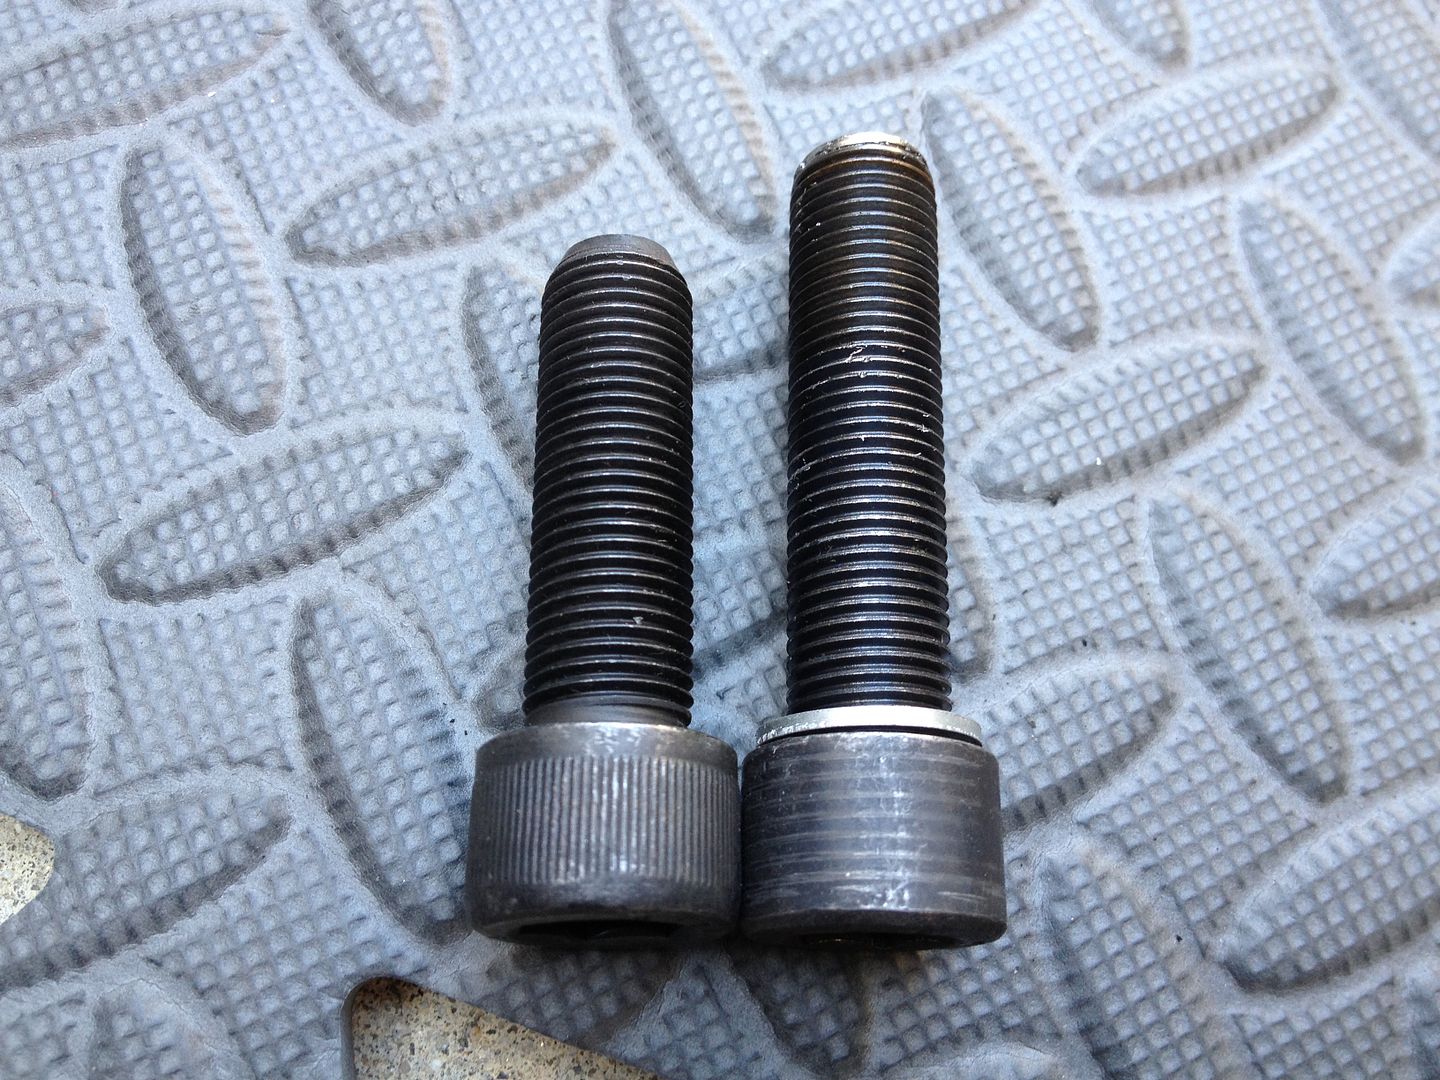
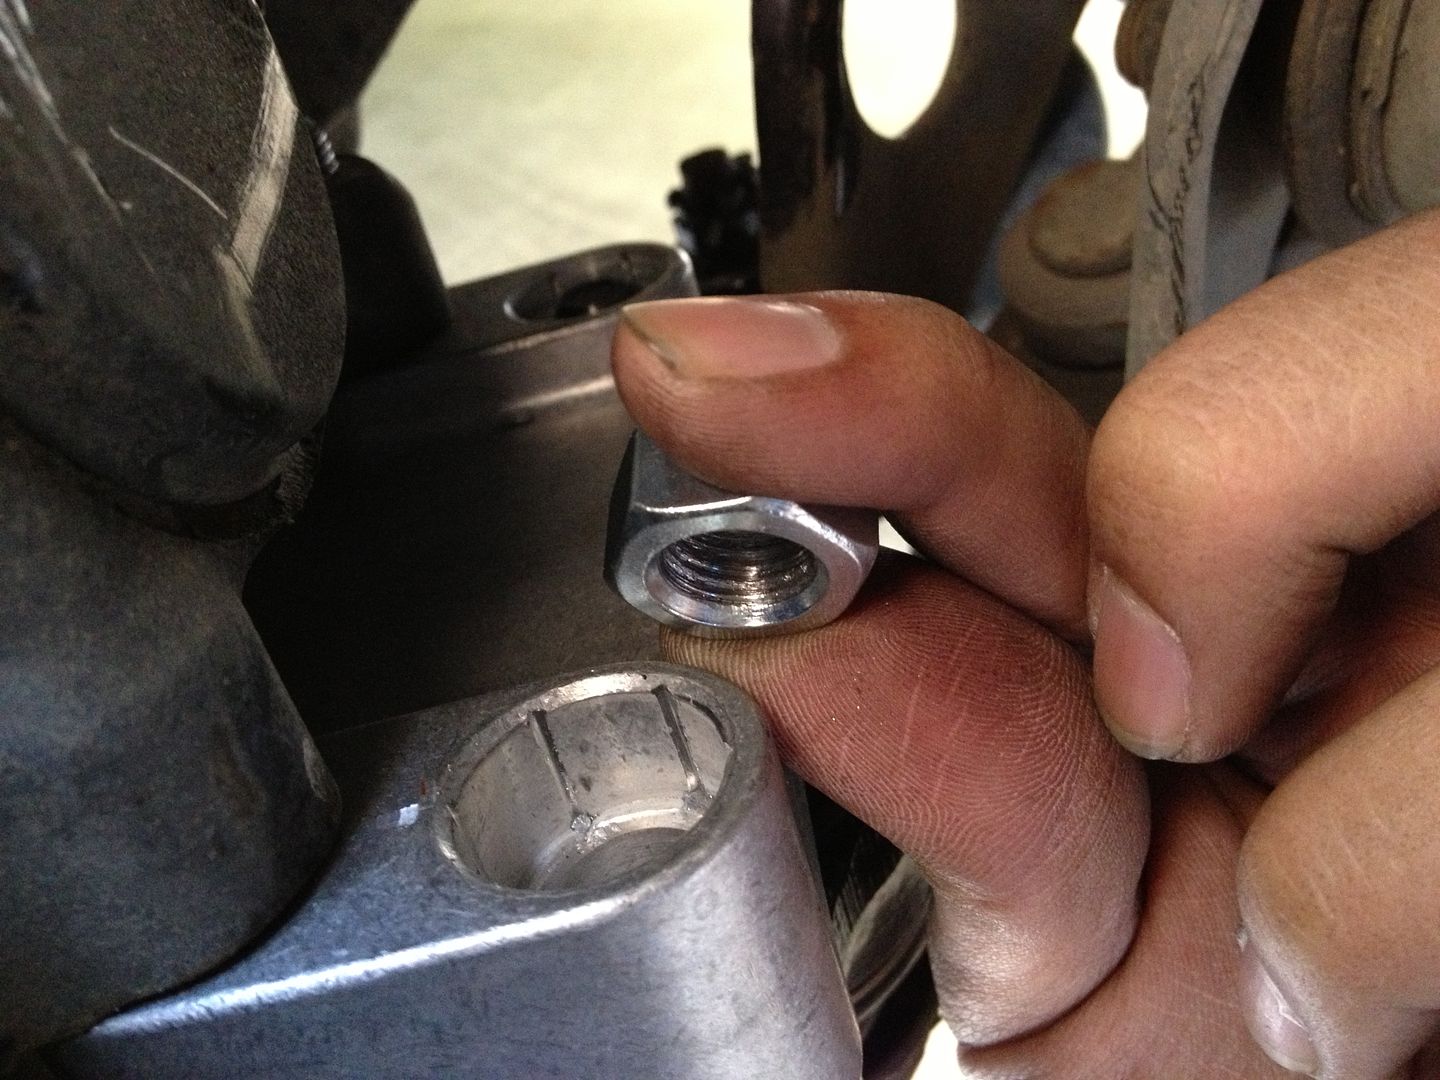
as i was tightening it all, one of them suddenly stripped. i did NOT use air tools on it!
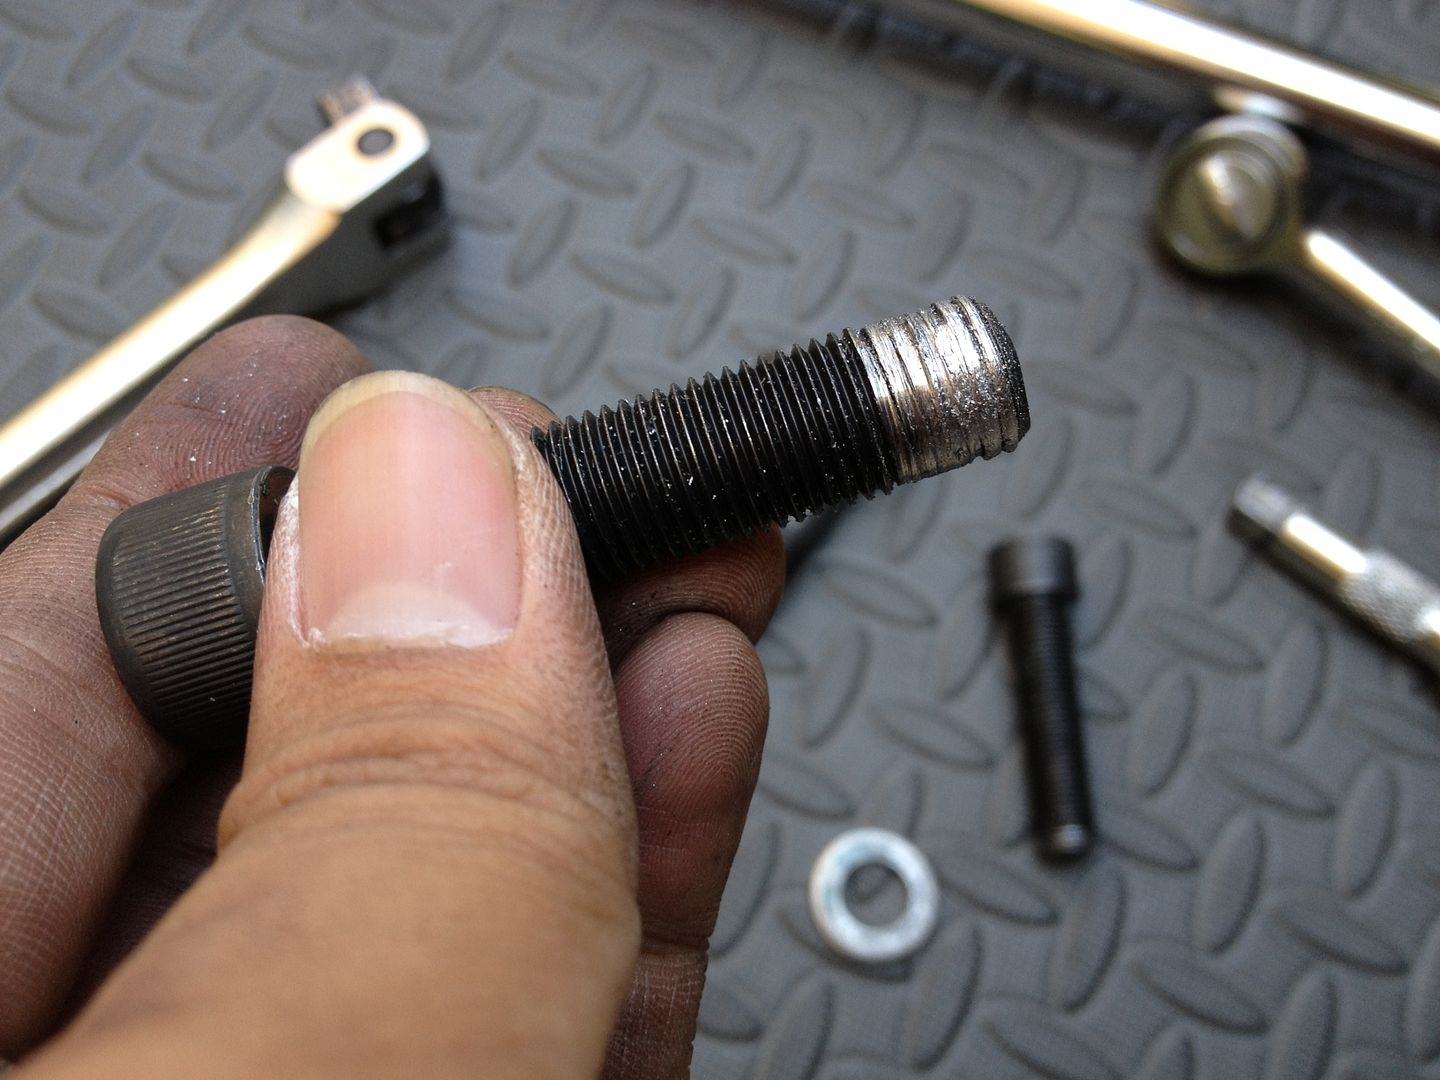
my guess is that debris fell into the threads and stripped even the nut.
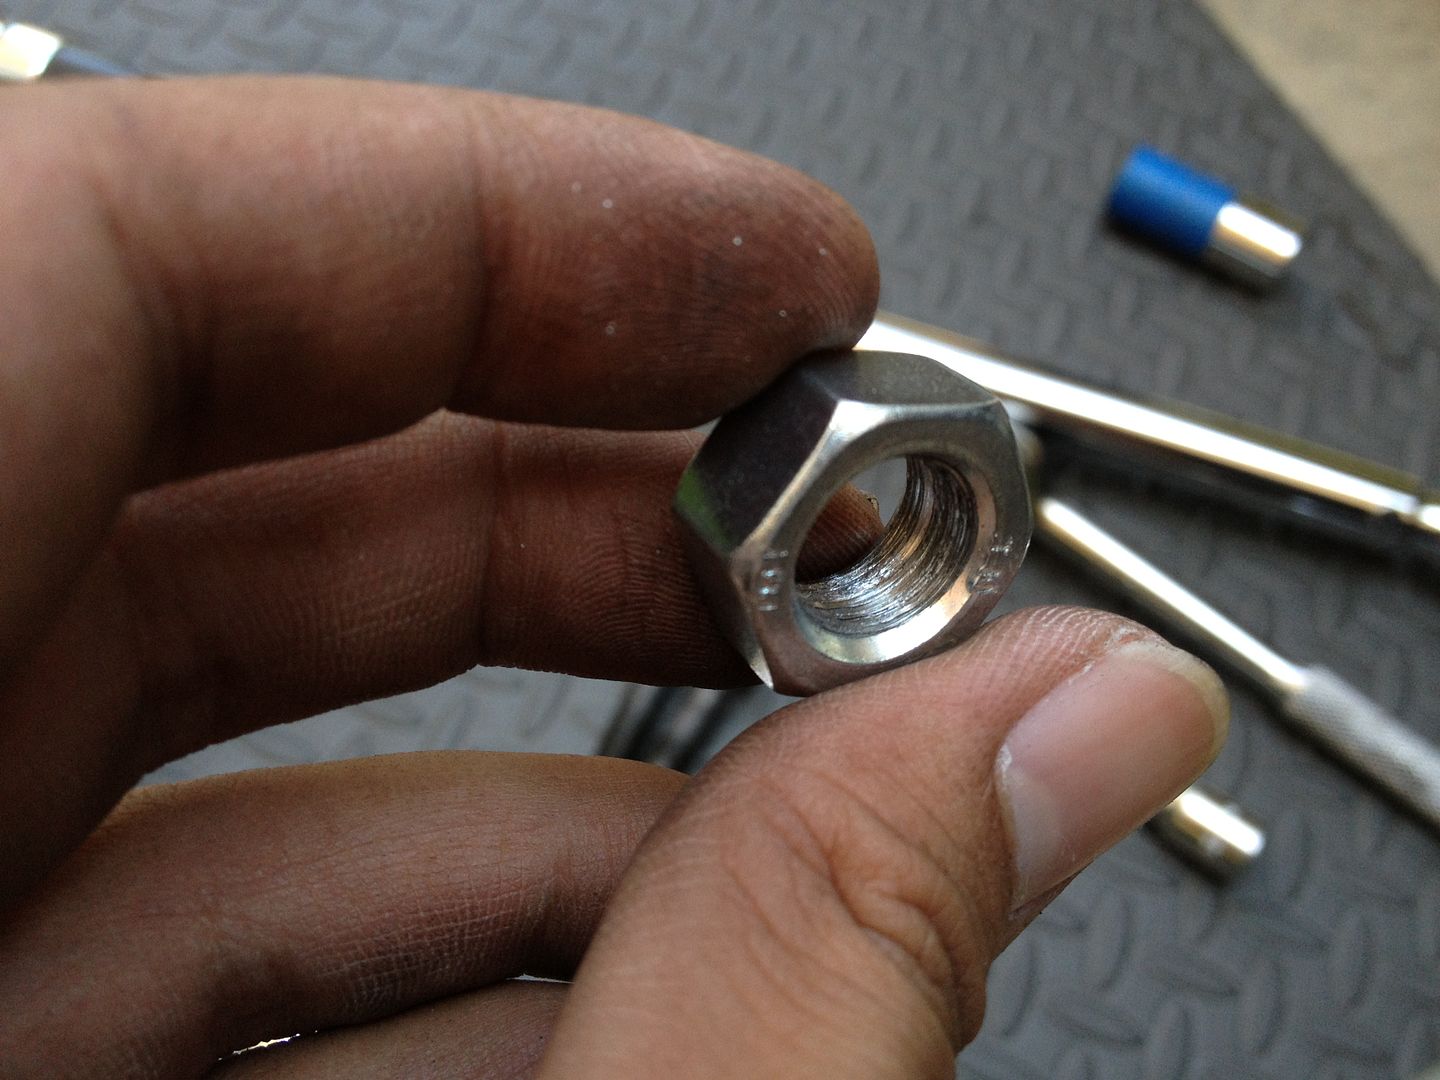
i set my torque wrench to 95ft-lbs. good thing the RCAs have removable nuts.
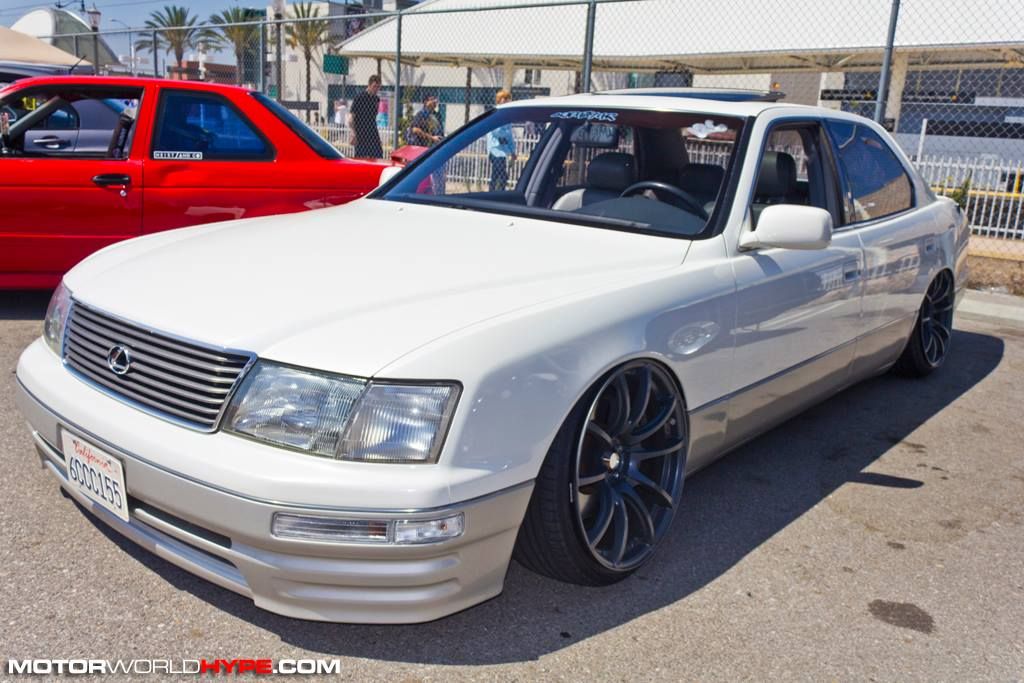
and here is a quick shot from the nisei show this past weekend showing the final results. i had to run a different set of wheels since i had no time to play with my SSR Vienna Kreis. my buddy gladly loaned me his Weds SA-55M in a custom grey steel matte finish. sizing is 19x9.5 +24 225/35 and 10.5 +24 235/35.
with the RCA, the front fender perfectly splits the tire and wheel never touching anything! tsuraichi! and keep in mind i do NOT have my towers cut for the upper ball joint. this is with the upper a-arm resting on the tower. rears are tucked.
i drove on this setup (aired up of course) for over 200 miles this weekend with no adverse affects at full speed on the fwy! next is to get an alignment to correct the toe but overall i am very happy with the outcome.
View original BBCode
small update.

instead of shortening one of the 50mm bolts, i was able to get a 40mm long bolt. to reiterate, the 50mm bolt was too long and did not thread in all the way into the knuckle.
[img]http://i27.photobucket.com/albums/c194/timmy0toole/Kimberly/IMG_3897_zps9abb8a9b.jpg[/img]

as i was tightening it all, one of them suddenly stripped. i did NOT use air tools on it!
[img]http://i27.photobucket.com/albums/c194/timmy0toole/Kimberly/IMG_3899_zps9a5cb98e.jpg[/img]

my guess is that debris fell into the threads and stripped even the nut.
[img]http://i27.photobucket.com/albums/c194/timmy0toole/Kimberly/IMG_3900_zps3df85c94.jpg[/img]

i set my torque wrench to 95ft-lbs. good thing the RCAs have removable nuts.
[img]http://i27.photobucket.com/albums/c194/timmy0toole/Kimberly/IMG_3901_zpsada1372e.jpg[/img]

and here is a quick shot from the nisei show this past weekend showing the final results. i had to run a different set of wheels since i had no time to play with my SSR Vienna Kreis. my buddy gladly loaned me his Weds SA-55M in a custom grey steel matte finish. sizing is 19x9.5 +24 225/35 and 10.5 +24 235/35.

with the RCA, the front fender perfectly splits the tire and wheel never touching anything! tsuraichi! and keep in mind i do NOT have my towers cut for the upper ball joint. this is with the upper a-arm resting on the tower. rears are tucked.
[img]http://i27.photobucket.com/albums/c194/timmy0toole/Kimberly/1119824_10151801539364564_584900225_o_zps95287180.jpg[/img]

i drove on this setup (aired up of course) for over 200 miles this weekend with no adverse affects at full speed on the fwy! next is to get an alignment to correct the toe but overall i am very happy with the outcome.
That looks fresh!
View original BBCode
That looks fresh!
better shot from a good friend.

View original BBCode
better shot from a good friend.

[URL="http://i27.photobucket.com/albums/c194/timmy0toole/Kimberly/9560139794_09443d2f37_b_zps262776d4.jpg"][IMG]http://i27.photobucket.com/albums/c194/timmy0toole/Kimberly/9560139794_09443d2f37_b_zps262776d4.jpg[/IMG][/URL]
got some love from elvis!
current specs:
19x9.5 +24 225/35
19x10.5 +24 235/35
need to find replacements though as these wheels are currently on loan.


this is WITHOUT opening my strut towers to clear the ball joints. the camber RCAS do push out the wheels.

stops perfectly, within millimeters of the fender!

View original BBCode
got some love from elvis!

current specs:
19x9.5 +24 225/35
19x10.5 +24 235/35

need to find replacements though as these wheels are currently on loan.

[img]http://i27.photobucket.com/albums/c194/timmy0toole/Kimberly/IMG_0112_zps84abf46b.jpg[/img]

[img]http://i27.photobucket.com/albums/c194/timmy0toole/Kimberly/IMG_0113_zpsa50095b1.jpg[/img]

this is WITHOUT opening my strut towers to clear the ball joints. the camber RCAS do push out the wheels.
[img]http://i27.photobucket.com/albums/c194/timmy0toole/Kimberly/IMG_0122_zpse413bf4c.jpg[/img]

stops perfectly, within millimeters of the fender!
[img]http://i27.photobucket.com/albums/c194/timmy0toole/Kimberly/IMG_0121_zpsf4c734b9.jpg[/img]
Love your LS. Looks very cool. :thumbsup:

(i still search my 5mm washers) :)
View original BBCode
Love your LS. Looks very cool. :thumbsup:
(i still search my 5mm washers) :)
If you are looking for replacements, I have a set that I'm going to pull off of my 400 and start building my 430. Kyoei and I did a roll and very mild pull.... 20x9.5 + 20 approx. 20x10.5 +10. IRC. I can't go anywhere without attention and people wanting to take pics. Pm me and I can send you photos.
View original BBCode
If you are looking for replacements, I have a set that I'm going to pull off of my 400 and start building my 430. Kyoei and I did a roll and very mild pull.... 20x9.5 + 20 approx. 20x10.5 +10. IRC. I can't go anywhere without attention and people wanting to take pics. Pm me and I can send you photos.
Sits purrty on the loaner wheels

Sent from my SGH-T999 using Tapatalk 2
View original BBCode
Sits purrty on the loaner wheels
Sent from my SGH-T999 using Tapatalk 2
looks good. I had the same experience with the studio camber adapters. sucks.
View original BBCode
looks good. I had the same experience with the studio camber adapters. sucks.
love the look on the weds. I want front camber but all the stories of those rca's scare me.
View original BBCode
love the look on the weds. I want front camber but all the stories of those rca's scare me.
Just read your entire thread.. great work as always brotha!!!
View original BBCode
Just read your entire thread.. great work as always brotha!!!
In realy i know only one storie abt the RCAs. And there was the guy it self fault. Because he has screwed the bolts too tightly.
Also we are still waiting for his pictures...
View original BBCode
In realy i know only one storie abt the RCAs. And there was the guy it self fault. Because he has screwed the bolts too tightly.
Also we are still waiting for his pictures...
something different for the new year.
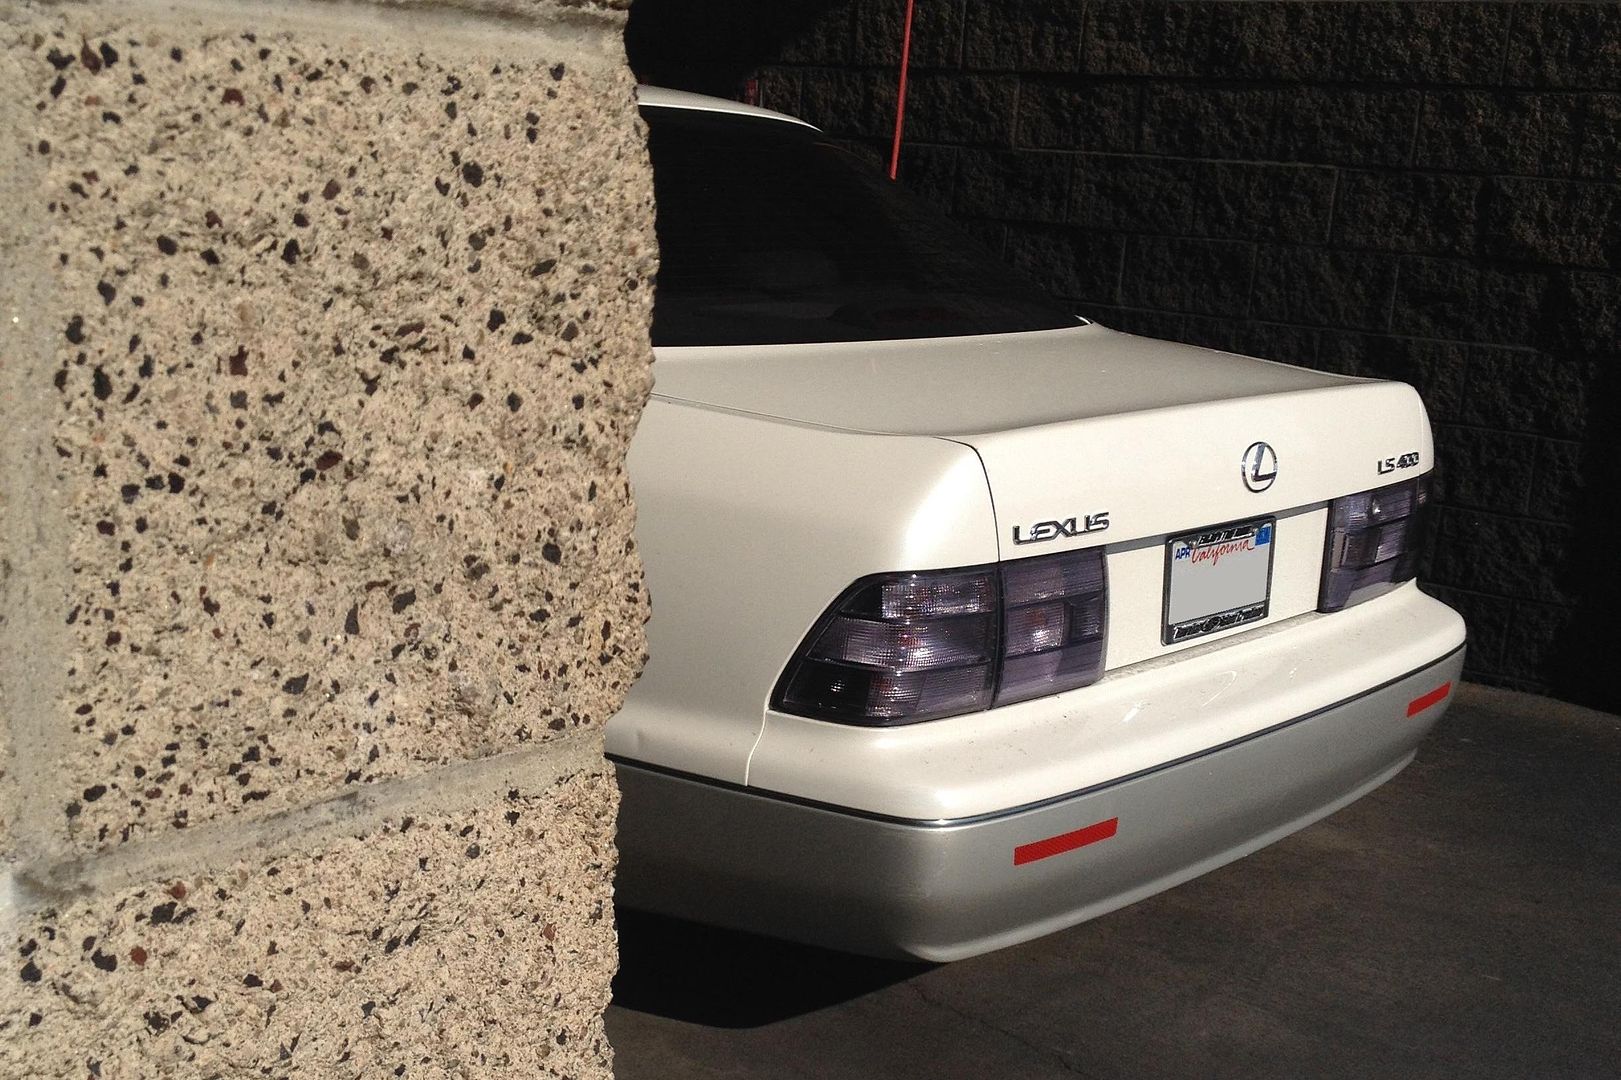
View original BBCode
[COLOR=#000000][FONT=verdana]something different for the new year.[/FONT][/COLOR]

[img]http://i27.photobucket.com/albums/c194/timmy0toole/Kimberly/IMG_4500rev_zpsa944e688.jpg[/img]
Lovin the direction and new look
I'm bias to love all clear taillights especially since Ive been rockin them on my wide body civics on 18s lmao
View original BBCode
Lovin the direction and new look
I'm bias to love all clear taillights especially since Ive been rockin them on my wide body civics on 18s lmao
RITZY33;506706 wrote:Lovin the direction and new look
I'm bias to love all clear taillights especially since Ive been rockin them on my wide body civics on 18s lmao
hatchs + clears = $$$$$$$$$$$$
View original BBCode
[QUOTE=RITZY33;506706]Lovin the direction and new look
I'm bias to love all clear taillights especially since Ive been rockin them on my wide body civics on 18s lmao[/QUOTE]

hatchs + clears = $$$$$$$$$$$$
there is only one wide body hatch with 18s and clears that comes to mind...lj garcia's EK!
View original BBCode
there is only one wide body hatch with 18s and clears that comes to mind...lj garcia's EK!
nice job Timmy. I like the clean and functional trunk.
View original BBCode
nice job Timmy. I like the clean and functional trunk.
timmy0tool;506727 wrote:there is only one wide body hatch with 18s and clears that comes to mind...lj garcia's EK!
lol dam tbt or what?! I still have that import tunner mag haha
.....maybe that phase of the import scene is what gave us our training wheels into VIP
lowered suspension fender modification and oversized wheels
View original BBCode
[QUOTE=timmy0tool;506727]there is only one wide body hatch with 18s and clears that comes to mind...lj garcia's EK![/QUOTE]

lol dam tbt or what?! I still have that import tunner mag haha
.....maybe that phase of the import scene is what gave us our training wheels into VIP
lowered suspension fender modification and oversized wheels
i changed my transmission mount this weekend and took some pics of the front suspension and air line routing while i was under the car. i know there are more and more folks interested in running air suspension so this is just a supplement to what i already have.
front passenger side showing air line fitting and hose which i wrapped in wire loom for protection.

routing to the frame rail

view from under

lower

into the wire channel that runs the length of the car, there is a similar channel on the driver's side too, simply use a flathead screwdriver to push the air line into the channel.

View original BBCode
i changed my transmission mount this weekend and took some pics of the front suspension and air line routing while i was under the car. i know there are more and more folks interested in running air suspension so this is just a supplement to what i already have.


front passenger side showing air line fitting and hose which i wrapped in wire loom for protection.
[img]http://i27.photobucket.com/albums/c194/timmy0toole/Air%20Suspension/IMG_4693_zps3e967c77.jpg[/img]


routing to the frame rail
[img]http://i27.photobucket.com/albums/c194/timmy0toole/Air%20Suspension/IMG_4694_zpseeb7c895.jpg[/img]


view from under
[img]http://i27.photobucket.com/albums/c194/timmy0toole/Air%20Suspension/IMG_4695_zps52190836.jpg[/img]


lower
[img]http://i27.photobucket.com/albums/c194/timmy0toole/Air%20Suspension/IMG_4696_zps3c15d026.jpg[/img]


into the wire channel that runs the length of the car, there is a similar channel on the driver's side too, simply use a flathead screwdriver to push the air line into the channel.
[img]http://i27.photobucket.com/albums/c194/timmy0toole/Air%20Suspension/IMG_4698_zps2b6ce399.jpg[/img]
from nisei showoff
removed the NRCAs and put the viennas back on for now.
front lip is being borrowed from Dranom, he has the full lip kit painted for sale, hit him up!
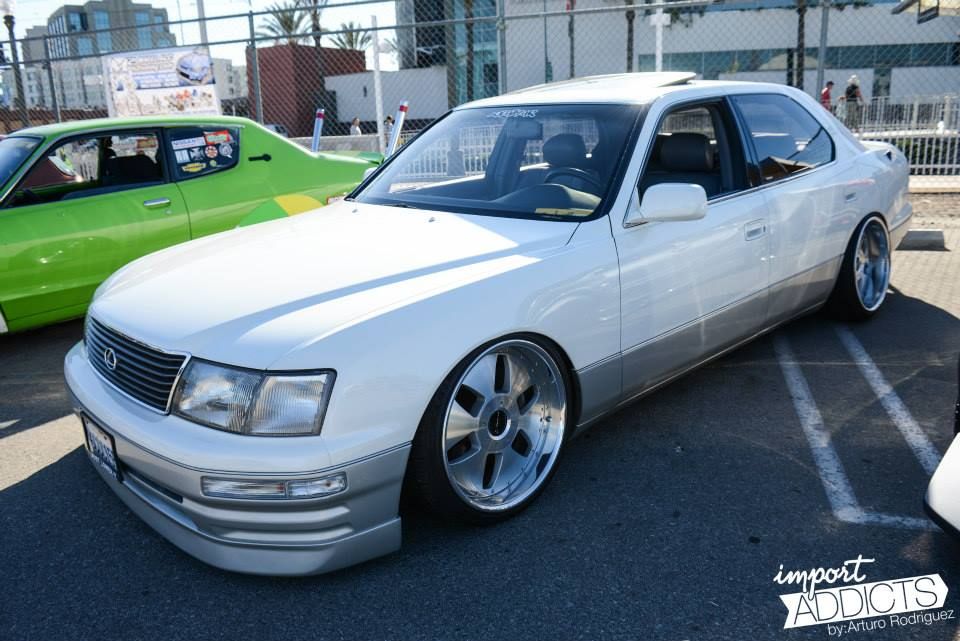
while i was there, did an impromptu shoot with julian aka sleepy wagon.
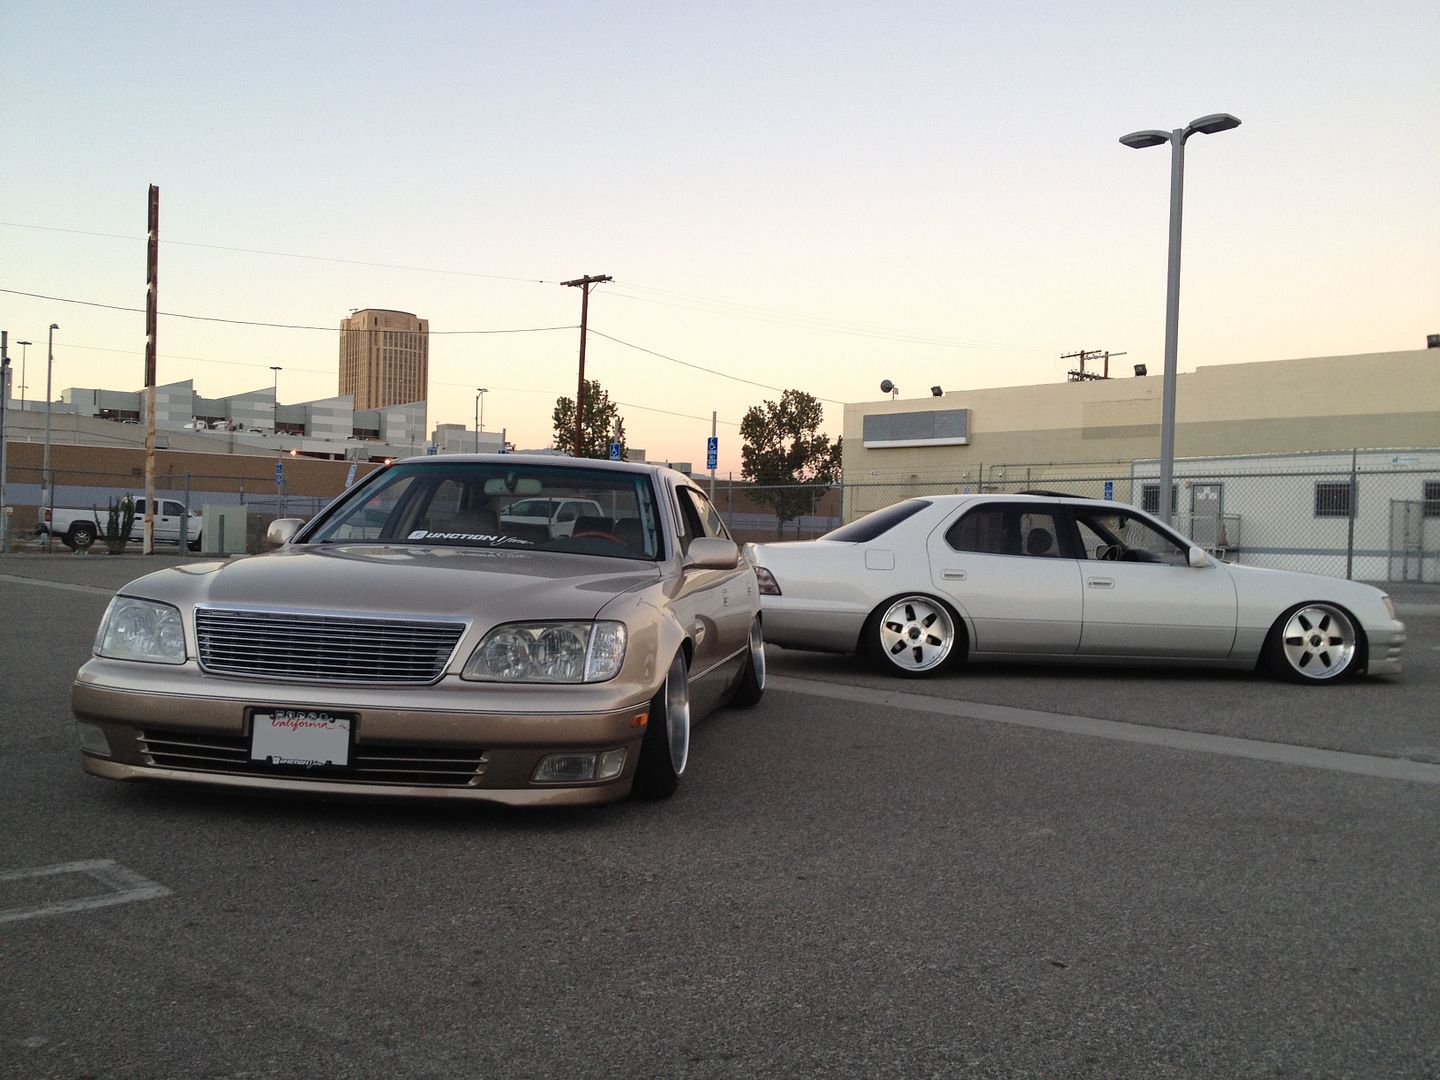
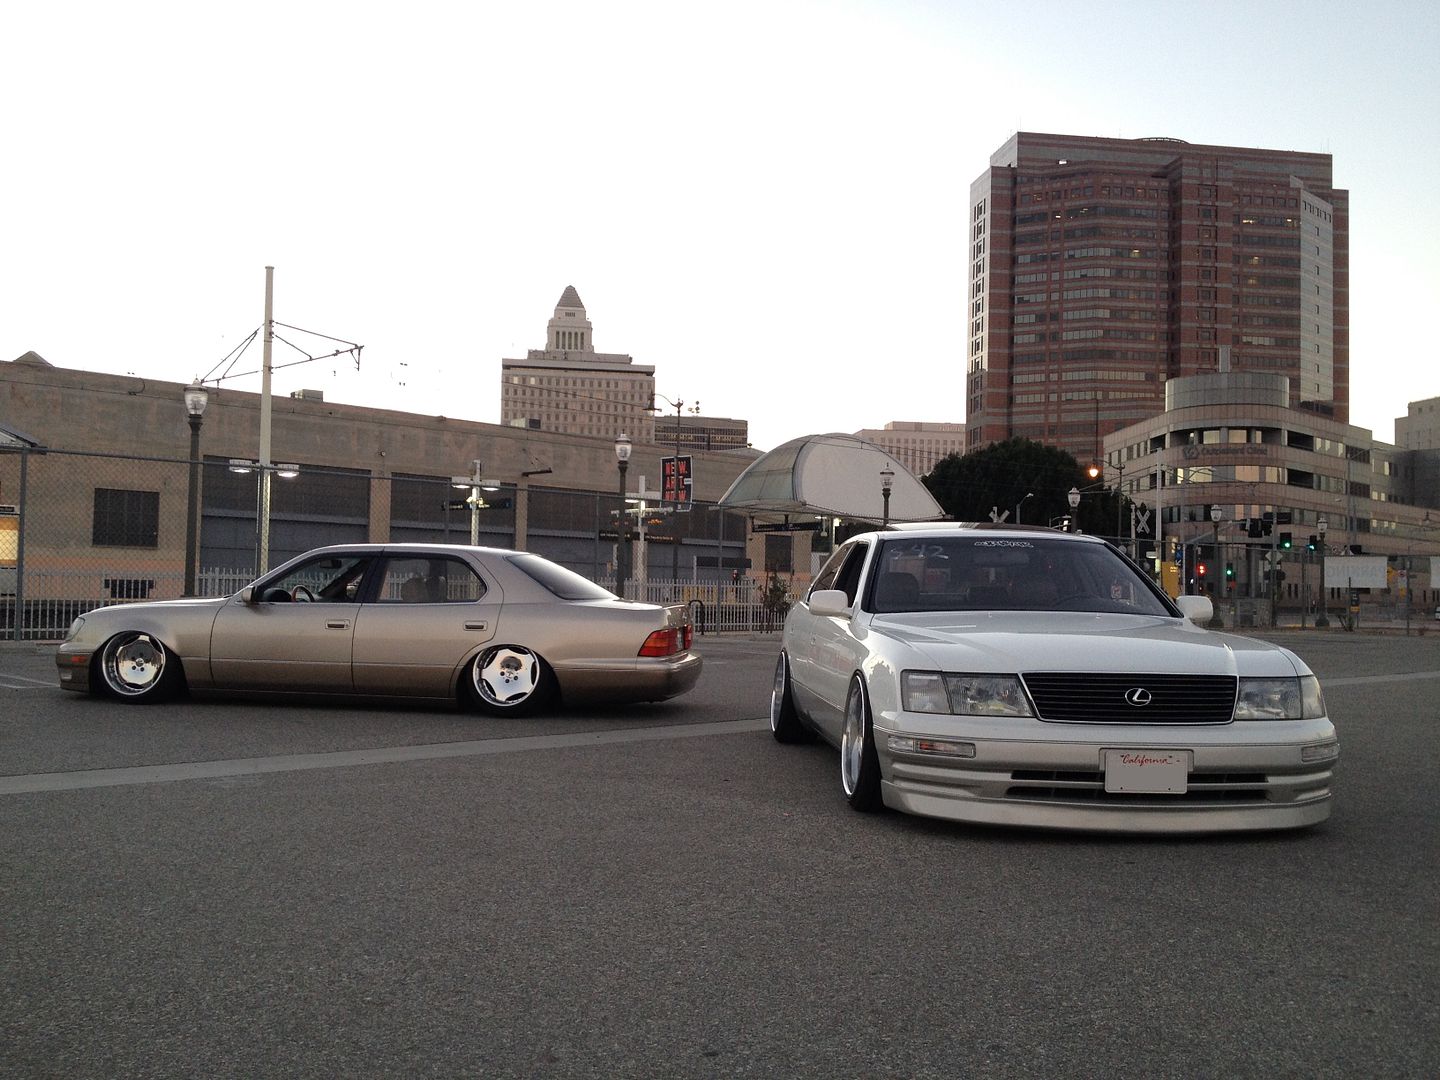
View original BBCode
from nisei showoff
removed the NRCAs and put the viennas back on for now.
front lip is being borrowed from Dranom, he has the full lip kit painted for sale, hit him up!
[URL="http://i27.photobucket.com/albums/c194/timmy0toole/Kimberly/10606222_10152412745993392_8871605022216567831_n_zpsea3a1b53.jpg"][IMG]http://i27.photobucket.com/albums/c194/timmy0toole/Kimberly/10606222_10152412745993392_8871605022216567831_n_zpsea3a1b53.jpg[/IMG][/URL]


while i was there, did an impromptu shoot with julian aka sleepy wagon.
[URL="http://i27.photobucket.com/albums/c194/timmy0toole/Kimberly/IMG_5454_zpsc19afec3.jpg"][IMG]http://i27.photobucket.com/albums/c194/timmy0toole/Kimberly/IMG_5454_zpsc19afec3.jpg[/IMG][/URL]
[URL="http://i27.photobucket.com/albums/c194/timmy0toole/Kimberly/IMG_5453_zpsbfd86c10.jpg"][IMG]http://i27.photobucket.com/albums/c194/timmy0toole/Kimberly/IMG_5453_zpsbfd86c10.jpg[/IMG][/URL]
Wow looking super cool!
View original BBCode
Wow looking super cool!
nice work
View original BBCode
nice work
nicely done...
View original BBCode
nicely done...
timmy0tool;512632 wrote:from nisei showoff
removed the NRCAs and put the viennas back on for now.
front lip is being borrowed from Dranom, he has the full lip kit painted for sale, hit him up!
while i was there, did an impromptu shoot with julian aka sleepy wagon.
them wheelz tho...
View original BBCode
[QUOTE=timmy0tool;512632]from nisei showoff
removed the NRCAs and put the viennas back on for now.
front lip is being borrowed from Dranom, he has the full lip kit painted for sale, hit him up!
[URL="http://i27.photobucket.com/albums/c194/timmy0toole/Kimberly/10606222_10152412745993392_8871605022216567831_n_zpsea3a1b53.jpg"][IMG]http://i27.photobucket.com/albums/c194/timmy0toole/Kimberly/10606222_10152412745993392_8871605022216567831_n_zpsea3a1b53.jpg[/IMG][/URL]


while i was there, did an impromptu shoot with julian aka sleepy wagon.

[/QUOTE]


them wheelz tho...
GS300ToM;512680 wrote:them wheelz tho...
haha thanks tom, unfortunately i just told them a week after the show, to a fellow in illinois with a 350z. wish i sold them locally as you did to me (relatively haha) as shipping costs were a nightmare with such a heavy wheel.
View original BBCode
[QUOTE=GS300ToM;512680]them wheelz tho...[/QUOTE]
haha thanks tom, unfortunately i just told them a week after the show, to a fellow in illinois with a 350z. wish i sold them locally as you did to me (relatively haha) as shipping costs were a nightmare with such a heavy wheel.
newest addition, looking more like grandma's house!


View original BBCode
newest addition, looking more like grandma's house!
[img]http://i27.photobucket.com/albums/c194/timmy0toole/Kimberly/IMG_5547_zps4c51dd49.jpg[/img]
[img]http://i27.photobucket.com/albums/c194/timmy0toole/Kimberly/IMG_5539_zps2277e6f4.jpg[/img]
sucks i missed VIPfest this year but here are some recents, on borrowed wheels yet again lol but this time in 20s!
weds maverick 405s
20x9 +24 225/35 nitto nt555
20x10 +24 245/35 nitto nt555
no pull, all stock fenders, just shaved front and back!


caliper clearance passes the paper test! two sheets would NOT!

View original BBCode
sucks i missed VIPfest this year but here are some recents, on borrowed wheels yet again lol but this time in 20s!

weds maverick 405s
20x9 +24 225/35 nitto nt555
20x10 +24 245/35 nitto nt555
no pull, all stock fenders, just shaved front and back!

[img]http://i27.photobucket.com/albums/c194/timmy0toole/Kimberly/IMG_5769_zps17594ee6.jpg[/img]


[img]http://i27.photobucket.com/albums/c194/timmy0toole/Kimberly/IMG_5768_zps26fc037c.jpg[/img]


[img]http://i27.photobucket.com/albums/c194/timmy0toole/Kimberly/IMG_5771_zps7592d520.jpg[/img]


caliper clearance passes the paper test! two sheets would NOT!
[img]http://i27.photobucket.com/albums/c194/timmy0toole/Kimberly/IMG_5770_zps0b3f8f1e.jpg[/img]
Yea! Realy realy realy cool.

I love it!
View original BBCode
Yea! Realy realy realy cool.
I love it!
new year, new wheels. details coming soon!

View original BBCode
new year, new wheels. details coming soon!


[img]http://i27.photobucket.com/albums/c194/timmy0toole/Kimberly/IMG_6196_zps81924442.jpg[/img]
View original BBCode
update on how she is today.
[IMG]http://i27.photobucket.com/albums/c194/timmy0toole/Kimberly/11890032_10153346518694902_156554925284445305_o_zpsi4ntjaej.jpg[/IMG]


[IMG]http://i27.photobucket.com/albums/c194/timmy0toole/Kimberly/11883849_10153346518789902_6592694374419612008_o_zpsixtaqnu7.jpg[/IMG]


[IMG]http://i27.photobucket.com/albums/c194/timmy0toole/Kimberly/11026226_10153346518859902_2678664995904422911_o_zpsct58seih.jpg[/IMG]
View original BBCode
my buddy with his GS and i went out into old towne orange one evening, and his wife happened to have a decent camera. with that kind of backdrop, an impromptu shoot ensued!


[img]http://i27.photobucket.com/albums/c194/timmy0toole/Kimberly/12006565_10153434498329902_6319794965040525147_o_zpsfevg1ckg.jpg[/img]


[img]http://i27.photobucket.com/albums/c194/timmy0toole/Kimberly/12068414_10153434506514902_2324979440424631097_o_zps29zpw6so.jpg[/img]


[img]http://i27.photobucket.com/albums/c194/timmy0toole/Kimberly/12027212_10153434511574902_8184061242556014460_o_zpsb6h6lrb4.jpg[/img]


found a CLEAN right hand drive merc on air...
[img]http://i27.photobucket.com/albums/c194/timmy0toole/Kimberly/11999689_10153434523944902_6300595335077960142_o_zpsvtmgi96t.jpg[/img]


[img]http://i27.photobucket.com/albums/c194/timmy0toole/Kimberly/12015049_10153434520764902_3052739803324434253_o_zpspq74e8qe.jpg[/img]


[img]http://i27.photobucket.com/albums/c194/timmy0toole/Kimberly/12045491_10153434500959902_4333553996829738778_o_zpswf4uanlk.jpg[/img]


[img]http://i27.photobucket.com/albums/c194/timmy0toole/Kimberly/12079884_10153434538814902_5472292005761570393_o_zpsp4skgly2.jpg[/img]


[img]http://i27.photobucket.com/albums/c194/timmy0toole/Kimberly/12022619_10153434529029902_3518994279138964950_o_zpsjr077ysy.jpg[/img]


and one of my fav shots from that shoot
[img]http://i27.photobucket.com/albums/c194/timmy0toole/Kimberly/12039090_10153434514449902_2570256491473809472_o_zpsji9q59nx.jpg[/img]


[img]http://i27.photobucket.com/albums/c194/timmy0toole/Kimberly/12029574_10153434515594902_8808265045518404725_o_zpsisplcv43.jpg[/img]
nice pics
View original BBCode
nice pics
amazing write up, this will help a lot of people! And the car looks great too!!
View original BBCode
amazing write up, this will help a lot of people! And the car looks great too!!
Love the tails and traditional seat covers! Pretty cool ying/yang thing u two got going with white wheels/black body and black wheels/white body!
View original BBCode
Love the tails and traditional seat covers! Pretty cool ying/yang thing u two got going with white wheels/black body and black wheels/white body!
...swap wheels for another shoot? Lol
View original BBCode
...swap wheels for another shoot? Lol
What are the sizes/offsets and tire sizes now on the LS brother? GS is tight as hell too!
View original BBCode
What are the sizes/offsets and tire sizes now on the LS brother? GS is tight as hell too!
car is coming along real nice keep up the good work
View original BBCode
car is coming along real nice keep up the good work