71camaroJune 3, 2013
#492677VIP-inspired Audi S8 D2, what's done and what's next.
FOR ANYONE VIEWING THIS POST, WAITING ON A MOD TO APPROVE MY REPLIES WITH FURTHER WORK AND PICSHey guys, I'm fairly new here on VSC, been on VWVortex and Stanceworks for years. I started out with a 1971 Camaro, built that from the ground up, was a rusted shell when I got it, ended up like this:


Then I built my Scirocco, ended up like this:


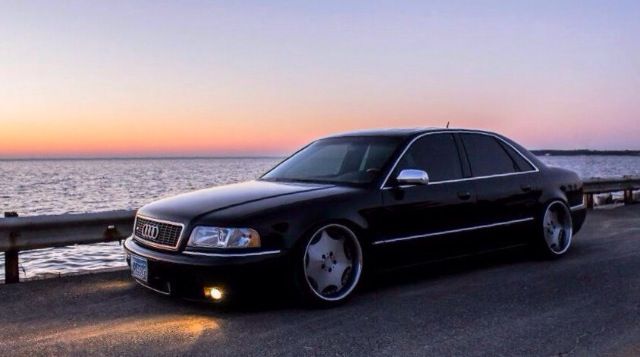
Then I got my S8. I hadn't messed with air suspension before, but I knew it was right for a car of this nature and that I wanted to go with a VIP look with the build.
When I bought the car it was from the second owner, who'd had it since 2004 (car is a MY2003). It was pretty well maintained, save a crack in the rear bumper and a few small electrical issues (power headrests in rear, parking sensor out, things like that).
Upon purchase:
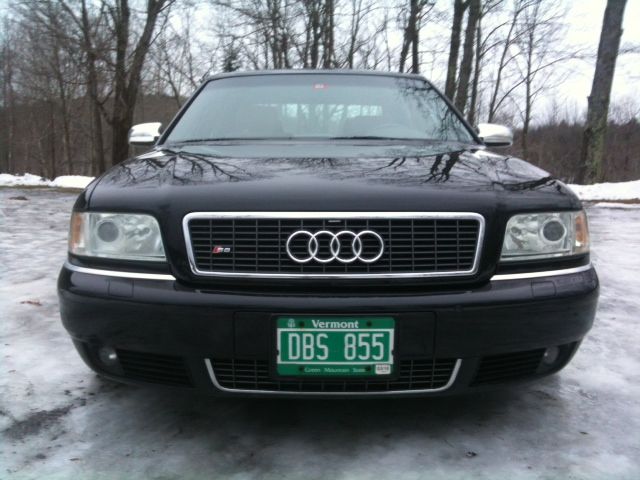
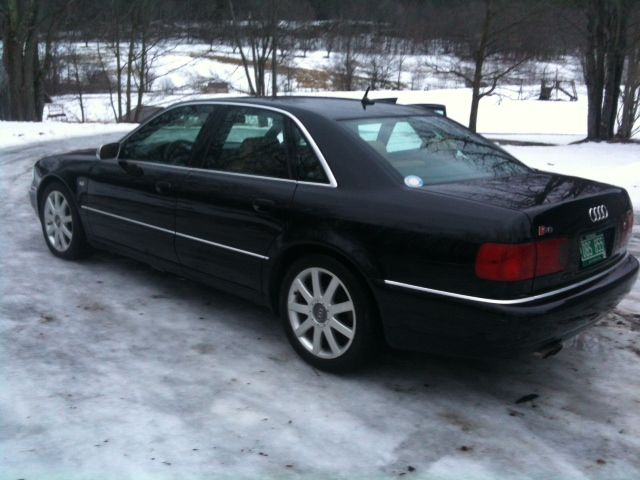
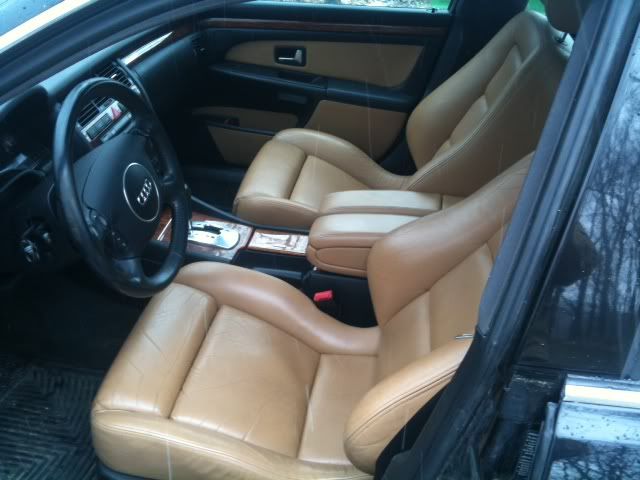
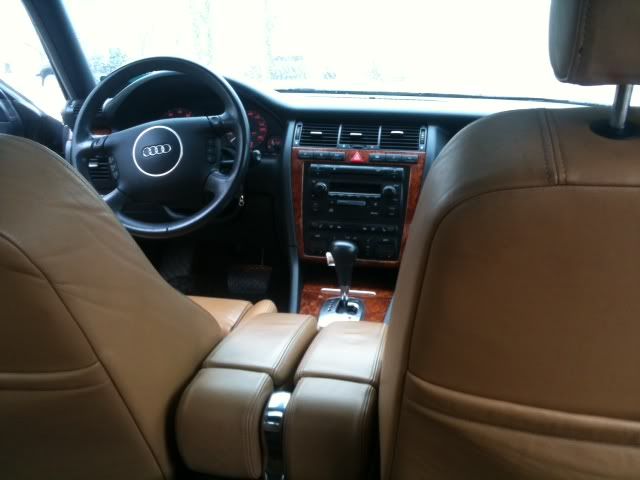
I was slow getting moving on the project, but knew the general direction I wanted to take the car, a blend of classic Euro-look with a strong VIP influence.
I ordered Bagyard Supreme front struts and classic rears from Bagriders. I also ordered Accuair E-Level. Several months into the project the Bagyard product was nowhere to be seen and Bagriders was struggling to communicate with them. I didn't know what to do or where to turn, then I saw an entry on Stanceworks about Airlift Universal Crafter struts. I called Bagriders and asked what they thought of these. They said the product was excellent, and dampening adjustable, with much easier to deal with customer service. The problem was I'd have to cut up the stock struts for parts and have some things (like mounting tabs) tig-welded. No bother, I ordered these and Slam Specialties rear bellows for my car and set to work.
I knew I'd need to engineer some rear bag mounts and I was none too sure how to design them, then I ran across Dorbritz Designs and their rear bag mounts for VW mk5 platform cars. I studied their solution and determined I'd take a similar route, albeit with some changes to match the chassis. I bought some schedule 80 pipe in the correct diameters and some 1/4" steel plate and set to work.
Here, the bags:
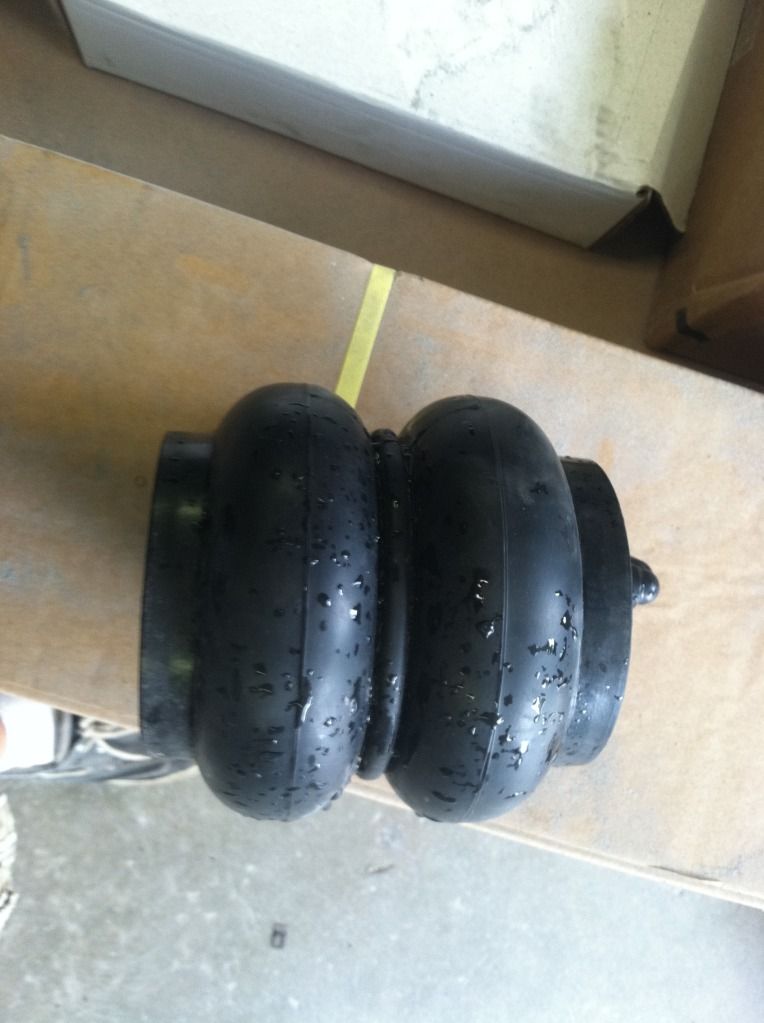
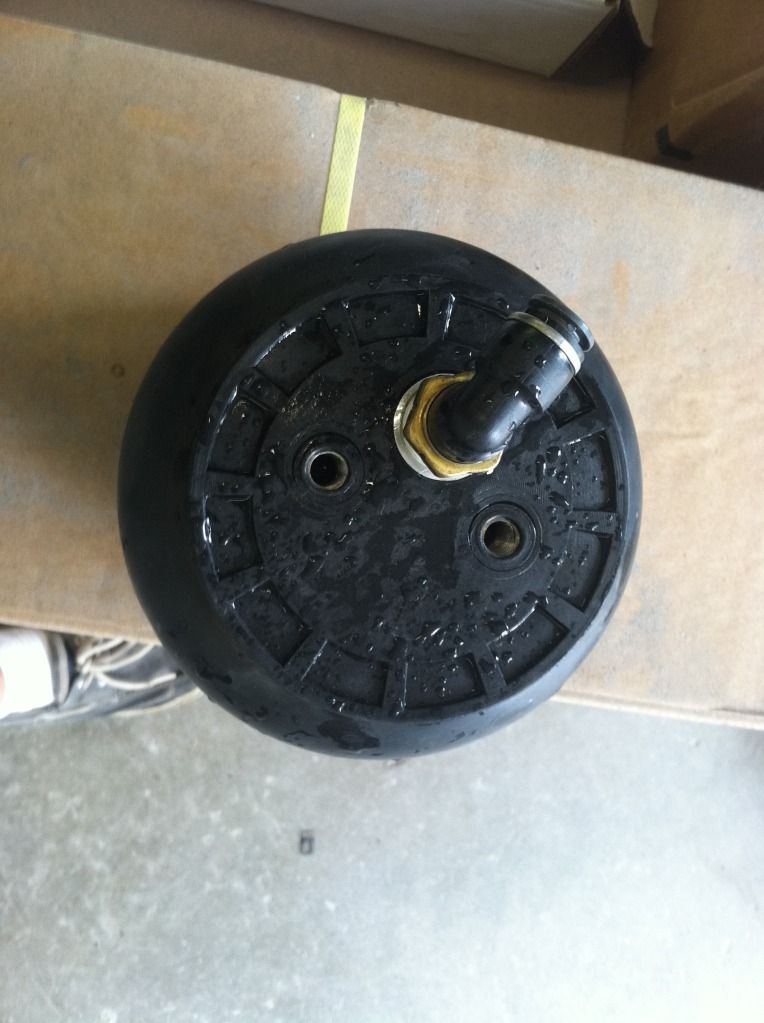
These bags are the Slam Specialties SS-5.
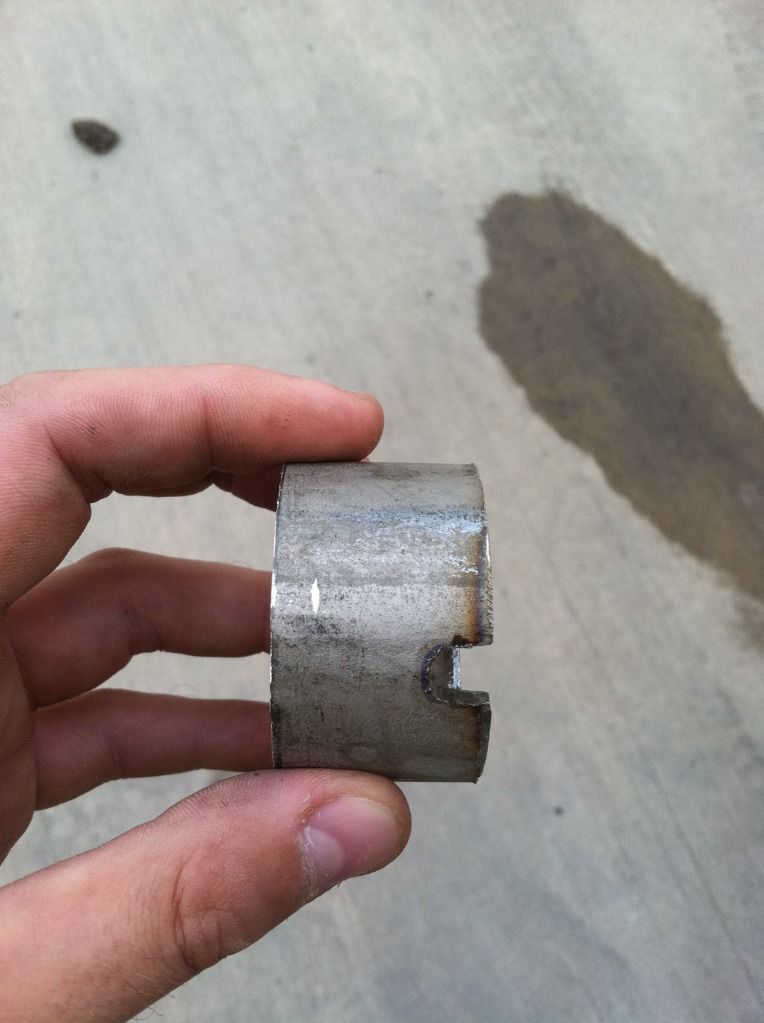
The brackets are fairly complex. First we'll discuss the lower mount and how it'll fit over the peg on the control arm. I'm using pipe as a base. It is Schedule 80 (1/4" wall thickness) with an inner diameter of 1 7/8". I cut to 1 1/8" length which is just tall enough to clear the peg while also allowing a mounting bolt for the bag to pass. Here is the lower "pipe" for the lower mount:
And the "peg":
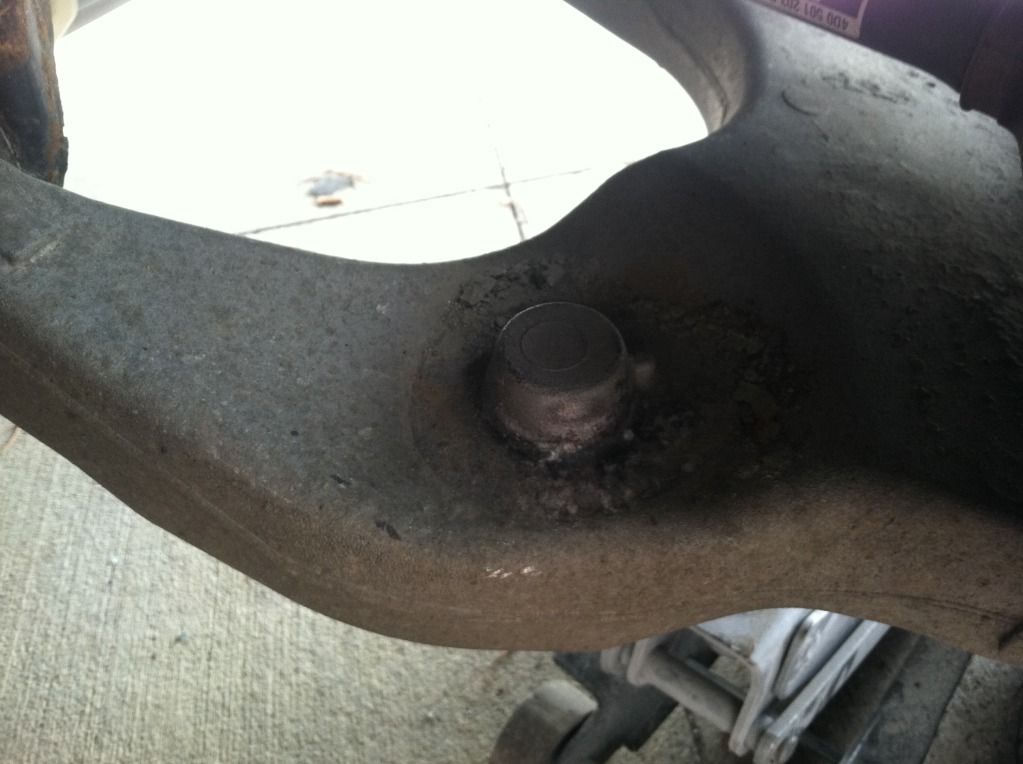
I notched it to fit over a key of sorts that is found on the peg on the control arm. This allows it to sit flat, prevents turning or twisting, and keeps the base exactly centered. I may add some material around the base as a "foot" of sorts but it isn't necessary.
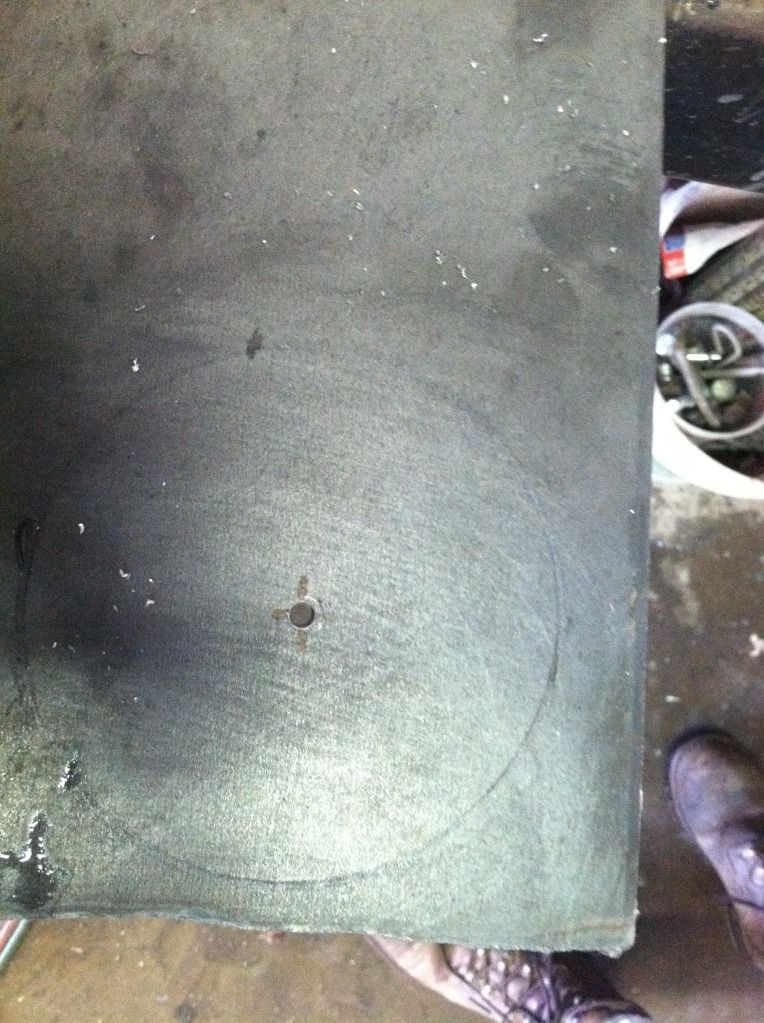
The bags are the same size on both the top and bottom mounting plate. Therefore I cut four identical bases (two for top and two for bottom, or one for each side on both top and bottom) for the mounting brackets. To do that I marked a sheet of 1/4"hardened steel I had in the same diameter as the base of the bags. I then marked center and punched it. After hitting the center with the punch we used a bit and drilled the center:
Then we cut the sheet off close to the marking and placed it on this rig we devised:
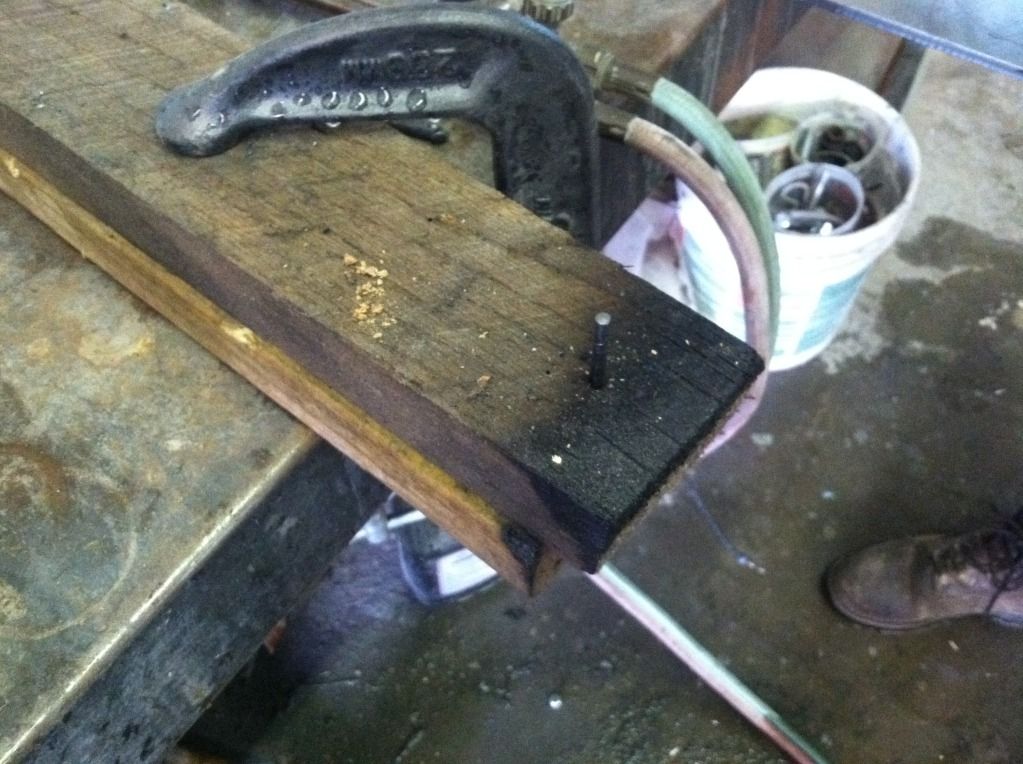
That's a couple 2x4 pieces of wood with the drill bit run into it. Once that was together we slid some washers over the drill bit and then placed the at present square piece of steel onto it. The table we were using has a vice on it so we placed a cutting torch into the vice and fired it up. Then, with the torch set to cut we spun the steel plate on the wood/washers/drill bit to get a circular "pad" to mount the bags onto.
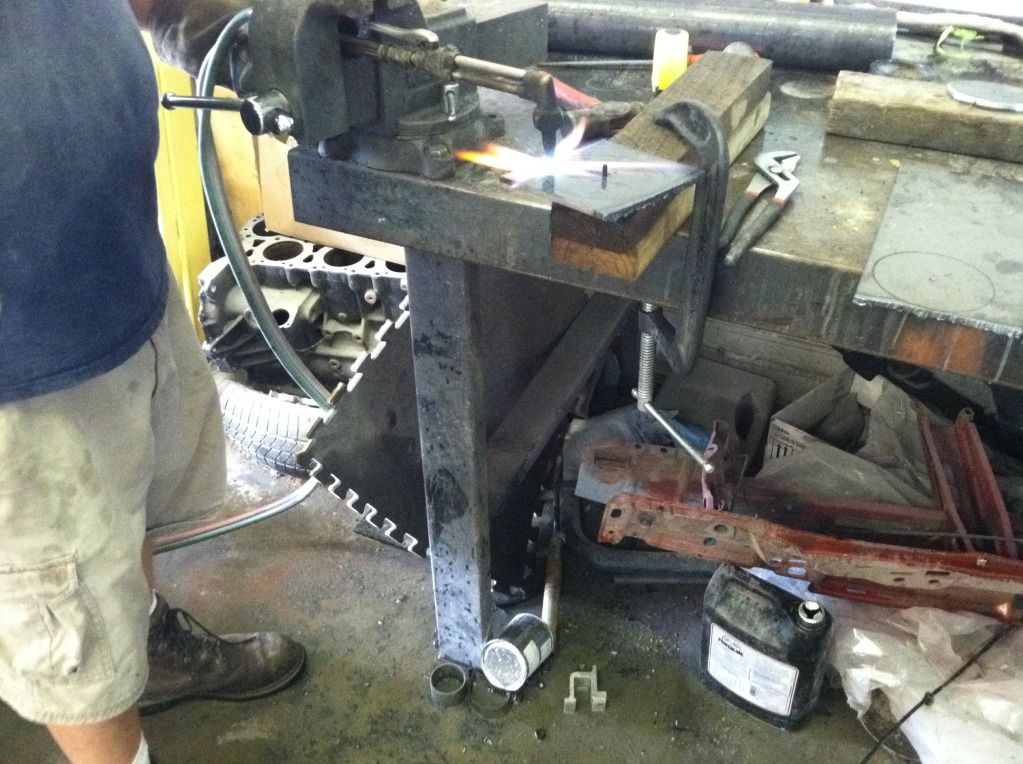
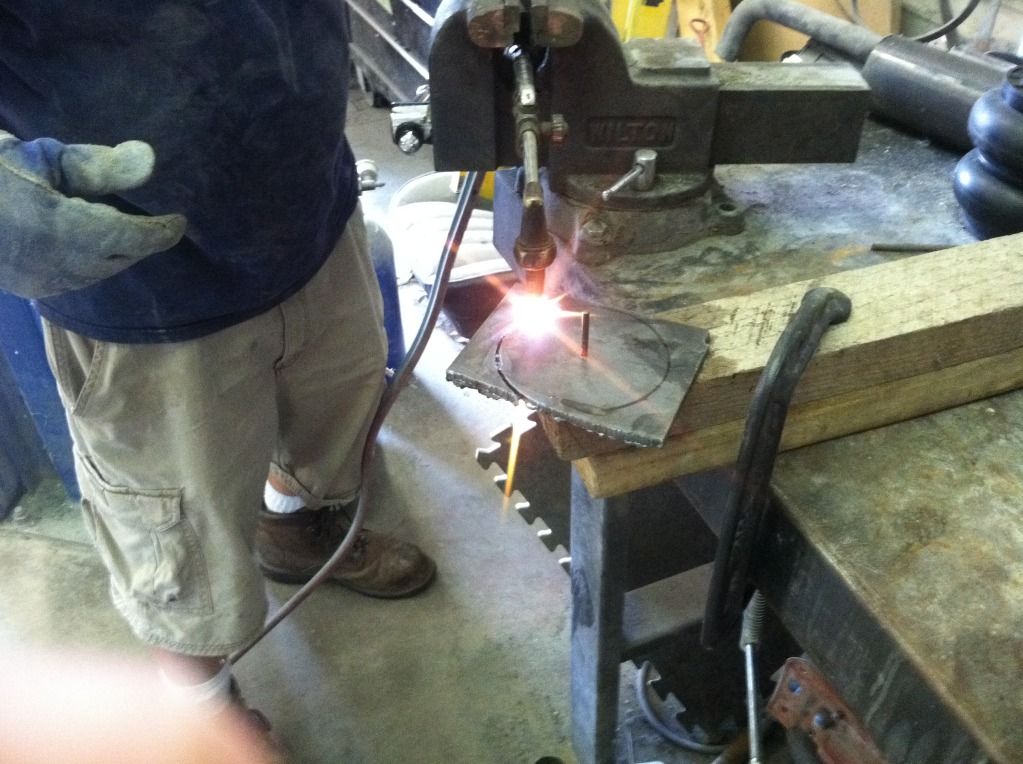
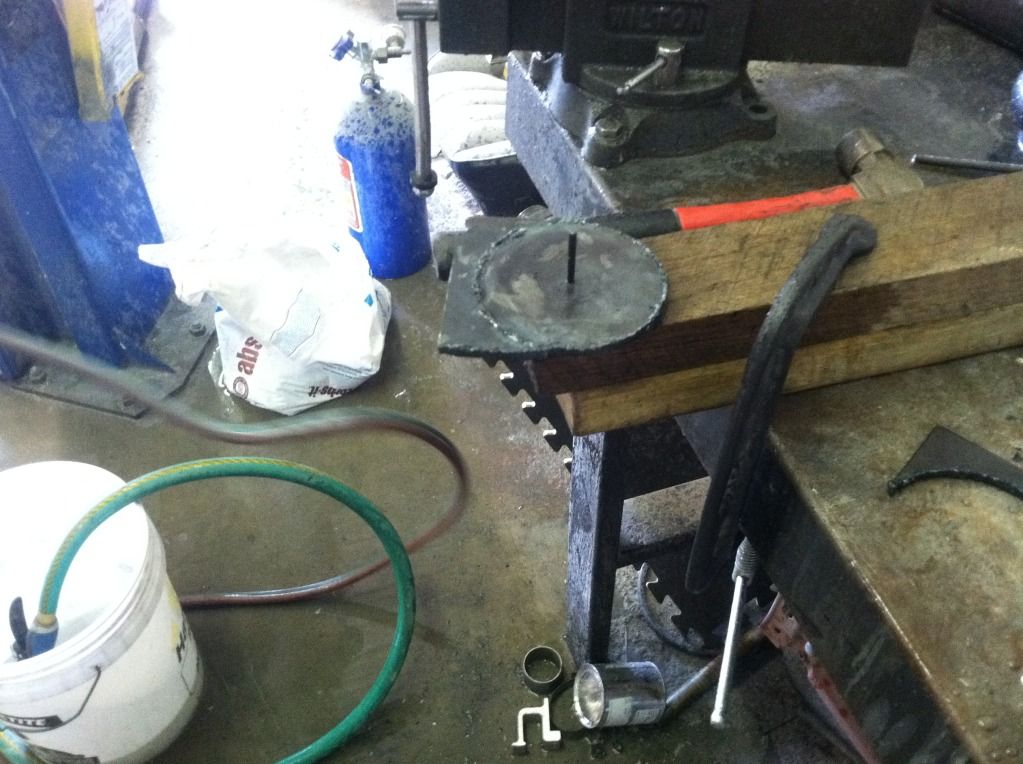
That process gave a circle but it had a lot of waste and slag so we chucked a grinder into the vice and cleaned them up:
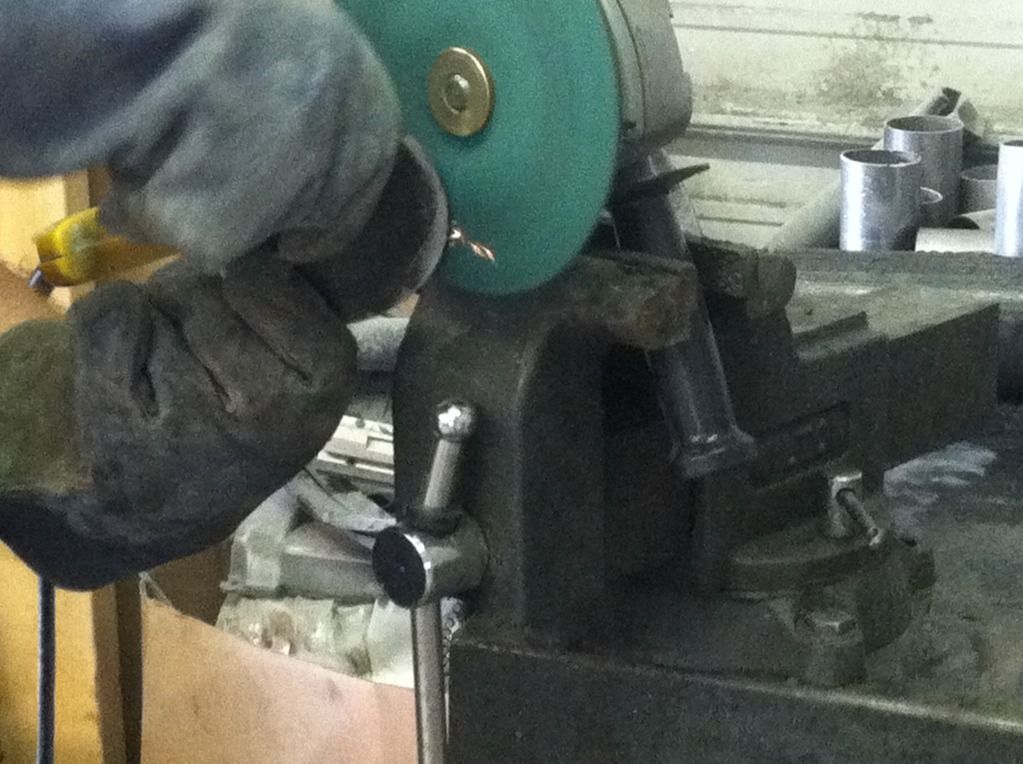
You get something like this:
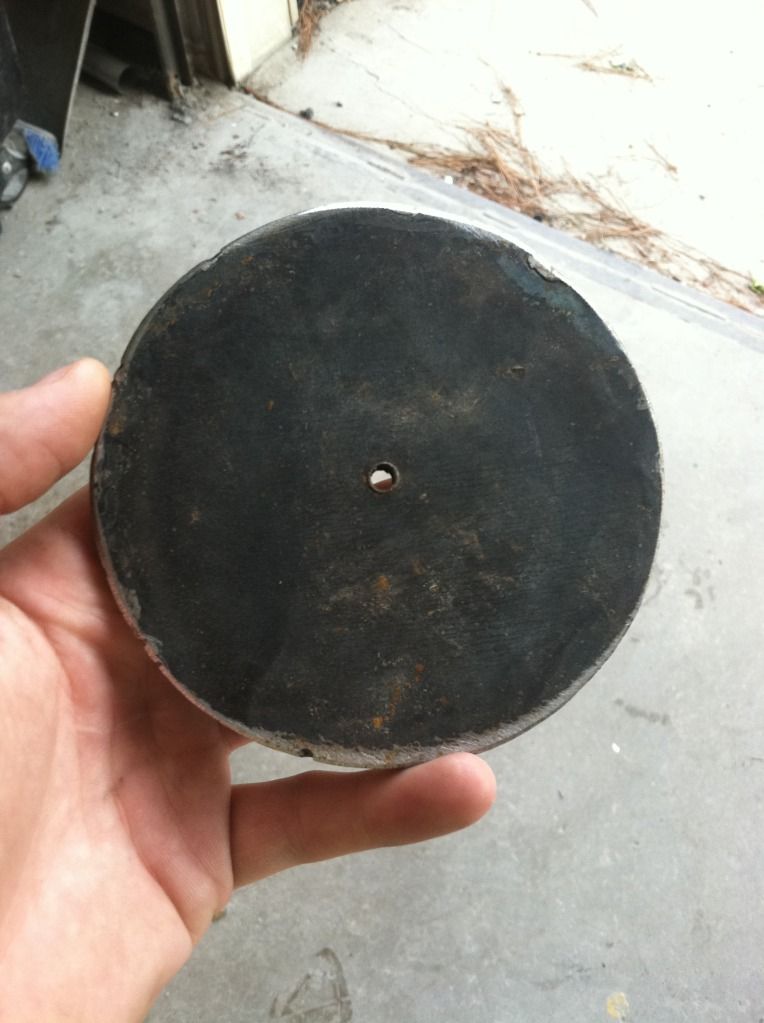
I gave these plates to my grandfather, who has a machine shop. He cut a notch to allow the air fitting to pass and drilled the holes for mounting bolts. The bottom plate will only be able to have one bolt to mount but has three holes so I welded guide pins for two of the three bolt holes. The top gets two bolts into it and those won't be an issue.
The top mount slides over this:
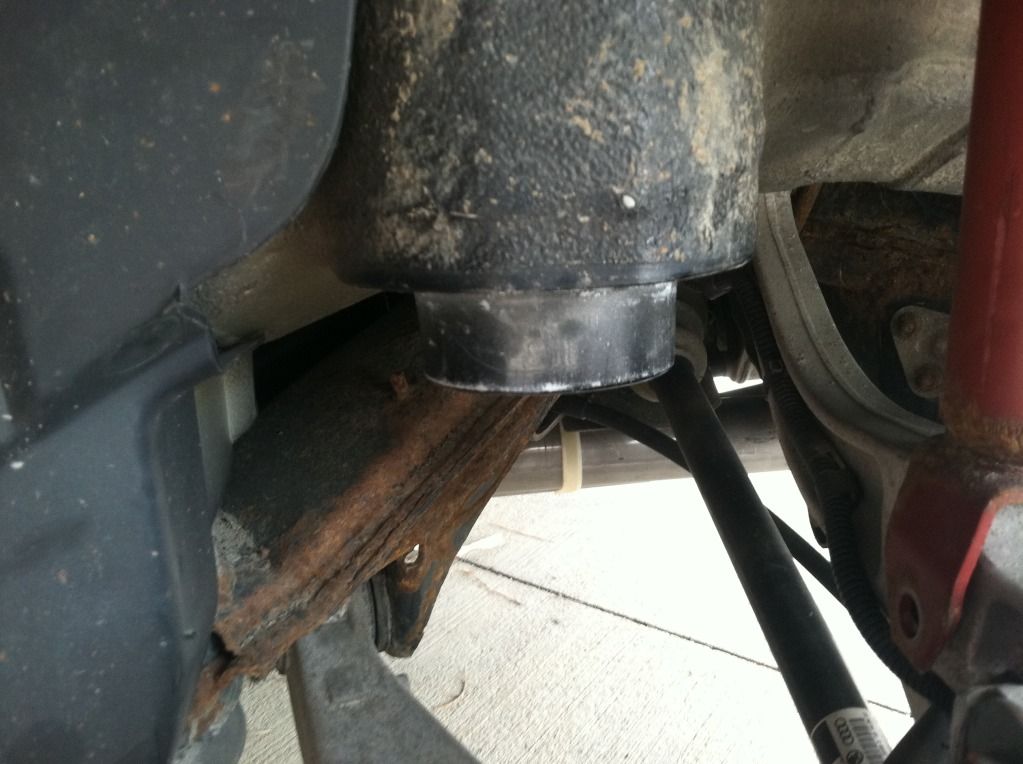
I'm using 3 inch inner diameter Schedule 80 (1/4" wall thickness) here. Cut to 2 inches it slides over perfectly and allows room for the air-line fitting.
View original BBCode
FOR ANYONE VIEWING THIS POST, WAITING ON A MOD TO APPROVE MY REPLIES WITH FURTHER WORK AND PICS

Hey guys, I'm fairly new here on VSC, been on VWVortex and Stanceworks for years. I started out with a 1971 Camaro, built that from the ground up, was a rusted shell when I got it, ended up like this:
[URL="https://sphotos-a.xx.fbcdn.net/hphotos-prn1/23507_117131598301031_1179157_n.jpg"][IMG]https://sphotos-a.xx.fbcdn.net/hphotos-prn1/23507_117131598301031_1179157_n.jpg[/IMG][/URL][URL="https://sphotos-b.xx.fbcdn.net/hphotos-prn1/23507_117131604967697_2794455_n.jpg"][IMG]https://sphotos-b.xx.fbcdn.net/hphotos-prn1/23507_117131604967697_2794455_n.jpg[/IMG][/URL]

Then I built my Scirocco, ended up like this:

[URL="https://fbcdn-sphotos-f-a.akamaihd.net/hphotos-ak-prn1/34697_420073518006836_1336720880_n.jpg"][IMG]https://fbcdn-sphotos-f-a.akamaihd.net/hphotos-ak-prn1/34697_420073518006836_1336720880_n.jpg[/IMG][/URL]
[URL="https://fbcdn-sphotos-d-a.akamaihd.net/hphotos-ak-prn1/296899_294455593901963_2010806463_n.jpg"][IMG]https://fbcdn-sphotos-d-a.akamaihd.net/hphotos-ak-prn1/296899_294455593901963_2010806463_n.jpg[/IMG][/URL]

Then I got my S8. I hadn't messed with air suspension before, but I knew it was right for a car of this nature and that I wanted to go with a VIP look with the build.

When I bought the car it was from the second owner, who'd had it since 2004 (car is a MY2003). It was pretty well maintained, save a crack in the rear bumper and a few small electrical issues (power headrests in rear, parking sensor out, things like that).

Upon purchase:

[URL="http://i631.photobucket.com/albums/uu33/atb5144/null_zpsbf0f5a71.jpg"][IMG]http://i631.photobucket.com/albums/uu33/atb5144/null_zpsbf0f5a71.jpg[/IMG][/URL]
[URL="http://i631.photobucket.com/albums/uu33/atb5144/null_zpsc587b933.jpg"][IMG]http://i631.photobucket.com/albums/uu33/atb5144/null_zpsc587b933.jpg[/IMG][/URL]
[URL="http://i631.photobucket.com/albums/uu33/atb5144/get-attachmentaspx.jpg"][IMG]http://i631.photobucket.com/albums/uu33/atb5144/get-attachmentaspx.jpg[/IMG][/URL]
[URL="http://i631.photobucket.com/albums/uu33/atb5144/get-attachmentaspx1.jpg"][IMG]http://i631.photobucket.com/albums/uu33/atb5144/get-attachmentaspx1.jpg[/IMG][/URL]

I was slow getting moving on the project, but knew the general direction I wanted to take the car, a blend of classic Euro-look with a strong VIP influence.

I ordered Bagyard Supreme front struts and classic rears from Bagriders. I also ordered Accuair E-Level. Several months into the project the Bagyard product was nowhere to be seen and Bagriders was struggling to communicate with them. I didn't know what to do or where to turn, then I saw an entry on Stanceworks about Airlift Universal Crafter struts. I called Bagriders and asked what they thought of these. They said the product was excellent, and dampening adjustable, with much easier to deal with customer service. The problem was I'd have to cut up the stock struts for parts and have some things (like mounting tabs) tig-welded. No bother, I ordered these and Slam Specialties rear bellows for my car and set to work.

I knew I'd need to engineer some rear bag mounts and I was none too sure how to design them, then I ran across Dorbritz Designs and their rear bag mounts for VW mk5 platform cars. I studied their solution and determined I'd take a similar route, albeit with some changes to match the chassis. I bought some schedule 80 pipe in the correct diameters and some 1/4" steel plate and set to work.


Here, the bags:


[URL="http://i631.photobucket.com/albums/uu33/atb5144/IMG_0842.jpg"][IMG]http://i631.photobucket.com/albums/uu33/atb5144/IMG_0842.jpg[/IMG][/URL]

[URL="http://i631.photobucket.com/albums/uu33/atb5144/IMG_0843.jpg"][IMG]http://i631.photobucket.com/albums/uu33/atb5144/IMG_0843.jpg[/IMG][/URL]


These bags are the Slam Specialties SS-5.
The brackets are fairly complex. First we'll discuss the lower mount and how it'll fit over the peg on the control arm. I'm using pipe as a base. It is Schedule 80 (1/4" wall thickness) with an inner diameter of 1 7/8". I cut to 1 1/8" length which is just tall enough to clear the peg while also allowing a mounting bolt for the bag to pass. Here is the lower "pipe" for the lower mount:


[URL="http://i631.photobucket.com/albums/uu33/atb5144/IMG_0856.jpg"][IMG]http://i631.photobucket.com/albums/uu33/atb5144/IMG_0856.jpg[/IMG][/URL]


And the "peg":


[URL="http://i631.photobucket.com/albums/uu33/atb5144/IMG_0846.jpg"][IMG]http://i631.photobucket.com/albums/uu33/atb5144/IMG_0846.jpg[/IMG][/URL]


I notched it to fit over a key of sorts that is found on the peg on the control arm. This allows it to sit flat, prevents turning or twisting, and keeps the base exactly centered. I may add some material around the base as a "foot" of sorts but it isn't necessary.


The bags are the same size on both the top and bottom mounting plate. Therefore I cut four identical bases (two for top and two for bottom, or one for each side on both top and bottom) for the mounting brackets. To do that I marked a sheet of 1/4"hardened steel I had in the same diameter as the base of the bags. I then marked center and punched it. After hitting the center with the punch we used a bit and drilled the center:


[URL="http://i631.photobucket.com/albums/uu33/atb5144/IMG_0848.jpg"][IMG]http://i631.photobucket.com/albums/uu33/atb5144/IMG_0848.jpg[/IMG][/URL]


Then we cut the sheet off close to the marking and placed it on this rig we devised:


[URL="http://i631.photobucket.com/albums/uu33/atb5144/IMG_0849.jpg"][IMG]http://i631.photobucket.com/albums/uu33/atb5144/IMG_0849.jpg[/IMG][/URL]


That's a couple 2x4 pieces of wood with the drill bit run into it. Once that was together we slid some washers over the drill bit and then placed the at present square piece of steel onto it. The table we were using has a vice on it so we placed a cutting torch into the vice and fired it up. Then, with the torch set to cut we spun the steel plate on the wood/washers/drill bit to get a circular "pad" to mount the bags onto.


[URL="http://i631.photobucket.com/albums/uu33/atb5144/IMG_0851.jpg"][IMG]http://i631.photobucket.com/albums/uu33/atb5144/IMG_0851.jpg[/IMG][/URL]

[URL="http://i631.photobucket.com/albums/uu33/atb5144/IMG_0837.jpg"][IMG]http://i631.photobucket.com/albums/uu33/atb5144/IMG_0837.jpg[/IMG][/URL]
[URL="http://i631.photobucket.com/albums/uu33/atb5144/IMG_0838.jpg"][IMG]http://i631.photobucket.com/albums/uu33/atb5144/IMG_0838.jpg[/IMG][/URL]


That process gave a circle but it had a lot of waste and slag so we chucked a grinder into the vice and cleaned them up:


[URL="http://i631.photobucket.com/albums/uu33/atb5144/IMG_0841.jpg"][IMG]http://i631.photobucket.com/albums/uu33/atb5144/IMG_0841.jpg[/IMG][/URL]


You get something like this:


[URL="http://i631.photobucket.com/albums/uu33/atb5144/IMG_0854.jpg"][IMG]http://i631.photobucket.com/albums/uu33/atb5144/IMG_0854.jpg[/IMG][/URL]


I gave these plates to my grandfather, who has a machine shop. He cut a notch to allow the air fitting to pass and drilled the holes for mounting bolts. The bottom plate will only be able to have one bolt to mount but has three holes so I welded guide pins for two of the three bolt holes. The top gets two bolts into it and those won't be an issue.


The top mount slides over this:


[URL="http://i631.photobucket.com/albums/uu33/atb5144/IMG_0845.jpg"][IMG]http://i631.photobucket.com/albums/uu33/atb5144/IMG_0845.jpg[/IMG][/URL]


I'm using 3 inch inner diameter Schedule 80 (1/4" wall thickness) here. Cut to 2 inches it slides over perfectly and allows room for the air-line fitting.