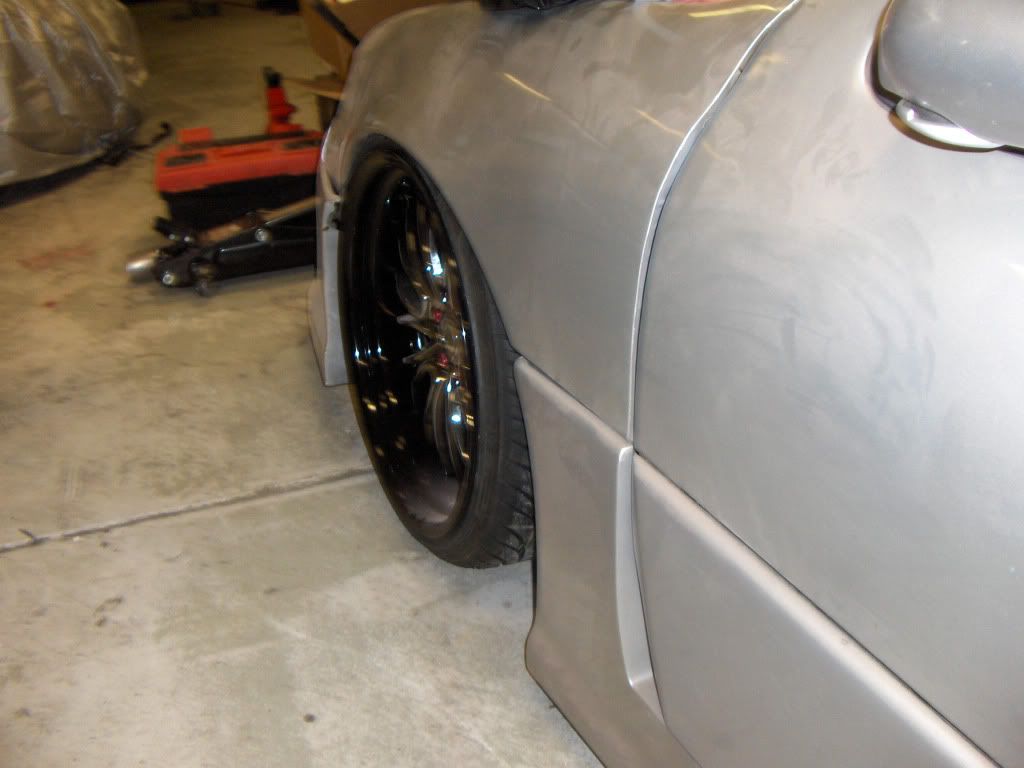
Project "Madara"
Hi! Names Juzzo and I come from the land of the thousand lakes... Lets cap the crap and get into business :D
I'm trying to hold it down up here, VIP-vize of course. Bought the Aristo from Japan in the winter of 07/08, and at first thought it was a done deal. 2JZ-GTE, jap coilovers, Work Equips and Garson kitted what else would a big boy want, right? Nah... 08 went fiddling with minor stuff and last year starting upping the pace. D2 Air Suspension, full Hertz sound system, braided brakelines, FMIC and gathering parts needed. This winters I'm going all out, or atleast try to... Euro-spec turbos, cams and injectors, Greddy ATF & motor coolers, custom intercooler tubing, custom exhaust, Greddy E-Manage Ultimate, various gauges for eyeing oil press/temp, AFR's, EGT, boost, Dakota Digital pressure gauge for air suspension, full colour change to Lexus Smoky Granite Mica and to top it all new wheels... Work Schwert SC5's in WBC and black lip, F: 19/9,5/+13 R: 20/10,5/+7 :giggity:
Here's a few old pics of the project, and more progress pics to come later...


And after installing bags...


View original BBCode
Hi! Names Juzzo and I come from the land of the thousand  lakes... Lets cap the crap and get into business :D
I'm trying to hold it down up here, VIP-vize of course. Bought the Aristo from Japan in the winter of 07/08, and at first thought it was a done deal. 2JZ-GTE, jap coilovers, Work Equips and Garson kitted what else would a big boy want, right? Nah... 08 went fiddling with minor stuff and last year starting upping the pace. D2 Air Suspension, full Hertz sound system, braided brakelines, FMIC and gathering parts needed. This winters I'm going all out, or atleast try to... Euro-spec turbos, cams and injectors, Greddy ATF & motor coolers, custom intercooler tubing, custom exhaust, Greddy E-Manage Ultimate, various gauges for eyeing oil press/temp, AFR's, EGT, boost, Dakota Digital pressure gauge for air suspension, full colour change to Lexus Smoky Granite Mica and to top it all new wheels... Work Schwert SC5's in WBC and black lip, F: 19/9,5/+13 R: 20/10,5/+7 :giggity:
Here's a few old pics of the project, and more progress pics to come later...
[URL="http://img706.imageshack.us/i/aqjkom.jpg/"][IMG]http://img706.imageshack.us/img706/4120/aqjkom.th.jpg[/IMG][/URL] [U][URL="http://img210.imageshack.us/i/hpim3416copy.jpg/"][IMG]http://img210.imageshack.us/img210/5224/hpim3416copy.th.jpg[/IMG][/URL][/U]
And after installing bags...
[URL="http://img512.imageshack.us/i/hpim4239u.jpg/"][IMG]http://img512.imageshack.us/img512/9169/hpim4239u.th.jpg[/IMG][/URL] [URL="http://img43.imageshack.us/i/hpim4237.jpg/"][IMG]http://img43.imageshack.us/img43/5134/hpim4237.th.jpg[/IMG][/URL]
[URL="http://img5.imageshack.us/i/hpim4201d.jpg/"][IMG]http://img5.imageshack.us/img5/4359/hpim4201d.th.jpg[/IMG][/URL] [URL="http://img529.imageshack.us/i/hpim4242.jpg/"][IMG]http://img529.imageshack.us/img529/5498/hpim4242.th.jpg[/IMG][/URL]
Welcome aboard!
View original BBCode
Welcome aboard!
Welcome. Good work so far. I like your plans. Keep us posted on your progress.
View original BBCode
Welcome. Good work so far. I like your plans. Keep us posted on your progress.
Hmmm think it's time to update this project. Last year didn't go as planned. First after I had taken the stock turbos off I noticed that there was quite alot of oil in the ex. manifold, so had to do a by-pass test. Verdict was that the valve stem seals were done. So head had to come off, new ex. valves, new seals and while we were there the head also got ported. Same time I decided to sell the us-spec turbos and for a single turbo...
Later in the spring came the second set-back: I had made a fracking typo in my wheel order. I managed to order 1 inch too narrow rear wheels :pat:
After much thought about that, I decided to get another pair for rear later in the year.
Sooo... last week Mark from RavSpec hooked me up with a great deal for a bigger pair of the same Schwerts in black chrome w/ black lip. Sizing should be a first for the 147 Aristo: I'm gonna put the "old rears" in front - 20"x9,5" +7 O-disk, and the new pair for rear will be a modest 21"x10,5" -7 O-disk. And I think I'm gonna have to through some 10-20mm spacers in every corner if I'm going to get BBK all around. Although I can't afford BBK until late 2011, because I gotta get a build automatic(Titan Motorsport?) next, but it's good to be prepared. Especially cause I gotta do my fenders before a full respray is happening, which should be around March/April. But lets get to the pics I've taken in the last year of the project :giggity:


View original BBCode
Hmmm think it's time to update this project. Last year didn't go as planned. First after I had taken the stock turbos off I noticed that there was quite alot of oil in the ex. manifold, so had to do a by-pass test. Verdict was that the valve stem seals were done. So head had to come off, new ex. valves, new seals and while we were there the head also got ported. Same time I decided to sell the us-spec turbos and for a single turbo...

Later in the spring came the second set-back: I had made a fracking typo in my wheel order. I managed to order 1 inch too narrow rear wheels :pat:
After much thought about that, I decided to get another pair for rear later in the year.

Sooo... last week Mark from RavSpec hooked me up with a great deal for a bigger pair of the same Schwerts in black chrome w/ black lip. Sizing should be a first for the 147 Aristo: I'm gonna put the "old rears" in front - 20"x9,5" +7 O-disk, and the new pair for rear will be a modest 21"x10,5" -7 O-disk. And I think I'm gonna have to through some 10-20mm spacers in every corner if I'm going to get BBK all around. Although I can't afford BBK until late 2011, because I gotta get a build automatic(Titan Motorsport?) next, but it's good to be prepared. Especially cause I gotta do my fenders before a full respray is happening, which should be around March/April. But lets get to the pics I've taken in the last year of the project :giggity:

[IMG]http://i1200.photobucket.com/albums/bb327/Lord_Juzzo/HPIM4518.jpg[/IMG] [IMG]http://i1200.photobucket.com/albums/bb327/Lord_Juzzo/HPIM4539.jpg[/IMG] [IMG]http://i1200.photobucket.com/albums/bb327/Lord_Juzzo/DSCN0456.jpg[/IMG] [IMG]http://i1200.photobucket.com/albums/bb327/Lord_Juzzo/HPIM4691.jpg[/IMG] [IMG]http://i1200.photobucket.com/albums/bb327/Lord_Juzzo/HPIM4702.jpg[/IMG] [IMG]http://i1200.photobucket.com/albums/bb327/Lord_Juzzo/HPIM4738.jpg[/IMG] [IMG]http://i1200.photobucket.com/albums/bb327/Lord_Juzzo/HPIM4749.jpg[/IMG] [IMG]http://i1200.photobucket.com/albums/bb327/Lord_Juzzo/HPIM4757.jpg[/IMG] [IMG]http://i1200.photobucket.com/albums/bb327/Lord_Juzzo/HPIM4761.jpg[/IMG] [IMG]http://i1200.photobucket.com/albums/bb327/Lord_Juzzo/HPIM4764.jpg[/IMG] [IMG]http://i1200.photobucket.com/albums/bb327/Lord_Juzzo/HPIM4765.jpg[/IMG] [IMG]http://i1200.photobucket.com/albums/bb327/Lord_Juzzo/HPIM4809.jpg[/IMG]
Looks really promising. Love the wheel choice and in that finish as well.
View original BBCode
Looks really promising. Love the wheel choice and in that finish as well.
widebody_Q;363008 wrote:Looks really promising. Love the wheel choice and in that finish as well.
Thanks Agi! Here's a better pics of the wheels that are now on:

On the risk of going off-topic: may I ask which wheels your getting?
View original BBCode
[QUOTE=widebody_Q;363008]Looks really promising.  Love the wheel choice and in that finish as well.[/QUOTE]
Thanks Agi! Here's a better pics of the wheels that are now on:
[IMG]http://i1200.photobucket.com/albums/bb327/Lord_Juzzo/sc5_wbc_bklip_01.jpg[/IMG]

On the risk of going off-topic: may I ask which wheels your getting?
that wheel is pretty dope in that finish.
View original BBCode
that wheel is pretty dope in that finish.
Damn, 19/20 stagger? That's gonna look sick.
View original BBCode
Damn, 19/20 stagger? That's gonna look sick.
bob_sagat;363046 wrote:Damn, 19/20 stagger? That's gonna look sick.
Actually after I get my new rears I'm gonna use 19/20 setup only for the yearly government inspections, and the rest of the time it will be the GAME setup with 20/21 hellaflush :giggity:
Also the 19"ers will be my "burn-out" rims, that should be baller enough, right =)
View original BBCode
[QUOTE=bob_sagat;363046]Damn, 19/20 stagger? That's gonna look sick.[/QUOTE]
Actually after I get my new rears I'm gonna use 19/20 setup only for the yearly government inspections, and the rest of the time it will be the GAME setup with 20/21 hellaflush :giggity:

Also the 19"ers will be my "burn-out" rims, that should be baller enough, right =)
View original BBCode
Test fitted the 20's on one side to see how it would fit in the front. Could't slam it all the way because my downpipe's flange hit the floor, luckily it's only spot welded atm... so gonna have to modify it a little bit :pat:

[IMG]http://i1200.photobucket.com/albums/bb327/Lord_Juzzo/HPIM4782.jpg[/IMG]

[IMG]http://i1200.photobucket.com/albums/bb327/Lord_Juzzo/HPIM4828.jpg[/IMG]

[IMG]http://i1200.photobucket.com/albums/bb327/Lord_Juzzo/HPIM4829.jpg[/IMG]

[IMG]http://i1200.photobucket.com/albums/bb327/Lord_Juzzo/HPIM4831.jpg[/IMG]

[IMG]http://i1200.photobucket.com/albums/bb327/Lord_Juzzo/HPIM4835.jpg[/IMG]

[IMG]http://i1200.photobucket.com/albums/bb327/Lord_Juzzo/HPIM4832.jpg[/IMG]

And as can be seen in the pics, fitment isn't right so I'm thinking of getting 20mm spacers for front and rear to handle the future BBK. And don't worry about the rear wheels, it's gonna change. New rear wheels should stick out about an inch MORE, plus the spacers...
i think it looks good so far, but yea 25mm all around
!
View original BBCode
i think it looks good so far, but yea 25mm all around
!
love the rest of your car, but i can't say i'm digging the welds on the exhaust manifold.
View original BBCode
love the rest of your car, but i can't say i'm digging the welds on the exhaust manifold.
brainneeded;363658 wrote:love the rest of your car, but i can't say i'm digging the welds on the exhaust manifold.
I can undestand that, reason for that is: the mani is a custom made by a buddy of mine with regular black steel with a MIG... and because I'm doing a cover for it, we didn't bother smoothing all the welds.
And please bear in mind this project isn't a shop one, it's all done by me and a few friends. So be patient and understanding on some details =)
View original BBCode
[QUOTE=brainneeded;363658]love the rest of your car, but i can't say i'm digging the welds on the exhaust manifold.[/QUOTE]
I can undestand that, reason for that is: the mani is a custom made by a buddy of mine with regular black steel with a MIG... and because I'm doing a cover for it, we didn't bother smoothing all the welds.

And please bear in mind this project isn't a shop one, it's all done by me and a few friends. So be patient and understanding on some details  =)
[QUOTE=Juzzo;363012]Thanks Agi! Here's a better pics of the wheels that are now on:
:biggthumpup:
View original BBCode
[QUOTE=Juzzo;363012]Thanks Agi! Here's a better pics of the wheels that are now on:
[IMG]http://i1200.photobucket.com/albums/bb327/Lord_Juzzo/sc5_wbc_bklip_01.jpg[/IMG]


:biggthumpup:
Not very big on the rocker panels for the JZS147 but this is super cleaness and another added inspiration to my future build.
View original BBCode
Not very big on the rocker panels for the JZS147 but this is super cleaness and another added inspiration to my future build.
View original BBCode
Not much to report, fiddling with some little things. Re-routed the wheel well wiring harness and cut some clearance for the UCAs.

[IMG]http://i1200.photobucket.com/albums/bb327/Lord_Juzzo/HPIM4842.jpg[/IMG]

[IMG]http://i1200.photobucket.com/albums/bb327/Lord_Juzzo/HPIM4843.jpg[/IMG]

[IMG]http://i1200.photobucket.com/albums/bb327/Lord_Juzzo/HPIM4848.jpg[/IMG]

[IMG]http://i1200.photobucket.com/albums/bb327/Lord_Juzzo/HPIM4840.jpg[/IMG]

[IMG]http://i1200.photobucket.com/albums/bb327/Lord_Juzzo/HPIM4845.jpg[/IMG]

After this I screwed my coils lower and came across a TINY problem...  it seems that I can't go lower 'cause other parts (than the ball-joint part) of UCAs are resting on the wheel well, and there's limited movement on the UCAs mounting points! :pat:
Only thing that comes to my mind to get lower, is to shorten the "shoulder arm"(the one that is between UCA and wheel hub)... Any ideas fellas would be hella appreciated! :dunno:
What a mess:innoutrofl2:
Never heard

?
Or r you going to cups over the holes?
View original BBCode
What a mess:innoutrofl2:
Never heard
 [IMG]http://t0.gstatic.com/images?q=tbn:ANd9GcTwG-r1VHcVEuqmi-nj7i2NQvaAvm9SaU1RE0yEcvCq2Y406bp_eg[/IMG]

?

Or r you going to cups over the holes?
samsa;369579 wrote:What a mess:innoutrofl2:
Or r you going to cups over the holes?
I'm gonna cut a little more inwards and then shape(hammertime), add sheet metal and weld shut. It should then look like a OEM-ish-bulge :giggity:
View original BBCode
[QUOTE=samsa;369579]What a mess:innoutrofl2:

Or r you going to cups over the holes?[/QUOTE]
I'm gonna cut a little more inwards and then shape(hammertime), add sheet metal and weld shut. It should then look like a OEM-ish-bulge :giggity:
Juzzo;369568 wrote:
After this I screwed my coils lower and came across a TINY problem... it seems that I can't go lower 'cause other parts (than the ball-joint part) of UCAs are resting on the wheel well, and there's limited movement on the UCAs mounting points! :pat:
Only thing that comes to my mind to get lower, is to shorten the "shoulder arm"(the one that is between UCA and wheel hub)... Any ideas fellas would be hella appreciated! :dunno:
Solution to your problem.. :biggthumpup:
http://www.importmonster.com.au/view?url=http://page15.auctions.yahoo.co.jp/jp/auction/t182400598&thumb=http://f0.auctions.c.yimg.jp/f11batchimg.auctions.yahoo.co.jp/users/1/7/5/9/anfield_2009-thumb-1292313655344608.jpg&title=Antares%20JZS147View original BBCode
[QUOTE=Juzzo;369568]

After this I screwed my coils lower and came across a TINY problem...  it seems that I can't go lower 'cause other parts (than the ball-joint part) of UCAs are resting on the wheel well, and there's limited movement on the UCAs mounting points! :pat:
Only thing that comes to my mind to get lower, is to shorten the "shoulder arm"(the one that is between UCA and wheel hub)... Any ideas fellas would be hella appreciated! :dunno:[/QUOTE]

Solution to your problem.. :biggthumpup:

[url]http://www.importmonster.com.au/view?url=http://page15.auctions.yahoo.co.jp/jp/auction/t182400598&thumb=http://f0.auctions.c.yimg.jp/f11batchimg.auctions.yahoo.co.jp/users/1/7/5/9/anfield_2009-thumb-1292313655344608.jpg&title=Antares%20JZS147[/url]
samsa;369719 wrote:Solution to your problem.. :biggthumpup:
http://www.importmonster.com.au/view?url=http://page15.auctions.yahoo.co.jp/jp/auction/t182400598&thumb=http://f0.auctions.c.yimg.jp/f11batchimg.auctions.yahoo.co.jp/users/1/7/5/9/anfield_2009-thumb-1292313655344608.jpg&title=Antares%20JZS147
One problem bro... you gotta ship your original part to Japan to get shortened and with out postages it cost 60K Yen = 550€. Not gonna happen, in fact I was thinking of shortening mine myself and then gonna get a cnc billet one made:biggthumpup:
View original BBCode
[QUOTE=samsa;369719]Solution to your problem.. :biggthumpup:

[url]http://www.importmonster.com.au/view?url=http://page15.auctions.yahoo.co.jp/jp/auction/t182400598&thumb=http://f0.auctions.c.yimg.jp/f11batchimg.auctions.yahoo.co.jp/users/1/7/5/9/anfield_2009-thumb-1292313655344608.jpg&title=Antares%20JZS147[/url][/QUOTE]

One problem bro... you gotta ship your original part to Japan to get shortened and with out postages it cost 60K Yen = 550€. Not gonna happen, in fact I was thinking of shortening mine myself and then gonna get a cnc billet one made:biggthumpup:
so much potential in this hurry up :D
View original BBCode
so much potential in this hurry up :D
Meinasitko sisälokarit jättää pois? :D
View original BBCode
Meinasitko sisälokarit jättää pois? :D
Juzzo;363012 wrote:Thanks Agi! Here's a better pics of the wheels that are now on:
i love the wheels! and the overall look of the GS! keep us posted!
View original BBCode
[QUOTE=Juzzo;363012]Thanks Agi! Here's a better pics of the wheels that are now on:
[IMG]http://i1200.photobucket.com/albums/bb327/Lord_Juzzo/sc5_wbc_bklip_01.jpg[/IMG][/QUOTE]

i love the wheels! and the overall look of the GS! keep us posted!
samsa;371188 wrote:Meinasitko sisälokarit jättää pois? :D
Probably yeah, gotta see how shitty the bay will look after a rainy drive =)
View original BBCode
[QUOTE=samsa;371188]Meinasitko sisälokarit jättää pois? :D[/QUOTE]
Probably yeah, gotta see how shitty the bay will look after a rainy drive =)
Juzzo;371606 wrote:Probably yeah, gotta see how shitty the bay will look after a rainy drive =)
VERY shitty. I've driven my opel 3 years without...
Dust, salt, and rocks in every hole =)
View original BBCode
[QUOTE=Juzzo;371606]Probably yeah, gotta see how shitty the bay will look after a rainy drive =)[/QUOTE]

VERY shitty.  I've driven my opel 3 years without...
Dust, salt, and rocks in every hole =)
View original BBCode
Started to box the UCA holes. Managed to do one side, metal work nearly done...

[IMG]http://i1200.photobucket.com/albums/bb327/Lord_Juzzo/HPIM4849.jpg[/IMG]

[IMG]http://i1200.photobucket.com/albums/bb327/Lord_Juzzo/HPIM4861.jpg[/IMG]

[IMG]http://i1200.photobucket.com/albums/bb327/Lord_Juzzo/HPIM4869.jpg[/IMG]

[IMG]http://i1200.photobucket.com/albums/bb327/Lord_Juzzo/HPIM4870.jpg[/IMG]

[IMG]http://i1200.photobucket.com/albums/bb327/Lord_Juzzo/HPIM4872.jpg[/IMG]

Been thinking if I should use any filler in this one? Or then I could go the easier route and just slap on some filler :shrug:
Got bored after testing a cheap ass spray gun. So I decided to fuck-around with my new phone... =)

View original BBCode
Got bored after testing a cheap ass spray gun. So I decided to fuck-around with my new phone... =)
[URL=http://s1200.photobucket.com/albums/bb327/Lord_Juzzo/?action=view¤t=10032011001.mp4][IMG]http://i1200.photobucket.com/albums/bb327/Lord_Juzzo/th_10032011001.jpg[/IMG][/URL]
Juzzo;371931 wrote:

Been thinking if I should use any filler in this one? Or then I could go the easier route and just slap on some filler :shrug:
Fuck filler, you have a welder, grinder and skills.
View original BBCode
[QUOTE=Juzzo;371931]

[IMG]http://i1200.photobucket.com/albums/bb327/Lord_Juzzo/HPIM4872.jpg[/IMG]

Been thinking if I should use any filler in this one? Or then I could go the easier route and just slap on some filler :shrug:[/QUOTE]

Fuck filler, you have a welder, grinder and skills.
View original BBCode
After all I pussed out and sprayed some filler. Then sand some more and checked the outcome with some black primer.

[IMG]http://i1200.photobucket.com/albums/bb327/Lord_Juzzo/HPIM4874.jpg[/IMG]

[IMG]http://i1200.photobucket.com/albums/bb327/Lord_Juzzo/HPIM4875.jpg[/IMG]

[IMG]http://i1200.photobucket.com/albums/bb327/Lord_Juzzo/HPIM4878.jpg[/IMG]

[IMG]http://i1200.photobucket.com/albums/bb327/Lord_Juzzo/HPIM4879.jpg[/IMG]

[IMG]http://i1200.photobucket.com/albums/bb327/Lord_Juzzo/HPIM4880.jpg[/IMG]

[IMG]http://i1200.photobucket.com/albums/bb327/Lord_Juzzo/HPIM4882.jpg[/IMG]

Then it was time to clean and sand rest of the bay, and I gotta say thats a pain in the ass =)

[IMG]http://i1200.photobucket.com/albums/bb327/Lord_Juzzo/HPIM4888.jpg[/IMG]

[IMG]http://i1200.photobucket.com/albums/bb327/Lord_Juzzo/HPIM4892.jpg[/IMG]
is this you?

[youtube]2bmqdnx5R1U[/youtube]

(only famous fin i know lol)
View original BBCode
is this you?
[youtube]2bmqdnx5R1U[/youtube]
(only famous fin i know lol)
View original BBCode
And today I managed to finish all that up, just in time 'cuz today I picked up my new spray gun. Also remembered to hammer the front inner wheel wells.

[IMG]http://i1200.photobucket.com/albums/bb327/Lord_Juzzo/HPIM4891.jpg[/IMG]

[IMG]http://i1200.photobucket.com/albums/bb327/Lord_Juzzo/HPIM4889.jpg[/IMG]

[IMG]http://i1200.photobucket.com/albums/bb327/Lord_Juzzo/HPIM4890.jpg[/IMG]

Then it was time to test out the new gun, so I painted the bay with the engine in it...

[IMG]http://i1200.photobucket.com/albums/bb327/Lord_Juzzo/HPIM4893.jpg[/IMG]

[IMG]http://i1200.photobucket.com/albums/bb327/Lord_Juzzo/HPIM4894.jpg[/IMG]

[IMG]http://i1200.photobucket.com/albums/bb327/Lord_Juzzo/HPIM4899.jpg[/IMG]

[IMG]http://i1200.photobucket.com/albums/bb327/Lord_Juzzo/HPIM4898.jpg[/IMG]

I know it isn't perfect, but at the moment I'm ok with it. After all I'm going to repaint it with a different colour next winter when the engine and tranny gets a makeover. This was just a quickie to get the car on the road this summer :shrug:
brainneeded;376902 wrote:is this you?
[youtube]2bmqdnx5R1U[/youtube]
(only famous fin i know lol)
Nah I'm not THAT much into rallying :smiley-rofl:
View original BBCode
[QUOTE=brainneeded;376902]is this you?

[youtube]2bmqdnx5R1U[/youtube]

(only famous fin i know lol)[/QUOTE]

Nah I'm not THAT much into rallying :smiley-rofl:
Build is looking really good. Paint looks pretty good IMO. Much props for taking on such a project. Cant wait for the finished product.
View original BBCode
Build is looking really good. Paint looks pretty good IMO. Much props for taking on such a project. Cant wait for the finished product.
Thanks Smitty, that means alot. Especially considering the level you're coming from :bowdown:
View original BBCode
Thanks Smitty, that means alot. Especially considering the level you're coming from :bowdown:
Damn I got keep up with the rest of the 3GS peeps... so minor update is in place:coolugh:
New wheels "should" arrive by the end of next week woot woot! And I've got Toyo Proxes waiting for 'em, size might be too large -> 255/30/21 but what you gonna do when NO ONE makes any smaller in 21"s... So before they arrive I should try to get the eng.bay sorted out. Did some minor colour scheme adjustments and maintance. Also in went the new Eagle 200Amp alternator =)


And finally I managed to sort out the steering knuckle dilemma: Had my local metal/cnc shop to take 38mm slice out of 'em, and they also strenghtened it around the cut point with ~1/8" steel plate. Something the jap. place doesn't do to their knucles...


Now I ONLY have to do rest of the wire harness cleaning/cutting/rewiring AND reassemble.
No biggie, right:pat:
View original BBCode
Damn I got keep up with the rest of the 3GS peeps... so minor update is in place:coolugh:

New wheels "should" arrive by the end of next week woot woot! And I've got Toyo Proxes waiting for 'em, size might be too large -> 255/30/21 but what you gonna do when NO ONE makes any smaller in 21"s... So before they arrive I should try to get the eng.bay sorted out. Did some minor colour scheme adjustments and maintance. Also in went the new Eagle 200Amp alternator =)

[IMG]http://i1200.photobucket.com/albums/bb327/Lord_Juzzo/HPIM4906.jpg[/IMG]

[IMG]http://i1200.photobucket.com/albums/bb327/Lord_Juzzo/HPIM4912.jpg[/IMG]

And finally I managed to sort out the steering knuckle dilemma: Had my local metal/cnc shop to take 38mm slice out of 'em, and they also strenghtened it around the cut point with ~1/8" steel plate. Something the jap. place doesn't do to their knucles...

[IMG]http://i1200.photobucket.com/albums/bb327/Lord_Juzzo/HPIM4901.jpg[/IMG]

[IMG]http://i1200.photobucket.com/albums/bb327/Lord_Juzzo/HPIM4914.jpg[/IMG]

[IMG]http://i1200.photobucket.com/albums/bb327/Lord_Juzzo/HPIM4915.jpg[/IMG]

[IMG]http://i1200.photobucket.com/albums/bb327/Lord_Juzzo/HPIM4919.jpg[/IMG]

[IMG]http://i1200.photobucket.com/albums/bb327/Lord_Juzzo/HPIM4920.jpg[/IMG]

Now I ONLY have to do rest of the wire harness cleaning/cutting/rewiring AND reassemble.
No biggie, right:pat:
Damn wheels gonna take a little while longer, expected date 27th :runcoold:
But at least some items have fast shipping, Fizz 12-pack of puddle lights arrived today. Only took a week from payment to finding them in my mail box. I think that's a record for me (USA -> Finland).

I'm starting to get anxious about the radius jobbie :innoutrofl2:
View original BBCode
Damn wheels gonna take a little while longer, expected date 27th :runcoold:
But at least some items have fast shipping, Fizz 12-pack of puddle lights arrived today. Only took a week from payment to finding them in my mail box. I think that's a record for me (USA -> Finland).
I'm starting to get anxious about the radius jobbie :innoutrofl2:
Mini update:
Longer wheel studs for the front are in, what a PITA... They were sold as replacement for Opel/Toyota, right bore but more teeth. Took me 3 hours to bang 'em in with a 10lbs hammer :pat:
 27:04:2011
 by
Lord_Juzzo, on Flickr
And yesterday the new rear wheels came in and got the Toyo's mounted on 'em. Got to finish the front and the I can do a test fit without spacers.
 28:04:2011
 by
Lord_Juzzo, on Flickr
 28:04:2011
 by
Lord_Juzzo, on Flickr
Also got some jdm cat-back to test out.
 26:04:2011
 by
Lord_Juzzo, on Flickr
View original BBCode
Mini update:

Longer wheel studs for the front are in, what a PITA... They were sold as replacement for Opel/Toyota, right bore but more teeth. Took me 3 hours to bang 'em in with a 10lbs hammer :pat:

[url=http://www.flickr.com/photos/juzzo_inc/5662111544/][img]http://farm6.static.flickr.com/5266/5662111544_bae64a4e3e_b.jpg[/img][/url]
[url=http://www.flickr.com/photos/juzzo_inc/5662111544/]27:04:2011[/url] by [url=http://www.flickr.com/people/juzzo_inc/]Lord_Juzzo[/url], on Flickr

And yesterday the new rear wheels came in and got the Toyo's mounted on 'em. Got to finish the front and the I can do a test fit without spacers.


[url=http://www.flickr.com/photos/juzzo_inc/5665409953/][img]http://farm6.static.flickr.com/5062/5665409953_09bba31e8a_b.jpg[/img][/url]
[url=http://www.flickr.com/photos/juzzo_inc/5665409953/]28:04:2011[/url] by [url=http://www.flickr.com/people/juzzo_inc/]Lord_Juzzo[/url], on Flickr

[url=http://www.flickr.com/photos/juzzo_inc/5665406471/][img]http://farm6.static.flickr.com/5309/5665406471_921ca2e25d_b.jpg[/img][/url]
[url=http://www.flickr.com/photos/juzzo_inc/5665406471/]28:04:2011[/url] by [url=http://www.flickr.com/people/juzzo_inc/]Lord_Juzzo[/url], on Flickr

Also got some jdm cat-back to test out.

[url=http://www.flickr.com/photos/juzzo_inc/5657210518/][img]http://farm6.static.flickr.com/5185/5657210518_1d8a86c06b_b.jpg[/img][/url]
[url=http://www.flickr.com/photos/juzzo_inc/5657210518/]26:04:2011[/url] by [url=http://www.flickr.com/people/juzzo_inc/]Lord_Juzzo[/url], on Flickr
i like where this is going
View original BBCode
i like where this is going
Those wheels look very very good. Not sure how much I'm digging the blue powdercoat but rock it. Looks like you are doing big work!
View original BBCode
Those wheels look very very good. Not sure how much I'm digging the blue powdercoat but rock it. Looks like you are doing big work!
View original BBCode
[QUOTE=Juzzo;371931]Started to box the UCA holes. Managed to do one side, metal work nearly done...

[IMG]http://i1200.photobucket.com/albums/bb327/Lord_Juzzo/HPIM4849.jpg[/IMG]

[IMG]http://i1200.photobucket.com/albums/bb327/Lord_Juzzo/HPIM4861.jpg[/IMG]

[IMG]http://i1200.photobucket.com/albums/bb327/Lord_Juzzo/HPIM4869.jpg[/IMG]

[IMG]http://i1200.photobucket.com/albums/bb327/Lord_Juzzo/HPIM4870.jpg[/IMG]

[IMG]http://i1200.photobucket.com/albums/bb327/Lord_Juzzo/HPIM4872.jpg[/IMG]

Been thinking if I should use any filler in this one? Or then I could go the easier route and just slap on some filler :shrug:[/QUOTE]

Good job with this solution
gh0st;384779 wrote:Those wheels look very very good. Not sure how much I'm digging the blue powdercoat but rock it. Looks like you are doing big work!
Me neither, but had to try to see it if works with the whole.
More progress... test fit. Remember I will be adding 20mm/front and 15mm/rear spacers, so fenders will need A LITTLE work =)
 29:04:2011
 by
Lord_Juzzo, on Flickr
 29:04:2011
 by
Lord_Juzzo, on Flickr
 29:04:2011
 by
Lord_Juzzo, on Flickr
 29:04:2011
 by
Lord_Juzzo, on Flickr
 29:04:2011
 by
Lord_Juzzo, on Flickr
View original BBCode
[QUOTE=gh0st;384779]Those wheels look very very good. Not sure how much I'm digging the blue powdercoat but rock it. Looks like you are doing big work![/QUOTE]
Me neither, but had to try to see it if works with the whole.

More progress... test fit. Remember I will be adding 20mm/front and 15mm/rear spacers, so fenders will need A LITTLE work  =)

[url=http://www.flickr.com/photos/juzzo_inc/5668465029/][img]http://farm6.static.flickr.com/5185/5668465029_125656657f_b.jpg[/img][/url]
[url=http://www.flickr.com/photos/juzzo_inc/5668465029/]29:04:2011[/url] by [url=http://www.flickr.com/people/juzzo_inc/]Lord_Juzzo[/url], on Flickr

[url=http://www.flickr.com/photos/juzzo_inc/5668849053/][img]http://farm6.static.flickr.com/5229/5668849053_785412ccfe_b.jpg[/img][/url]
[url=http://www.flickr.com/photos/juzzo_inc/5668849053/]29:04:2011[/url] by [url=http://www.flickr.com/people/juzzo_inc/]Lord_Juzzo[/url], on Flickr

[url=http://www.flickr.com/photos/juzzo_inc/5669675378/][img]http://farm6.static.flickr.com/5028/5669675378_edc0471c7e_b.jpg[/img][/url]
[url=http://www.flickr.com/photos/juzzo_inc/5669675378/]29:04:2011[/url] by [url=http://www.flickr.com/people/juzzo_inc/]Lord_Juzzo[/url], on Flickr

[url=http://www.flickr.com/photos/juzzo_inc/5669155203/][img]http://farm6.static.flickr.com/5149/5669155203_3a7e318a85_b.jpg[/img][/url]
[url=http://www.flickr.com/photos/juzzo_inc/5669155203/]29:04:2011[/url] by [url=http://www.flickr.com/people/juzzo_inc/]Lord_Juzzo[/url], on Flickr

[url=http://www.flickr.com/photos/juzzo_inc/5669704402/][img]http://farm6.static.flickr.com/5306/5669704402_d7097c480c_b.jpg[/img][/url]
[url=http://www.flickr.com/photos/juzzo_inc/5669704402/]29:04:2011[/url] by [url=http://www.flickr.com/people/juzzo_inc/]Lord_Juzzo[/url], on Flickr
ANOTHER EPIC 1ST GEN BUILD!! killer progress bro!! sorry about jocking your color combo didnt realize it until now!
are you planning to buy a BBK? if not LS brakes are easy!!

View original BBCode
ANOTHER EPIC 1ST GEN BUILD!! killer progress bro!! sorry about jocking your color combo didnt realize it until now!

are you planning to buy a BBK? if not LS brakes are easy!!

[IMG]http://farm6.static.flickr.com/5165/5314753712_86f5793496_z.jpg[/IMG]
CubanGS;384885 wrote:ANOTHER EPIC 1ST GEN BUILD!! killer progress bro!! sorry about jocking your color combo didnt realize it until now!
are you planning to buy a BBK? if not LS brakes are easy!!
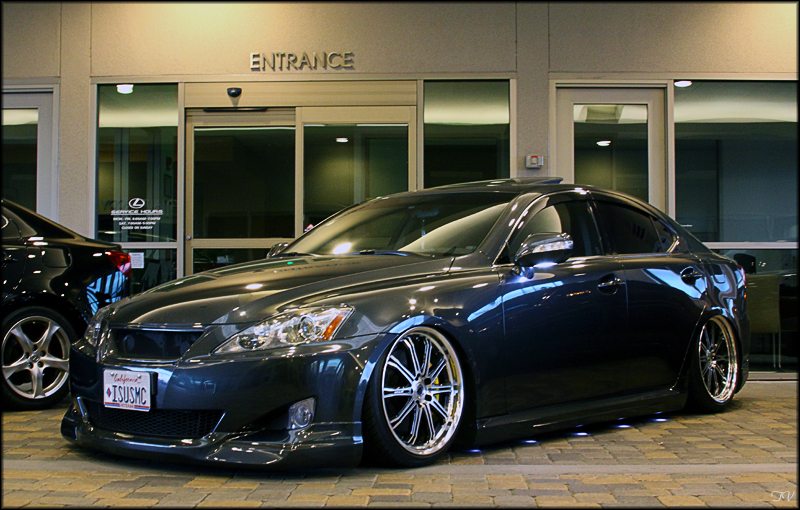
Not a problem bro, I decided over a year ago that this car will be re-sprayed with Smoky Granite Mica. I'm starting to gather funds for the 8-pot/380mm front and 6-pot/356mm rear BBK upgrade =)
I just love this color/car:
View original BBCode
[QUOTE=CubanGS;384885]ANOTHER EPIC 1ST GEN BUILD!! killer progress bro!! sorry about jocking your color combo didnt realize it until now!

are you planning to buy a BBK? if not LS brakes are easy!!

[IMG]http://farm6.static.flickr.com/5165/5314753712_86f5793496_z.jpg[/IMG][/QUOTE]
Not a problem bro, I decided over a year ago that this car will be re-sprayed with Smoky Granite Mica. I'm starting to gather funds for the 8-pot/380mm front and 6-pot/356mm rear BBK upgrade =)

I just love this color/car:
[IMG]http://farm3.static.flickr.com/2431/3753913931_a20249d675_o.jpg[/IMG]
your project is very sick !!!! :biggthumpup:

Are you going to take part in the American Car Show in Helsinki next year? I´ve been there this year, quite a lot of nice cars, but no VIP or VIP inspired cars.

btw, your interior seats look funny =)
View original BBCode
your project is very sick !!!! :biggthumpup:
Are you going to take part in the American Car Show in Helsinki next year? I´ve been there this year, quite a lot of nice cars, but no VIP or VIP inspired cars.
btw, your interior seats look funny =)
Yeah I was thinking that I could try to get it to some shows next year...
This being a DIY project and me spending 40k+ Euros on it, it might be appropriate to show it off a little and not just as my daily driver :shrug:
View original BBCode
Yeah I was thinking that I could try to get it to some shows next year...
This being a DIY project and me spending 40k+ Euros on it, it might be appropriate to show it off a little and not just as my daily driver :shrug:
Juzzo;385024 wrote:Not a problem bro, I decided over a year ago that this car will be re-sprayed with Smoky Granite Mica. I'm starting to gather funds for the 8-pot/380mm front and 6-pot/356mm rear BBK upgrade =)
I just love this color/car:
cant wait to see the progress!!
View original BBCode
[QUOTE=Juzzo;385024]Not a problem bro, I decided over a year ago that this car will be re-sprayed with Smoky Granite Mica. I'm starting to gather funds for the 8-pot/380mm front and 6-pot/356mm rear BBK upgrade =)

I just love this color/car:
[IMG]http://farm3.static.flickr.com/2431/3753913931_a20249d675_o.jpg[/IMG][/QUOTE]

cant wait to see the progress!!
Damn! This is a dope build! Good shit! :biggthumpup:
View original BBCode
Damn! This is a dope build! Good shit! :biggthumpup:
Electric work for the engine is pretty much done. Last night I made a resistor pack w/ harness for the low impedance injectors, and today I wired it in.
 05:05:2011
 by
Lord_Juzzo, on Flickr
 05:05:2011
 by
Lord_Juzzo, on Flickr
 05:05:2011
 by
Lord_Juzzo, on Flickr
At the mo I'm doing a shield-case for the resistor pack, second time should be the charm. This metal work is new to me, I'm more of a fiberglass guy =)
1st try:
 06:05:2011
 by
Lord_Juzzo, on Flickr
2nd try is looking much better:
 06:05:2011
 by
Lord_Juzzo, on Flickr
... coffee break over, gotta go weld that little fucker up =)
View original BBCode
Electric work for the engine is pretty much done. Last night I made a resistor pack w/ harness for the low impedance injectors, and today I wired it in.

[url=http://www.flickr.com/photos/juzzo_inc/5688677283/][img]http://farm6.static.flickr.com/5025/5688677283_4b02101382_b.jpg[/img][/url]
[url=http://www.flickr.com/photos/juzzo_inc/5688677283/]05:05:2011[/url] by [url=http://www.flickr.com/people/juzzo_inc/]Lord_Juzzo[/url], on Flickr

[url=http://www.flickr.com/photos/juzzo_inc/5690623097/][img]http://farm6.static.flickr.com/5024/5690623097_d09e32426e_b.jpg[/img][/url]
[url=http://www.flickr.com/photos/juzzo_inc/5690623097/]05:05:2011[/url] by [url=http://www.flickr.com/people/juzzo_inc/]Lord_Juzzo[/url], on Flickr

[url=http://www.flickr.com/photos/juzzo_inc/5689436244/][img]http://farm6.static.flickr.com/5229/5689436244_21fd6d6f91_b.jpg[/img][/url]
[url=http://www.flickr.com/photos/juzzo_inc/5689436244/]05:05:2011[/url] by [url=http://www.flickr.com/people/juzzo_inc/]Lord_Juzzo[/url], on Flickr

At the mo I'm doing a shield-case for the resistor pack, second time should be the charm. This metal work is new to me, I'm more of a fiberglass guy =)

1st try: [url=http://www.flickr.com/photos/juzzo_inc/5691126557/][img]http://farm6.static.flickr.com/5106/5691126557_9dbe564100_b.jpg[/img][/url]
[url=http://www.flickr.com/photos/juzzo_inc/5691126557/]06:05:2011[/url] by [url=http://www.flickr.com/people/juzzo_inc/]Lord_Juzzo[/url], on Flickr

2nd try is looking much better: [url=http://www.flickr.com/photos/juzzo_inc/5691099127/][img]http://farm6.static.flickr.com/5187/5691099127_0183873ac7_b.jpg[/img][/url]
[url=http://www.flickr.com/photos/juzzo_inc/5691099127/]06:05:2011[/url] by [url=http://www.flickr.com/people/juzzo_inc/]Lord_Juzzo[/url], on Flickr

... coffee break over, gotta go weld that little fucker up =)
looks like a lot of effort and hard work is going into this build,cant wait to see the outcome:biggthumpup:
View original BBCode
looks like a lot of effort and hard work is going into this build,cant wait to see the outcome:biggthumpup:
Done, mig run out of gas so it didn't work properly. Wha eva =)
I'm content with the "quality", don't really matter much 'coz it goes inside the dash.
 06:05:2011
 by
Lord_Juzzo, on Flickr
 06:05:2011
 by
Lord_Juzzo, on Flickr
View original BBCode
Done, mig run out of gas so it didn't work properly. Wha eva =)
I'm content with the "quality", don't really matter much 'coz it goes inside the dash.

[url=http://www.flickr.com/photos/juzzo_inc/5691814624/][img]http://farm6.static.flickr.com/5142/5691814624_43543d0c6d_b.jpg[/img][/url]
[url=http://www.flickr.com/photos/juzzo_inc/5691814624/]06:05:2011[/url] by [url=http://www.flickr.com/people/juzzo_inc/]Lord_Juzzo[/url], on Flickr

[url=http://www.flickr.com/photos/juzzo_inc/5691344107/][img]http://farm6.static.flickr.com/5264/5691344107_755a1830d8_b.jpg[/img][/url]
[url=http://www.flickr.com/photos/juzzo_inc/5691344107/]06:05:2011[/url] by [url=http://www.flickr.com/people/juzzo_inc/]Lord_Juzzo[/url], on Flickr
Nice build so far, keep the updates coming. Later.
View original BBCode
Nice build so far, keep the updates coming. Later.
Will do, but it's sooo hard to stop procrastinating :D
View original BBCode
Will do, but it's sooo hard to stop procrastinating :D
Wow... nice build man! I was looking for your thread, and then I searched and found it here.. very nice work. This should be moved out of the 101 sections!!! haha
View original BBCode
Wow... nice build man! I was looking for your thread, and then I searched and found it here.. very nice work. This should be moved out of the 101 sections!!! haha
jzz30tt;391353 wrote:Wow... nice build man! I was looking for your thread, and then I searched and found it here.. very nice work. This should be moved out of the 101 sections!!! haha
Much obliged bro!
Yeah I've been thinking the same thing, but I would need to come up with an adequate project title =)
View original BBCode
[QUOTE=jzz30tt;391353]Wow... nice build man! I was looking for your thread, and then I searched and found it here.. very nice work. This should be moved out of the 101 sections!!! haha[/QUOTE]
Much obliged bro!
Yeah I've been thinking the same thing, but I would need to come up with an adequate project title =)
Epic Aristo147 Build? :P

Good to see you on here too mate. Loving the work!
View original BBCode
Epic Aristo147 Build? :P
Good to see you on here too mate. Loving the work!
Question about the front suspension work...
1. Are you running RCA's down below?
2. With the custom-shortened steering knuckle, do you think you still need the box cutout out the top for the UCA balljoint?

I'm going to be going very low as well, and want to know what to expect I guess. RCA's fix the LCA angles and coilover length issue, but worried about mashing my UCA's into my wheelarches. Pretty sure cutting/bending holes for the UCA to go higher is illegal where I am, so shortened steering knuckle is perhaps the only way.
View original BBCode
Question about the front suspension work...
1. Are you running RCA's down below?
2. With the custom-shortened steering knuckle, do you think you still need the box cutout out the top for the UCA balljoint?
I'm going to be going very low as well, and want to know what to expect I guess. RCA's fix the LCA angles and coilover length issue, but worried about mashing my UCA's into my wheelarches. Pretty sure cutting/bending holes for the UCA to go higher is illegal where I am, so shortened steering knuckle is perhaps the only way.
rustyP;391554 wrote:Question about the front suspension work...
1. Are you running RCA's down below?
2. With the custom-shortened steering knuckle, do you think you still need the box cutout out the top for the UCA balljoint?
I'm going to be going very low as well, and want to know what to expect I guess. RCA's fix the LCA angles and coilover length issue, but worried about mashing my UCA's into my wheelarches. Pretty sure cutting/bending holes for the UCA to go higher is illegal where I am, so shortened steering knuckle is perhaps the only way.
Yo whaddup Rusty!
I don't have RCA's, and they would push the spindle/knuckle/UCA even higher so that's a no-go. I actually first did the shock tower box and then realized that it doesn't cut it with the 20"ers. With 19" fronts I was able to get my Garson f/bar about a 1 cm of the ground, and this was before I shortened my knuckles.
Best thing with the shortened knuckles is that I should be able to drive quite slammed, and the UCA's will still be in a ok'ish angle, which should improve handling...
Other easy fix for the UCA-bang is just to drill a 2" hole in the shock tower, if there becomes an issue after shortening. Oh BTW what wheels were you Rusty running with?
View original BBCode
[QUOTE=rustyP;391554]Question about the front suspension work...
1. Are you running RCA's down below?
2. With the custom-shortened steering knuckle, do you think you still need the box cutout out the top for the UCA balljoint?

I'm going to be going very low as well, and want to know what to expect I guess. RCA's fix the LCA angles and coilover length issue, but worried about mashing my UCA's into my wheelarches. Pretty sure cutting/bending holes for the UCA to go higher is illegal where I am, so shortened steering knuckle is perhaps the only way.[/QUOTE]

Yo whaddup Rusty!
I don't have RCA's, and they would push the spindle/knuckle/UCA even higher so that's a no-go. I actually first did the shock tower box and then realized that it doesn't cut it with the 20"ers. With 19" fronts I was able to get my Garson f/bar about a 1 cm of the ground, and this was before I shortened my knuckles.

Best thing with the shortened knuckles is that I should be able to drive quite slammed, and the UCA's will still be in a ok'ish angle, which should improve handling...

Other easy fix for the UCA-bang is just to drill a 2" hole in the shock tower, if there becomes an issue after shortening. Oh BTW what wheels were you Rusty running with?
Not true mate,
Given the same hub position relative to body (ie. same height), RCA's won't change your UCA position/angle at all.
If you think about that being fixed, all they do is "push your LCA's downwards" if you get my meaning. Usually this brings your airbags/LCA into better alignment = better handling, etc.
Also, you will need them regardless when you get BBK, as big calipers strike the tie rod end. So unless you wanna go messing with custom tierod attachment, best to just put the RCA's in now IMO then adjust the bags accordingly.

Anyway, atm, I have some old SSR Gartmaiers on, but they're only 18 and are sorta 'dailies'. Will be getting new, big 'show' rims later when everything else is ready.. long road.! Probably won't be as ballsy as yours.. I want around 19x9.5 front, 20x10.5/11 rear. And weaker offsets :P Mine will be +10-20 sorta range. Trying to get fender work done first, then will try n measure what will fit and adjust accordingly.

I understand you did the shock tower box first, and then found it insufficient later. I guess what I'm saying is.. if you just did the shortened knuckles, do you think you have enough room to not have UCA holes cut? As in, do you have enough room so your UCA's clear the stock body while 'fully slammed' ? Or do you think you require both shortened knuckles AND the holes..?
View original BBCode
Not true mate,
Given the same hub position relative to body (ie. same height), RCA's won't change your UCA position/angle at all.
If you think about that being fixed, all they do is "push your LCA's downwards" if you get my meaning. Usually this brings your airbags/LCA into better alignment = better handling, etc.
Also, you will need them regardless when you get BBK, as big calipers strike the tie rod end. So unless you wanna go messing with custom tierod attachment, best to just put the RCA's in now IMO then adjust the bags accordingly.
Anyway, atm, I have some old SSR Gartmaiers on, but they're only 18 and are sorta 'dailies'. Will be getting new, big 'show' rims later when everything else is ready.. long road.! Probably won't be as ballsy as yours.. I want around 19x9.5 front, 20x10.5/11 rear. And weaker offsets :P Mine will be +10-20 sorta range. Trying to get fender work done first, then will try n measure what will fit and adjust accordingly.
I understand you did the shock tower box first, and then found it insufficient later. I guess what I'm saying is.. if you just did the shortened knuckles, do you think you have enough room to not have UCA holes cut? As in, do you have enough room so your UCA's clear the stock body while 'fully slammed' ? Or do you think you require both shortened knuckles AND the holes..?
This is mos def. a DOPE build, i like ur vision so far, u do welding, fiberglass, gabricating and spraying, nuff respect to u bro :biggthumpup:
View original BBCode
This is mos def. a DOPE build, i like ur vision so far, u do welding, fiberglass, gabricating and spraying, nuff respect to u bro :biggthumpup:
cefiro;398240 wrote:This is mos def. a DOPE build, i like ur vision so far, u do welding, fiberglass, gabricating and spraying, nuff respect to u bro :biggthumpup:
Thanks bro!
I gotta admit that an all-on full build like this is hard work. Especially 'coz this is a diy-job and me not having any prior (before -08) experience in modding =)
But as they say it's not always the destination, but the journey that gets you there that counts.
And sorry no real updates so far 'coz I spent June on vacation and didn't even visit the garage:shrug:
But in the next few weeks I should put in some hard work...
View original BBCode
[QUOTE=cefiro;398240]This is mos def. a DOPE build, i like ur vision so far, u do welding, fiberglass, gabricating and spraying, nuff respect to u bro :biggthumpup:[/QUOTE]
Thanks bro!
I gotta admit that an all-on full build like this is hard work. Especially 'coz this is a diy-job and me not having any prior (before -08) experience in modding =)

But as they say it's not always the destination, but the journey that gets you there that counts.

And sorry no real updates so far 'coz I spent June on vacation and didn't even visit the garage:shrug:
But in the next few weeks I should put in some hard work...
Ok I passed the point of NO RETURN...


Just gotta see how this turns out =)
View original BBCode
Ok I passed the point of NO RETURN...

[IMG]http://i1200.photobucket.com/albums/bb327/Lord_Juzzo/HPIM4957.jpg[/IMG]

[IMG]http://i1200.photobucket.com/albums/bb327/Lord_Juzzo/HPIM4958.jpg[/IMG]

[IMG]http://i1200.photobucket.com/albums/bb327/Lord_Juzzo/HPIM4959.jpg[/IMG]

Just gotta see how this turns out =)
LOL point of no return! metal is metal if you take some off just add more!!

what are the plans with the cuts? you might need to add metal for widebody or you can just chop it off at the black line and radius and pull the fender like mine!

i think its the angle of the shot but the center of the curve on the black line is leaning towards the rear?
View original BBCode
LOL point of no return! metal is metal if you take some off just add more!!
what are the plans with the cuts? you might need to add metal for widebody or you can just chop it off at the black line and radius and pull the fender like mine!
i think its the angle of the shot but the center of the curve on the black line is leaning towards the rear?
Just saw all 4 pages of this build. Looking good man...makes me miss my 1st gen gs that was totalled.
View original BBCode
Just saw all 4 pages of this build. Looking good man...makes me miss my 1st gen gs that was totalled.
looking good bro
View original BBCode
looking good bro
CubanGS;399429 wrote:LOL point of no return! metal is metal if you take some off just add more!!
what are the plans with the cuts? you might need to add metal for widebody or you can just chop it off at the black line and radius and pull the fender like mine!
i think its the angle of the shot but the center of the curve on the black line is leaning towards the rear?
Don't really know at the moment what I'm doing with it, original plan was a 2" radius so I'm def. gonna cut more... Biggest problem desing-wise is how I'm going to keep the arch looking nice and subtle. If I go high in a large circular line I'm gonna need to modify my bumper&skirt and possibly the door.... hmmm need to let the ideas flow and just keep on doing, I'll get it right at some point =)
View original BBCode
[QUOTE=CubanGS;399429]LOL point of no return! metal is metal if you take some off just add more!!

what are the plans with the cuts? you might need to add metal for widebody or you can just chop it off at the black line and radius and pull the fender like mine!

i think its the angle of the shot but the center of the curve on the black line is leaning towards the rear?[/QUOTE]
Don't really know at the moment what I'm doing with it, original plan was a 2" radius so I'm def. gonna cut more... Biggest problem desing-wise is how I'm going to keep the arch looking nice and subtle. If I go high in a large circular line I'm gonna need to modify my bumper&skirt and possibly the door.... hmmm need to let the ideas flow and just keep on doing, I'll get it right at some point =)
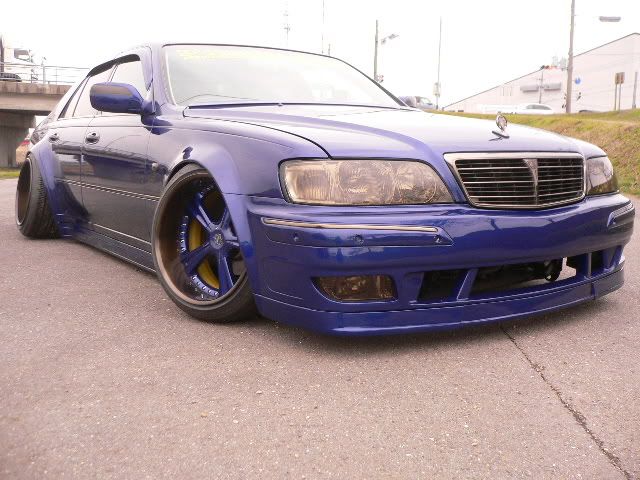
i know this is a bad angle but look for more pics of this car! if yo can pull of this widebody with the door it would be CRAZY!! or just cut at the black line like mine.

View original BBCode
i know this is a bad angle but look for more pics of this car! if yo can pull of this widebody with the door it would be CRAZY!! or just cut at the black line like mine.

[IMG]http://i242.photobucket.com/albums/ff65/o1o9o6o3impala/p1010881.jpg[/IMG]

[IMG]http://farm6.static.flickr.com/5259/5432513127_e8b03a5bda.jpg[/IMG]
Yeah Chris I'd love to do that, but I really don't know if I gotz tha skilz for tha shit:shrug:
... But opinions please! After this cut I'm questioning the radius line, 'coz it kinda bothers me that the side skirt and wheel arch "gap" changes like so:
 20:07:2011
 by
Lord_Juzzo, on Flickr
And I really don't know IF I should just make that "gap" more consistent in width...?
View original BBCode
Yeah Chris I'd love to do that, but I really don't know if I gotz tha skilz for tha shit:shrug:

... But opinions please! After this cut I'm questioning the radius line, 'coz it kinda bothers me that the side skirt and wheel arch "gap" changes like so:
[url=http://www.flickr.com/photos/juzzo_inc/5956609444/][img]http://farm7.static.flickr.com/6145/5956609444_2f73989c2f_b.jpg[/img][/url]
[url=http://www.flickr.com/photos/juzzo_inc/5956609444/]20:07:2011[/url] by [url=http://www.flickr.com/people/juzzo_inc/]Lord_Juzzo[/url], on Flickr

And I really don't know IF I should just make that "gap" more consistent in width...?
I think its a great starting point. The 1st gen has a weird arch already. If you make a normal one it makes everything look weird. Even on cubans car. I think the best way is to even it up by the door as it comes down to the side skirt. it wont give you that wheel hugging arch, but it will look more normal i think. They have oval arches.

But before you do anything.. let the other gurus chime in

ps, how did you measure the radius line? I did mine, and now its more off than ever haha havent cut it yet. but soon i will be.
View original BBCode
I think its a great starting point. The 1st gen has a weird arch already. If you make a normal one it makes everything look weird. Even on cubans car. I think the best way is to even it up by the door as it comes down to the side skirt. it wont give you that wheel hugging arch, but it will look more normal i think. They have oval arches.
But before you do anything.. let the other gurus chime in
ps, how did you measure the radius line? I did mine, and now its more off than ever haha havent cut it yet. but soon i will be.
i think its looks good! i would just trim the fender where the side skirt meets. its seems like the fender and side skirt dont match up. also try pulling the fender evenly now! it might fix the look of the cut.
View original BBCode
i think its looks good! i would just trim the fender where the side skirt meets. its seems like the fender and side skirt dont match up. also try pulling the fender evenly now! it might fix the look of the cut.
iono what advice to give you but this is gonna be sick! your intuition hasnt failed you thus far.
View original BBCode
iono what advice to give you but this is gonna be sick! your intuition hasnt failed you thus far.
View original BBCode
Okay some progress, but not enough. Both sides have been radiused, about 4cm (1,5").

[IMG]http://i1200.photobucket.com/albums/bb327/Lord_Juzzo/HPIM4959-1.jpg[/IMG]

[IMG]http://i1200.photobucket.com/albums/bb327/Lord_Juzzo/HPIM4958-1.jpg[/IMG]

[IMG]http://i1200.photobucket.com/albums/bb327/Lord_Juzzo/HPIM4960.jpg[/IMG]

[IMG]http://i1200.photobucket.com/albums/bb327/Lord_Juzzo/HPIM4957-1.jpg[/IMG]

After this the rear clearance was about 8cm from the back of the side skirt. Then it was time to use hammers and some 2" steel pipe to roll the fenders. Managed to get the car to a 6,5cm clearance. There still is about 3cm of tire exposed, so IF I can manage to get the tire to tuck then I would have around 3-3,5cm of clearance.... Front at the moment is about 3cm from the side skirts front portion and about a centimeter lower at the bumper.

[IMG]http://i1200.photobucket.com/albums/bb327/Lord_Juzzo/HPIM4965.jpg[/IMG]

[IMG]http://i1200.photobucket.com/albums/bb327/Lord_Juzzo/HPIM4966.jpg[/IMG]

[IMG]http://i1200.photobucket.com/albums/bb327/Lord_Juzzo/HPIM4968.jpg[/IMG]

[IMG]http://i1200.photobucket.com/albums/bb327/Lord_Juzzo/HPIM4963.jpg[/IMG]

[IMG]http://i1200.photobucket.com/albums/bb327/Lord_Juzzo/HPIM4964.jpg[/IMG]

But without a lot more camber or taking the flare to the door (=full widebody) this can't be achieved :pat:

This shit is really starting to piss me off a tad bit =)
build a new radius, take some very very small metal tubing or thick metal wire and clamp it at either end of the fender so its got a nice curve that is by the lip of the wheel, tack weld it in place. then, then you can and some metal strips that attach it to the quarter, and fiberglass the quarter to the now new radius arch. this way its still radius, but you achieve what you want
View original BBCode
build a new radius, take some very very small metal tubing or thick metal wire and clamp it at either end of the fender so its got a nice curve that is by the lip of the wheel, tack weld it in place. then, then you can and some metal strips that attach it to the quarter, and fiberglass the quarter to the now new radius arch. this way its still radius, but you achieve what you want
so what is the problem exactly... the poke or getting lower?
View original BBCode
so what is the problem exactly... the poke or getting lower?
Kouki Monster;401505 wrote:build a new radius, take some very very small metal tubing or thick metal wire and clamp it at either end of the fender so its got a nice curve that is by the lip of the wheel, tack weld it in place. then, then you can and some metal strips that attach it to the quarter, and fiberglass the quarter to the now new radius arch. this way its still radius, but you achieve what you want
That's a really good idea actually, but don't know if this is needed in my case.
OG;401546 wrote:so what is the problem exactly... the poke or getting lower?
It's getting lower. I've got too much tire(255/30) so I can't get the tire to tuck so i could get the wheel lip to kiss the fender. The bitch needs to get DOWN =)
And I wouldn't want to cut and widen the door, so I may have to resort to camber for starters to see if that would suffice...
View original BBCode
[QUOTE=Kouki Monster;401505]build a new radius, take some very very  small metal tubing or thick metal wire and clamp it at either end of the  fender so its got a nice curve that is by the lip of the wheel, tack  weld it in place. then, then you can and some metal strips that attach  it to the quarter, and fiberglass the quarter to the now new radius  arch. this way its still radius, but you achieve what you want[/QUOTE]
That's a really good idea actually, but don't know if this is needed in my case.

[QUOTE=OG;401546]so what is the problem exactly... the poke or getting lower?[/QUOTE]
It's getting lower. I've got too much tire(255/30) so I can't get the tire to tuck so i could get the wheel lip to kiss the fender. The bitch needs to get DOWN =)

And I wouldn't want to cut and widen the door, so I may have to resort to camber for starters to see if that would suffice...
So I've been thinking about this, and I may be making my own adjustable rear uca's. Just gotta source out the needed building materials. Any thoughts fellas?
View original BBCode
So I've been thinking about this, and I may be making my own adjustable rear uca's. Just gotta source out the needed building materials. Any thoughts fellas?
my thoughts are...WORK FASTER :biggthumpup:
View original BBCode
my thoughts are...WORK FASTER :biggthumpup:
I'd love to but I also gotta manage a bar to finance this build :shrug:
Also I made a find in Ebay:
http://www.ebay.co.uk/itm/93-97-TOYOTA-SUPRA-TCS-REAR-UPPER-CONTROL-CAMBER-ARMS-/280710844210?_trksid=p5197.m7&_trkparms=algo%3DLVI%26itu%3DUCI%26otn%3D5%26po%3DLVI%26ps%3D63%26clkid%3D1660394756788735650&_qi=RTM742988#ht_3414wt_932
With this price there's no point in making my own arms, especially 'coz the design of these arms will let me shorten them with out any gimmicks. These can only adjust +-2 deg. so I was thinking that I'd saw a 5-10 mm slice of the adjusting thread. That
should give me enough camber to make the tire to tuck =) *fingers crossed*
View original BBCode
I'd love to but I also gotta manage a bar to finance this build :shrug:

Also I made a find in Ebay: [url]http://www.ebay.co.uk/itm/93-97-TOYOTA-SUPRA-TCS-REAR-UPPER-CONTROL-CAMBER-ARMS-/280710844210?_trksid=p5197.m7&_trkparms=algo%3DLVI%26itu%3DUCI%26otn%3D5%26po%3DLVI%26ps%3D63%26clkid%3D1660394756788735650&_qi=RTM742988#ht_3414wt_932[/url]
With this price there's no point in making my own arms, especially 'coz the design of these arms will let me shorten them with out any gimmicks. These can only adjust +-2 deg. so I was thinking that I'd saw a 5-10 mm slice of the adjusting thread. That [I]should[/I] give me enough camber to make the tire to tuck =) *fingers crossed*
i think with a couple degrees of camber and a little lower you'll get inside the arches. no mods necessary.
View original BBCode
i think with a couple degrees of camber and a little lower you'll get inside the arches. no mods necessary.
OG;402067 wrote:i think with a couple degrees of camber and a little lower you'll get inside the arches. no mods necessary.
At the moment I can't go any lower 'coz a portion of the door arch is resting on the tire :pat:
So I'm kinda hoping that enough camber will sort this out and there wouldn't be anymore cutting... oh and the wheels are 21"x10,5" -7 so that makes fitting them a tad bit tougher, especially 'coz I want to be an inch of the ground :biggthumpup:
View original BBCode
[QUOTE=OG;402067]i think with a couple degrees of camber and a little lower you'll get inside the arches. no mods necessary.[/QUOTE]
At the moment I can't go any lower 'coz a portion of the door arch is resting on the tire :pat:
So I'm kinda hoping that enough camber will sort this out and there wouldn't be anymore cutting... oh and the wheels are 21"x10,5" -7 so that makes fitting them a tad bit tougher, especially 'coz I want to be an inch of the ground :biggthumpup:
Juzzo;402065 wrote:I'd love to but I also gotta manage a bar to finance this build :shrug:
Also I made a find in Ebay: http://www.ebay.co.uk/itm/93-97-TOYOTA-SUPRA-TCS-REAR-UPPER-CONTROL-CAMBER-ARMS-/280710844210?_trksid=p5197.m7&_trkparms=algo%3DLVI%26itu%3DUCI%26otn%3D5%26po%3DLVI%26ps%3D63%26clkid%3D1660394756788735650&_qi=RTM742988#ht_3414wt_932
With this price there's no point in making my own arms, especially 'coz the design of these arms will let me shorten them with out any gimmicks. These can only adjust +-2 deg. so I was thinking that I'd saw a 5-10 mm slice of the adjusting thread. That should give me enough camber to make the tire to tuck =) *fingers crossed*
did you order these already? did you look for reviews? i almost didnt buy the SPC FUCAs after some reviews i found online. and apparently they were right luckily i was able to make some modifications in order to make them work! ill be looking forward to a review! these might be next on my wishlist! the 326 power parts are a bit pricey :shrug:
View original BBCode
[QUOTE=Juzzo;402065]I'd love to but I also gotta manage a bar to finance this build :shrug:

Also I made a find in Ebay: [url]http://www.ebay.co.uk/itm/93-97-TOYOTA-SUPRA-TCS-REAR-UPPER-CONTROL-CAMBER-ARMS-/280710844210?_trksid=p5197.m7&_trkparms=algo%3DLVI%26itu%3DUCI%26otn%3D5%26po%3DLVI%26ps%3D63%26clkid%3D1660394756788735650&_qi=RTM742988#ht_3414wt_932[/url]
With this price there's no point in making my own arms, especially 'coz the design of these arms will let me shorten them with out any gimmicks. These can only adjust +-2 deg. so I was thinking that I'd saw a 5-10 mm slice of the adjusting thread. That [I]should[/I] give me enough camber to make the tire to tuck =) *fingers crossed*[/QUOTE]

did you order these already? did you look for reviews? i almost didnt buy the SPC FUCAs after some reviews i found online. and apparently they were right luckily i was able to make some modifications in order to make them work! ill be looking forward to a review! these might be next on my wishlist! the 326 power parts are a bit pricey :shrug:
CubanGS;402081 wrote:did you order these already? did you look for reviews? i almost didnt buy the SPC FUCAs after some reviews i found online. and apparently they were right luckily i was able to make some modifications in order to make them work! ill be looking forward to a review! these might be next on my wishlist! the 326 power parts are a bit pricey :shrug:
oooh i forgot!! have you already notched the mounting holes for the RUCAs? if not then do it immediately! im at -9 degrees in the rear from just doing that!!
View original BBCode
[QUOTE=CubanGS;402081]did you order these already? did you look for reviews? i almost didnt buy the SPC FUCAs after some reviews i found online. and apparently they were right luckily i was able to make some modifications in order to make them work! ill be looking forward to a review! these might be next on my wishlist! the 326 power parts are a bit pricey :shrug:[/QUOTE]

oooh i forgot!! have you already notched the mounting holes for the RUCAs? if not then do it immediately! im at -9 degrees in the rear from just doing that!!
Chris these rear arms are made by TCS, not SPC, and a hell of a lot cheaper so I don't really care how bad they are. I'll fab up my own billet ones if it comes to that. But just don't have the time for that at the mo, I really need to get the fitment done by last summer :biggthumpup:
----
Edit:
CubanGS;402082 wrote:oooh i forgot!! have you already notched the mounting holes for the RUCAs? if not then do it immediately! im at -9 degrees in the rear from just doing that!!
Notched the mounting holes, care to elaborate...? Customs arms and increased movement need more space or what...? Don't have yet but I could now go to the garage and do that =)
View original BBCode
Chris these rear arms are made by TCS, not SPC, and a hell of a lot cheaper so I don't really care how bad they are. I'll fab up my own billet ones if it comes to that. But just don't have the time for that at the mo, I really need to get the fitment done by last summer :biggthumpup:

----
Edit:

[QUOTE=CubanGS;402082]oooh i forgot!! have you already notched the  mounting holes for the RUCAs? if not then do it immediately! im at -9  degrees in the rear from just doing that!![/QUOTE]
Notched the mounting holes, care to elaborate...? Customs arms and increased movement need more space or what...? Don't have yet but I could now go to the garage and do that =)
Juzzo;402099 wrote:Chris these rear arms are made by TCS, not SPC, and a hell of a lot cheaper so I don't really care how bad they are. I'll fab up my own billet ones if it comes to that. But just don't have the time for that at the mo, I really need to get the fitment done by last summer :biggthumpup:
notch the holes where the RUCAs bolt up! im at -9 from that alone! all my rear suspension is STOCK! minus the coilovers ofcourse!
View original BBCode
[QUOTE=Juzzo;402099]Chris these rear arms are made by TCS, not SPC, and a hell of a lot cheaper so I don't really care how bad they are. I'll fab up my own billet ones if it comes to that. But just don't have the time for that at the mo, I really need to get the fitment done by last summer :biggthumpup:[/QUOTE]

notch the holes where the RUCAs bolt up! im at -9 from that alone! all my rear suspension is STOCK! minus the coilovers ofcourse!
i think basically change the O where the arm mounts to a (___) to angle in where it mounts
View original BBCode
i think basically change the O where the arm mounts to a (___) to angle in where it mounts
So you mean the "option 2" of this pic, right?

How much material did you Chris grind out, few mm's?
View original BBCode
So you mean the "option 2" of this pic, right?

[IMG]http://i1200.photobucket.com/albums/bb327/Lord_Juzzo/28072011284.jpg[/IMG]

How much material did you Chris grind out, few mm's?
I just read the build and I am digging it man. A lot to be learned here. I won't beat a dead horse with some of the other things that have been said:biggthumpup:
View original BBCode
I just read the build and I am digging it man. A lot to be learned here. I won't beat a dead horse with some of the other things that have been said:biggthumpup:
Option 2, i didnt do it myself Platinum did it. I could take the wheel off and try to take some pics when i get home!

I would be careful.not to widen the hole just make it where the arm slides further in!!! I have seen notching drill bits before online when i was thinking of doing it.myself! Do it right bro and take your time!
View original BBCode
Option 2, i didnt do it myself Platinum did it. I could take the wheel off and try to take some pics when i get home!
I would be careful.not to widen the hole just make it where the arm slides further in!!! I have seen notching drill bits before online when i was thinking of doing it.myself! Do it right bro and take your time!
Yeah this shits have to be done right if done at all, it ain't easy to undone this type of a mod if fucked up... :giggity:

But fuck me was the RUCA bolts seized as a mofo, only managed to disassemble one side tonight. Gotta do the other side tomorrow and then see how much grinding room I got down there. If it's too tight then I'll wait for the adjustable arms to arrive and go that route. I'm hoping they would ship them out tomorrow or at the latest on monday... So no matter what, within a week or so it's camber-time :biggthumpup:

I'm shooting for around 10-15 deg. of neg. camber on the rear so it still stays within the GS' lines. Just haven't figured what I'm going to do with the front camber, 'coz I can't make it match the rear. Dunno just gotta try to make it stay in an overall balance.
View original BBCode
Yeah this shits have to be done right if done at all, it ain't easy to undone this type of a mod if fucked up... :giggity:
But fuck me was the RUCA bolts seized as a mofo, only managed to disassemble one side tonight. Gotta do the other side tomorrow and then see how much grinding room I got down there. If it's too tight then I'll wait for the adjustable arms to arrive and go that route. I'm hoping they would ship them out tomorrow or at the latest on monday... So no matter what, within a week or so it's camber-time :biggthumpup:
I'm shooting for around 10-15 deg. of neg. camber on the rear so it still stays within the GS' lines. Just haven't figured what I'm going to do with the front camber, 'coz I can't make it match the rear. Dunno just gotta try to make it stay in an overall balance.
Juzzo;402218 wrote:Yeah this shits have to be done right if done at all, it ain't easy to undone this type of a mod if fucked up... :giggity:
But fuck me was the RUCA bolts seized as a mofo, only managed to disassemble one side tonight. Gotta do the other side tomorrow and then see how much grinding room I got down there. If it's too tight then I'll wait for the adjustable arms to arrive and go that route. I'm hoping they would ship them out tomorrow or at the latest on monday... So no matter what, within a week or so it's camber-time :biggthumpup:
I'm shooting for around 10-15 deg. of neg. camber on the rear so it still stays within the GS' lines. Just haven't figured what I'm going to do with the front camber, 'coz I can't make it match the rear. Dunno just gotta try to make it stay in an overall balance.
sounds like a plan!!!! BTW you cant match the front to the rear??
i had -7.5 front camber with the lower camber adjustment at 0. all you need are the STUDIO camber RCAs. only down side with the camber RCAs is that they push the top of the wheel out about 10% of the bottom and my fitment was already too aggressive for these. i will fit them with some more work! i want -10 all around :shrug:

View original BBCode
[QUOTE=Juzzo;402218]Yeah this shits have to be done right if done at all, it ain't easy to undone this type of a mod if fucked up... :giggity:

But fuck me was the RUCA bolts seized as a mofo, only managed to disassemble one side tonight. Gotta do the other side tomorrow and then see how much grinding room I got down there. If it's too tight then I'll wait for the adjustable arms to arrive and go that route. I'm hoping they would ship them out tomorrow or at the latest on monday... So no matter what, within a week or so it's camber-time :biggthumpup:

I'm shooting for around 10-15 deg. of neg. camber on the rear so it still stays within the GS' lines. Just haven't figured what I'm going to do with the front camber, 'coz I can't make it match the rear. Dunno just gotta try to make it stay in an overall balance.[/QUOTE]

sounds like a plan!!!! BTW you cant match the front to the rear??

i had -7.5 front camber with the lower camber adjustment at 0. all you need are the STUDIO camber RCAs. only down side with the camber RCAs is that they push the top of the wheel out about 10% of the bottom and my fitment was already too aggressive for these. i will fit them with some more work! i want -10 all around :shrug:

[IMG]http://farm6.static.flickr.com/5142/5791712946_aa18572fee_z.jpg[/IMG]
Project "Madara"
CubanGS;402242 wrote:sounds like a plan!!!! BTW you cant match the front to the rear??
Well not to a degree or two. I'm gonna put 20mm spacers in the front to clear my future 8 pot brakes, so that would make the front wheels poke 15mm's out the stock fenders when fully inflated. And I was planning on radiusing and slightly pulling the fronts so I can't add any crazy camber or those puppies would tuck. Can't have that =)
Oh and I re-christened my car to "Madara", when I first got it decided to call it the "Silver Fang". You know from the Ginga Nagareboshi Gin anime show, that shit's still my favorite after nearly twenty years. But this ain't gonna be nice, fluffy and silvery for long, so name change 'coz this bitch is gonna go semi-murder and rip some heads off =)
So if the Mighty Mods could change the Thread Title to
Project "Madara" and transfer it out of the 101 to the Lexus/Toyota section I would be very obliged. I just think it's time to take the training wheels of this puppy :wave:
View original BBCode
[QUOTE=CubanGS;402242]sounds like a plan!!!! BTW you cant match the front to the rear??

[/QUOTE]
Well not to a degree or two. I'm gonna put 20mm spacers in the front to clear my future 8 pot brakes, so that would make the front wheels poke 15mm's out the stock fenders when fully inflated. And I was planning on radiusing and slightly pulling the fronts so I can't add any crazy camber or those puppies would tuck. Can't have that =)

Oh and I re-christened my car to "Madara", when I first got it decided to call it the "Silver Fang". You know from the Ginga Nagareboshi Gin anime show, that shit's still my favorite after nearly twenty years.  But this ain't gonna be nice, fluffy and silvery for long, so name change 'coz this bitch is gonna go semi-murder and rip some heads off =)

So if the Mighty Mods could change the Thread Title to [U][B]Project "Madara"[/B][/U] and transfer it out of the 101 to the Lexus/Toyota section I would be very obliged. I just think it's time to take the training wheels of this puppy :wave:
just for you bro!! no homo! LOL


View original BBCode
just for you bro!! no homo! LOL

[IMG]http://i411.photobucket.com/albums/pp194/Cadi_luva/IMAG0053.jpg[/IMG]
[IMG]http://i411.photobucket.com/albums/pp194/Cadi_luva/IMAG0055.jpg[/IMG]
¡Muchas gracias hombre!

Although I'm not going to try this before I get my new adjustable UCA's in a few days. I see this as a last resort only...
View original BBCode
¡Muchas gracias hombre!
Although I'm not going to try this before I get my new adjustable UCA's in a few days. I see this as a last resort only...
no problem!!! im looking forward to the UCAs to so i can order some =)
View original BBCode
no problem!!! im looking forward to the UCAs to so i can order some =)
Dope build Juzzo, loving it... and the wheels are definitely pure sex man!!! GL on ur plans man!!!
View original BBCode
Dope build Juzzo, loving it... and the wheels are definitely pure sex man!!! GL on ur plans man!!!
Where the RUCAs at??? Lol
View original BBCode
Where the RUCAs at??? Lol
Sick sick ride

Mycket Sisu i den du. :)
View original BBCode
Sick sick ride
Mycket Sisu i den du. :)
CubanGS;404383 wrote:Where the RUCAs at??? Lol
Last update on USPS' tracking service was on the 6th and they were in New Jersey, so should be in Europe by now...
Chäfen;404385 wrote:Sick sick ride
Mycket Sisu i den du. :)
Tack ska du ha, snubbe! =)
Looking forward to seeing more of your Jag.
View original BBCode
[QUOTE=CubanGS;404383]Where the RUCAs at??? Lol[/QUOTE]
Last update on USPS' tracking service was on the 6th and they were in New Jersey, so should be in Europe by now...

[QUOTE=Chäfen;404385]Sick sick ride

Mycket Sisu i den du. :)[/QUOTE]
Tack ska du ha, snubbe! =)
Looking forward to seeing more of your Jag.
check out spc camber bolts. they have a template to elongate the hole and a larger cam on the eccentric bolt for more adjustement. there is also a recommended dremel attatchment for stretching the hole. not sure if there's a 1g ap (the 2g setup is not what you want) but a bolt is a bolt... kinda.
View original BBCode
check out spc camber bolts. they have a template to elongate the hole and a larger cam on the eccentric bolt for more adjustement. there is also a recommended dremel attatchment for stretching the hole. not sure if there's a 1g ap (the 2g setup is not what you want) but a bolt is a bolt... kinda.
Yeah I already went through SPC's site and I suspect they might work with a 1g. Although I rationalized that there shouldn't be any need for them in my case. I'm just waiting on the RUCA's to see if my plan works out. Measured that I'd need to pull the upper portion of the wheel about an inch inwards to clear the lowest part of the wheel/door well.
View original BBCode
Yeah I already went through SPC's site and I suspect they might work with a 1g. Although I rationalized that there shouldn't be any need for them in my case. I'm just waiting on the RUCA's to see if my plan works out. Measured that I'd need to pull the upper portion of the wheel about an inch inwards to clear the lowest part of the wheel/door well.
Hellz yeah the TCS' RUCAs and FK's hubcentric 20mm spacers are here, finally :runcoold:


View original BBCode
Hellz yeah the TCS' RUCAs and FK's hubcentric 20mm spacers are here, finally :runcoold:

[IMG]http://i1200.photobucket.com/albums/bb327/Lord_Juzzo/HPIM4973.jpg[/IMG]

[IMG]http://i1200.photobucket.com/albums/bb327/Lord_Juzzo/HPIM4974.jpg[/IMG]
isnt 20 mm kinda a lot??

I have adjustable lower arms and I went from 15mm to 3 mm spacers =) hope you wont make same mistake!
View original BBCode
isnt 20 mm kinda a lot??
I have adjustable lower arms and I went from 15mm to 3 mm spacers =) hope you wont make same mistake!
Don't worry bro! No need to put spacers at the back 'coz the rear wheels (21x10,5" -7) were already poking 2" and I calculated that my upcoming rear BBK should clear without spacers. They'll go front 'coz the 20x9,5" +7 was a bit (5mm) sunken when it cambered in and the 8-pot/380mm BBK needs a lot more space to clear. So have to space out the front :shrug:
View original BBCode
Don't worry bro! No need to put spacers at the back 'coz the rear wheels (21x10,5" -7) were already poking 2" and I calculated that my upcoming rear BBK should clear without spacers. They'll go front 'coz the 20x9,5" +7 was a bit (5mm) sunken when it cambered in and the 8-pot/380mm BBK needs a lot more space to clear. So have to space out the front :shrug:
congratulations on the parts!!!!now do work!!!!
View original BBCode
congratulations on the parts!!!!now do work!!!!
They are already installed but didn't remember to take pics before heading off to work. Tomorrow morning when I go back to the garage and drop the car from stands I'll take pics.
View original BBCode
They are already installed but didn't remember to take pics before heading off to work. Tomorrow morning when I go back to the garage and drop the car from stands I'll take pics.
Done and all rear adjustments maxed out... about -18 :smiley-rofl:


Gotta come back tomorrow and re-adjust a little bit to see how much clearance I really need. Now the rears are hella sunken =)
At least the ground clearance seems to be alright, about an inch.
View original BBCode
Done and all rear adjustments maxed out... about -18 :smiley-rofl:

 [IMG]http://i1200.photobucket.com/albums/bb327/Lord_Juzzo/HPIM4980.jpg[/IMG]

[IMG]http://i1200.photobucket.com/albums/bb327/Lord_Juzzo/HPIM4982.jpg[/IMG]

[IMG]http://i1200.photobucket.com/albums/bb327/Lord_Juzzo/HPIM4981.jpg[/IMG]

Gotta come back tomorrow and re-adjust a little bit to see how much clearance I really need. Now the rears are hella sunken =)
At least the ground clearance seems to be alright, about an inch.
beautiful wheels
View original BBCode
beautiful wheels
:eek2::eek2::eek2::eek2::eek2::drool::drool::drool::drool::drool::bowdown::bowdown::bowdown::bowdown::bowdown:

my RUCAs are already shipped!!!!!!!
View original BBCode
:eek2::eek2::eek2::eek2::eek2::drool::drool::drool::drool::drool::bowdown::bowdown::bowdown::bowdown::bowdown:
my RUCAs are already shipped!!!!!!!
-18 ?! :eek2::eek2::eek2:
when I was messing with  my camber and I put -15, it was a killer.
front camber is also gonna be done, right ??=)

one more thing, camber doesnt look too crazy in the garage, but when you do outside, its NUUUUUTTTTSSS !!!!!:thumbsup::thumbsup::thumbsup:
View original BBCode
-18 ?! :eek2::eek2::eek2:
when I was messing with my camber and I put -15, it was a killer.
front camber is also gonna be done, right ??=)
one more thing, camber doesnt look too crazy in the garage, but when you do outside, its NUUUUUTTTTSSS !!!!!:thumbsup::thumbsup::thumbsup:
:dance: on a whole new level!
View original BBCode
:dance: on a whole new level!
Thanks fellas =)
Before going to work stopped by the garage and toned down the camber a bit... about -13 in these pics. Starting to hit on point...


I'll try to go "tomorrow" before work and pull a couple degrees and maybe cut of the inner fender, or at least give it a good banging. Then it's time to start fine-tuning the wheel arch, I've got Tuesday and Wednesday off so I think I'll be living at the garage then... :inoutwavey:
View original BBCode
Thanks fellas =)

Before going to work stopped by the garage and toned down the camber a bit... about -13 in these pics. Starting to hit on point...

[IMG]http://i1200.photobucket.com/albums/bb327/Lord_Juzzo/HPIM4988.jpg[/IMG]

[IMG]http://i1200.photobucket.com/albums/bb327/Lord_Juzzo/HPIM4987.jpg[/IMG]

[IMG]http://i1200.photobucket.com/albums/bb327/Lord_Juzzo/HPIM4989.jpg[/IMG]

I'll try to go "tomorrow" before work and pull a couple degrees and maybe cut of the inner fender, or at least give it a good banging. Then it's time to start fine-tuning the wheel arch, I've got Tuesday and Wednesday off so I think I'll be living at the garage then... :inoutwavey:
Gotta love your wheel fitment, keep it up!

I joined the forum just to read up more about the VIP style.

Very nice.
View original BBCode
Gotta love your wheel fitment, keep it up!
I joined the forum just to read up more about the VIP style.
Very nice.
wait i just realized your on 19s!! what are you going to do about the side skirt moulding. i think you know exactly what im talking about! im on 18s and 255s and the only way i clear mine are with excessive toe in!

keep up the great progress!!
View original BBCode
wait i just realized your on 19s!! what are you going to do about the side skirt moulding. i think you know exactly what im talking about! im on 18s and 255s and the only way i clear mine are with excessive toe in!
keep up the great progress!!
CubanGS;405564 wrote:wait i just realized your on 19s!! what are you going to do about the side skirt moulding. i think you know exactly what im talking about! im on 18s and 255s and the only way i clear mine are with excessive toe in!
keep up the great progress!!
Dawg those 19" SC5's are just my burner wheels, My setup is F: 20x9,5" -13 (20mm spacer) and R: 21x10,5" -7 :turbonoes_3:
And I've been thinking about it, just haven't had any decent ideas. I cut a little bit out but that didn't help much...
View original BBCode
[QUOTE=CubanGS;405564]wait i just realized your on 19s!! what are you going to do about the side skirt moulding. i think you know exactly what im talking about! im on 18s and 255s and the only way i clear mine are with excessive toe in!

keep up the great progress!![/QUOTE]

Dawg those 19" SC5's are just my burner wheels, My setup is F: 20x9,5" -13 (20mm spacer) and R: 21x10,5" -7 :turbonoes_3:

And I've been thinking about it, just haven't had any decent ideas. I cut a little bit out but that didn't help much...
Juzzo;405571 wrote:Dawg those 19" SC5's are just my burner wheels, My setup is F: 20x9,5" -13 (20mm spacer) and R: 21x10,5" -7 :turbonoes_3:
And I've been thinking about it, just haven't had any decent ideas. I cut a little bit out but that didn't help much...
mine are chopped in half and dont even think about using any of the screws to hold them in those sliced my tires even after being shaved to almost nothing! the only way mine stay on is i took them off sanded them down by the inside and literally glued all the tabs on the front of the moulding with rubber cement. also the screw on the bottom is rubber cemented half way in. the theory is that whenever the wheel does reach the moulding (only in extreme situations) the moulding will flex with the wheel instead of being shoved out of the way. i havent had any issues ever since! but currently im running WAY smaller tires and am running alot more toe! hope that helps!!
i have to ask why 20s and not 18s?
View original BBCode
[QUOTE=Juzzo;405571]Dawg those 19" SC5's are just my burner wheels, My setup is F: 20x9,5" -13 (20mm spacer) and R: 21x10,5" -7 :turbonoes_3:

And I've been thinking about it, just haven't had any decent ideas. I cut a little bit out but that didn't help much...[/QUOTE]

mine are chopped in half and dont even think about using any of the screws to hold them in those sliced my tires even after being shaved to almost nothing! the only way mine stay on is i took them off sanded them down by the inside and literally glued all the tabs on the front of the moulding with rubber cement. also the screw on the bottom is rubber cemented half way in. the theory is that whenever the wheel does reach the moulding (only in extreme situations) the moulding will flex with the wheel instead of being shoved out of the way. i havent had any issues ever since! but currently im running WAY smaller tires and am running alot more toe! hope that helps!!

i have to ask why 20s and not 18s?
I had 18" Equips but after going on air sus. 2 years back I started feeling that 18's just didn't suit a big bodied kitted car like this. Wide 19's are perfect for a stock bodied GS in my mind...

I could've made it work fairly easily with the original staggered 19"/20" setup if I wouldn't have fucked up my wheel order, but then I just decided to order those 21" rears for just the hell of it... Gotta go the hard way to be unique you know? If this was easy, then everyone would be doing this =)
View original BBCode
I had 18" Equips but after going on air sus. 2 years back I started feeling that 18's just didn't suit a big bodied kitted car like this. Wide 19's are perfect for a stock bodied GS in my mind...
I could've made it work fairly easily with the original staggered 19"/20" setup if I wouldn't have fucked up my wheel order, but then I just decided to order those 21" rears for just the hell of it... Gotta go the hard way to be unique you know? If this was easy, then everyone would be doing this =)
Juzzo;405688 wrote:I had 18" Equips but after going on air sus. 2 years back I started feeling that 18's just didn't suit a big bodied kitted car like this. Wide 19's are perfect for a stock bodied GS in my mind...
I could've made it work fairly easily with the original staggered 19"/20" setup if I wouldn't have fucked up my wheel order, but then I just decided to order those 21" rears for just the hell of it... Gotta go the hard way to be unique you know? If this was easy, then everyone would be doing this =)
to each their own but very well said!! those guys in japan got it all wrong on 18s LOL JK :biggthumpup:
come to think of it ive owned the GS for exactly a year to this month! w00t
View original BBCode
[QUOTE=Juzzo;405688]I had 18" Equips but after going on air sus. 2 years back I started feeling that 18's just didn't suit a big bodied kitted car like this. Wide 19's are perfect for a stock bodied GS in my mind...

I could've made it work fairly easily with the original staggered 19"/20" setup if I wouldn't have fucked up my wheel order, but then I just decided to order those 21" rears for just the hell of it... Gotta go the hard way to be unique you know? If this was easy, then everyone would be doing this =)[/QUOTE]

to each their own but very well said!! those guys in japan got it all wrong on 18s LOL JK :biggthumpup:

come to think of it ive owned the GS for exactly a year to this month! w00t
Shiet only a year, last time I drove mine was in December 2009, and that was just a 8km drive to the garage with slicks and 4" of snow :sad:
I'm nearly starting to get anxious about getting to start this beast up maybe within this month, and maybe even taking it out on the streets before it starts snowing again :coolugh:
View original BBCode
Shiet only a year, last time I [U][I]drove[/I][/U] mine was in December 2009, and that was just a 8km drive to the garage with slicks and 4" of snow :sad:

I'm nearly starting to get anxious about getting to start this beast up maybe within this month, and maybe even taking it out on the streets before it starts snowing again  :coolugh:
Juzzo;405702 wrote:Shiet only a year, last time I drove mine was in December 2009, and that was just a 8km drive to the garage with slicks and 4" of snow :sad:
I'm nearly starting to get anxious about getting to start this beast up maybe within this month, and maybe even taking it out on the streets before it starts snowing again :coolugh:
dirve that bitch forward and backward inside the garage! LOL i just took my car out of the garage after a week, checking fluids and making sure its ready for the roadtrip tomorrow =)
View original BBCode
[QUOTE=Juzzo;405702]Shiet only a year, last time I [U][I]drove[/I][/U] mine was in December 2009, and that was just a 8km drive to the garage with slicks and 4" of snow :sad:

I'm nearly starting to get anxious about getting to start this beast up maybe within this month, and maybe even taking it out on the streets before it starts snowing again  :coolugh:[/QUOTE]

dirve that bitch forward and backward inside the garage! LOL i just took my car out of the garage after a week, checking fluids and making sure its ready for the roadtrip tomorrow =)
CubanGS;405707 wrote:dirve that bitch forward and backward inside the garage! LOL i just took my car out of the garage after a week, checking fluids and making sure its ready for the roadtrip tomorrow =)
Fo sho! Last summer I pushed it down the second story drive ramp and steered it as long as it had momentum. After had a buddy tow me to our other garage in the 3rd floor. What a blast LOL :innoutrofl2:
View original BBCode
[QUOTE=CubanGS;405707]dirve that bitch forward and backward inside the garage! LOL i just took my car out of the garage after a week, checking fluids and making sure its ready for the roadtrip tomorrow =)[/QUOTE]
Fo sho! Last summer I pushed it down the second story drive ramp and steered it as long as it had momentum. After had a buddy tow me to our other garage in the 3rd floor. What a blast LOL :innoutrofl2:
sick progress man, cant wait til its finished!
View original BBCode
sick progress man, cant wait til its finished!
Well me nether =)

Most of the stuff that's not done yet is pretty straight forward, but I gotta practice upholstering  more before I tackle the interior part of the build. And I also need to gather up the funds for the built auto ( BoostLogic or Titan ) and the front ( 8-pot/380mm ) and rear ( 6-pot/356mm ) BBK :signdammit:
View original BBCode
Well me nether =)
Most of the stuff that's not done yet is pretty straight forward, but I gotta practice upholstering more before I tackle the interior part of the build. And I also need to gather up the funds for the built auto ( BoostLogic or Titan ) and the front ( 8-pot/380mm ) and rear ( 6-pot/356mm ) BBK :signdammit:
got the package from TC Sportline today =X
View original BBCode
got the package from TC Sportline today =X
Front camber maxed out, not enough... So I'm gonna modify the lower arm mounting points =)

View original BBCode
Front camber maxed out, not enough... So I'm gonna modify the lower arm mounting points =)

[IMG]http://i1200.photobucket.com/albums/bb327/Lord_Juzzo/HPIM4996.jpg[/IMG]
Juzzo;406166 wrote:Front camber maxed out, not enough... So I'm gonna modify the lower arm mounting points =)
NICE! you can notch the lowers exactly the same way i suggested to do the RUCAs! remember you can also buy the STUDIO camber RCAs!
View original BBCode
[QUOTE=Juzzo;406166]Front camber maxed out, not enough... So I'm gonna modify the lower arm mounting points =)[/QUOTE]

NICE! you can notch the lowers exactly the same way i suggested to do the RUCAs! remember you can also buy the STUDIO camber RCAs!
Love the new sig Juzzo! now GET TO WORK!
View original BBCode
Love the new sig Juzzo! now GET TO WORK!
Dope!!
Is that a s13 with kouki s14 front I see?
View original BBCode
Dope!!
Is that a s13 with kouki s14 front I see?
clean that Shop Bro =)
View original BBCode
clean that Shop Bro =)
I'd say to modify them if u got the skillz... I obviously dont do most of the stuff on my cars but when I do, I'm very proud myself.... nd I save money, lol. :biggthumpup:
View original BBCode
I'd say to modify them if u got the skillz... I obviously dont do most of the stuff on my cars but when I do, I'm very proud myself.... nd I save money, lol. :biggthumpup:
Kouki Monster;406201 wrote:Dope!!
Is that a s13 with kouki s14 front I see?
Good eye Kouki, but it's actually my buddys mk3 Supra. Drift spec, 10" metal widebody, 2JZ swap, S14 front, JZA80 rear...
View original BBCode
[QUOTE=Kouki Monster;406201]Dope!!
Is that a s13 with kouki s14 front I see?[/QUOTE]
Good eye Kouki, but it's actually my buddys mk3 Supra. Drift spec, 10" metal widebody, 2JZ swap, S14 front, JZA80 rear...
wtf! hahaha i need to see now.
View original BBCode
wtf! hahaha i need to see now.
gettin it dialed in. :biggthumpup:
View original BBCode
gettin it dialed in. :biggthumpup:
Kouki Monster;406258 wrote:wtf! hahaha i need to see now.
Gotta try and remember to take some pics tomorrow.
Managed to get a few hours of hours work today and finished modding the FLCA mounting point. I only widened the eccentric hole about 10mm outwards, but that didn't actually do much. Added only a couple degrees, so the fronts should be around 6-7 degrees...


So only few options left to get the front camber match the rear, or at least close:
- SPC adjustable UCA's
- STUDIO camber RCA's
- Modified oem LCA's (which might bring me headache with the fitment problems)
These should be my current options at the mo, and I will take any thoughtful ideas into careful consideration =)
View original BBCode
[QUOTE=Kouki Monster;406258]wtf! hahaha i need to see now.[/QUOTE]
Gotta try and remember to take some pics tomorrow.

Managed to get a few hours of hours work today and finished modding the FLCA mounting point. I only widened the eccentric hole about 10mm outwards, but that didn't actually do much. Added only a couple degrees, so the fronts should be around 6-7 degrees...

[IMG]http://i1200.photobucket.com/albums/bb327/Lord_Juzzo/HPIM5006.jpg[/IMG]

[IMG]http://i1200.photobucket.com/albums/bb327/Lord_Juzzo/24082011300.jpg[/IMG]

So only few options left to get the front camber match the rear, or at least close:
   - SPC adjustable UCA's
   - STUDIO camber  RCA's
   - Modified oem LCA's (which might bring me headache with the fitment problems)

These should be my current options at the mo, and I will take any thoughtful ideas into careful consideration =)
i vote for the spc fuca since you need additional camber and you also need to pull the top of the wheel in. the other 2 methonds will push the bottom of the wheel out.
View original BBCode
i vote for the spc fuca since you need additional camber and you also need to pull the top of the wheel in. the other 2 methonds will push the bottom of the wheel out.
This is shaping to be one of the best builds on here this year. Very nice so far
View original BBCode
This is shaping to be one of the best builds on here this year. Very nice so far
Yeah that was the first thing in my mind as well, although I can always modify the front fenders in my liking... So now I'm just looking for the fastest, low-hassle and lowest cost option out them 3 :shrug:
I just
need to get that fitment right, and as fast as possible, to give me some more motivation to finish up the rest of the car... shits starting to get heavy lol =)
widebody_Q;407376 wrote:This is shaping to be one of the best builds on here this year. Very nice so far
Damn... thanks Agi.
Just trying to do my thing and hold up the game in the old continent.
View original BBCode
Yeah that was the first thing in my mind as well, although I can always modify the front fenders in my liking...  So now I'm just looking for the fastest, low-hassle and lowest cost option out them 3 :shrug:

I just [B][I]need[/I][/B] to get that fitment right, and as fast as possible, to give me some more motivation to finish up the rest of the car... shits starting to get heavy lol =)

[QUOTE=widebody_Q;407376]This is shaping to be one of the best builds on here this year.  Very nice so far[/QUOTE]
Damn... thanks Agi.
Just trying to do my thing and hold up the game in the old continent.
get the SPC FUCAs. FYI the FUCAs only give 1 degree of adjustment either way as per the instructions that came with the arms. i had the adjustment slot notched to the max!
View original BBCode
get the SPC FUCAs. FYI the FUCAs only give 1 degree of adjustment either way as per the instructions that came with the arms. i had the adjustment slot notched to the max!
CubanGS;407384 wrote:FYI the FUCAs only give 1 degree of adjustment either way as per the instructions that came with the arms.
that's not correct. i didn't read (or even see) any instructions but they are advertised as +/-1 caster and +/-2 camber. the size of the slot alone tells me there was more than a 2* range.
straight from spc:
http://www.youtube.com/watch?v=vQgranRrDEU
real world, on car application may be different though if you're going by measued specs. it makes sense thatt the upward angle of the upper control arm on a slammed car would alter the measurment.
View original BBCode
[QUOTE=CubanGS;407384]FYI the FUCAs only give 1 degree of adjustment either way as per the instructions that came with the arms. [/QUOTE]

that's not correct. i didn't read (or even see) any instructions but they are advertised as +/-1 caster and +/-2 camber. the size of the slot alone tells me there was more than a 2* range.

straight from spc:
[URL]http://www.youtube.com/watch?v=vQgranRrDEU[/URL]

real world, on car application may be different though if you're going by measued specs. it makes sense thatt the upward angle of the upper control arm on a slammed car would alter the measurment.
OG;407391 wrote:that's not correct. i didn't read (or even see) any instructions but they are advertised as +/-1 caster and +/-2 camber. the size of the slot alone tells me there was more than a 2* range.
straight from spc:
http://www.youtube.com/watch?v=vQgranRrDEU
real world, on car application may be different though if you're going by measued specs. it makes sense thatt the upward angle of the upper control arm on a slammed car would alter the measurment.
okay bro! here we fucken go again!!! trying reading this without thinking too hard!
my SPC FUCAs came with instructions that stated the arms only give 1 degree of adjustment and it was confirmed via my alignment the next day! everything isnt your way! if you got more camber out of your congratulations!! FML this muthafucker knows everything!!
again if this sounds harsh i apologize! i am tired!
View original BBCode
[QUOTE=OG;407391]that's not correct. i didn't read (or even see) any instructions but they are advertised as +/-1 caster and +/-2 camber. the size of the slot alone tells me there was more than a 2* range.

straight from spc:
[URL]http://www.youtube.com/watch?v=vQgranRrDEU[/URL]

real world, on car application may be different though if you're going by measued specs. it makes sense thatt the upward angle of the upper control arm on a slammed car would alter the measurment.[/QUOTE]

okay bro! here we fucken go again!!! trying reading this without thinking too hard!

my SPC FUCAs came with instructions that stated the arms only give 1 degree of adjustment and it was confirmed via my alignment the next day! everything isnt your way! if you got more camber out of your congratulations!! FML this muthafucker knows everything!!

again if this sounds harsh i apologize! i am tired!
^^^LMAO where's my popcorn :smiley-rofl:

But gotta say that's some odd shit though, but luckily there's enough metal to modify 'em. I think I'm just gonna order 'em and see if I can make them work.
View original BBCode
^^^LMAO where's my popcorn :smiley-rofl:
But gotta say that's some odd shit though, but luckily there's enough metal to modify 'em. I think I'm just gonna order 'em and see if I can make them work.
lmao Chris.

great job so far Juzzo, likin the build.
View original BBCode
lmao Chris.
great job so far Juzzo, likin the build.
http://www.spcalignment.net/instructions/72270-INS_WEB.pdf
the only thing mentioned is caster change. nowhere does it say anything about camber.
as for why you only saw 1* of change on an alignment; these parts are not designed for the geomtery that we run at these heights, they are designed for arms that are parallel to the ground. when you lower the car as much as we do the arms angle upwards (same reason the uca hits the body). an adjustment at this angle is not the same as it would be on a parallel plane. is it probable that the op will see the same end result? sure, but that will depend on his specific situation. the parts advertise/deliver 2* of adjustment on typical geometry and this would be obvious to anyone who knew what they were looking at with these in hand (+/- 1 would be something like a 10mm adjustment track).

picture these 2 lines, that are equal length, as your range of adjustment. as you can see the horizontal line extends significantly farther than the angled one. make sense?
View original BBCode
[URL]http://www.spcalignment.net/instructions/72270-INS_WEB.pdf[/URL]

the only thing mentioned is caster change. nowhere does it say anything about camber.

as for why you only saw 1* of change on an alignment; these parts are not designed for the geomtery that we run at these heights, they are designed for arms that are parallel to the ground. when you lower the car as much as we do the arms angle upwards (same reason the uca hits the body). an adjustment at this angle is not the same as it would be on a parallel plane. is it probable that the op will see the same end result? sure, but that will depend on his specific situation. the parts advertise/deliver 2* of adjustment on typical geometry and this would be obvious to anyone who knew what they were looking at with these in hand (+/- 1 would be something like a 10mm adjustment track).

[IMG]http://i214.photobucket.com/albums/cc188/BLACKonBLACK98/bf1fdb78.gif[/IMG]

picture these 2 lines, that are equal length, as your range of adjustment. as you can see the horizontal line extends significantly farther than the angled one. make sense?
this thread delivers on multiple fronts!!
View original BBCode
this thread delivers on multiple fronts!!
i know im wrong right now but im not even going to waste my time reading that fucken essay you just wrote! no offense to JUZZO for the drama in his thread someone please moderate this bullshit!

hey OG >>>> 619 341 8273!
View original BBCode
i know im wrong right now but im not even going to waste my time reading that fucken essay you just wrote! no offense to JUZZO for the drama in his thread someone please moderate this bullshit!
hey OG >>>> 619 341 8273!
281 330 8004 lulz
View original BBCode
281 330 8004 lulz
cheez80;407494 wrote:281 330 8004 lulz
is that his shit?
View original BBCode
[QUOTE=cheez80;407494]281 330 8004 lulz[/QUOTE]

is that his shit?
thats mike jones' number lol
View original BBCode
thats mike jones' number lol
jeebus;407499 wrote:thats mike jones' number lol
funny guy! charles i tried calling it! :smiley-rofl:
View original BBCode
[QUOTE=jeebus;407499]thats mike jones' number lol[/QUOTE]

funny guy! charles i tried calling it! :smiley-rofl:
:yahoo_101: :smiley-rofl:
brainneeded;407503 wrote:who?
Mike Jones!!!
lmao...
View original BBCode
:yahoo_101: :smiley-rofl:

[QUOTE=brainneeded;407503]who?[/QUOTE]

Mike Jones!!!

lmao...
CubanGS;407501 wrote:funny guy! charles i tried calling it! :smiley-rofl:
who?
View original BBCode
[QUOTE=CubanGS;407501]funny guy! charles i tried calling it! :smiley-rofl:[/QUOTE]
who?
:innoutrofl2::smiley-rofl:

HA-LARIOUS! And Chris said he called it LOL!
TOO FUNNY!
View original BBCode
:innoutrofl2::smiley-rofl:
HA-LARIOUS! And Chris said he called it LOL!
TOO FUNNY!
Just throwing my personal experience here Juzzo, and adding to what the boys are arguing about:

You need to pull the front uppers Inwards moreso than pulling the bottom Outwards. You're already having issues with sticking out a little too much at the top. Extending your LCAs in that innovative way (nice btw!) gives you camber but doesn't really change the "scrubbing line" at the top.
As such, pulling your F. Upper wishbone attachment inwards needs to be your primary goal.
I believe this is only really possible with modified UCA's, or you can try to modify the way the UCA mounts to the body and/or the upright.

Double check first you have room on your *tyre* for fitting a modified balljoint before you buy F.UCA's. Sometimes the new balljoints on adjustable UCA's are larger, and if you've already shortened the upright knuckle, you may run out of room and hit the actual tyre.
Also adding even normal RCA's (let alone the extra cambered RCA's that are mentioned?) will help bring the lower mounts back into line a bit and should give you a tad bit more camber.
Lets say you're currently on -7 or -8. You want around -10 or -12.. so 2-5 more degrees. I'm going to Guesstimate and say RCA's should give you ~1 degree, maybe 2 if they're angled RCA's. UCA's should give another 1-2 degrees depending on their construction, but if you want more you'll need to modify the mounts a touch (elongated bolt holes etc). So depends how much more camber you want.

My advice: If you're going to need to modify the structural elements Anyway, best off doing this FIRST before fitting F.UCA's or RCA's. Then figure out how best to optimize it from there. As OG has said, understanding what each part does is key. Then pick your part to match what you need. But at this stage it doesn't look like another 5* is going to be possible just by adding RCA's and (what are according to CubanGS) -1* UCA's.

Excuse the essay :)
Goodluck!
View original BBCode
Just throwing my personal experience here Juzzo, and adding to what the boys are arguing about:
You need to pull the front uppers Inwards moreso than pulling the bottom Outwards. You're already having issues with sticking out a little too much at the top. Extending your LCAs in that innovative way (nice btw!) gives you camber but doesn't really change the "scrubbing line" at the top.
As such, pulling your F. Upper wishbone attachment inwards needs to be your primary goal.
I believe this is only really possible with modified UCA's, or you can try to modify the way the UCA mounts to the body and/or the upright.
Double check first you have room on your *tyre* for fitting a modified balljoint before you buy F.UCA's. Sometimes the new balljoints on adjustable UCA's are larger, and if you've already shortened the upright knuckle, you may run out of room and hit the actual tyre.
Also adding even normal RCA's (let alone the extra cambered RCA's that are mentioned?) will help bring the lower mounts back into line a bit and should give you a tad bit more camber.
Lets say you're currently on -7 or -8. You want around -10 or -12.. so 2-5 more degrees. I'm going to Guesstimate and say RCA's should give you ~1 degree, maybe 2 if they're angled RCA's. UCA's should give another 1-2 degrees depending on their construction, but if you want more you'll need to modify the mounts a touch (elongated bolt holes etc). So depends how much more camber you want.
My advice: If you're going to need to modify the structural elements Anyway, best off doing this FIRST before fitting F.UCA's or RCA's. Then figure out how best to optimize it from there. As OG has said, understanding what each part does is key. Then pick your part to match what you need. But at this stage it doesn't look like another 5* is going to be possible just by adding RCA's and (what are according to CubanGS) -1* UCA's.
Excuse the essay :)
Goodluck!
rustyP;407523 wrote:Just throwing my personal experience here Juzzo, and adding to what the boys are arguing about:
You need to pull the front uppers Inwards moreso than pulling the bottom Outwards. You're already having issues with sticking out a little too much at the top. Extending your LCAs in that innovative way (nice btw!) gives you camber but doesn't really change the "scrubbing line" at the top.
As such, pulling your F. Upper wishbone attachment inwards needs to be your primary goal.
I believe this is only really possible with modified UCA's, or you can try to modify the way the UCA mounts to the body and/or the upright.
Double check first you have room on your *tyre* for fitting a modified balljoint before you buy F.UCA's. Sometimes the new balljoints on adjustable UCA's are larger, and if you've already shortened the upright knuckle, you may run out of room and hit the actual tyre.
Also adding even normal RCA's (let alone the extra cambered RCA's that are mentioned?) will help bring the lower mounts back into line a bit and should give you a tad bit more camber.
Lets say you're currently on -7 or -8. You want around -10 or -12.. so 2-5 more degrees. I'm going to Guesstimate and say RCA's should give you ~1 degree, maybe 2 if they're angled RCA's. UCA's should give another 1-2 degrees depending on their construction, but if you want more you'll need to modify the mounts a touch (elongated bolt holes etc). So depends how much more camber you want.
My advice: If you're going to need to modify the structural elements Anyway, best off doing this FIRST before fitting F.UCA's or RCA's. Then figure out how best to optimize it from there. As OG has said, understanding what each part does is key. Then pick your part to match what you need. But at this stage it doesn't look like another 5* is going to be possible just by adding RCA's and (what are according to CubanGS) -1* UCA's.
Excuse the essay :)
Goodluck!
wow this guy is right on the money!! everything he said is FACT. the SPC UCAs will give clearance issues at the top of the strut tower and the balljoint might in fact hit your tire and wheel depending on your wheels specs! we had an issue when chopping the knuckles for this very reason. the balljoint currently sits directly over the rim lip! if my wheels had more positive offset or if they were wider i would be rubbing balljoint and tire. i will try to look for a pic!
i wish i could elaborate like RUSTY but i cant :sad:
View original BBCode
[QUOTE=rustyP;407523]Just throwing my personal experience here Juzzo, and adding to what the boys are arguing about:

You need to pull the front uppers Inwards moreso than pulling the bottom Outwards. You're already having issues with sticking out a little too much at the top. Extending your LCAs in that innovative way (nice btw!) gives you camber but doesn't really change the "scrubbing line" at the top.
As such, pulling your F. Upper wishbone attachment inwards needs to be your primary goal.
I believe this is only really possible with modified UCA's, or you can try to modify the way the UCA mounts to the body and/or the upright.

Double check first you have room on your *tyre* for fitting a modified balljoint before you buy F.UCA's. Sometimes the new balljoints on adjustable UCA's are larger, and if you've already shortened the upright knuckle, you may run out of room and hit the actual tyre.
Also adding even normal RCA's (let alone the extra cambered RCA's that are mentioned?) will help bring the lower mounts back into line a bit and should give you a tad bit more camber.
Lets say you're currently on -7 or -8. You want around -10 or -12.. so 2-5 more degrees. I'm going to Guesstimate and say RCA's should give you ~1 degree, maybe 2 if they're angled RCA's. UCA's should give another 1-2 degrees depending on their construction, but if you want more you'll need to modify the mounts a touch (elongated bolt holes etc). So depends how much more camber you want.

My advice: If you're going to need to modify the structural elements Anyway, best off doing this FIRST before fitting F.UCA's or RCA's. Then figure out how best to optimize it from there. As OG has said, understanding what each part does is key. Then pick your part to match what you need. But at this stage it doesn't look like another 5* is going to be possible just by adding RCA's and (what are according to CubanGS) -1* UCA's.

Excuse the essay :)
Goodluck![/QUOTE]

wow this guy is right on the money!! everything he said is FACT. the SPC UCAs will give clearance issues at the top of the strut tower and the balljoint might in fact hit your tire and wheel depending on your wheels specs! we had an issue when chopping the knuckles for this very reason. the balljoint currently sits directly over the rim lip! if my wheels had more positive offset or if they were wider i would be rubbing balljoint and tire. i will try to look for a pic!

i wish i could elaborate like RUSTY but i cant :sad:
It's good to stimulate some healthy geometry discussion =)

Yeah it's vital knowing what different changes in suspension components does, as everything affects everything but in different degree... that make any sense haha.

And as I stated above, I really don't care about the fender/rim fitment cause I'm going to modify the fenders in the end. Of course at this point I'm going to start adding more neg. camber from the upper susp. components, cause I'm maxxed out in the bottom. Only changes that could be made to lower side would be adjustable lower arms and camber rca's, but I'm not going to go that route yet. So I'll order the SPC's arms and see if I can modify them a little to make to my goal: around -10* front camber. Should be achievable by my logic:shrug:

Oh and I just measured my ball joint/wheel clearance and it was about 40mm so going by the product pics I suspect there shouldn't be any clearance problems. They look to be about 2cm further than these BluePrint ones I have under now. Without the 20mm spacer I wouldn't even be thinking getting these, but luckily I need BBK clearance as well =)
View original BBCode
It's good to stimulate some healthy geometry discussion =)
Yeah it's vital knowing what different changes in suspension components does, as everything affects everything but in different degree... that make any sense haha.
And as I stated above, I really don't care about the fender/rim fitment cause I'm going to modify the fenders in the end. Of course at this point I'm going to start adding more neg. camber from the upper susp. components, cause I'm maxxed out in the bottom. Only changes that could be made to lower side would be adjustable lower arms and camber rca's, but I'm not going to go that route yet. So I'll order the SPC's arms and see if I can modify them a little to make to my goal: around -10* front camber. Should be achievable by my logic:shrug:
Oh and I just measured my ball joint/wheel clearance and it was about 40mm so going by the product pics I suspect there shouldn't be any clearance problems. They look to be about 2cm further than these BluePrint ones I have under now. Without the 20mm spacer I wouldn't even be thinking getting these, but luckily I need BBK clearance as well =)
spoke to chris on the phone and got it worked out. i left the important information just in case it's of use to anyone. carry on with the build.
View original BBCode
spoke to chris on the phone and got it worked out. i left the important information just in case it's of use to anyone. carry on with the build.
OG;407603 wrote:spoke to chris on the phone and got it worked out. i left the important information just in case it's of use to anyone. carry on with the build.
glad you guys could work it out :D
View original BBCode
[QUOTE=OG;407603]spoke to chris on the phone and got it worked out. i left the important information just in case it's of use to anyone. carry on with the build.[/QUOTE]

glad you guys could work it out :D
Love this build & no build is complete without a little drama, lol... :biggthumpup:
View original BBCode
Love this build & no build is complete without a little drama, lol... :biggthumpup:
867-5309
View original BBCode
867-5309
we need an area code bro.

so i can whisper sweet nothings in your ear while you're sitting there like who the fuck is this? :innoutrofl2:
View original BBCode
we need an area code bro.
so i can whisper sweet nothings in your ear while you're sitting there like who the fuck is this? :innoutrofl2:
:pat: "kids" youtube the number. lol
View original BBCode
:pat: "kids" youtube the number. lol
i wasn't even born yet. lol

i still want to whisper sweet nothings into your ear. :giggity:
View original BBCode
i wasn't even born yet. lol
i still want to whisper sweet nothings into your ear. :giggity:
brainneeded;407671 wrote:i still want to whisper sweet nothings into your ear. :giggity:
get in line.:innoutrofl2:
On to the build. I am curious as how this would effect the rear half shafts doing this. Would they bind up if you brought the lower control arm as well as a upper control arm in. I know if you push the wheel out it will stretch out the axle. I guess I am answering my own question.. but just curious if any have ran into that problem
View original BBCode
[QUOTE=brainneeded;407671]i still want to whisper sweet nothings into your ear. :giggity:[/QUOTE]

get in line.:innoutrofl2:

On to the build. I am curious as how this would effect the rear half shafts doing this. Would they bind up if you brought the lower control arm as well as a upper control arm in. I know if you push the wheel out it will stretch out the axle. I guess I am answering my own question.. but just curious if any have ran into that problem
There is a fair bit of flex in the stock halfshafts..
But you're entirely right there should be a limit somewhere at which its pushing against itself too much and you'll ruin your CV's.

Guess we'll wait and see! :D
View original BBCode
There is a fair bit of flex in the stock halfshafts..
But you're entirely right there should be a limit somewhere at which its pushing against itself too much and you'll ruin your CV's.
Guess we'll wait and see! :D
Kouki Monster;407672 wrote:get in line.:innoutrofl2:
On to the build. I am curious as how this would effect the rear half shafts doing this. Would they bind up if you brought the lower control arm as well as a upper control arm in. I know if you push the wheel out it will stretch out the axle. I guess I am answering my own question.. but just curious if any have ran into that problem
Hmmm yeah of course the parts would meet it's mechanical limits at one point... but why would you want to bring both in?
I couldn't think of a any worse way to try to fit poking wheels =)
Are you Kouki planning to do
that, or were you just letting your ideas flow?
View original BBCode
[QUOTE=Kouki Monster;407672]get in line.:innoutrofl2:

On to the build. I am curious as how this would effect the rear half shafts doing this. Would they bind up if you brought the lower control arm as well as a upper control arm in. I know if you push the wheel out it will stretch out the axle. I guess I am answering my own question.. but just curious if any have ran into that problem[/QUOTE]
Hmmm yeah of course the parts would meet it's mechanical limits at one point... but why would you want to bring both in?
I couldn't think of a any worse way to try to fit poking wheels =)

Are you Kouki planning to do[I] that[/I], or were you just letting your ideas flow?
Kouki Monster;407664 wrote:867-5309
lol you old as me Kouki!? :giggity:
View original BBCode
[QUOTE=Kouki Monster;407664]867-5309[/QUOTE]


lol you old as me Kouki!? :giggity:
Q45er;407703 wrote:lol you old as me Kouki!? :giggity:
Yes, possibly. haha
And i am letting ideas flow cause I am curious. And yes I need to shorten a few things to make things fit. I am more about that then just cambering it til it fits. Which is fine i like it, but just trying to change the game.. or something:shrug:
View original BBCode
[QUOTE=Q45er;407703]lol you old as me Kouki!? :giggity:[/QUOTE]

Yes, possibly. haha

And i am letting ideas flow cause I am curious. And yes I need to shorten a few things to make things fit. I am more about that then just cambering it til it fits. Which is fine i like it, but just trying to change the game.. or something:shrug:
View original BBCode
Woot woot! Finally the beast rocks =)

[url=http://www.flickr.com/photos/juzzo_inc/6241663509/#secretc0e82a5121]http://www.flickr.com/photos/juzzo_inc/6241663509/#secretc0e82a5121[/url]
It's blue!!! That's tight
View original BBCode
It's blue!!! That's tight
congrats on the start up!!!!!
View original BBCode
congrats on the start up!!!!!
Congrats!!! Always a nice feeling!
View original BBCode
Congrats!!! Always a nice feeling!
Those pipes <3
View original BBCode
Those pipes <3
the build thread is awesomme
View original BBCode
the build thread is awesomme
Thanks for the compliments fellas!
A little update as of late:
So it took a month to find a dealer willing to sell and ship me the SPC's adjustable UCAs and another month to get the arms because I also ordered poly sway bar bushes that got lost in B2B transit before UltraRev could ship me the whole batch :pat:
So now the arms have been notched about 20mm, which actually gave me an extra 15mm of adjustability. Now the front camber is around 8-9 degrees, thats kinda ok with how my rear is at the mo, around 10 deg. =)


Adding camber up front also brought up a new problem: My steering arm knuckles hit the bag and it's lower bracket. This didn't come to my mind earlier because when they where shortened I grinded a couple mm's from the backside. Today I did one side, and gonna do the other one tomorrow. It's almost scary taking of SO MUCH of structural material off... measured the one that now clears the bag and the bracket when aired-up/-down and turning. Modified old ones were 24mm thick at the upper portion and 28mm at the lower. Now it's only 16mm upper and 18mm lower. So that ish is drastically weaker than what it should. Hope it won't give me any problems ahead the road. Only good thing is that both "sides" of the knuckles have been re-enforced with a 5mm steel plate. My buddy told me that I should have at least 20mm thick knuckles, but what the hell we'll see if they'll snap :smiley-rofl:
And sorry no pics yet, I f'ed up my mobile photobucket upload, and the pix are in 100x100 resolution, not good. So I'll upload 'em again tomorrow when I get to the garage :pat:
View original BBCode
Thanks for the compliments fellas!

A little update as of late:
So it took a month to find a dealer willing to sell and ship me the SPC's adjustable UCAs and another month to get the arms because I also ordered poly sway bar bushes that got lost in B2B transit before UltraRev could ship me the whole batch :pat:

So now the arms have been notched about 20mm, which actually gave me an extra 15mm of adjustability. Now the front camber is around 8-9 degrees, thats kinda ok with how my rear is at the mo, around 10 deg. =)

[IMG]http://i1200.photobucket.com/albums/bb327/Lord_Juzzo/20111105309.jpg[/IMG]

[IMG]http://i1200.photobucket.com/albums/bb327/Lord_Juzzo/20111106320-1.jpg[/IMG]

[IMG]http://i1200.photobucket.com/albums/bb327/Lord_Juzzo/20111106311.jpg[/IMG]

[IMG]http://i1200.photobucket.com/albums/bb327/Lord_Juzzo/20111106312.jpg[/IMG]

[IMG]http://i1200.photobucket.com/albums/bb327/Lord_Juzzo/20111106313.jpg[/IMG]

[IMG]http://i1200.photobucket.com/albums/bb327/Lord_Juzzo/20111106315.jpg[/IMG]

[IMG]http://i1200.photobucket.com/albums/bb327/Lord_Juzzo/20111106317.jpg[/IMG]

Adding camber up front also brought up a new problem: My steering arm knuckles hit the bag and it's lower bracket. This didn't come to my mind earlier because when they where shortened I grinded a couple mm's from the backside. Today I did one side, and gonna do the other one tomorrow. It's almost scary taking of SO MUCH of structural material off... measured the one that now clears the bag and the bracket when aired-up/-down and turning. Modified old ones were 24mm thick at the upper portion and 28mm at the lower. Now it's only 16mm upper and 18mm lower. So that ish is drastically weaker than what it should. Hope it won't give me any problems ahead the road. Only good thing is that both "sides" of the knuckles have been re-enforced with a 5mm steel plate. My buddy told me that I should have at least 20mm thick knuckles, but what the hell we'll see if they'll snap :smiley-rofl:

And sorry no pics yet, I f'ed up my mobile photobucket upload, and the pix are in 100x100 resolution, not good. So I'll upload 'em again tomorrow when I get to the garage :pat:
nice on gettin work in.

I would like to see the mods of where your area of concern is on the structure. Maybe I/we can give some pointers on beefing it up a bit,
View original BBCode
nice on gettin work in.
I would like to see the mods of where your area of concern is on the structure. Maybe I/we can give some pointers on beefing it up a bit,
^^^Updated those fitment pics, and here is the side by side comparison of the knuckles and clearance:


Did the other one today, just gotta throw em back in tomorrow so I can drop the car and see how it really looks =)
View original BBCode
^^^Updated those fitment pics, and here is the side by side comparison of the knuckles and clearance:

[IMG]http://i1200.photobucket.com/albums/bb327/Lord_Juzzo/20111107325.jpg[/IMG]

[IMG]http://i1200.photobucket.com/albums/bb327/Lord_Juzzo/20111106322.jpg[/IMG]

Did the other one today, just gotta throw em back in tomorrow so I can drop the car and see how it really looks =)
NICE!!!!! cant wait to see it!!!!
View original BBCode
NICE!!!!! cant wait to see it!!!!
Oh wow yeah that is quiet the differnce. I would a slight gusset on the front side of the arm. Or go coilovers and cup kit front lol
View original BBCode
Oh wow yeah that is quiet the differnce. I would a slight gusset on the front side of the arm. Or go coilovers and cup kit front lol
Kouki Monster;421318 wrote: I would a slight gusset on the front side of the arm.
Yeah I was thinking that as well, at least then it shouldn't snap at the weld point... But then again can't have anything visible done to these arms because of the annual inspections, so maybe I'll just weld a 1/8" plate on the front and clean it up and paint again :shrug:
View original BBCode
[QUOTE=Kouki Monster;421318] I would a slight gusset on the front side of the arm.[/QUOTE]
Yeah I was thinking that as well, at least then it shouldn't snap at the weld point... But then again can't have anything visible done to these arms because of the annual inspections, so maybe I'll just weld a 1/8" plate on the front and clean it up and paint again :shrug:
Juzzo;421163 wrote:
So it took a month to find a dealer willing to sell and ship me the SPC's adjustable UCAs
Where did you get them?
Circuit motorsports shipped to me with no problems..
View original BBCode
[QUOTE=Juzzo;421163]
So it took a month to find a dealer willing to sell and ship me the SPC's adjustable UCAs [/QUOTE]

Where did you get them?

Circuit motorsports shipped to me with no problems..
inspections!! what.. weak! you going to daily it then?
View original BBCode
inspections!! what.. weak! you going to daily it then?
samsa;421459 wrote:Where did you get them?
Circuit motorsports shipped to me with no problems..
1st I tried THMotors but their replies took forever so I ordered them from UltraRev.
Kouki Monster;421489 wrote:inspections!! what.. weak! you going to daily it then?
Yeah I know, min ground clearance 80mm can't make any structural changes can't have camber can't have big rims can't change your turbo setup smog checks all non-OEM parts must have an official approval blah blah blah... Get the fuck outta here! Oh and hell yeah I'm gonna daily this bitch and fuck up my rims and kit 'cuz that's what we do =)
It's gonna be interesting driving this thing in the highway, overtaking someone with decent amount out camber so no traction and about 500hp through the OEM torsen diff :3gears:
View original BBCode
[QUOTE=samsa;421459]Where did you get them?

Circuit motorsports shipped to me with no problems..[/QUOTE]
1st I tried THMotors but their replies took forever so I ordered them from UltraRev.

[QUOTE=Kouki Monster;421489]inspections!! what.. weak!  you going to daily it then?[/QUOTE]
Yeah I know, min ground clearance 80mm can't make any structural changes can't have camber can't have big rims can't change your turbo setup smog checks all non-OEM parts must have an official approval blah blah blah... Get the fuck outta here! Oh and hell yeah I'm gonna daily this bitch and fuck up my rims and kit 'cuz that's what we do =)

It's gonna be interesting driving this thing in the highway, overtaking someone with decent amount out camber so no traction and about 500hp through the OEM torsen diff :3gears:
hehe, hurry up with this thing, progress looks so promising!!
View original BBCode
hehe, hurry up with this thing, progress looks so promising!!
BAHC;421720 wrote:hehe, hurry up with this thing, progress looks so promising!!
No need to hurry.. winter is behind the corner again :sad:
View original BBCode
[QUOTE=BAHC;421720]hehe, hurry up with this thing, progress looks so promising!![/QUOTE]

No need to hurry..  winter is behind the corner again :sad:
samsa;421734 wrote:No need to hurry.. winter is behind the corner again :sad:
Well it will be spring pretty fast yet again. I'm aiming to finish fitment and bodywork before xmas, so I could hit the booth and spray new color in January so it will have time to cure properly before April when the roads are drivable again and can get the car on the road finally=)
View original BBCode
[QUOTE=samsa;421734]No need to hurry..  winter is behind the corner again :sad:[/QUOTE]
Well it will be spring pretty fast yet again. I'm aiming to finish fitment and bodywork before xmas, so I could hit the booth and spray new color in January so it will have time to cure properly before April when the roads are drivable again and can get the car on the road finally=)
rustyP;391562 wrote:Not true mate,
Given the same hub position relative to body (ie. same height), RCA's won't change your UCA position/angle at all.
If you think about that being fixed, all they do is "push your LCA's downwards" if you get my meaning. Usually this brings your airbags/LCA into better alignment = better handling, etc.
Also, you will need them regardless when you get BBK, as big calipers strike the tie rod end. So unless you wanna go messing with custom tierod attachment, best to just put the RCA's in now IMO then adjust the bags accordingly.
Anyway, atm, I have some old SSR Gartmaiers on, but they're only 18 and are sorta 'dailies'. Will be getting new, big 'show' rims later when everything else is ready.. long road.! Probably won't be as ballsy as yours.. I want around 19x9.5 front, 20x10.5/11 rear. And weaker offsets :P Mine will be +10-20 sorta range. Trying to get fender work done first, then will try n measure what will fit and adjust accordingly.
I understand you did the shock tower box first, and then found it insufficient later. I guess what I'm saying is.. if you just did the shortened knuckles, do you think you have enough room to not have UCA holes cut? As in, do you have enough room so your UCA's clear the stock body while 'fully slammed' ? Or do you think you require both shortened knuckles AND the holes..?
Sorry that I didn't respond earlier, but now that the front suspension is kinda done I noticed that with the adjustable UCAs I do indeed need the cups/holes in the shock towers. Those SPC UCAs are so long that when my shit is cambered and dropped to the max the end of adjusting point goes into the cup. I'd say that with stock arms and 19" wheels there wouldn't be any UCA clearance problems if the knuckles were shortened app. 40mm. In this scenario your frame rails should hit the ground about the same time as your UCAs hit the shock tower =)
View original BBCode
[QUOTE=rustyP;391562]Not true mate,
Given the same hub position relative to body (ie. same height), RCA's won't change your UCA position/angle at all.
If you think about that being fixed, all they do is "push your LCA's downwards" if you get my meaning. Usually this brings your airbags/LCA into better alignment = better handling, etc.
Also, you will need them regardless when you get BBK, as big calipers strike the tie rod end. So unless you wanna go messing with custom tierod attachment, best to just put the RCA's in now IMO then adjust the bags accordingly.

Anyway, atm, I have some old SSR Gartmaiers on, but they're only 18 and are sorta 'dailies'. Will be getting new, big 'show' rims later when everything else is ready.. long road.! Probably won't be as ballsy as yours.. I want around 19x9.5 front, 20x10.5/11 rear. And weaker offsets :P Mine will be +10-20 sorta range. Trying to get fender work done first, then will try n measure what will fit and adjust accordingly.

I understand you did the shock tower box first, and then found it insufficient later. I guess what I'm saying is.. if you just did the shortened knuckles, do you think you have enough room to not have UCA holes cut? As in, do you have enough room so your UCA's clear the stock body while 'fully slammed' ? Or do you think you require both shortened knuckles AND the holes..?[/QUOTE]
Sorry that I didn't respond earlier, but now that the front suspension is kinda done I noticed that with the adjustable UCAs I do indeed need the cups/holes in the shock towers. Those SPC UCAs are so long that when my shit is cambered and dropped to the max the end of adjusting point goes into the cup. I'd say that with stock arms and 19" wheels there wouldn't be any UCA clearance problems if the knuckles were shortened app. 40mm. In this scenario your frame rails should hit the ground about the same time as your UCAs hit the shock tower =)
Juzzo;421872 wrote:Well it will be spring pretty fast yet again. I'm aiming to finish fitment and bodywork before xmas, so I could hit the booth and spray new color in January so it will have time to cure properly before April when the roads are drivable again and can get the car on the road finally=)
Do work son, looks like its coming out great...
On another note: Holly shit that place is filled to the brim...time for an organizer or a bigger place..lol
View original BBCode
[QUOTE=Juzzo;421872]Well it will be spring pretty fast yet again. I'm aiming to finish fitment and bodywork before xmas, so I could hit the booth and spray new color in January so it will have time to cure properly before April when the roads are drivable again and can get the car on the road finally=)[/QUOTE]

Do work son, looks like its coming out great...


On another note: Holly shit that place is filled to the brim...time for an organizer or a bigger place..lol
Yeah it's getting there little by little....
Aside there risto had to share some loving to the T.
rusty old winter beater Corolla also. Seems like it doesn't like salt too much, so devoted a couple hours to it in Friday and today as well. =)


And a piece of sheet metal later...

It's just a beater so couldn't be arsed to do it properly, and I've been thinking that it could retire in a year or two anyway... maybe I'll make a rally car out of it :smiley-rofl:
View original BBCode
Yeah it's getting there little by little....

Aside there risto had to share some loving to the T.[U][I]rusty[/I][/U] old winter beater Corolla also. Seems like it doesn't like salt too much, so devoted a couple hours to it in Friday and today as well.  =)

[IMG]http://i1200.photobucket.com/albums/bb327/Lord_Juzzo/20111109329.jpg[/IMG]

[IMG]http://i1200.photobucket.com/albums/bb327/Lord_Juzzo/20111110330.jpg[/IMG]

And a piece of sheet metal later...

[IMG]http://i1200.photobucket.com/albums/bb327/Lord_Juzzo/20111112335.jpg[/IMG]

It's just a beater so couldn't be arsed to do it properly, and I've been thinking that it could retire in a year or two anyway... maybe I'll make a rally car out of it :smiley-rofl:
View original BBCode
So this is where I'm at the moment... not much progress but I finally pulled the trigger on the rear fenders :shrug:

[IMG]http://i1200.photobucket.com/albums/bb327/Lord_Juzzo/HPIM5009.jpg[/IMG]

[IMG]http://i1200.photobucket.com/albums/bb327/Lord_Juzzo/HPIM5014.jpg[/IMG]

[IMG]http://i1200.photobucket.com/albums/bb327/Lord_Juzzo/HPIM5017.jpg[/IMG]

[IMG]http://i1200.photobucket.com/albums/bb327/Lord_Juzzo/HPIM5018.jpg[/IMG]

[IMG]http://i1200.photobucket.com/albums/bb327/Lord_Juzzo/HPIM5020.jpg[/IMG]

[IMG]http://i1200.photobucket.com/albums/bb327/Lord_Juzzo/HPIM5023.jpg[/IMG]

[IMG]http://i1200.photobucket.com/albums/bb327/Lord_Juzzo/HPIM5024.jpg[/IMG]

[IMG]http://i1200.photobucket.com/albums/bb327/Lord_Juzzo/HPIM5028.jpg[/IMG]

I'm trying to find used front lower control arms to mod, so I can get more camber in the front. Also gotta change my front tires to 225/30/20 to get the front a tad lower.

The biggest problem I've been struggling with is the rear wheel wells, just can't slam that ass like I'd like to. So had to go with the big boi approach =)

[IMG]http://i1200.photobucket.com/albums/bb327/Lord_Juzzo/HPIM5032.jpg[/IMG]

[IMG]http://i1200.photobucket.com/albums/bb327/Lord_Juzzo/HPIM5034.jpg[/IMG]

[IMG]http://i1200.photobucket.com/albums/bb327/Lord_Juzzo/HPIM5033.jpg[/IMG]

[IMG]http://i1200.photobucket.com/albums/bb327/Lord_Juzzo/HPIM5035.jpg[/IMG]

Later I'm off to chop the inner wells... :dance:
dope!! but now i am hungry
View original BBCode
dope!! but now i am hungry
Okay I think I'm pretty much done with the lh wheel well, not including full tubbing there just isn't anything left that I can do by myself. And then the door would
really need to be cut up, not just a little slice like now.


I can live with rear bumper hovering at 35mm's, and I can always add more fiberglass if I change my mind... keep in mind that this is with a 255/30/21 tire =)
So now it's time to do a tiny flare to it and then hit the other side.
View original BBCode
Okay I think I'm pretty much done with the lh wheel well, not including full tubbing  there just isn't anything left that I can do by myself. And then the door would [I]really[/I] need to be cut up, not just a little slice like now.

[IMG]http://i1200.photobucket.com/albums/bb327/Lord_Juzzo/HPIM5037.jpg[/IMG]

[IMG]http://i1200.photobucket.com/albums/bb327/Lord_Juzzo/HPIM5038.jpg[/IMG]

[IMG]http://i1200.photobucket.com/albums/bb327/Lord_Juzzo/HPIM5045.jpg[/IMG]

[IMG]http://i1200.photobucket.com/albums/bb327/Lord_Juzzo/HPIM5041.jpg[/IMG]

I can live with rear bumper hovering at 35mm's, and I can always add more fiberglass if I change my mind... keep in mind that this is with a [COLOR="Red"]255/30/21[/COLOR] tire =)

So now it's time to do a tiny flare to it and then hit the other side.
dayyuuum! givin me a run for my money on my radius lol

I may have to go bigger wheels so i dont have to drop it on the ground and mess everything up like Cuban GS lol
View original BBCode
dayyuuum! givin me a run for my money on my radius lol
I may have to go bigger wheels so i dont have to drop it on the ground and mess everything up like Cuban GS lol
The door jamb on the 1gs is a pita, how about the f50? Took a quick look at the build f50's, but it kinda seemed that there is adequate room to radius just below the gas filler cap...? But how's the door built, is it easily narrow-able? With the GS there was a straight ledge, the one I taped and cut, that can be easily deleted...
View original BBCode
The door jamb on the 1gs is a pita, how about the f50? Took a quick look at the build f50's, but it kinda seemed that there is adequate room to radius just below the gas filler cap...? But how's the door built, is it easily narrow-able? With the GS there was a straight ledge, the one I taped and cut, that can be easily deleted...
actually I am not even going to get into the door.
View original BBCode
actually I am not even going to get into the door.
Nioce progress...


"Your sister is hot but your mom does that thing with her tongue"
View original BBCode
Nioce progress...
"Your sister is hot but your mom does that thing with her tongue"
You make me want to go outside and radius my own fenders.

But that may not work as well as I think.
View original BBCode
You make me want to go outside and radius my own fenders.
But that may not work as well as I think.
hahaha
View original BBCode
hahaha
Rob Schandlers voice: You can do it!:smiley-rofl:
But yeah thanks fellas. I went back, and actually manage to add a little clearance into the wells...


View original BBCode
Rob Schandlers voice: You can do it!:smiley-rofl:
But yeah thanks fellas. I went back, and actually manage to add a little clearance into the wells...

[IMG]http://i1200.photobucket.com/albums/bb327/Lord_Juzzo/HPIM5049.jpg[/IMG]

[IMG]http://i1200.photobucket.com/albums/bb327/Lord_Juzzo/HPIM5050.jpg[/IMG]
holy shit!
View original BBCode
holy shit!
i think you mean rob schneider lol. you gonna do anything to reinforce the body?
View original BBCode
i think you mean rob schneider lol. you gonna do anything to reinforce the body?
wow...lots of cutting!!!!! Now weld some braces....

and I LOVE how the wheels look!
View original BBCode
wow...lots of cutting!!!!! Now weld some braces....
and I LOVE how the wheels look!
speedaddict;430958 wrote:wow...lots of cutting!!!!! Now weld some braces....
and I LOVE how the wheels look!
brainneeded;430949 wrote:i think you mean rob schneider lol. you gonna do anything to reinforce the body?
Oh yeah typo... But yeah I'm going to add something in there to keep the structural integrity intact, but I gotta go back tomorrow to figure out how I'm going to finish it up =)
View original BBCode
[QUOTE=speedaddict;430958]wow...lots of cutting!!!!! Now weld some braces....

and I LOVE how the wheels look![/QUOTE]


[QUOTE=brainneeded;430949]i think you mean rob schneider lol. you gonna do anything to reinforce the body?[/QUOTE]

Oh yeah typo... But yeah I'm going to add something in there to keep the structural integrity intact, but I gotta go back tomorrow to figure out how I'm going to finish it up =)
Damn!
View original BBCode
Damn!
View original BBCode
[IMG]http://mauivents.com/wp-content/uploads/2010/08/MAUIVENTS.jpg[/IMG]
I saw him when he came into town doing a stand up. omg.. soo great
View original BBCode
I saw him when he came into town doing a stand up. omg.. soo great
Wow, I love looking at this thread :)

Keep it up!
View original BBCode
Wow, I love looking at this thread :)
Keep it up!
It looks like grandiosa offers two styles of pizza, Mexicana and Kebab. I think I would prefer Kebab. And props for the fearless 1/4 panel cutting. Looks like you have a lot of welding ahead of you.
View original BBCode
It looks like grandiosa offers two styles of pizza, Mexicana and Kebab. I think I would prefer Kebab. And props for the fearless 1/4 panel cutting. Looks like you have a lot of welding ahead of you.
There's also MeatLovers etc.. Frozen pizzas @ The garage ftw:biggthumpup:
But yeah there is quite alot of precision work coming, just need to get of this HIGH horse, and get cracking again... last day didn't go as planned. Faded 32h =)
View original BBCode
There's also MeatLovers etc.. Frozen pizzas @ The garage ftw:biggthumpup:
But yeah there is quite alot of precision work coming, just need to get of this HIGH horse, and get cracking again... last day didn't go as planned. Faded 32h =)
yes, need more inspiration
View original BBCode
yes, need more inspiration
wow!

just wow!

would look amazing man!
View original BBCode
wow!
just wow!
would look amazing man!
Got bored at work so I typed a little mod list of what I've been up to for the past few years with this build =)
Toyota Aristo 3.0V - 1991- Version1.5


Powertrain


- 2JZ-GTE w/ ported and polished head (intake side)

- US-spec camshafts

- 550cc injectors w/ custom resistor pack

- Modified OEM fuel rail - dual inlet

- MasterPower T3 twinscroll - IN: 60.5mm AR.70 / EX: 64.5mm AR.70 w/ ceramic coating

- Custom low-mount exhaust manifold w/ ceramic coating

- Custom 3" downpipe and midpipe

- JDM "VIP" catback - manufacturer unknown

- PLX wideband

- Billet timing belt tensioner w/ GReddy reinforced timing belt

- GReddy aux. pulleys w/ PowerEnterprise reinforced aux. belt

- GReddy motor oil cooler kit

- GReddy ATF cooler kit

- GReddy E-Manage Ultimate w/ universal harness and 3Bar MAP

- Re-worked engine wiring w/ a mild tuck and wheel well harness relocated

- 600x300x76mm "Ebay" intercooler w/ custom piping

- HDi electronic boost controller

- Eagle 200Amp alternator


Chassis


- Work Schwerts SC5's w/ Work Black Chrome disks and gloss black lips

- Fronts: 20x9,5" +7 O-disk (effective offset -13 w/20mm spacer) - Nankang NS2 225/35/19 tires

- Rears: 21x10,5" -7 O-disk - Toyo Proxes 255/30/21 tires

- Burn out rears: 19x9,5" +13 R-disk - Nankang NS2 225/35/19 tires

- D2 Deluxe air suspension kit w/ FBSS valving and an extra Viair 380C compressor

- Dakota Digital pressure gauge w/ 5 pressure senders

- SPC FUCA's - notched for increased camber

- Front eccentric camber bolts modified - notched for increased camber

- TLC RUCA's

- Front steering knuckles modified - 38mm shorter

- Adjustable FLCA's - unfinished -

- Adjustable front tension arms - unfinished -

- Longer wheel studs in front

- Front strut towers cupped


Exterior


- Garson Exclusive Aero 8-piece body kit

- Front bumper modified to fit Caldina OEM glass fog lights w/ HID's

- Front fenders shaved and pulled - still need to do a 1/2" radius -

- Rear quarters aggressively radiused w/ modified fender wells and chopped doors  -unfinished-

-  Lexus badges and GS300 trunk garnish

- Modified Aristo headlights w/HID's - unfinished -

- White puddle lights


Interior


- Full LED conversion

- Air purifier removal

- Turbo timer and boost controller integrated into the dash instead of the OEM center speaker

- Front door panels modified to work as custom spec'd speaker enclosures

- Carpet dyed in black

- Momo steering wheel w/ OEM cruise control

- LCD reverse mirror - double screen for 4 cameras

- Center console panels modified to fit 1-DIN head unit and AFR / EGR / Boost / Oil temp. /

   Oil press. and Air suspension pressure gauges


ICE


- Alpine head unit

- Renegade 4-ch "2kW" amp for the front speakers

- SPL dynamics 1,5kW monoblock for the subwoofer

- Front: Hertz components - 6,5" / 3" / 1,5" w/ Hertz crossovers

- Rear: Hertz 4" coaxials

- Subwoofer:  15" Hertz 380DD mounted to the modified parcel shelf with a custom enclosure

- Stinger 15Farad capacitor

- Audison distribution/fuse block

- Quality RCA's and heavy duty power wiring - 50mm2 and smaller between diff. components

- 2x Exide Premium 100Ah batteries w/ DLS connectors
And still got heaps of stuff not done that didn't make it to the list :pat:
View original BBCode
Got bored at work so I typed a little mod list of what I've been up to for the past few years with this build =)

[CODE]Toyota Aristo 3.0V - 1991- Version1.5

Powertrain

- 2JZ-GTE w/ ported and polished head (intake side)
- US-spec camshafts
- 550cc injectors w/ custom resistor pack
- Modified OEM fuel rail - dual inlet
- MasterPower T3 twinscroll - IN: 60.5mm AR.70 / EX: 64.5mm AR.70 w/ ceramic coating
- Custom low-mount exhaust manifold w/ ceramic coating
- Custom 3" downpipe and midpipe
- JDM "VIP" catback - manufacturer unknown
- PLX wideband
- Billet timing belt tensioner w/ GReddy reinforced timing belt
- GReddy aux. pulleys w/ PowerEnterprise reinforced aux. belt
- GReddy motor oil cooler kit
- GReddy ATF cooler kit
- GReddy E-Manage Ultimate w/ universal harness and 3Bar MAP
- Re-worked engine wiring w/ a mild tuck and wheel well harness relocated
- 600x300x76mm "Ebay" intercooler w/ custom piping
- HDi electronic boost controller
- Eagle 200Amp alternator

Chassis

- Work Schwerts SC5's w/ Work Black Chrome disks and gloss black lips
- Fronts: 20x9,5" +7 O-disk (effective offset -13 w/20mm spacer) - Nankang NS2 225/35/19 tires
- Rears: 21x10,5" -7 O-disk - Toyo Proxes 255/30/21 tires
- Burn out rears: 19x9,5" +13 R-disk - Nankang NS2 225/35/19 tires
- D2 Deluxe air suspension kit w/ FBSS valving and an extra Viair 380C compressor
- Dakota Digital pressure gauge w/ 5 pressure senders
- SPC FUCA's - notched for increased camber
- Front eccentric camber bolts modified - notched for increased camber
- TLC RUCA's
- Front steering knuckles modified - 38mm shorter
- Adjustable FLCA's - unfinished -
- Adjustable front tension arms - unfinished -
- Longer wheel studs in front
- Front strut towers cupped

Exterior

- Garson Exclusive Aero 8-piece body kit
- Front bumper modified to fit Caldina OEM glass fog lights w/ HID's
- Front fenders shaved and pulled - still need to do a 1/2" radius -
- Rear quarters aggressively radiused w/ modified fender wells and chopped doors  -unfinished-
-  Lexus badges and GS300 trunk garnish
- Modified Aristo headlights w/HID's - unfinished -
- White puddle lights

Interior

- Full LED conversion
- Air purifier removal
- Turbo timer and boost controller integrated into the dash instead of the OEM center speaker
- Front door panels modified to work as custom spec'd speaker enclosures
- Carpet dyed in black
- Momo steering wheel w/ OEM cruise control
- LCD reverse mirror - double screen for 4 cameras
- Center console panels modified to fit 1-DIN head unit and AFR / EGR / Boost / Oil temp. /
   Oil press. and Air suspension pressure gauges

ICE

- Alpine head unit
- Renegade 4-ch "2kW" amp for the front speakers
- SPL dynamics 1,5kW monoblock for the subwoofer
- Front: Hertz components - 6,5" / 3" / 1,5" w/ Hertz crossovers
- Rear: Hertz 4" coaxials
- Subwoofer:  15" Hertz 380DD mounted to the modified parcel shelf with a custom enclosure
- Stinger 15Farad capacitor
- Audison distribution/fuse block
- Quality RCA's and heavy duty power wiring - 50mm2 and smaller between diff. components
- 2x Exide Premium 100Ah batteries w/ DLS connectors

[/CODE]

And still got heaps of stuff not done that didn't make it to the list :pat:
Dope! I need more pics man. We need that inspiration around here
View original BBCode
Dope! I need more pics man. We need that inspiration around here
Yes Juzzo, Get off the HIGH horse and finish this wheelhouse job. :rules:Dont make us come over there with the T.V. show INTERVENTION and Dr. Phil and Billy Mays(oh wait he's dead). But on a serious note, your mod list shits all-over my mod list.
View original BBCode
Yes Juzzo, Get off the HIGH horse and finish this wheelhouse job. :rules:Dont make us come over there with the T.V. show INTERVENTION and Dr. Phil and Billy Mays(oh wait he's dead). But on a serious note, your mod list shits all-over my mod list.
i love how close are suspension mods are!! keep up the great work!!!!!!!!!!!

kinda feels like my car has a sister =)
View original BBCode
i love how close are suspension mods are!! keep up the great work!!!!!!!!!!!
kinda feels like my car has a sister =)
View original BBCode
Finally got something done besides the constant abuse of alcohol =)
Finished the rear fender design and execution, 2nd try's the charm, and in person it looks a lot harder than in these pics.

 [IMG]http://i1200.photobucket.com/albums/bb327/Lord_Juzzo/HPIM5053.jpg[/IMG]

[IMG]http://i1200.photobucket.com/albums/bb327/Lord_Juzzo/HPIM5055.jpg[/IMG]

[IMG]http://i1200.photobucket.com/albums/bb327/Lord_Juzzo/HPIM5059.jpg[/IMG]

[IMG]http://i1200.photobucket.com/albums/bb327/Lord_Juzzo/HPIM5060.jpg[/IMG]

[IMG]http://i1200.photobucket.com/albums/bb327/Lord_Juzzo/HPIM5057.jpg[/IMG]

This week should see more progress now that I'm a tad more motivated. Need to finish the welds and smooth everything out, then repeat at the other side. Well that should be easy'ish now that I'm getting the hang of this metalwork stuff =)
Nice!!!!
View original BBCode
Nice!!!!
Got few days off, so let's get cracking... bit of vodka, rum and beer under my belt at the mo. Still got sum nice ish left =)

Last night got bored at work so I designed my next build: 10sec or under Aristo, chopped roof and centerline, rear door delete... shits going to happen as soon I get this beast on the road first haha=)

Looks a tad like a Supra, just dont know what engine to put into it... maybe an LSx or the sweet 380Magnum my bro-in-law got in his garage, if he doesn't put it into his -69 Challenger. Dunno if he'd do it, cause he's pretty anal and only builds pure oem spec'd muscles, like his -69 RT Charger etc... So maybe I can steal it off him with a family price :dance:
.
.
.
But now Imma go and finish my rear fenders... later:inoutwavey:
View original BBCode
Got few days off, so let's get cracking... bit of vodka, rum and beer under my belt at the mo. Still got sum nice ish left =)

[IMG]http://i1200.photobucket.com/albums/bb327/Lord_Juzzo/HPIM5070.jpg[/IMG]

Last night got bored at work so I designed my next build: 10sec or under Aristo, chopped roof and centerline, rear door delete... shits going to happen as soon I get this beast on the road first haha=)

[IMG]http://i1200.photobucket.com/albums/bb327/Lord_Juzzo/HPIM5062.jpg[/IMG]

Looks a tad like a Supra, just dont know what engine to put into it... maybe an LSx or the sweet 380Magnum my bro-in-law got in his garage, if he doesn't put it into his -69 Challenger. Dunno if he'd do it, cause he's pretty anal and only builds pure oem spec'd muscles, like his -69 RT Charger etc... So maybe I can steal it off him with a family price :dance:

.
.
.
But now Imma go and finish my rear fenders... later:inoutwavey:
Finishing the rear wheel well...
[YOUTUBE]ImaVnWIgbdw[/YOUTUBE]
Odd that there ain't no sound, had some killer shit playing in the background =)
View original BBCode
Finishing the rear wheel well...
[YOUTUBE]ImaVnWIgbdw[/YOUTUBE]
Odd that there ain't no sound, had some killer shit playing in the background =)
Love this thread....keep up the good work....:biggthumpup:
View original BBCode
Love this thread....keep up the good work....:biggthumpup:
haha sick! thanks for the tutorial. Drink a can, smoke, and weld. got it! haha
View original BBCode
haha sick! thanks for the tutorial. Drink a can, smoke, and weld. got it! haha
View original BBCode
I was hoping to get the fenders done all metal and minimal spray filler, but ain't gonna happen. I just don't have enough experience with body lead. Have to use some bondo to get 'em all nice and smooth... left rear half way grinded, and after a this brake Imma sand some more and apply bondo.:pat:

[IMG]http://i1200.photobucket.com/albums/bb327/Lord_Juzzo/HPIM5098.jpg[/IMG]

[IMG]http://i1200.photobucket.com/albums/bb327/Lord_Juzzo/HPIM5099.jpg[/IMG]

[IMG]http://i1200.photobucket.com/albums/bb327/Lord_Juzzo/HPIM5102.jpg[/IMG]
Looks like a great start!!
View original BBCode
Looks like a great start!!
Nice work Juzzo!!! keep moving and put the bottle down :smiley-rofl:
View original BBCode
Nice work Juzzo!!! keep moving and put the bottle down :smiley-rofl:
we dont make the beer boxes trash cans, we use them to cover our expensive wheels when we cut/weld/grind/paint/sand being drunk lol

makin some progress!!!
View original BBCode
we dont make the beer boxes trash cans, we use them to cover our expensive wheels when we cut/weld/grind/paint/sand being drunk lol
makin some progress!!!
You chug like a girl.... haha nah nah good shit going on here man. keep it up
View original BBCode
You chug like a girl.... haha nah nah good shit going on here man. keep it up
no cutting, no soldering, dont even need to open the driver door for this one! hope this helps!! :D
DIY: Cuban Wire Harness Relocation! ('93 GS300)
1. unplug the harness from the fuse box in the ENGINE BAY!
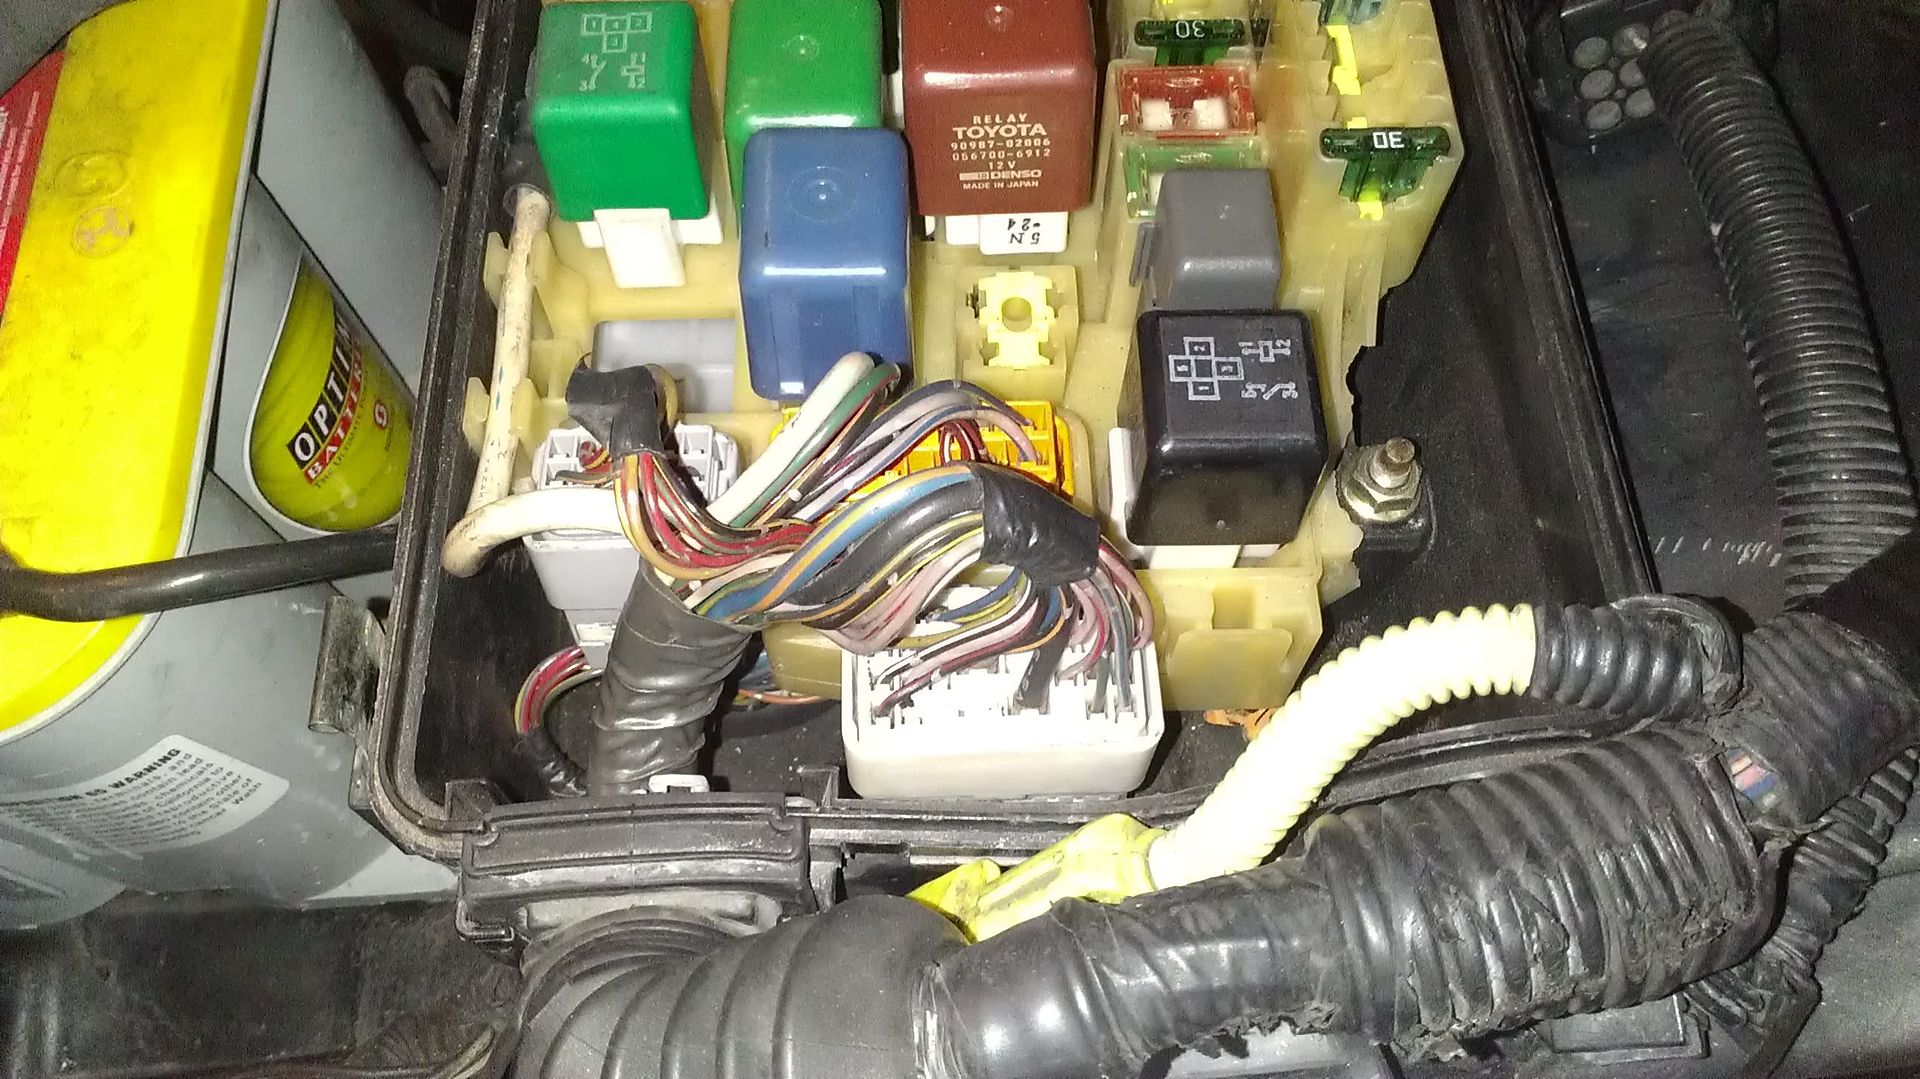
2. unplug the airbag sensor underneath the fender and the two plugs to the reservoir.
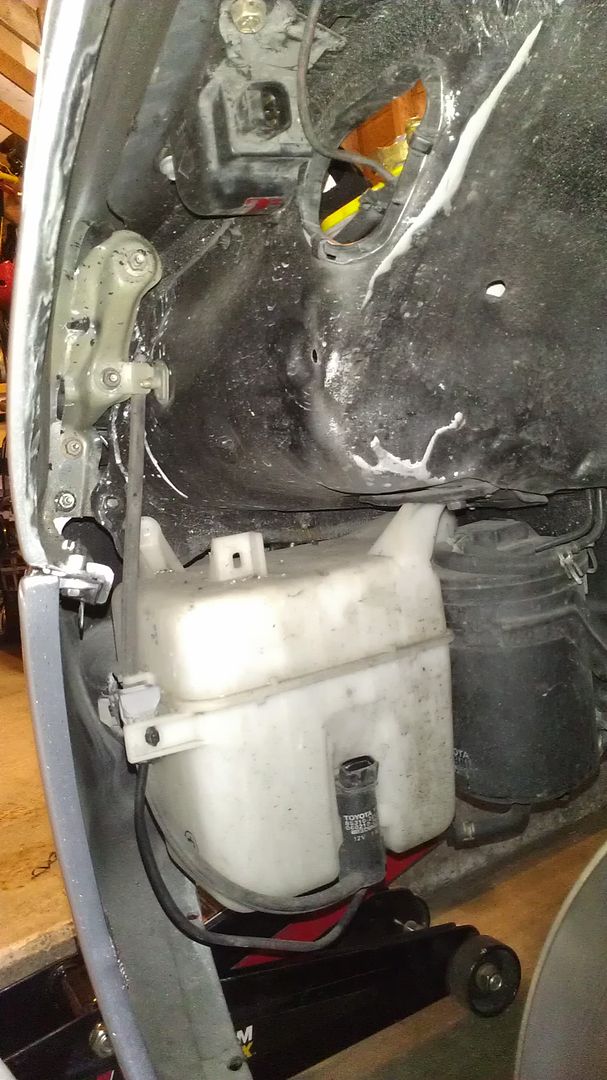
3. pull down the harness and inspect the wires. (you can see where i had it run before)
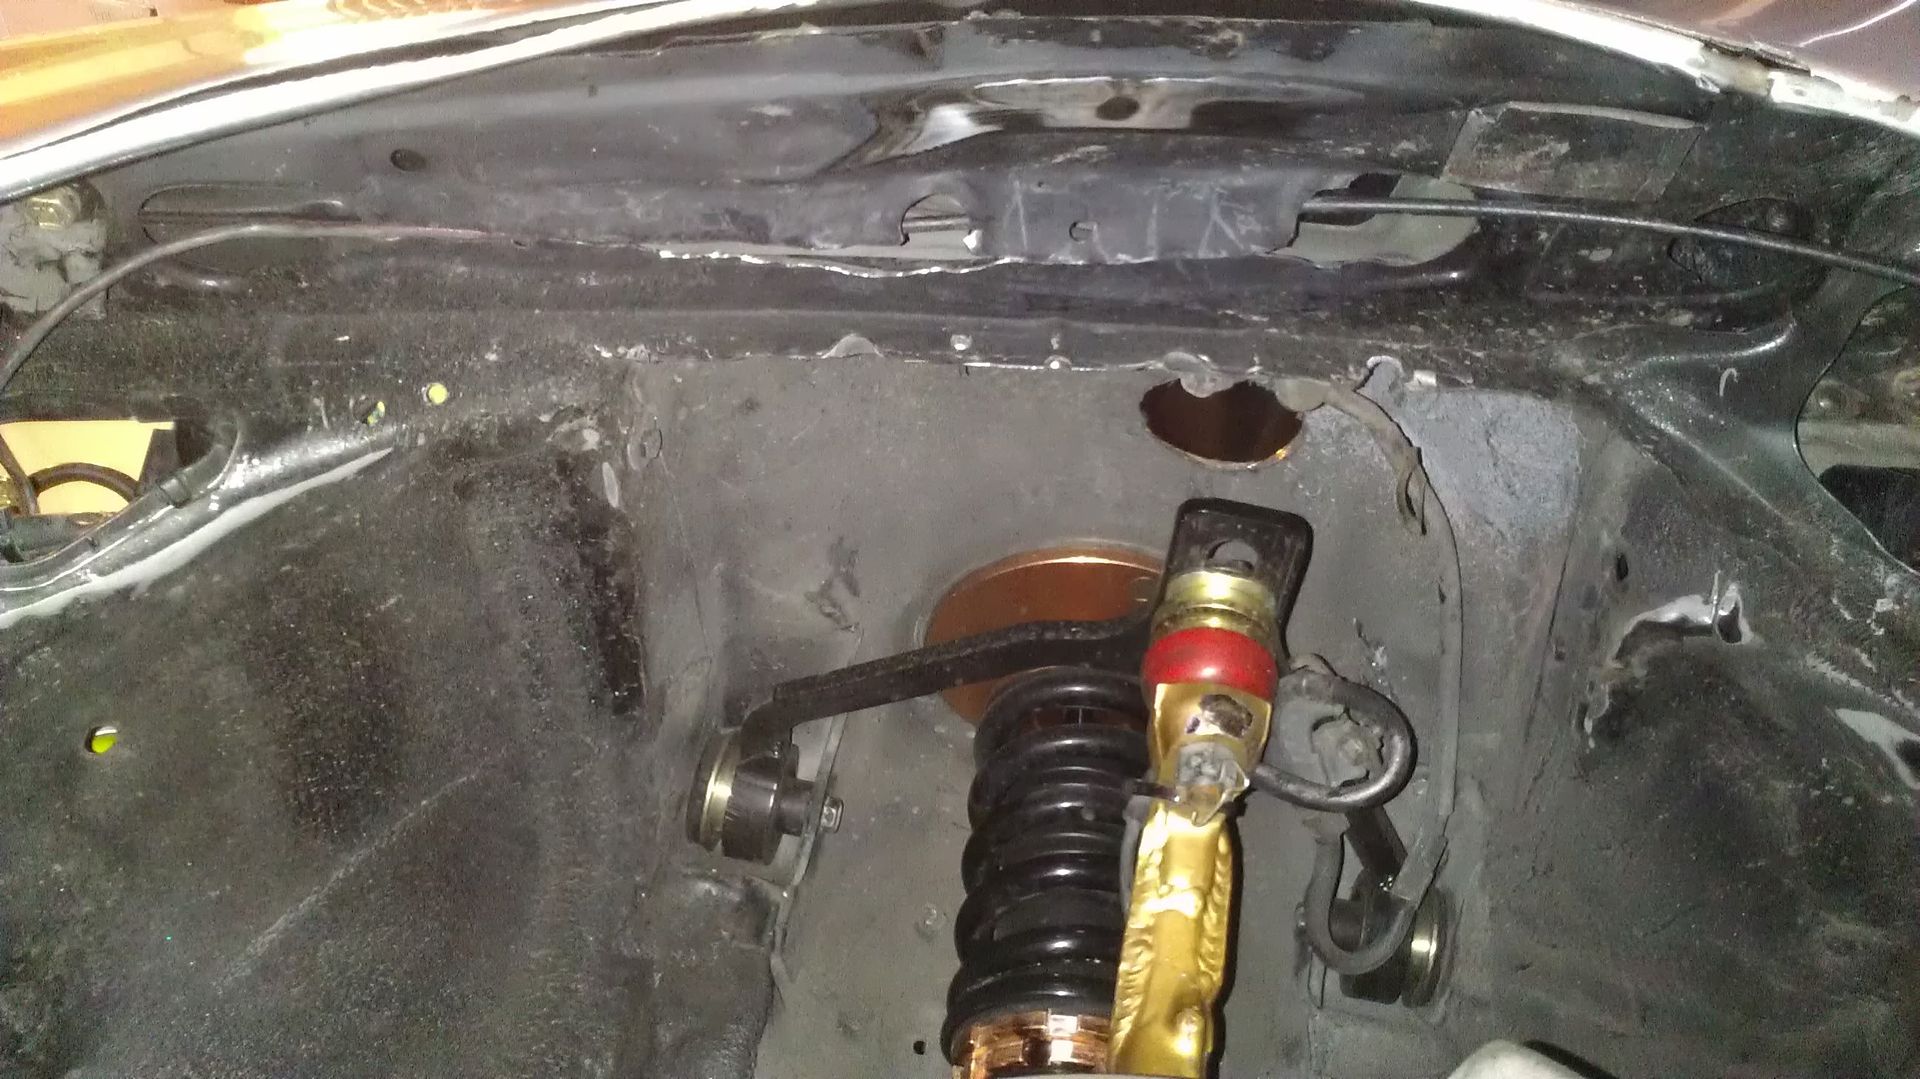
4. find this hole just above where the harness comes though from the interior.
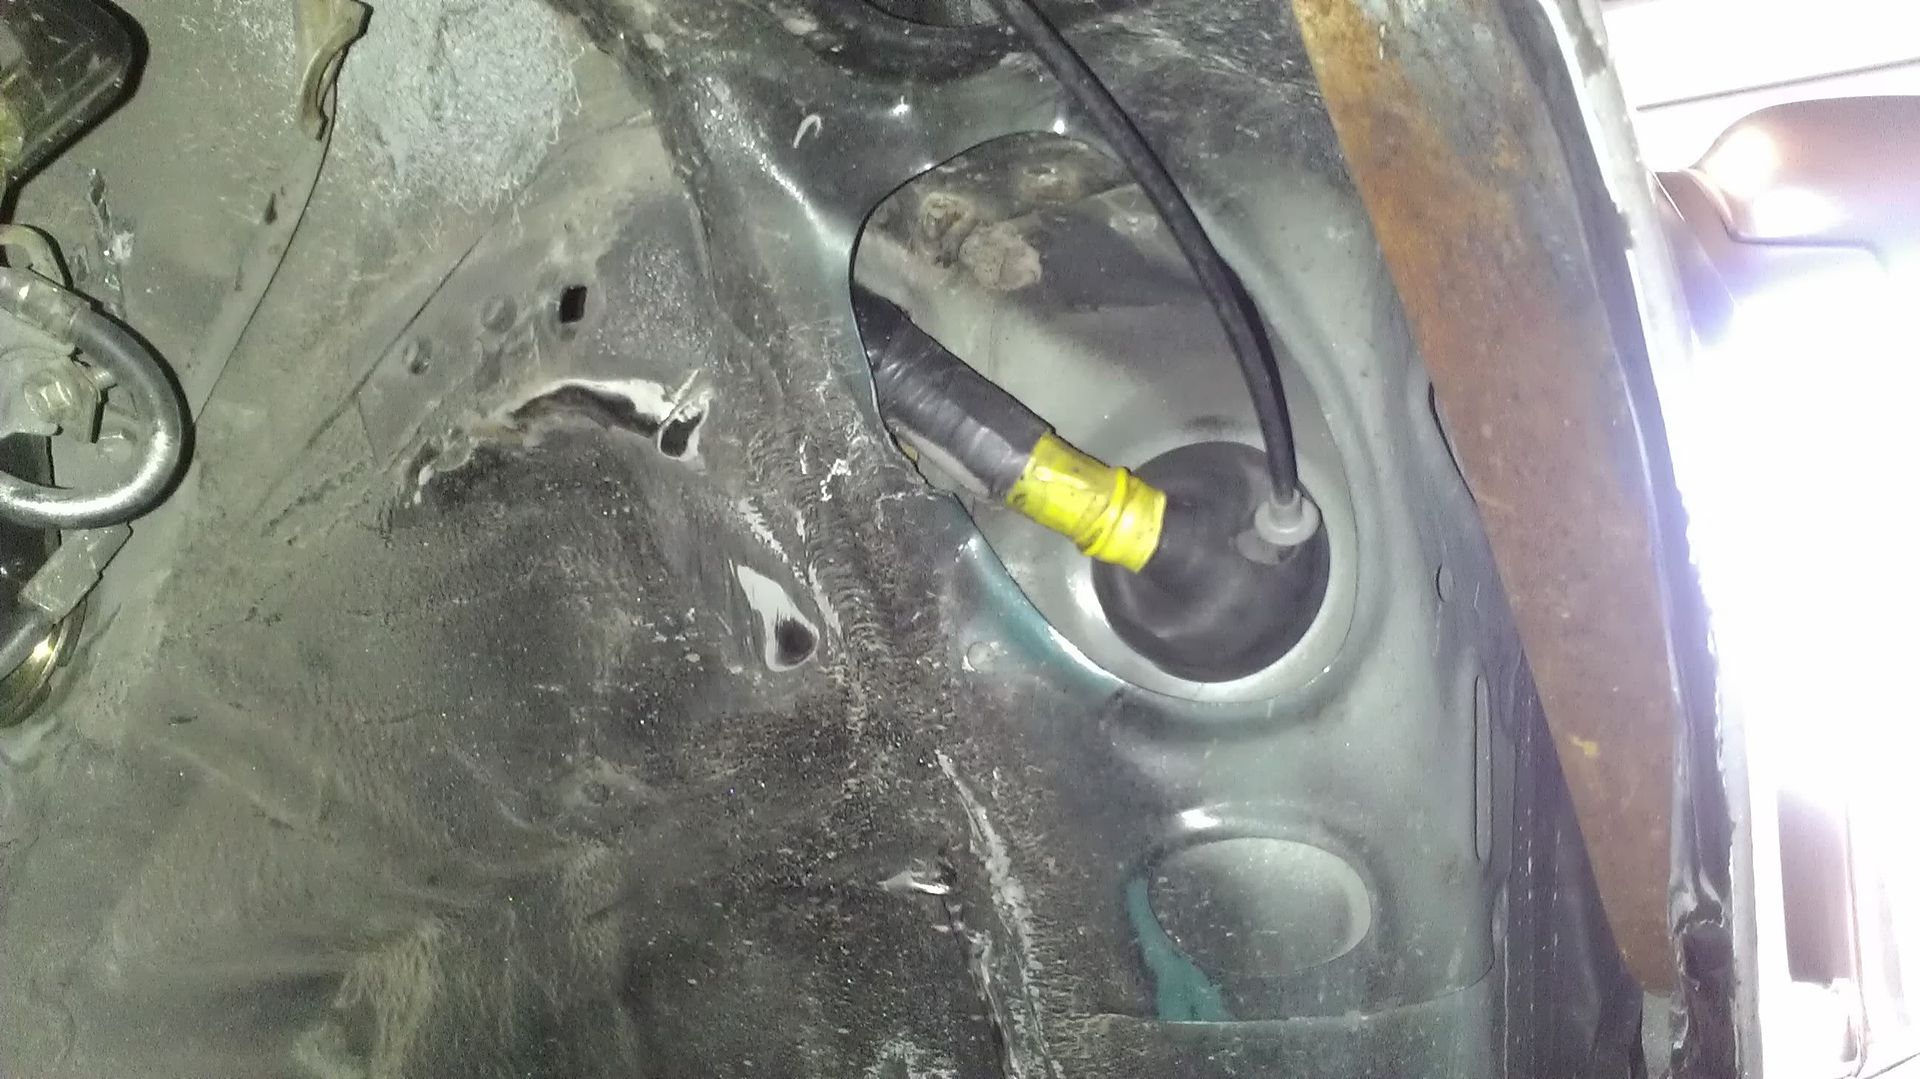
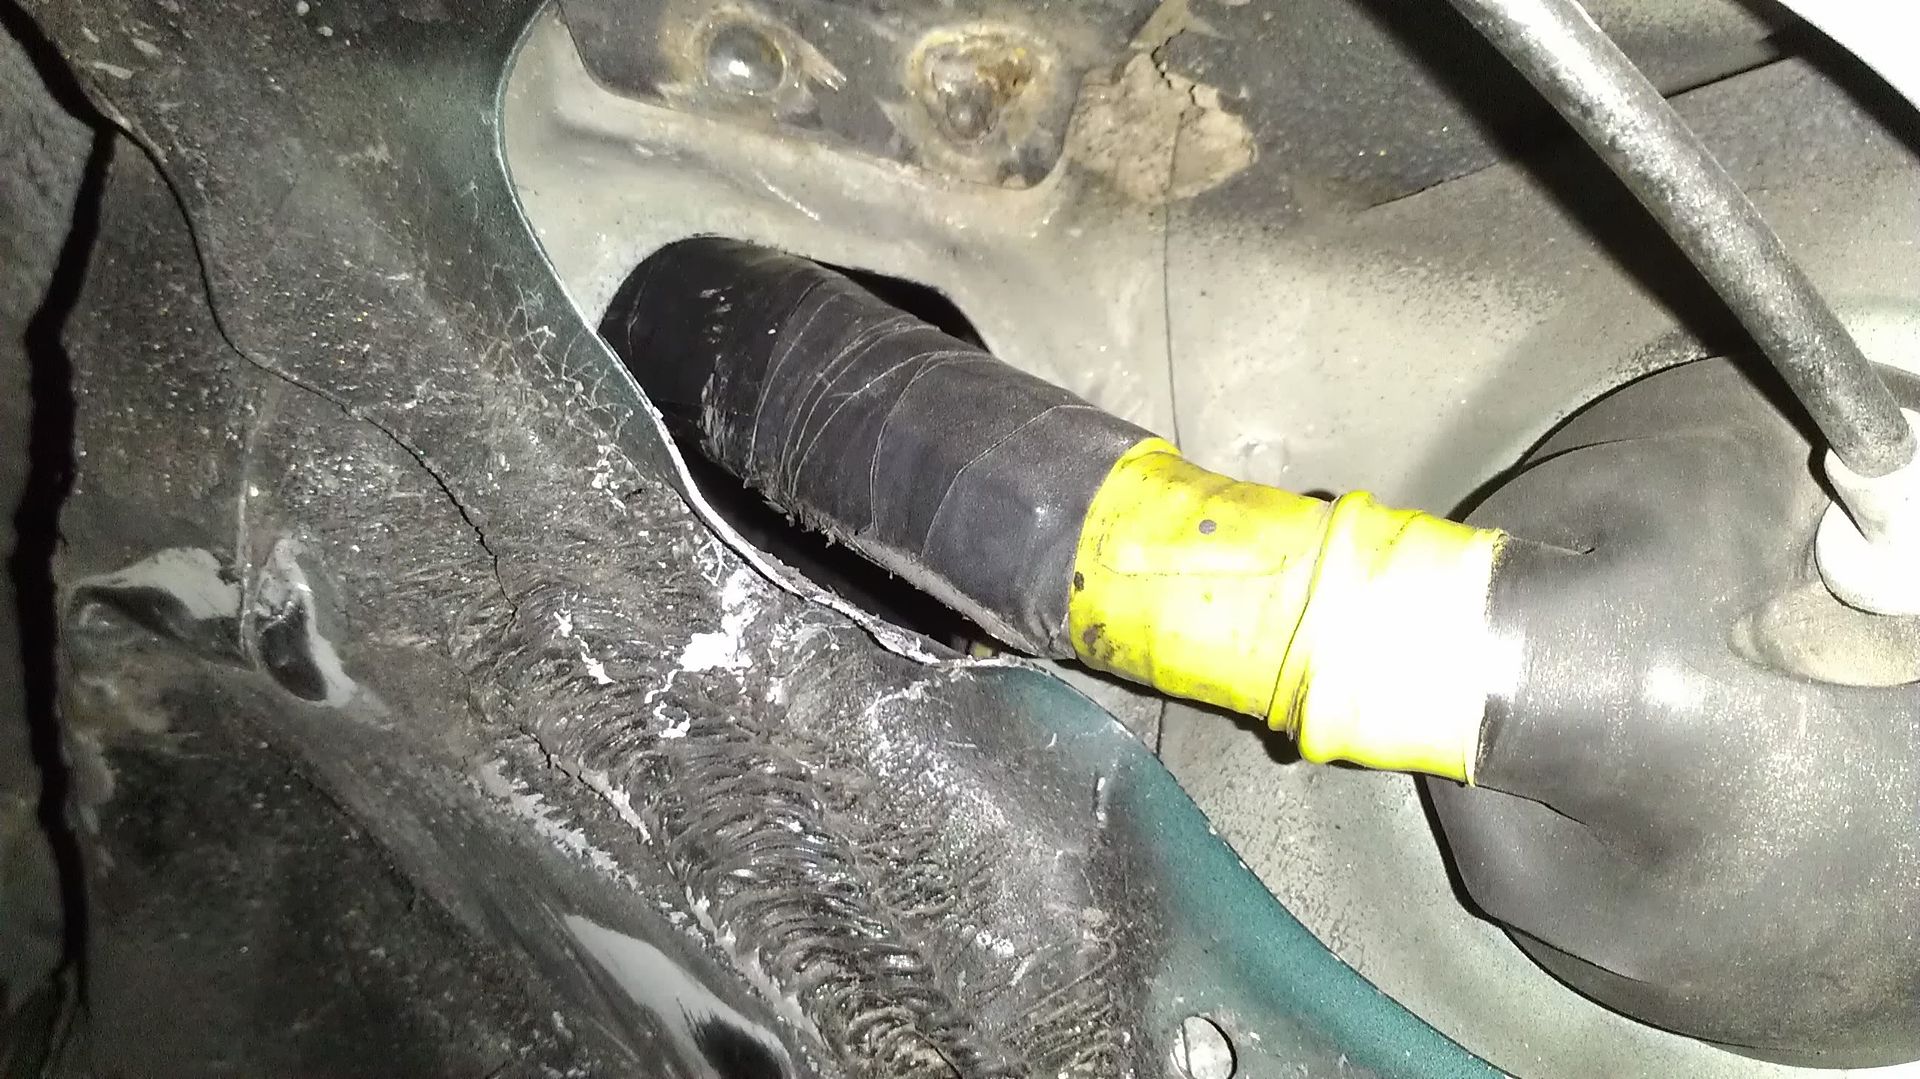
5. reroute the harness through the hole.
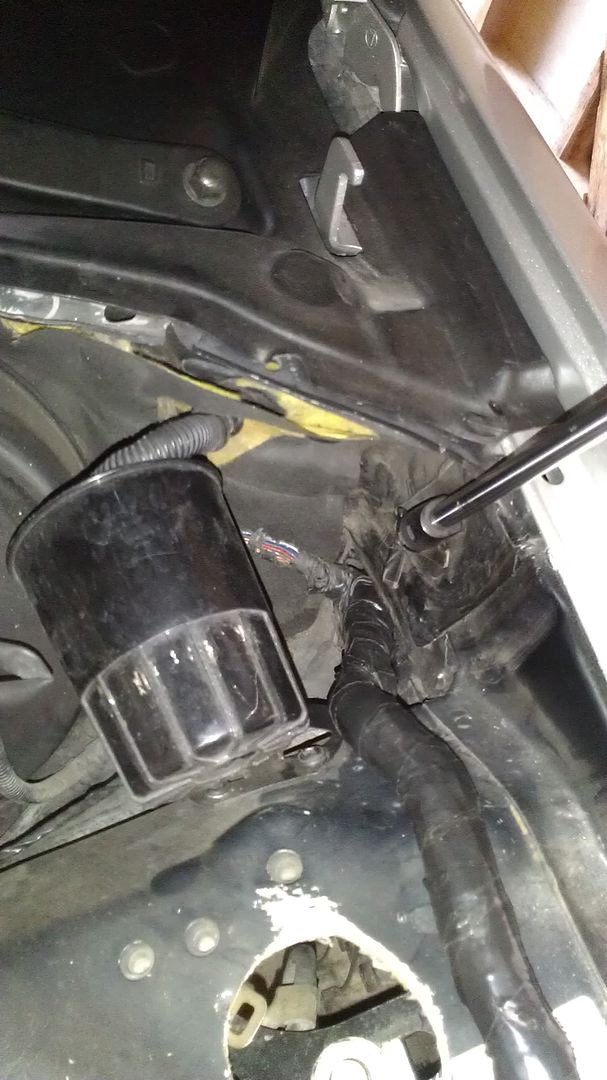
6. watch out for the hood dampener when shutting the hood.
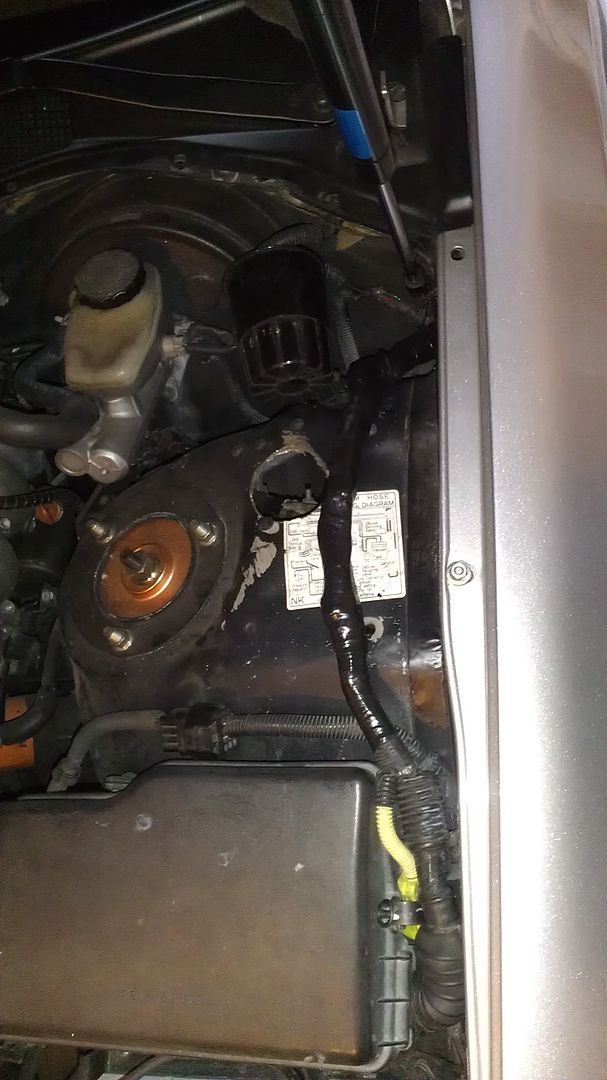
7. and finally! slam the **** out of the front with your coilovers to celebrate no more harness!
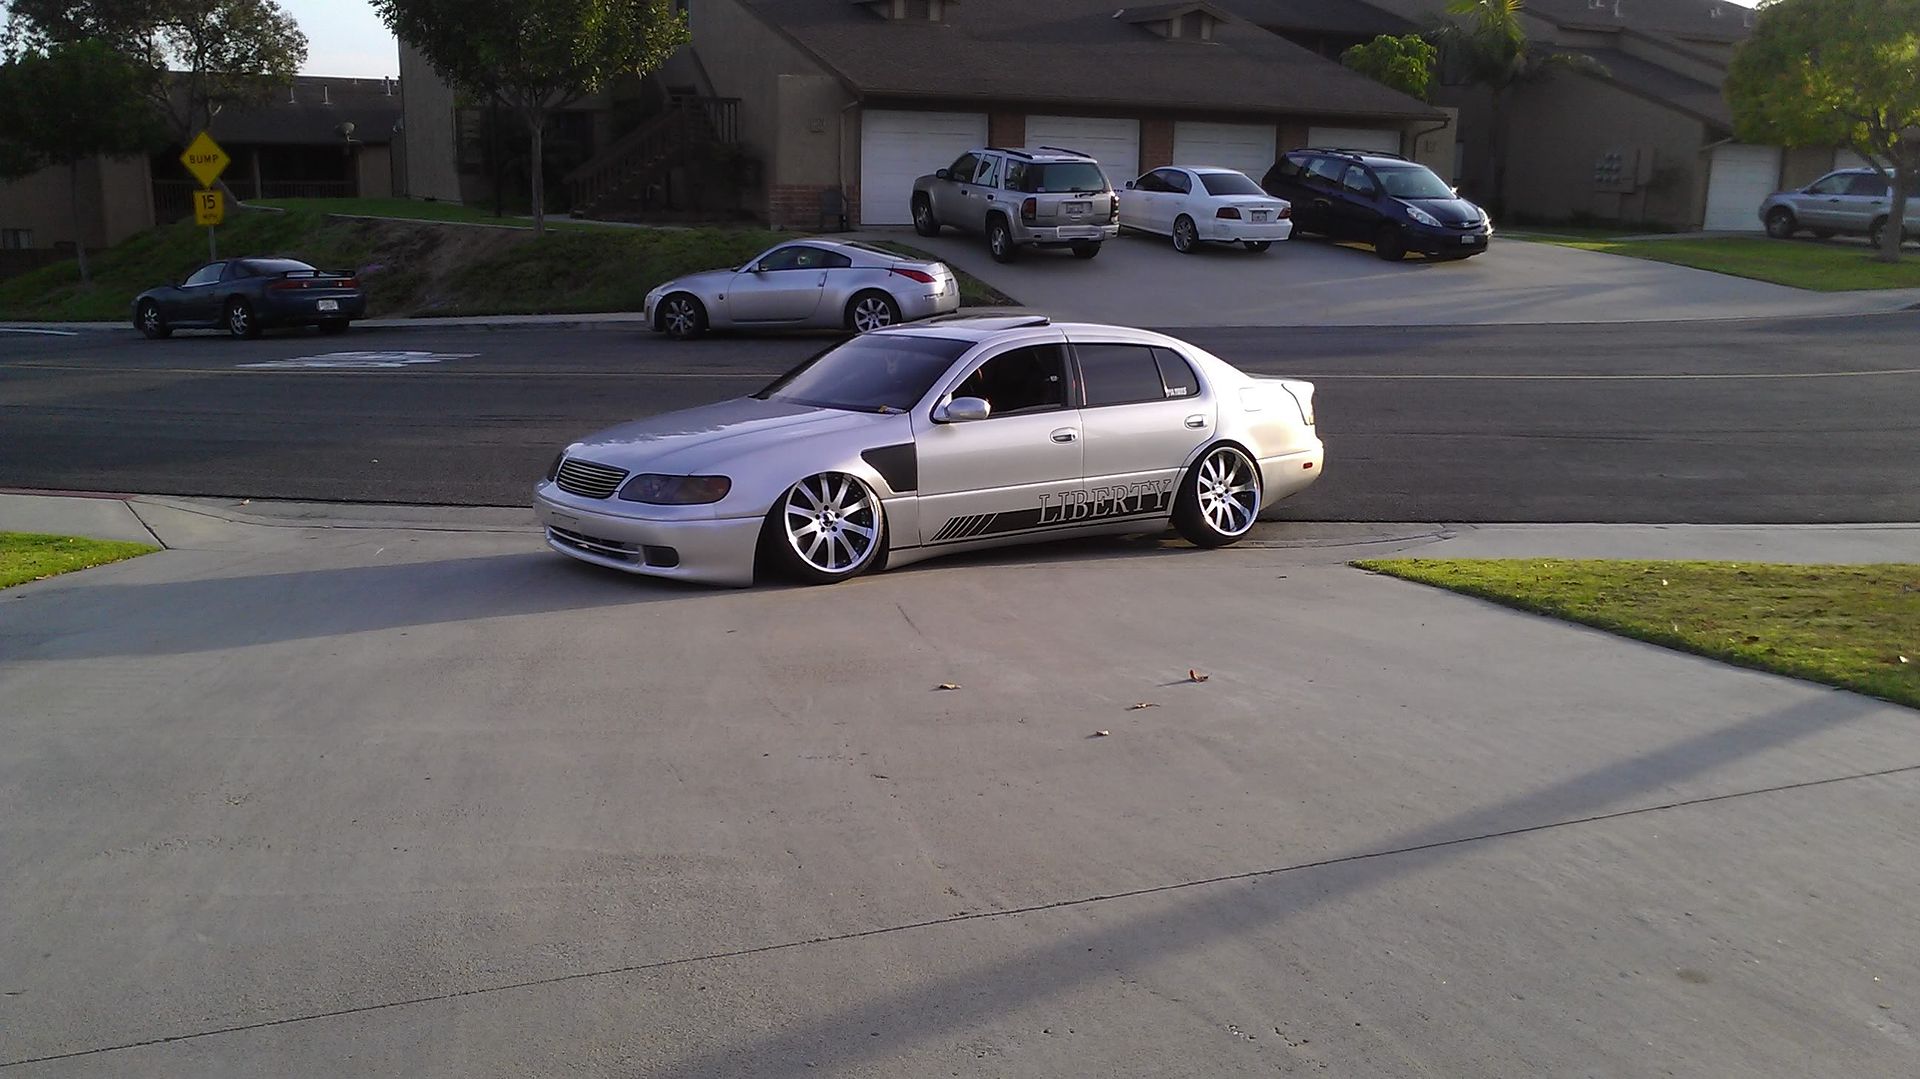
View original BBCode
no cutting, no soldering, dont even need to open the driver door for this one! hope this helps!! :D

[URL="http://www.clublexus.com/forums/gs-first-generation/626719-diy-wire-harness-relocation-93-gs300.html#post7123087"]DIY: Cuban Wire Harness Relocation! ('93 GS300)
[/URL]

1. unplug the harness from the fuse box in the ENGINE BAY!

[IMG]http://i411.photobucket.com/albums/pp194/Cadi_luva/IMAG0191.jpg[/IMG]

2. unplug the airbag sensor underneath the fender and the two plugs to the reservoir.

[IMG]http://i411.photobucket.com/albums/pp194/Cadi_luva/IMAG0193.jpg[/IMG]

3. pull down the harness and inspect the wires. (you can see where i had it run before)

[IMG]http://i411.photobucket.com/albums/pp194/Cadi_luva/IMAG0194.jpg[/IMG]

4. find this hole just above where the harness comes though from the interior.

[IMG]http://i411.photobucket.com/albums/pp194/Cadi_luva/IMAG0195.jpg[/IMG]
[IMG]http://i411.photobucket.com/albums/pp194/Cadi_luva/IMAG0197.jpg[/IMG]

5. reroute the harness through the hole.

[IMG]http://i411.photobucket.com/albums/pp194/Cadi_luva/IMAG0200.jpg[/IMG]

6. watch out for the hood dampener when shutting the hood.

[IMG]http://i411.photobucket.com/albums/pp194/Cadi_luva/IMAG0201.jpg[/IMG]

7. and finally! slam the **** out of the front with your coilovers to celebrate no more harness!

[IMG]http://i411.photobucket.com/albums/pp194/Cadi_luva/IMAG0202.jpg[/IMG]Nice write up Chris. We should make a 1.st gen slammage tutorial thread for all the new comers:biggthumpup:
View original BBCode
Nice write up Chris. We should make a 1.st gen slammage tutorial thread for all the new comers:biggthumpup:
btw I'm looking for some intake on an idea I had at work. Was thinking that I'd like to run my screamer through my sideskirt, maybe with a nice polished/carbon flap? Gotta check how much room I have for the piping...
View original BBCode
btw I'm looking for some intake on an idea I had at work. Was thinking that I'd like to run my screamer through my sideskirt, maybe with a nice polished/carbon flap? Gotta check how much room I have for the piping...
View original BBCode
Some work done last night and this morning... fender still need a coat of spray filler before it's done. Also had to weld a little piece in the door because I cut too much on the first go around :pat:
Gotta lead solder the door, apply bondo, spray filler and a lot sanding. Maybe I'll manage to get this into the paint booth by the end of April :giggity:

[IMG]http://i1200.photobucket.com/albums/bb327/Lord_Juzzo/HPIM5109.jpg[/IMG]

[IMG]http://i1200.photobucket.com/albums/bb327/Lord_Juzzo/HPIM5108.jpg[/IMG]

[IMG]http://i1200.photobucket.com/albums/bb327/Lord_Juzzo/HPIM5107.jpg[/IMG]

[IMG]http://i1200.photobucket.com/albums/bb327/Lord_Juzzo/HPIM5110.jpg[/IMG]
DAMN diy radius. props. i was skeptical during the intermediate phase but it's starting to look pretty fucking good now. :biggthumpup:
View original BBCode
DAMN diy radius. props. i was skeptical during the intermediate phase but it's starting to look pretty fucking good now. :biggthumpup:
How I cut mine to get the perfect edge was use welding wire.

Taped it to the lower edges of the fender on one side, put some slack in and taped it to the other side. This way it follows the natural contour of the fender, but all while allowing you to have a perfect height adjustment for how high you want to cut. Once you have your height desired. loosely tape it down so you dont mess up the form. sharpie trace the outline, remove, angle grind, enjoy.
View original BBCode
How I cut mine to get the perfect edge was use welding wire.
Taped it to the lower edges of the fender on one side, put some slack in and taped it to the other side. This way it follows the natural contour of the fender, but all while allowing you to have a perfect height adjustment for how high you want to cut. Once you have your height desired. loosely tape it down so you dont mess up the form. sharpie trace the outline, remove, angle grind, enjoy.
Yeah thanks for the tip (it was you or OG that talked about it last year)... =)
I used regular 2mm thick steel wire that I got from my local hardware store. But because I went crazy with the final cut I left the wire in and welded the sheet metal slices on it. Got away with minimal warping and  also I used two wires on top of each other and welded them together, I managed to create a strong structure out of it. So I didn't have to stamp an edge to the fender line. It's nice and strong now, so don't matter if my wheel gets a little misaligned and makes contact with the fender, it shouldn't fuck it up too bad.

Might have been easier to just try a basic radius, but I was skeptical if it would work. I knew that I'd require massive room for the mildly stretched tires, and also I wanted to create a stock'ish looking fender. It's always so much more of a mind fuck when you just can't really see what's been done to the ride to fit certain wheels. So I took the hard road and fully re-created the fender. Only thing that I was pondering before  welding the whole thing up, was should I center the fender precisely according the wheel... well I just eyeballed it, and now it sits a little front sided in the wheel well. I kinda like that look, has more of a non-bodywork vibe to it.
View original BBCode
Yeah thanks for the tip (it was you or OG that talked about it last year)... =)
I used regular 2mm thick steel wire that I got from my local hardware store. But because I went crazy with the final cut I left the wire in and welded the sheet metal slices on it. Got away with minimal warping and also I used two wires on top of each other and welded them together, I managed to create a strong structure out of it. So I didn't have to stamp an edge to the fender line. It's nice and strong now, so don't matter if my wheel gets a little misaligned and makes contact with the fender, it shouldn't fuck it up too bad.
Might have been easier to just try a basic radius, but I was skeptical if it would work. I knew that I'd require massive room for the mildly stretched tires, and also I wanted to create a stock'ish looking fender. It's always so much more of a mind fuck when you just can't really see what's been done to the ride to fit certain wheels. So I took the hard road and fully re-created the fender. Only thing that I was pondering before welding the whole thing up, was should I center the fender precisely according the wheel... well I just eyeballed it, and now it sits a little front sided in the wheel well. I kinda like that look, has more of a non-bodywork vibe to it.
Yeah it does a bit. I like it though.

I need to get back to mine too. I am not sure if one side someone leaned up on it or what but the fender edge is a little warped. But it is good its not done. just ran out of time and threw it in primer so it dont rust. Tomorrow I am taking the shocks out and hope to mod them so i can lower the car another 2inch or so. I still have massive rake and wheel gap in back.

Point is, I look at yours and it makes me want to go work on the car with what little time I have.
View original BBCode
Yeah it does a bit. I like it though.
I need to get back to mine too. I am not sure if one side someone leaned up on it or what but the fender edge is a little warped. But it is good its not done. just ran out of time and threw it in primer so it dont rust. Tomorrow I am taking the shocks out and hope to mod them so i can lower the car another 2inch or so. I still have massive rake and wheel gap in back.
Point is, I look at yours and it makes me want to go work on the car with what little time I have.
Yeah best thing in communities like this is that we motivate each other to keep on pushing ahead.
View original BBCode
Yeah best thing in communities like this is that we motivate each other to keep on pushing ahead.
Okay time for a lil update... slow-n-steady does it :pat:
Shell has been dismantled and I've started prepping for paint.

Fixed the door caps and reinforced 'em. Also decided to do test a piece with the paint before I order more. Most paint supplies are in, just need to order more paint and the spray filler that I forget off the 1st order.
Btw don't worry about the crappy look on the door cap, it's just a test run to see what the smoky granite mica looks like and how the mipa paint/clear lays on.


Also figured out how to do the lower front arms eventually, just waiting on the hard extension nuts to cut-n-weld em in place. I'm going to take appr. 40mm off the arm and then these will be welded right at the lower ball joint "socket".

This design will simplify the process and be cheaper overall, so I'll go with it for now. Kinda like a test, just need to fab up longer tie rod ends. But that ain't no biggie=)
View original BBCode
Okay time for a lil update... slow-n-steady does it :pat:
Shell has been dismantled and I've started prepping for paint.

[IMG]http://i1200.photobucket.com/albums/bb327/Lord_Juzzo/HPIM5144.jpg[/IMG]

Fixed the door caps and reinforced 'em. Also decided to do test a piece with the paint before I order more. Most paint supplies are in, just need to order more paint and the spray filler that I forget off the 1st order.
Btw don't worry about the crappy look on the door cap, it's just a test run to see what the smoky granite mica looks like and how the mipa paint/clear lays on.

[IMG]http://i1200.photobucket.com/albums/bb327/Lord_Juzzo/HPIM5155.jpg[/IMG]

[IMG]http://i1200.photobucket.com/albums/bb327/Lord_Juzzo/HPIM5163.jpg[/IMG]

[IMG]http://i1200.photobucket.com/albums/bb327/Lord_Juzzo/HPIM5159.jpg[/IMG]

Also figured out how to do the lower front arms eventually, just waiting on the hard extension nuts to cut-n-weld em in place. I'm going to take appr. 40mm off the arm and then these will be welded right at the lower ball joint "socket".

[IMG]http://i1200.photobucket.com/albums/bb327/Lord_Juzzo/HPIM5152.jpg[/IMG]

This design will simplify the process and be cheaper overall, so I'll go with it for now. Kinda like a test, just need to fab up longer tie rod ends. But that ain't no biggie=)
looking good!!
View original BBCode
looking good!!
Took a break from massaging the body kit pieces, and did one front lca for testing to see how much work I've to do to the front fenders.


As you can see it's quite a bit longer when fully retracted, and there ~40mm of adjustment on the 20mm bolt. I think I'm gonna get a nice front camber outta these =)
After I get the stronger extension nuts I can get my buddy to tig weld the lca's properly, these are just for testing while the car is on jack stands.
Also I planned these to act like 15mm rca block, 'coz I welded the end piece a tad higher than stock location.
View original BBCode
Took a break from massaging the body kit pieces, and did one front lca for testing to see how much work I've to do to the front fenders.

[IMG]http://i1200.photobucket.com/albums/bb327/Lord_Juzzo/HPIM5167.jpg[/IMG]

[IMG]http://i1200.photobucket.com/albums/bb327/Lord_Juzzo/HPIM5168.jpg[/IMG]

As you can see it's quite a bit longer when fully retracted, and there ~40mm of adjustment on the 20mm bolt. I think I'm gonna get a nice front camber outta these =)

After I get the stronger extension nuts I can get my buddy to tig weld the lca's properly, these are just for testing while the car is on jack stands.
Also I planned these to act like 15mm rca block, 'coz I welded the end piece a tad higher than stock location.
Too much? :smiley-rofl:


-17,5* of front camber, and I could screw the lca adjustment a tad further... Now I gotta check what the minimum camber will be when screwed all in :giggity:
View original BBCode
Too much? :smiley-rofl:

[IMG]http://i1200.photobucket.com/albums/bb327/Lord_Juzzo/HPIM5170.jpg[/IMG]

[IMG]http://i1200.photobucket.com/albums/bb327/Lord_Juzzo/HPIM5169.jpg[/IMG]

-17,5* of front camber, and I could screw the lca adjustment a tad further...  Now I gotta check what the minimum camber will be when screwed all in :giggity:
Juzzo;453875 wrote:Too much? :smiley-rofl:
-17,5* of front camber, and I could screw the lca adjustment a tad further... Now I gotta check what the minimum camber will be when screwed all in :giggity:
:bowdown::bowdown::bowdown::bowdown::bowdown:
my only issue with extending the lowers is having the bottom of the front tire poke more than the rear... i hate that!
View original BBCode
[QUOTE=Juzzo;453875]Too much? :smiley-rofl:

[IMG]http://i1200.photobucket.com/albums/bb327/Lord_Juzzo/HPIM5170.jpg[/IMG]

[IMG]http://i1200.photobucket.com/albums/bb327/Lord_Juzzo/HPIM5169.jpg[/IMG]

-17,5* of front camber, and I could screw the lca adjustment a tad further... Now I gotta check what the minimum camber will be when screwed all in :giggity:[/QUOTE]

:bowdown::bowdown::bowdown::bowdown::bowdown:

my only issue with extending the lowers is having the bottom of the front tire poke more than the rear... i hate that!
holy shit... hahaha

is that extension add on even safe?? lol
View original BBCode
holy shit... hahaha
is that extension add on even safe?? lol
FLCA's aren't done properly yet, bodywork still in progress... but got new bearings & seals for the diff, so decided to swap out the torsen lsd I had on the shelf.
Gotta say it was a pain in my ass job to do, but now it's done. After being under the car 21 years everything was a bit tight, I even had to cut out the old bearings :saiyancrunks:


And now that the diff was off I just had to paint it aswell, don't just yet know if I should spray sum metallic blue on top of that silver... or just throw it back under as is. I'm gonna sleep on it .
This outta way, I even might find more motivation to hurry up with the bodywork and spray a sanding coat over the weekend.... hmmm=)
View original BBCode
FLCA's aren't done properly yet, bodywork still in progress... but got new bearings & seals for the diff, so decided to swap out the torsen lsd I had on the shelf.
Gotta say it was a pain in my ass job to do, but now it's done. After being under the car 21 years everything was a bit tight, I even had to cut out the old bearings :saiyancrunks:

[IMG]http://i1200.photobucket.com/albums/bb327/Lord_Juzzo/HPIM5183.jpg[/IMG]

[IMG]http://i1200.photobucket.com/albums/bb327/Lord_Juzzo/HPIM5185.jpg[/IMG]

[IMG]http://i1200.photobucket.com/albums/bb327/Lord_Juzzo/HPIM5186.jpg[/IMG]

And now that the diff was off I just had to paint it aswell, don't just yet know if I should spray sum metallic blue on top of that silver... or just throw it back under as is. I'm gonna sleep on it .

This outta way, I even might find more motivation to hurry up with the bodywork and spray a sanding coat over the weekend.... hmmm=)
well holy shit. I am jelly. I need to get more time for the Q haha. Soon, i say, soon. This cressida will help the equasion. But for now. I will sit back and watch others take on the cools shit lol
View original BBCode
well holy shit. I am jelly. I need to get more time for the Q haha. Soon, i say, soon. This cressida will help the equasion. But for now. I will sit back and watch others take on the cools shit lol
DDDD
View original BBCode
DDDD
Need more update!!
View original BBCode
Need more update!!
This is sick!! In good way.
View original BBCode
This is sick!! In good way.
Do work juzzo!
View original BBCode
Do work juzzo!
Trying, but not hard enough...
So summer has ended, too many grands down the hatch and up in smoke. Even tried some ADD medication to help with the build but didn't work as I imagined.
So this is where I'm up now:

Sanding coat on and one panel at a time trying to get it like I want it. Shell was pretty good from the start but all the frp parts are bugging the fuck outta my... Like the lower "widebody" Garson door caps. I've spent over 40 hours actually working on 'em, and I still don't know if they're good enough. I'd love to make em straight like mirrors, but I'm just realizing that it can't be achieved with these part. caps:shrug:
Now that it's autumn, I'm starting to get into zone again. Just need to fix my finances next week and put on some hard labor, then this thing should see more progress after I sober up from the Black 3 -trip =)
View original BBCode
Trying, but not hard enough...

So summer has ended, too many grands down the hatch and up in smoke. Even tried some ADD medication to help with the build but didn't work as I imagined.
So this is where I'm up now:

[IMG]http://i1200.photobucket.com/albums/bb327/Lord_Juzzo/DSCN1283_zps49d2ad22.jpg[/IMG]

Sanding coat on and one panel at a time trying to get it like I want it. Shell was pretty good from the start but all the frp parts are bugging the fuck outta my... Like the lower "widebody" Garson door caps. I've spent over 40 hours actually working on 'em, and I still don't know if they're good enough. I'd love to make em straight like mirrors, but I'm just realizing that it can't be achieved with these part. caps:shrug:

Now that it's autumn, I'm starting to get into zone again. Just need to fix my finances next week and put on some hard labor, then this thing should see more progress after I sober up from the Black 3 -trip =)
damn juzzo stateside? have fun!
View original BBCode
damn juzzo stateside? have fun!
yeah man i think that is why majority of all vip cars have wavey shit on door caps. But I am pretty sure you can get it. Use less filler and bondo, and more fiberglass fibers in resin as a filler.
View original BBCode
yeah man i think that is why majority of all vip cars have wavey shit on door caps. But I am pretty sure you can get it. Use less filler and bondo, and more fiberglass fibers in resin as a filler.
Kittyhair...your friend
View original BBCode
Kittyhair...your friend
^yeah that stuff. Not sure if they have it there?

edit, he might actually shave a kitten and add it to resin lol
View original BBCode
^yeah that stuff. Not sure if they have it there?
edit, he might actually shave a kitten and add it to resin lol
^Fucking hilarious =)
View original BBCode
^Fucking hilarious =)
OMG...:smiley-rofl:
View original BBCode
OMG...:smiley-rofl:
just want to clarify a kitten, not some womans kitten...
View original BBCode
just want to clarify a kitten, not some womans kitten...
Kouki Monster;464849 wrote:^yeah that stuff. Not sure if they have it there?
edit, he might actually shave a kitten and add it to resin lol
:smiley-rofl:
View original BBCode
[QUOTE=Kouki Monster;464849]^yeah that stuff. Not sure if they have it there?

edit, he might actually shave a kitten and add it to resin lol[/QUOTE]

:smiley-rofl:
Sup, still alive... my homeboys were betting against me :innoutrofl2:
But yeah final design off the LCA are done and I just gotta drop em off to my homeboy so he can professionally weld the seems. I decided to do the weld joints in a "crossover" manner to improve strength. I'll see next spring if they'll hold up the rigors of daily driving...


View original BBCode
Sup, still alive... my homeboys were betting against me :innoutrofl2:

But yeah final design off the LCA are done and I just gotta drop em off to my homeboy so he can professionally weld the seems. I decided to do the weld joints in a "crossover" manner to improve strength. I'll see next spring if they'll hold up the rigors of daily driving...

[URL="http://sphotos-d.ak.fbcdn.net/hphotos-ak-snc6/183471_353832294709846_746683752_n.jpg"][IMG]http://sphotos-d.ak.fbcdn.net/hphotos-ak-snc6/183471_353832294709846_746683752_n.jpg[/IMG][/URL]

[URL="http://sphotos-e.ak.fbcdn.net/hphotos-ak-snc7/426258_353831501376592_756263465_n.jpg"][IMG]http://sphotos-e.ak.fbcdn.net/hphotos-ak-snc7/426258_353831501376592_756263465_n.jpg[/IMG][/URL]
Nah mate, I'm just a bartender/manager with zero training... but I've always been a self-taught/fast learner -type of a guy.
It's always nice to acquire new skills, back in high school I learned to read/draw Mayan and Egyptian hieroglyphs... too bad I've already forgotten most of it. Because ADD =)
View original BBCode
Nah mate, I'm just a bartender/manager with zero training... but I've always been a self-taught/fast learner -type of a guy.
It's always nice to acquire new skills, back in high school I learned to read/draw Mayan and Egyptian hieroglyphs... too bad I've already forgotten most of it. Because ADD =)
1st - Well if I'd work em too much, I could always cut everything out and do it again... it's just metal so one can always add new  =)

2nd - I had 18" on before, but they were just too small for a kit like this. Bare minimum I'd go now that the radiusing is done would be 19's. Cause with my other setup (19" fronts/20" rears) I can't even fully deflate cause my kit hits the ground... With the main setup (20" fronts/21" rears) I can rolling flush with about 1-2" of ground clearance, and park tucked even though I radiused the rear fenders about 2". The overall wheel "space" is so huge with the Garson kit that 18" wheels w/ skinny tires looked like I had some bitch-ass 16's under :smiley-rofl:
View original BBCode
1st - Well if I'd work em too much, I could always cut everything out and do it again... it's just metal so one can always add new =)
2nd - I had 18" on before, but they were just too small for a kit like this. Bare minimum I'd go now that the radiusing is done would be 19's. Cause with my other setup (19" fronts/20" rears) I can't even fully deflate cause my kit hits the ground... With the main setup (20" fronts/21" rears) I can rolling flush with about 1-2" of ground clearance, and park tucked even though I radiused the rear fenders about 2". The overall wheel "space" is so huge with the Garson kit that 18" wheels w/ skinny tires looked like I had some bitch-ass 16's under :smiley-rofl:
awesome work....any updates on the LCA's
View original BBCode
awesome work....any updates on the LCA's
more!!
View original BBCode
more!!
Kouki Monster;469778 wrote:more!!
Yea, I agree. (Now that I'm actually working on my car again, I pester you right?) I'm real anxious to see this thing rolling.
View original BBCode
[QUOTE=Kouki Monster;469778]more!![/QUOTE]

Yea, I agree. (Now that I'm actually working on my car again, I pester you right?) I'm real anxious to see this thing rolling.
Sorry guys, no updates yet... been working with a few other cars the past month. But my 30day resignation time ends the last day of this month, so I'm gonna be putting some serious work on the car in December and January. Aim is to get paint on in the beginning of January. Get it Gov. inspected in February/March, so I should be ready for the roads when spring comes =)

Just need to finish the bodywork and do the interior. Everything is planned, just need to order some more supplies etc. and get it done.
View original BBCode
Sorry guys, no updates yet... been working with a few other cars the past month. But my 30day resignation time ends the last day of this month, so I'm gonna be putting some serious work on the car in December and January. Aim is to get paint on in the beginning of January. Get it Gov. inspected in February/March, so I should be ready for the roads when spring comes =)
Just need to finish the bodywork and do the interior. Everything is planned, just need to order some more supplies etc. and get it done.
​Update:
Ok guys, now the arms are finally done! I used M20 (13/16") hard extension nuts and bolts for the adjustment. I also cut/grinded everything in an angle to get the strongest weld seem. This is a comparison of oem and my "battle version" FLCA, just tack welded by yours truly =)
And here're the finished pieces, which were "professionally" TIG welded with "high end" cerium rods by my homeboy. Should handle the abuse, at least the welds should, same rods were used when modifying the teams drift Supra's steering knuckles. Now just need to clean and paint em before bolting em up. Should give me a pretty nice amount of adjustability for the front :biggthumpup:


View original BBCode
[URL="http://sphotos-e.ak.fbcdn.net/hphotos-ak-snc6/207768_393346960758379_1715948533_n.jpg"]​[/URL]Update:
Ok guys, now the arms are finally done! I used M20 (13/16") hard extension nuts and bolts for the adjustment. I also cut/grinded everything in an angle to get the strongest weld seem. This is a comparison of oem and my "battle version" FLCA, just tack welded by yours truly =)

[URL="http://sphotos-d.ak.fbcdn.net/hphotos-ak-snc6/183471_353832294709846_746683752_n.jpg"][IMG]http://sphotos-d.ak.fbcdn.net/hphotos-ak-snc6/183471_353832294709846_746683752_n.jpg[/IMG][/URL]

And here're the finished pieces, which were "professionally" TIG welded with "high end" cerium rods by my homeboy. Should handle the abuse, at least the welds should, same rods were used when modifying the teams drift Supra's steering knuckles. Now just need to clean and paint em before bolting em up. Should give me a pretty nice amount of adjustability for the front :biggthumpup:

[URL="http://sphotos-b.ak.fbcdn.net/hphotos-ak-ash4/486075_393346787425063_1071262272_n.jpg"][IMG]http://sphotos-b.ak.fbcdn.net/hphotos-ak-ash4/486075_393346787425063_1071262272_n.jpg[/IMG][/URL]

[URL="http://sphotos-e.ak.fbcdn.net/hphotos-ak-snc6/207768_393346960758379_1715948533_n.jpg"][IMG]http://sphotos-e.ak.fbcdn.net/hphotos-ak-snc6/207768_393346960758379_1715948533_n.jpg[/IMG][/URL]
Isn't that going to be a bitch to adjust? Considering it's welded and not adjustable without undoing the ball joint
View original BBCode
Isn't that going to be a bitch to adjust? Considering it's welded and not adjustable without undoing the ball joint
Well kinda, got two ways how to adjust: 1st take the ball joint off, 2nd take two bolts off to separate from the steering knuckle and unscrew the tie rod end. 2nd one is the easiest and you still gotta adjust the toe after any camber adjustment.
View original BBCode
Well kinda, got two ways how to adjust: 1st take the ball joint off, 2nd take two bolts off to separate from the steering knuckle and unscrew the tie rod end. 2nd one is the easiest and you still gotta adjust the toe after any camber adjustment.
shouldnt have to if the end of it moves. if you move the whole rod, yes.
View original BBCode
shouldnt have to if the end of it moves. if you move the whole rod, yes.
Okay haven't yet installed the arms, only painted em. Today I fabbed up adjustable spacers for the tie rod ends, overall length 120mm and minimum out spacing is ~40mm.


Will smooth and paint em today, so might see if I can be arsed tomorrow to install all of em... we'll see =)
View original BBCode
Okay haven't yet installed the arms, only painted em. Today I fabbed up adjustable spacers for the tie rod ends, overall length 120mm and minimum out spacing is ~40mm.

 [URL="http://i1200.photobucket.com/albums/bb327/Lord_Juzzo/temporary-9.jpg"][IMG]http://i1200.photobucket.com/albums/bb327/Lord_Juzzo/temporary-9.jpg[/IMG][/URL]

[URL="http://i1200.photobucket.com/albums/bb327/Lord_Juzzo/temporary-12.jpg"][IMG]http://i1200.photobucket.com/albums/bb327/Lord_Juzzo/temporary-12.jpg[/IMG][/URL]

[URL="http://i1200.photobucket.com/albums/bb327/Lord_Juzzo/temporary-11.jpg"][IMG]http://i1200.photobucket.com/albums/bb327/Lord_Juzzo/temporary-11.jpg[/IMG][/URL]

Will smooth and paint em today, so might see if I can be arsed tomorrow to install all of em... we'll see =)
those welds Juzzo.....:inouteek:
View original BBCode
those welds Juzzo.....:inouteek:
Wanna see installed... progress is progress... keep it commin!
View original BBCode
Wanna see installed... progress is progress... keep it commin!
speedaddict;476403 wrote:those welds Juzzo.....:inouteek:
Yeah I know, Imma novice haha =)
Although I tend to set the MIG to sufficient power level I just keep the wire speed high, dunno maybe I'm just scared not to get an adequate seam. But you can always get rid of the excess. A little better after smoothing and paint...

Install tomorrow and pics also.
View original BBCode
[QUOTE=speedaddict;476403]those welds Juzzo.....:inouteek:[/QUOTE]
Yeah I know, Imma novice haha =)
Although I tend to set the MIG to sufficient power level I just keep the wire speed high, dunno maybe I'm just scared not to get an adequate seam. But you can always get rid of the excess. A little better after smoothing and paint...

 [URL="http://i1200.photobucket.com/albums/bb327/Lord_Juzzo/temporary-13.jpg"][IMG]http://i1200.photobucket.com/albums/bb327/Lord_Juzzo/temporary-13.jpg[/IMG][/URL]

Install tomorrow and pics also.
lol so long as you got full penetration (thats what she said) on those welds.
View original BBCode
lol so long as you got full penetration (thats what she said) on those welds.
View original BBCode
Okay the arms and rod spacers are in, and I also took out the locking collars from the rear coils. Managed to get it a little more level, previously there was ~10-15mm difference between front and rear. Also noticed that I had a measuring error when I did the 1st test arm, so now the rod spacers are so long that I can get front toe in spec only when the arms are maxed out. But whaeva, I'll do another pair for driving with less camber =)

[IMG]http://i1200.photobucket.com/albums/bb327/Lord_Juzzo/temporary-14.jpg[/IMG]

[URL="http://i1200.photobucket.com/albums/bb327/Lord_Juzzo/temporary-16.jpg"][IMG]http://i1200.photobucket.com/albums/bb327/Lord_Juzzo/temporary-16.jpg[/IMG][/URL]


[URL="http://i1200.photobucket.com/albums/bb327/Lord_Juzzo/temporary-23.jpg"][IMG]http://i1200.photobucket.com/albums/bb327/Lord_Juzzo/temporary-23.jpg[/IMG][/URL]


[URL="http://i1200.photobucket.com/albums/bb327/Lord_Juzzo/temporary-24.jpg"][IMG]http://i1200.photobucket.com/albums/bb327/Lord_Juzzo/temporary-24.jpg[/IMG][/URL]


In these pics there's around 100 psi in the bags, so highway (120-140kmh) pressure...

[IMG]http://i1200.photobucket.com/albums/bb327/Lord_Juzzo/temporary-17.jpg[/IMG]

[URL="http://i1200.photobucket.com/albums/bb327/Lord_Juzzo/temporary-20.jpg"][IMG]http://i1200.photobucket.com/albums/bb327/Lord_Juzzo/temporary-20.jpg[/IMG][/URL]


[URL="http://i1200.photobucket.com/albums/bb327/Lord_Juzzo/temporary-18.jpg"][IMG]http://i1200.photobucket.com/albums/bb327/Lord_Juzzo/temporary-18.jpg[/IMG][/URL]


And 60 psi for regular driving, and I can still roll lower if the road conditions will allow... yeah weak I know :shrug:


[URL="http://i1200.photobucket.com/albums/bb327/Lord_Juzzo/temporary-22.jpg"][IMG]http://i1200.photobucket.com/albums/bb327/Lord_Juzzo/temporary-22.jpg[/IMG][/URL]


And finally I got to attack the front fenders, did a little cut where the side skirt comes. A little pulling and I still need to chop a little slice of the back portion of the arch to get some turning room.


[URL="http://i1200.photobucket.com/albums/bb327/Lord_Juzzo/temporary-21.jpg"][IMG]http://i1200.photobucket.com/albums/bb327/Lord_Juzzo/temporary-21.jpg[/IMG][/URL]
more please
View original BBCode
more please
juzzo do work!
View original BBCode
juzzo do work!
it's messy as hell, but there's no denying you're putting in work. diy spirit right here.
View original BBCode
it's messy as hell, but there's no denying you're putting in work. diy spirit right here.
i heart juzzo..


lookin good man!
View original BBCode
i heart juzzo..
lookin good man!
Juzzo is at it again! This shit is wild. Hope it all works out for you.
View original BBCode
Juzzo is at it again! This shit is wild. Hope it all works out for you.
progress!
View original BBCode
progress!
Slow and steady does it. Tomorrow gotta go pick up more CO2 (ended w/ rod spacers) so I can notch my front upper frame rails just little bit. Only after that I can finish cutting&welding the front fenders. After a day off fiddling with the front end this seems to be the best route... =)
View original BBCode
Slow and steady does it. Tomorrow gotta go pick up more CO2 (ended w/ rod spacers) so I can notch my front upper frame rails just little bit. Only after that I can finish cutting&welding the front fenders. After a day off fiddling with the front end this seems to be the best route... =)
looking tight man what colour are you going to paint it?
View original BBCode
looking tight man what colour are you going to paint it?
Smokey Granite Mica, it's a nice subtle color and goes well with the dark theme with blue and chrome accents.
View original BBCode
Smokey Granite Mica, it's a nice subtle color and goes well with the dark theme with blue and chrome accents.
Loving the work Juzzo... You getting it in for sure... Nice diy work you're doing...
View original BBCode
Loving the work Juzzo... You getting it in for sure... Nice diy work you're doing...
Good stuff juzzo! Puttin in work!
View original BBCode
Good stuff juzzo! Puttin in work!
Thanks for the encouragement fellas!
View original BBCode
Thanks for the encouragement fellas!
MY CAR BETTER NOT BE FINISHED BEFORE YOURS!
View original BBCode
MY CAR BETTER NOT BE FINISHED BEFORE YOURS!
I think you will win... Only thing that has happened during the summer was be playing with a couple wastegate ideas... For starters I opted out for the easiest choice and vented it out under the car.... I'm still trying to figure out a way to vent it through the hood in a VIP way... Maybe I'll share the idea with you guys tomorrow after I can upload a sketch pic from the garage laptop....

And NOTHING has happened with the rest of the body, still got heaps of minor fiddling before I can ask for a time a my my local paint booth for me to go and spray the damn thing. At least I have finally made my mind about the actual color. After doing some test pieces with different color option, especially mixing the OEM Smokey granite mica with different pearls/flakes.

But it's ready when it's ready haha


Sent from my RM-825_eu_finland_422 using Tapatalk
View original BBCode
I think you will win... Only thing that has happened during the summer was be playing with a couple wastegate ideas... For starters I opted out for the easiest choice and vented it out under the car.... I'm still trying to figure out a way to vent it through the hood in a VIP way... Maybe I'll share the idea with you guys tomorrow after I can upload a sketch pic from the garage laptop....
And NOTHING has happened with the rest of the body, still got heaps of minor fiddling before I can ask for a time a my my local paint booth for me to go and spray the damn thing. At least I have finally made my mind about the actual color. After doing some test pieces with different color option, especially mixing the OEM Smokey granite mica with different pearls/flakes.
But it's ready when it's ready haha
Sent from my RM-825_eu_finland_422 using Tapatalk
.......
View original BBCode
.......
*Under construction*
View original BBCode
*Under construction*
Love me some camber
View original BBCode
Love me some camber
g5squared;508654 wrote:Love me some camber
Depending on the platform it usually ain't that hard. And if parts are hard to come by one can always fab up model specific ones =D
View original BBCode
[QUOTE=g5squared;508654]Love me some camber[/QUOTE]


Depending on the platform it usually ain't that hard. And if parts are hard to come by one can always fab up model specific ones =D